Page 86 of 272
Pull the handle forward to unlocks1, then push
the handle up completely to lock the sunroof
closed
s2.
REMOVING/INSTALLING
WARNING
Do not remove or install the sun shade
while driving so full attention may be
given to vehicle operation.
Removing the sun shade
1. Turn each lock bolt counterclockwise while
supporting the sun shade.
2. Slide the shade backward to remove it.
Installing the sun shade
1. Insert the 2 hooks on the front edge of sun
shade into holders on the sunroof.
2. Align the 2 lock bolts on the rear edge of sun
shade with the lock nuts. Turn each lock bolt
clockwise to securely lock the sun shade in
place.
WIC0347WIC0348
2-34Instruments and controls
ZREVIEW COPY:Ð2003 Xterra(xtr)
Owners Manual(owners)ÐUSA English(nna)
02/21/03Ðtbrooks
X
Page 97 of 272
To unlock the back door, turn the key clockwise
s1. To open the back door, lift up on the door
handle
s2and lift the door up. To close, lower
and push the door down securely. To lock the
back door, turn the key counterclockwise
s3.
WARNING
cAlways be sure the back door has been
closed securely to prevent it from open-
ing while driving.cDo not drive with the back door open.
This could allow dangerous exhaust
gases to be drawn into the vehicle. See
“Exhaust gas” in the “Starting and driv-
ing” section of this manual.
WPD0161
REAR DOOR
Pre-driving checks and adjustments3-9
ZREVIEW COPY:Ð2003 Xterra(xtr)
Owners Manual(owners)ÐUSA English(nna)
03/17/03Ðcathy
X
Page 99 of 272
1. Tubular roof rack torxdriver
2. Wheel nut wrench
3. Jack rod
Getting the tubular roof rack torxdriver
1. Open the back door.
2. Roll back the cargo area carpet.
3. Remove the roof rack torxdriver.
Tubular roof rack crossbar adjustment
The front and rear crossbars can be adjusted
forward, backward, or be removed. Use the
torxdriver located in the tool kit to loosen both
crossbar adjusting screws.To adjust:
a. Loosen the adjusting screws with the
torxdriver by turning counterclockwise.
WPD0163
AIC1146
Pre-driving checks and adjustments3-11
ZREVIEW COPY:Ð2003 Xterra(xtr)
Owners Manual(owners)ÐUSA English(nna)
03/17/03Ðcathy
X
Page 100 of 272

b. When the clamp is loosened, move the cross-
bars so the cargo can be positioned between
the crossbars.
c. Tighten the crossbar adjusting screws with
the torxdriver by turning clockwise.
d. Secure the cargo with rope.
e. Always check the tightness of the crossbar
adjusting screws.
To remove:
a. Loosen the adjusting screws with the
torxdriver by turning counterclockwise.
b. Rotate the clamps.
c. Remove the crossbars.
d. Reverse to install.
e. Always check the tightness of the crossbar
adjusting screws.
If you hear wind noise coming from the roof rack
while driving, adjust the roof rack crossbars to the
most rearward position.
The roof rack is equipped with a removable gear
basket.The maximum gear basket load is 30
lb (13.6 kg) evenly distributed.To remove the gear basket:
a. Unscrew the 4 hold down bolts by turning
them counterclockwise.
b. Lift up the rear of the basket.
c. Lift out the gear basket by moving it toward
the rear of the vehicle.
APD1092
3-12Pre-driving checks and adjustments
ZREVIEW COPY:Ð2003 Xterra(xtr)
Owners Manual(owners)ÐUSA English(nna)
03/17/03Ðcathy
X
Page 101 of 272
1. Tubular step rail
2. Front passenger step
3. Rear passenger step
The tubular step rail has a front and rear step for
assisting passengers getting into and out of the
vehicle.
FUEL FILLER CAP
The fuel filler cap is a ratcheting type. Turn the
cap counterclockwise to remove. To tighten, turn
the cap clockwise until ratcheting clicks are
heard.
WARNING
cGasoline is extremely flammable and
highly explosive under certain condi-
tions. You could be burned or seriously
injured if it is misused or mishandled.
Always stop the engine and do not
smoke or allow open flames or sparks
near the vehicle when refueling.WPD0164
WPD0165
TUBULAR STEP RAIL (if so equipped) FUEL FILLER LID
Pre-driving checks and adjustments3-13
ZREVIEW COPY:Ð2003 Xterra(xtr)
Owners Manual(owners)ÐUSA English(nna)
03/17/03Ðcathy
X
Page 119 of 272

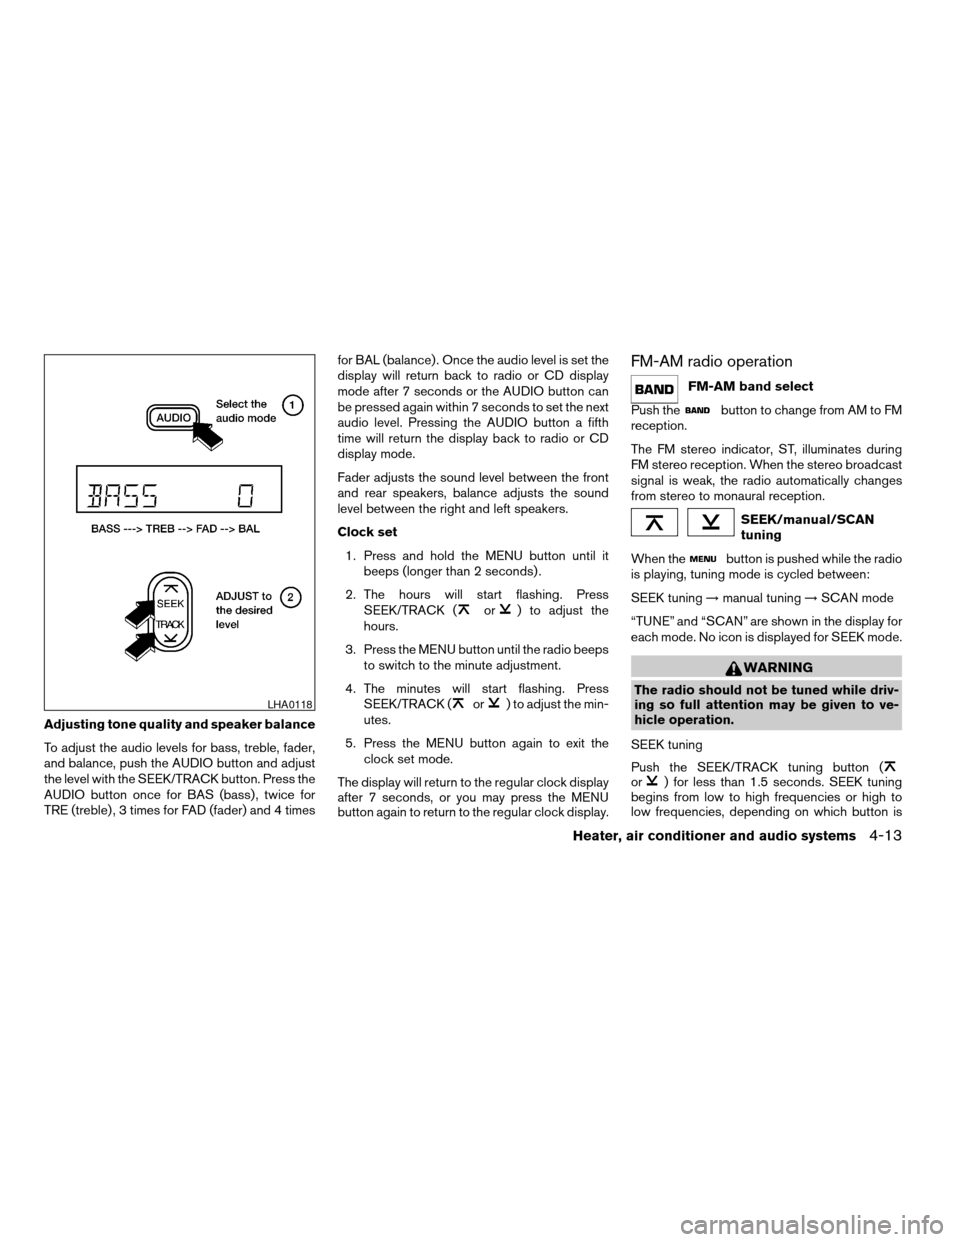
Adjusting tone quality and speaker balance
To adjust the audio levels for bass, treble, fader,
and balance, push the AUDIO button and adjust
the level with the SEEK/TRACK button. Press the
AUDIO button once for BAS (bass) , twice for
TRE (treble) , 3 times for FAD (fader) and 4 timesfor BAL (balance) . Once the audio level is set the
display will return back to radio or CD display
mode after 7 seconds or the AUDIO button can
be pressed again within 7 seconds to set the next
audio level. Pressing the AUDIO button a fifth
time will return the display back to radio or CD
display mode.
Fader adjusts the sound level between the front
and rear speakers, balance adjusts the sound
level between the right and left speakers.
Clock set
1. Press and hold the MENU button until it
beeps (longer than 2 seconds) .
2. The hours will start flashing. Press
SEEK/TRACK (
or) to adjust the
hours.
3. Press the MENU button until the radio beeps
to switch to the minute adjustment.
4. The minutes will start flashing. Press
SEEK/TRACK (
or) to adjust the min-
utes.
5. Press the MENU button again to exit the
clock set mode.
The display will return to the regular clock display
after 7 seconds, or you may press the MENU
button again to return to the regular clock display.
FM-AM radio operation
FM-AM band select
Push the
button to change from AM to FM
reception.
The FM stereo indicator, ST, illuminates during
FM stereo reception. When the stereo broadcast
signal is weak, the radio automatically changes
from stereo to monaural reception.
SEEK/manual/SCAN
tuning
When the
button is pushed while the radio
is playing, tuning mode is cycled between:
SEEK tuning!manual tuning!SCAN mode
“TUNE” and “SCAN” are shown in the display for
each mode. No icon is displayed for SEEK mode.
WARNING
The radio should not be tuned while driv-
ing so full attention may be given to ve-
hicle operation.
SEEK tuning
Push the SEEK/TRACK tuning button (
or) for less than 1.5 seconds. SEEK tuning
begins from low to high frequencies or high to
low frequencies, depending on which button is
LHA0118
Heater, air conditioner and audio systems4-13
ZREVIEW COPY:Ð2003 Xterra(xtr)
Owners Manual(owners)ÐUSA English(nna)
02/21/03Ðtbrooks
X
Page 122 of 272
1. Disc loading button
2. SEEK/TRACK button
3. CD select button
4. Band select buttons
5. CD insert slot
6. CD eject button
7. Radio manual tuning buttons
8. RPT MIX/PTY button
9. CLOCK button
10. AUDIO button
11. TRAVEL PRESET button
12. Station select buttons
13. RDS button
14. SCAN button
15. PRESET SCAN button
16. ON·OFF/VOL control knob
17. PRESET ABC button
FM-AM RADIO WITH COMPACT
DISC (CD) CHANGER (if so
equipped)
PWR/VOL control knob
Turn the ignition key to the ACC or ON position,
then push the PWR/VOL control knob. If you
listen to the radio with the engine not running,
turn the key to the ACC position. The mode (radio
WHA0134
4-16Heater, air conditioner and audio systems
ZREVIEW COPY:Ð2003 Xterra(xtr)
Owners Manual(owners)ÐUSA English(nna)
02/21/03Ðtbrooks
X
Page 124 of 272

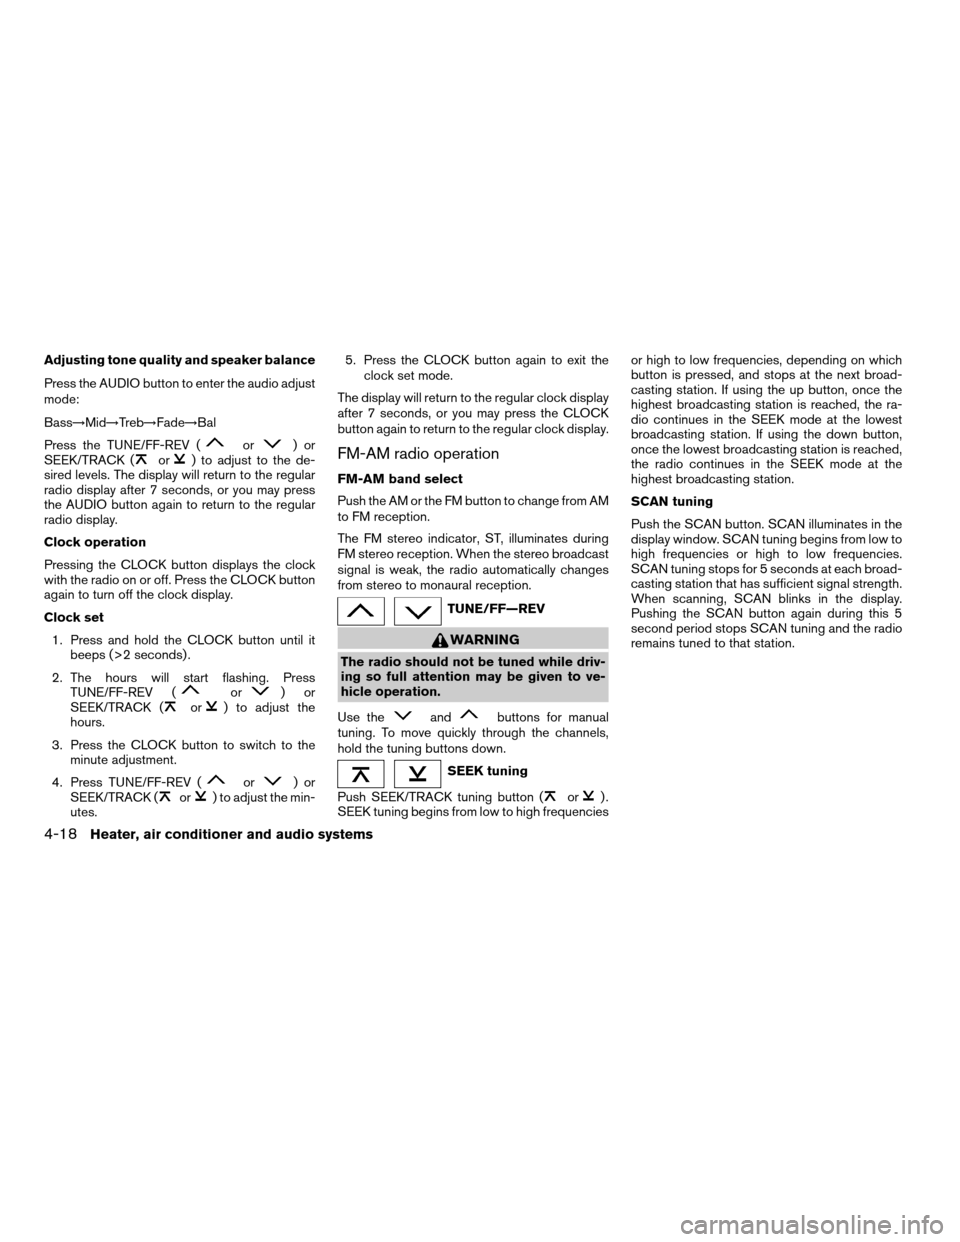
Adjusting tone quality and speaker balance
Press the AUDIO button to enter the audio adjust
mode:
Bass!Mid!Treb!Fade!Bal
Press the TUNE/FF-REV (
or)or
SEEK/TRACK (or) to adjust to the de-
sired levels. The display will return to the regular
radio display after 7 seconds, or you may press
the AUDIO button again to return to the regular
radio display.
Clock operation
Pressing the CLOCK button displays the clock
with the radio on or off. Press the CLOCK button
again to turn off the clock display.
Clock set
1. Press and hold the CLOCK button until it
beeps (>2 seconds) .
2. The hours will start flashing. Press
TUNE/FF-REV (
or)or
SEEK/TRACK (or) to adjust the
hours.
3. Press the CLOCK button to switch to the
minute adjustment.
4. Press TUNE/FF-REV (
or)or
SEEK/TRACK (or) to adjust the min-
utes.5. Press the CLOCK button again to exit the
clock set mode.
The display will return to the regular clock display
after 7 seconds, or you may press the CLOCK
button again to return to the regular clock display.
FM-AM radio operation
FM-AM band select
Push the AM or the FM button to change from AM
to FM reception.
The FM stereo indicator, ST, illuminates during
FM stereo reception. When the stereo broadcast
signal is weak, the radio automatically changes
from stereo to monaural reception.
TUNE/FF—REV
WARNING
The radio should not be tuned while driv-
ing so full attention may be given to ve-
hicle operation.
Use the
andbuttons for manual
tuning. To move quickly through the channels,
hold the tuning buttons down.
SEEK tuning
Push SEEK/TRACK tuning button (
or).
SEEK tuning begins from low to high frequenciesor high to low frequencies, depending on which
button is pressed, and stops at the next broad-
casting station. If using the up button, once the
highest broadcasting station is reached, the ra-
dio continues in the SEEK mode at the lowest
broadcasting station. If using the down button,
once the lowest broadcasting station is reached,
the radio continues in the SEEK mode at the
highest broadcasting station.
SCAN tuning
Push the SCAN button. SCAN illuminates in the
display window. SCAN tuning begins from low to
high frequencies or high to low frequencies.
SCAN tuning stops for 5 seconds at each broad-
casting station that has sufficient signal strength.
When scanning, SCAN blinks in the display.
Pushing the SCAN button again during this 5
second period stops SCAN tuning and the radio
remains tuned to that station.
4-18Heater, air conditioner and audio systems
ZREVIEW COPY:Ð2003 Xterra(xtr)
Owners Manual(owners)ÐUSA English(nna)
02/24/03Ðtbrooks
X