2003 NISSAN XTERRA four wheel drive
[x] Cancel search: four wheel drivePage 156 of 272
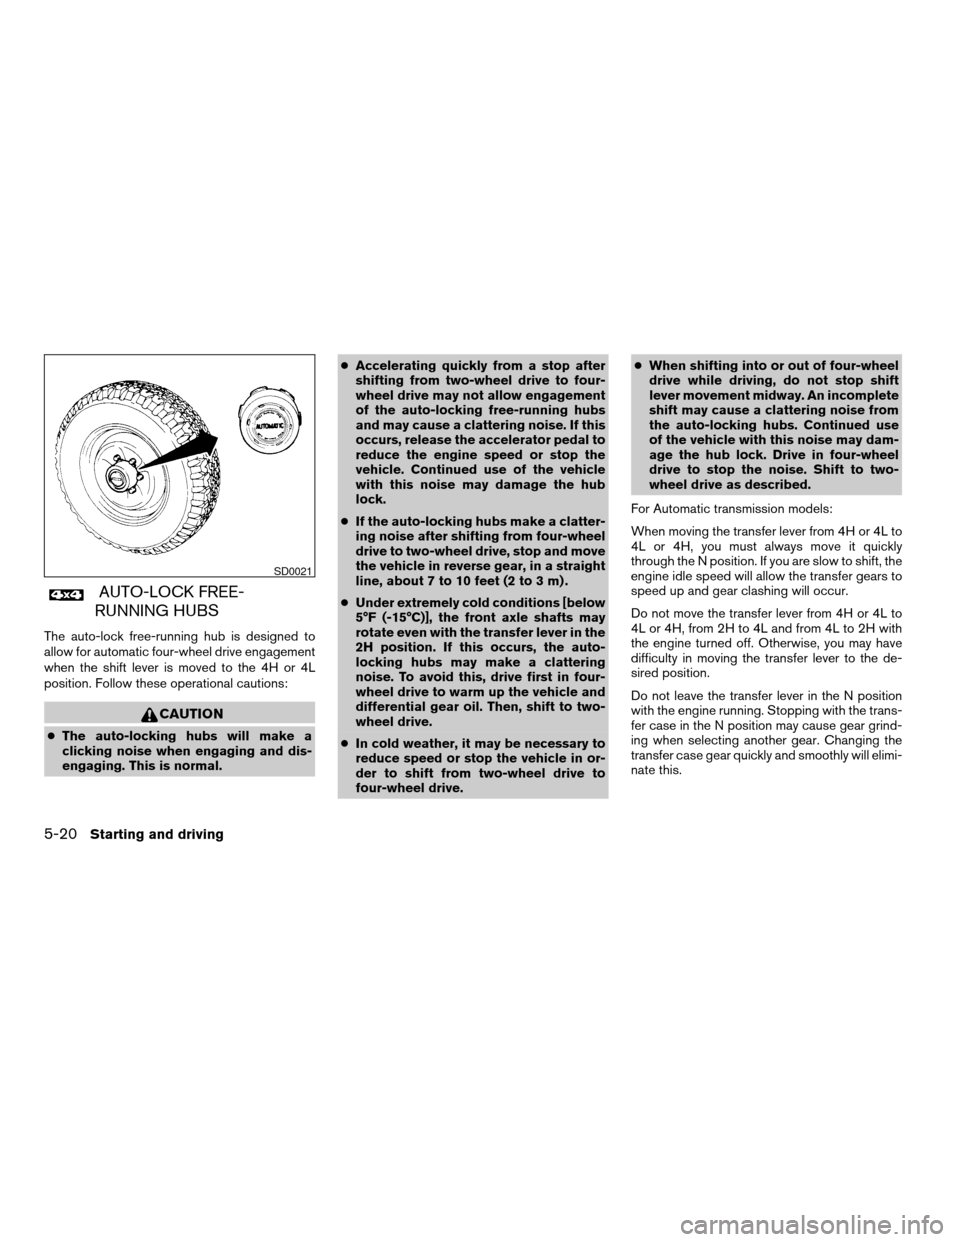
AUTO-LOCK FREE-
RUNNING HUBS
The auto-lock free-running hub is designed to
allow for automatic four-wheel drive engagement
when the shift lever is moved to the 4H or 4L
position. Follow these operational cautions:
CAUTION
cThe auto-locking hubs will make a
clicking noise when engaging and dis-
engaging. This is normal.cAccelerating quickly from a stop after
shifting from two-wheel drive to four-
wheel drive may not allow engagement
of the auto-locking free-running hubs
and may cause a clattering noise. If this
occurs, release the accelerator pedal to
reduce the engine speed or stop the
vehicle. Continued use of the vehicle
with this noise may damage the hub
lock.
cIf the auto-locking hubs make a clatter-
ing noise after shifting from four-wheel
drive to two-wheel drive, stop and move
the vehicle in reverse gear, in a straight
line, about 7 to 10 feet (2 to 3 m) .
cUnder extremely cold conditions [below
5°F (-15°C)], the front axle shafts may
rotate even with the transfer lever in the
2H position. If this occurs, the auto-
locking hubs may make a clattering
noise. To avoid this, drive first in four-
wheel drive to warm up the vehicle and
differential gear oil. Then, shift to two-
wheel drive.
cIn cold weather, it may be necessary to
reduce speed or stop the vehicle in or-
der to shift from two-wheel drive to
four-wheel drive.cWhen shifting into or out of four-wheel
drive while driving, do not stop shift
lever movement midway. An incomplete
shift may cause a clattering noise from
the auto-locking hubs. Continued use
of the vehicle with this noise may dam-
age the hub lock. Drive in four-wheel
drive to stop the noise. Shift to two-
wheel drive as described.
For Automatic transmission models:
When moving the transfer lever from 4H or 4L to
4L or 4H, you must always move it quickly
through the N position. If you are slow to shift, the
engine idle speed will allow the transfer gears to
speed up and gear clashing will occur.
Do not move the transfer lever from 4H or 4L to
4L or 4H, from 2H to 4L and from 4L to 2H with
the engine turned off. Otherwise, you may have
difficulty in moving the transfer lever to the de-
sired position.
Do not leave the transfer lever in the N position
with the engine running. Stopping with the trans-
fer case in the N position may cause gear grind-
ing when selecting another gear. Changing the
transfer case gear quickly and smoothly will elimi-
nate this.
SD0021
5-20Starting and driving
ZREVIEW COPY:Ð2003 Xterra(xtr)
Owners Manual(owners)ÐUSA English(nna)
02/24/03Ðtbrooks
X
Page 161 of 272
WARNING
cThe anti-lock brake system is a sophis-
ticated device, but it cannot prevent ac-
cidents resulting from careless or dan-
gerous driving techniques. It can help
maintain vehicle control during braking
on slippery surfaces, but remember that
the stopping distance on slippery sur-
faces will be longer than on normal
surfaces even with the anti-lock brake
system. Stopping distances may also
be longer on rough, gravel or snow cov-
ered roads, or if you are using tire
chains. Tire type and condition may also
affect braking effectiveness. Always
maintain a safe distance from the ve-
hicle in front of you. Ultimately, the re-
sponsibility for safety of self and others
rests in the hands of the driver.
cTire type and condition of tires may also
affect braking effectiveness.
cWhen replacing tires, install the speci-
fied size of tires on all four wheels.cWhen installing a spare tire, make sure
it is the proper size and type as speci-
fied on the tire placard. For tire placard
location information, refer to “Tire plac-
ard” in the “Technical and consumer
information” section of this manual.
cRefer to “Wheels and tires” in the
“Maintenance and do-it-yourself” sec-
tion of this manual.When driving on slippery surfaces or suddenly
avoiding obstacles on roads, the vehicle might
swerve or slip. With the Vehicle Dynamic Control
(VDC) system, sensors detect these movements
and control the braking and engine output to help
improve vehicle stability while driving.
cWhen the vehicle dynamic control system is
operating, the slip indicator in the instrument
panel blinks.
cWhen only the traction control system por-
tion of the vehicle dynamic control system is
operating, the slip indicator will also blink.
cIf the slip indicator blinks, the vehicle is un-
der slippery conditions. Be sure to drive
carefully. See “Slip indicator light”, and “Ve-
hicle dynamic control off indicator light” in
the “Instruments and controls” section.
cIndicator light
If malfunction occurs in the system, theandindicator lights come on in the
instrument panel.
As long as these warning lights are on, the
traction control function is canceled.
The VDC system uses a Brake Limited Slip Dif-
ferential (LSD) system to improve vehicle trac-
tion. The brake LSD system works when one of
the driving wheels is spinning on a slippery sur-
face. The brake LSD system brakes the spinning
VEHICLE DYNAMIC CONTROL (VDC)
SYSTEM (if so equipped)
Starting and driving5-25
ZREVIEW COPY:Ð2003 Xterra(xtr)
Owners Manual(owners)ÐUSA English(nna)
02/24/03Ðtbrooks
X
Page 163 of 272

FREEING A FROZEN DOOR LOCK
To prevent a door lock from freezing, apply de-
icer through the key hole. If the lock becomes
frozen, heat the key before inserting it into the key
hole.
ANTI-FREEZE
In the winter when it is anticipated that the tem-
perature will drop below 32°F (0°C) , check the
anti-freeze (ethylene glycol base) to assure
proper winter protection. For details, see ‘‘Engine
cooling system’’ in the ‘‘Maintenance and do-it-
yourself’’ section of this manual.
BATTERY
If the battery is not fully charged during extremely
cold weather conditions, the battery fluid may
freeze and damage the battery. To maintain maxi-
mum efficiency, the battery should be checked
regularly. For details, see ‘‘Battery’’ in the ‘‘Main-
tenance and do-it-yourself’’ section of this
manual.
DRAINING OF COOLANT WATER
If the vehicle is to be left outside without anti-
freeze, drain the cooling system, including the
engine block. Refill before operating the vehicle.For details, see ‘‘Changing engine coolant’’ in the
‘‘Maintenance and do-it-yourself’’ section of this
manual.
TIRE EQUIPMENT
1. SUMMER tires have a tread designed to
provide superior performance on dry pave-
ment. However, the performance of these
tires will be substantially reduced in snowy
and icy conditions. If you operate your ve-
hicle on snowy or icy roads, NISSAN recom-
mends the use of MUD & SNOW or ALL
SEASON TIRES on all four wheels. Please
consult a NISSAN dealer for the tire type,
size, speed rating and availability informa-
tion.
2. For additional traction on icy roads, studded
tires may be used. However, some U.S.
states and Canadian provinces prohibit their
use. Check local, state and provincial laws
before installing studded tires.
Skid and traction capabilities of studded
snow tires on wet or dry surfaces may be
poorer than that of non-studded snow tires.
3. Tire chains may be used.
Use of tire chains may be prohibited accord-
ing to location. Check the local laws before
installing tire chains. When installing tire
chains, make sure they are of proper size forthe tires on your vehicle and are installed
according to the chain manufacturer’s sug-
gestions.Use only SAE Class “S”
chains.Class “S” chains are used on ve-
hicles with restricted tire to vehicle clear-
ance. Vehicles that can use Class “S” chains
are designed to meet the minimum clear-
ances between the tire and the closest ve-
hicle suspension or body component re-
quired to accommodate the use of a winter
traction device (tire chains or cables) . The
minimum clearances are determined using
the factory equipped tire size. Other types
may damage your vehicle. Use chain ten-
sioners when recommended by the tire
chain manufacturer to ensure a tight fit.
Loose end links of the tire chain must be
secured or removed to prevent the possibil-
ity of whipping action damage to the fenders
or underbody. If possible, avoid fully loading
your vehicle when using tire chains. In addi-
tion, drive at a reduced speed. Otherwise,
your vehicle may be damaged and/or vehicle
handling and performance may be adversely
affected.
Never install tire chains on spare tires. Do
not use tire chains on dry roads.
COLD WEATHER DRIVING
Starting and driving5-27
ZREVIEW COPY:Ð2003 Xterra(xtr)
Owners Manual(owners)ÐUSA English(nna)
02/24/03Ðtbrooks
X
Page 177 of 272
When towing your vehicle, all State (Provincial in
Canada) and local regulations for towing must be
followed. Incorrect towing equipment could dam-
age your vehicle. Towing instructions are avail-
able from a NISSAN dealer. Local service opera-
tors are generally familiar with the applicable laws
and procedures for towing. To assure proper
towing and to prevent accidental damage to your
vehicle, NISSAN recommends having a service
operator tow your vehicle. It is advisable to have
the service operator carefully read the following
precautions:
WARNING
cNever ride in a vehicle that is being
towed.
cNever get under your vehicle after it has
been lifted by a tow truck.
CAUTION
cWhen towing, make sure that the trans-
mission, axles, steering system and
powertrain are in working condition. If
any unit is damaged, dollies must be
used.
cAlways attach safety chains before
towing.
TOWING RECOMMENDED BY
NISSANTwo-wheel drive models
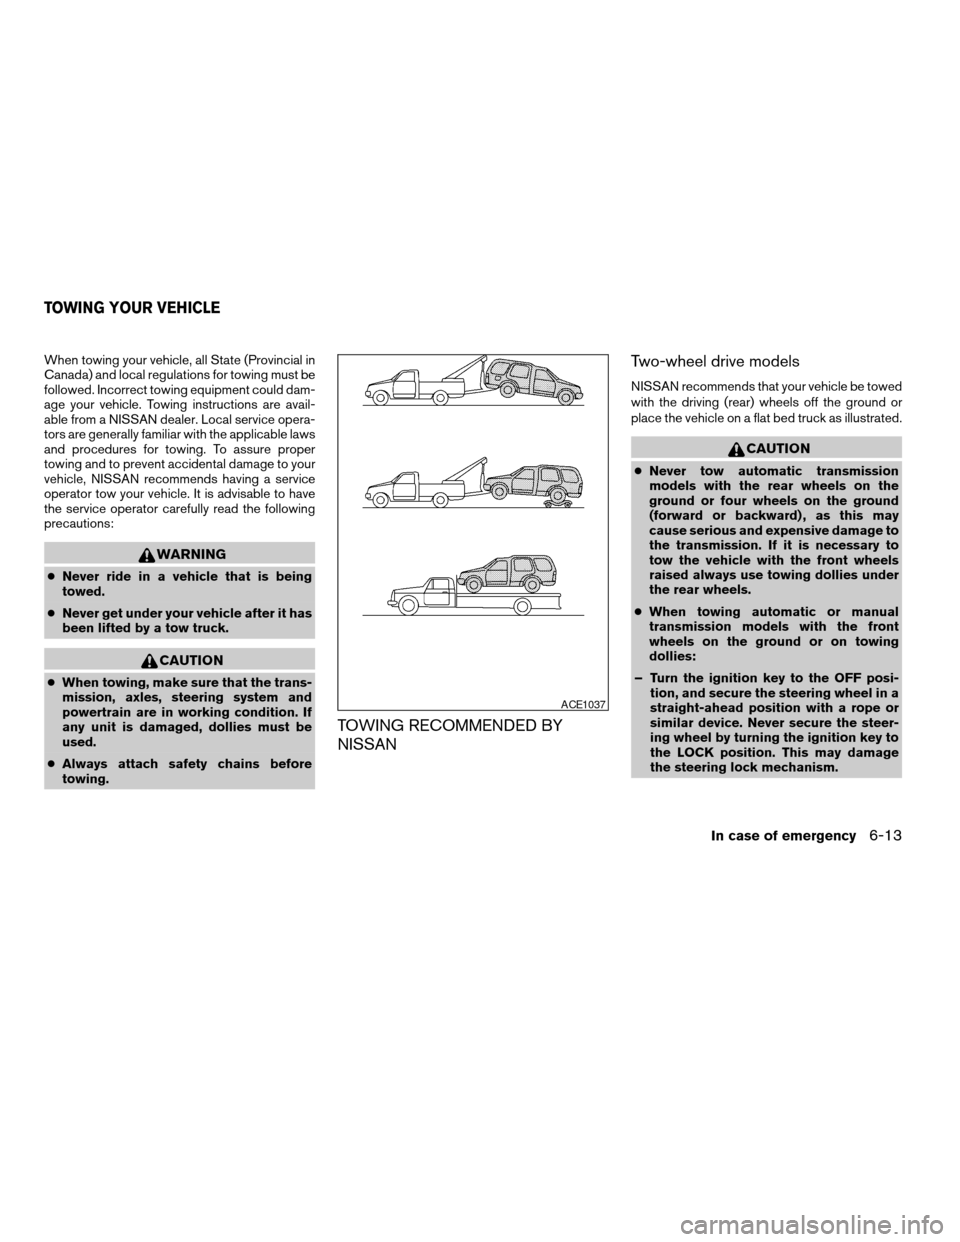
NISSAN recommends that your vehicle be towed
with the driving (rear) wheels off the ground or
place the vehicle on a flat bed truck as illustrated.
CAUTION
cNever tow automatic transmission
models with the rear wheels on the
ground or four wheels on the ground
(forward or backward) , as this may
cause serious and expensive damage to
the transmission. If it is necessary to
tow the vehicle with the front wheels
raised always use towing dollies under
the rear wheels.
cWhen towing automatic or manual
transmission models with the front
wheels on the ground or on towing
dollies:
– Turn the ignition key to the OFF posi-
tion, and secure the steering wheel in a
straight-ahead position with a rope or
similar device. Never secure the steer-
ing wheel by turning the ignition key to
the LOCK position. This may damage
the steering lock mechanism.
ACE1037
TOWING YOUR VEHICLE
In case of emergency6-13
ZREVIEW COPY:Ð2003 Xterra(xtr)
Owners Manual(owners)ÐUSA English(nna)
02/24/03Ðtbrooks
X
Page 178 of 272
cIf you have to tow manual transmission
models with the rear wheels on the
ground (if you do not use towing dol-
lies) or four wheels on the ground:
cAlways release the parking brake.
cMove the transmission shift lever to
the N (Neutral) position.
cObserve the following restricted tow-
ing speeds and distances for manual
transmission models only:
Speed: Below 60 MPH (97 km/h)
Distance: Less than 500 miles (805
km)
If the speed or distance must necessarily be
greater, remove the propeller shaft before towing
to prevent damage to the transmission.
Four-wheel drive models
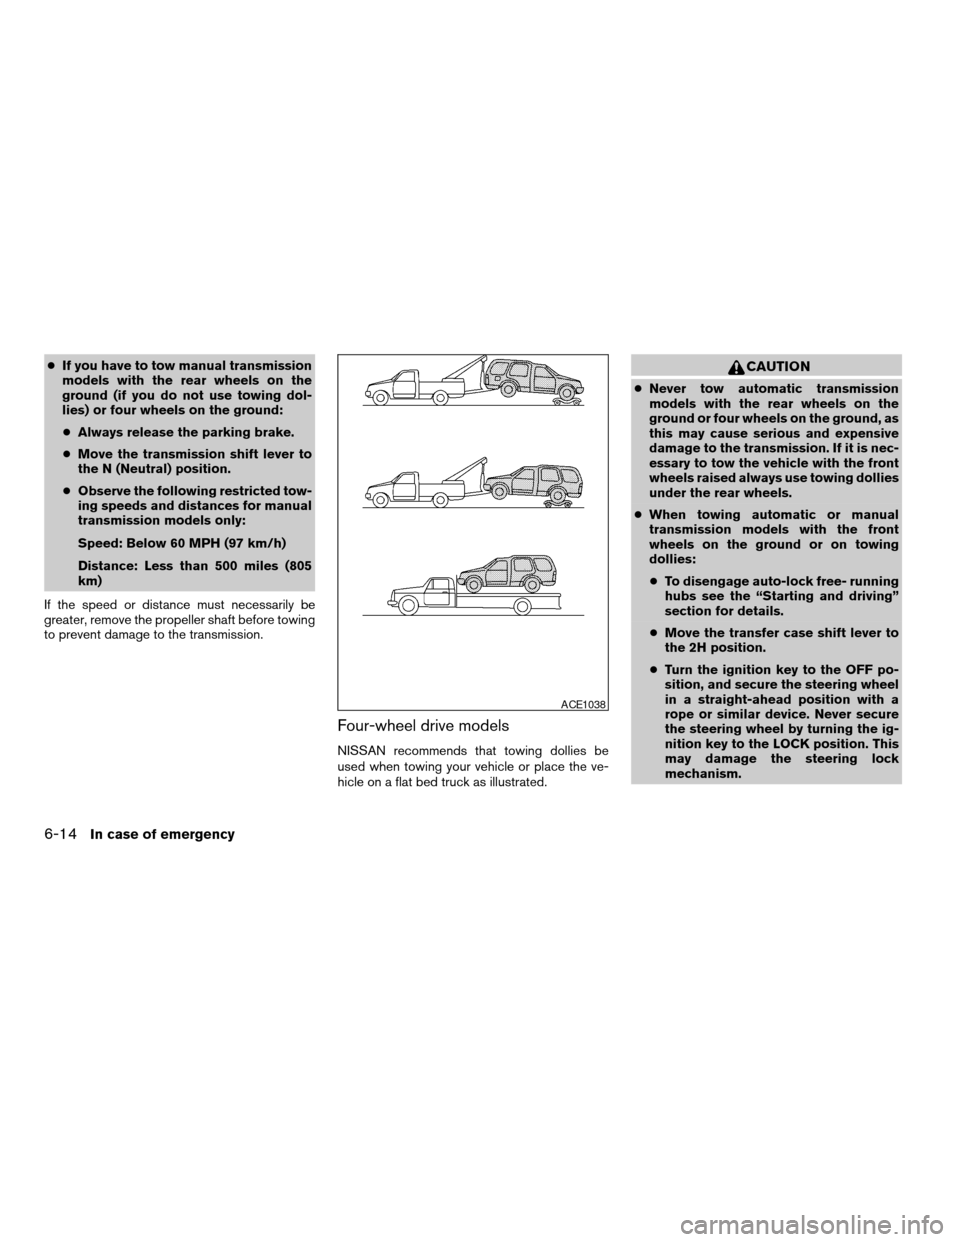
NISSAN recommends that towing dollies be
used when towing your vehicle or place the ve-
hicle on a flat bed truck as illustrated.
CAUTION
cNever tow automatic transmission
models with the rear wheels on the
ground or four wheels on the ground, as
this may cause serious and expensive
damage to the transmission. If it is nec-
essary to tow the vehicle with the front
wheels raised always use towing dollies
under the rear wheels.
cWhen towing automatic or manual
transmission models with the front
wheels on the ground or on towing
dollies:
cTo disengage auto-lock free- running
hubs see the “Starting and driving”
section for details.
cMove the transfer case shift lever to
the 2H position.
cTurn the ignition key to the OFF po-
sition, and secure the steering wheel
in a straight-ahead position with a
rope or similar device. Never secure
the steering wheel by turning the ig-
nition key to the LOCK position. This
may damage the steering lock
mechanism.
ACE1038
6-14In case of emergency
ZREVIEW COPY:Ð2003 Xterra(xtr)
Owners Manual(owners)ÐUSA English(nna)
02/24/03Ðtbrooks
X
Page 180 of 272

To tow a vehicle equipped with an automatic
transmission, an appropriate vehicle dollyMUST
be placed under the towed vehicle’s drive
wheels.Alwaysfollow the dolly manufacturer’s
recommendations when using their product.
Manual Transmission
cAlways tow with the manual transmission in
Neutral.
cOn four-wheel drive vehicles, place the
transfer case in the 2H range. Failure to do
so will cause the powertrain to bind up.
cAfter towing 500 miles, start and idle the
engine with the transmission in Neutral for
two minutes. Failure to idle the engine after
every 500 miles of towing may cause dam-
age to the transmission’s internal parts.
6-16In case of emergency
ZREVIEW COPY:Ð2003 Xterra(xtr)
Owners Manual(owners)ÐUSA English(nna)
02/24/03Ðtbrooks
X
Page 215 of 272
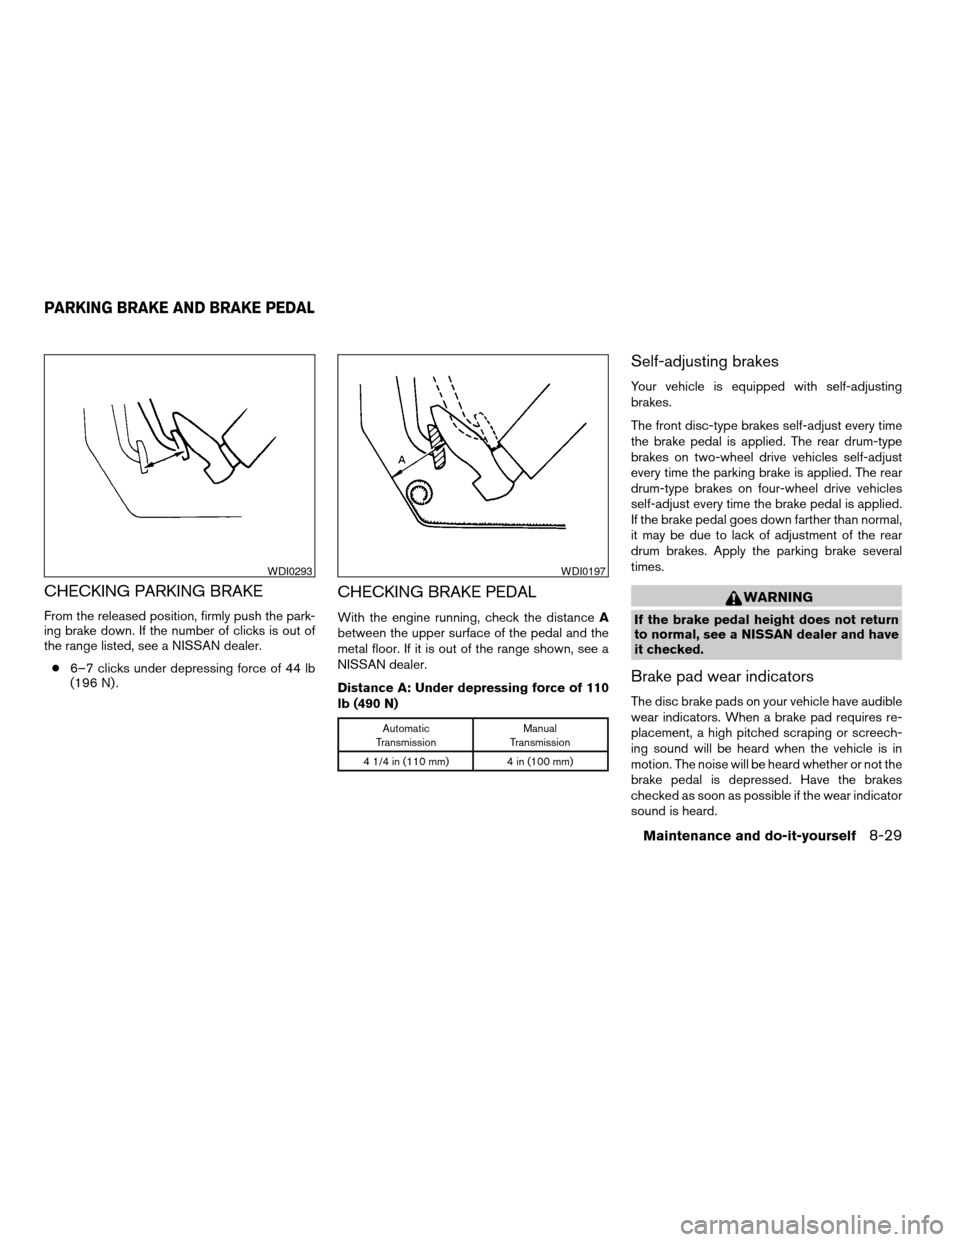
CHECKING PARKING BRAKE
From the released position, firmly push the park-
ing brake down. If the number of clicks is out of
the range listed, see a NISSAN dealer.
c6–7 clicks under depressing force of 44 lb
(196 N) .
CHECKING BRAKE PEDAL
With the engine running, check the distanceA
between the upper surface of the pedal and the
metal floor. If it is out of the range shown, see a
NISSAN dealer.
Distance A: Under depressing force of 110
lb (490 N)
Automatic
TransmissionManual
Transmission
4 1/4 in (110 mm) 4 in (100 mm)
Self-adjusting brakes
Your vehicle is equipped with self-adjusting
brakes.
The front disc-type brakes self-adjust every time
the brake pedal is applied. The rear drum-type
brakes on two-wheel drive vehicles self-adjust
every time the parking brake is applied. The rear
drum-type brakes on four-wheel drive vehicles
self-adjust every time the brake pedal is applied.
If the brake pedal goes down farther than normal,
it may be due to lack of adjustment of the rear
drum brakes. Apply the parking brake several
times.
WARNING
If the brake pedal height does not return
to normal, see a NISSAN dealer and have
it checked.
Brake pad wear indicators
The disc brake pads on your vehicle have audible
wear indicators. When a brake pad requires re-
placement, a high pitched scraping or screech-
ing sound will be heard when the vehicle is in
motion. The noise will be heard whether or not the
brake pedal is depressed. Have the brakes
checked as soon as possible if the wear indicator
sound is heard.
WDI0293WDI0197
PARKING BRAKE AND BRAKE PEDAL
Maintenance and do-it-yourself8-29
ZREVIEW COPY:Ð2003 Xterra(xtr)
Owners Manual(owners)ÐUSA English(nna)
02/24/03Ðtbrooks
X
Page 226 of 272
If you have a flat tire, see the “In case of
emergency” section in this manual.
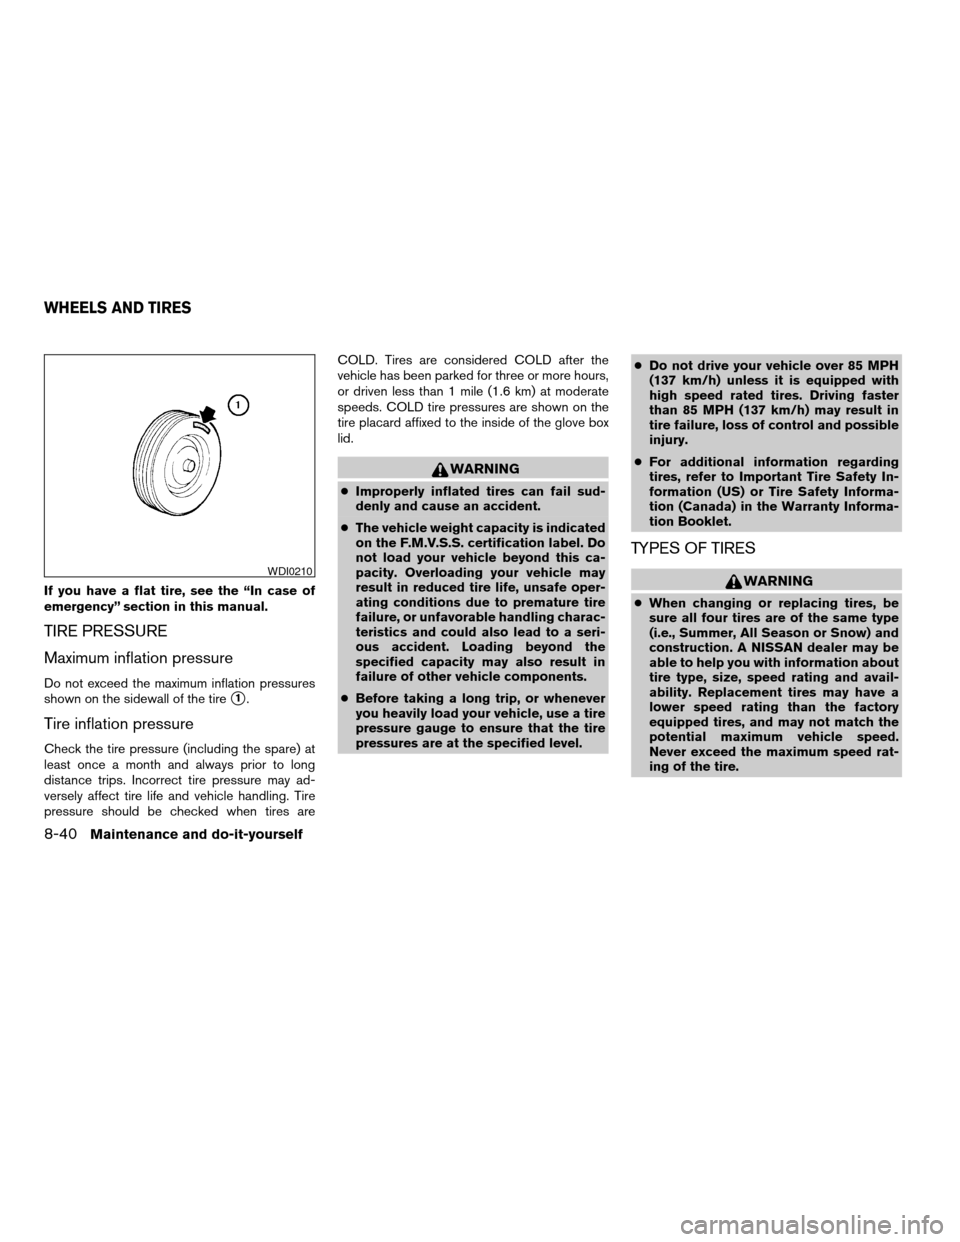
TIRE PRESSURE
Maximum inflation pressure
Do not exceed the maximum inflation pressures
shown on the sidewall of the tire
s1.
Tire inflation pressure
Check the tire pressure (including the spare) at
least once a month and always prior to long
distance trips. Incorrect tire pressure may ad-
versely affect tire life and vehicle handling. Tire
pressure should be checked when tires areCOLD. Tires are considered COLD after the
vehicle has been parked for three or more hours,
or driven less than 1 mile (1.6 km) at moderate
speeds. COLD tire pressures are shown on the
tire placard affixed to the inside of the glove box
lid.
WARNING
cImproperly inflated tires can fail sud-
denly and cause an accident.
cThe vehicle weight capacity is indicated
on the F.M.V.S.S. certification label. Do
not load your vehicle beyond this ca-
pacity. Overloading your vehicle may
result in reduced tire life, unsafe oper-
ating conditions due to premature tire
failure, or unfavorable handling charac-
teristics and could also lead to a seri-
ous accident. Loading beyond the
specified capacity may also result in
failure of other vehicle components.
cBefore taking a long trip, or whenever
you heavily load your vehicle, use a tire
pressure gauge to ensure that the tire
pressures are at the specified level.cDo not drive your vehicle over 85 MPH
(137 km/h) unless it is equipped with
high speed rated tires. Driving faster
than 85 MPH (137 km/h) may result in
tire failure, loss of control and possible
injury.
cFor additional information regarding
tires, refer to Important Tire Safety In-
formation (US) or Tire Safety Informa-
tion (Canada) in the Warranty Informa-
tion Booklet.
TYPES OF TIRES
WARNING
cWhen changing or replacing tires, be
sure all four tires are of the same type
(i.e., Summer, All Season or Snow) and
construction. A NISSAN dealer may be
able to help you with information about
tire type, size, speed rating and avail-
ability. Replacement tires may have a
lower speed rating than the factory
equipped tires, and may not match the
potential maximum vehicle speed.
Never exceed the maximum speed rat-
ing of the tire.
WDI0210
WHEELS AND TIRES
8-40Maintenance and do-it-yourself
ZREVIEW COPY:Ð2003 Xterra(xtr)
Owners Manual(owners)ÐUSA English(nna)
02/24/03Ðtbrooks
X