Page 4129 of 4179
PARKING, LICENSE PLATE AND TAIL LAMPS
LT-51
C
D
E
F
G
H
I
J
L
MA
B
LT
Bulb Replacement EKS003C1
PARKING AND TAIL LAMPS
Refer to LT- 6 3 , "Bulb Replacement" .
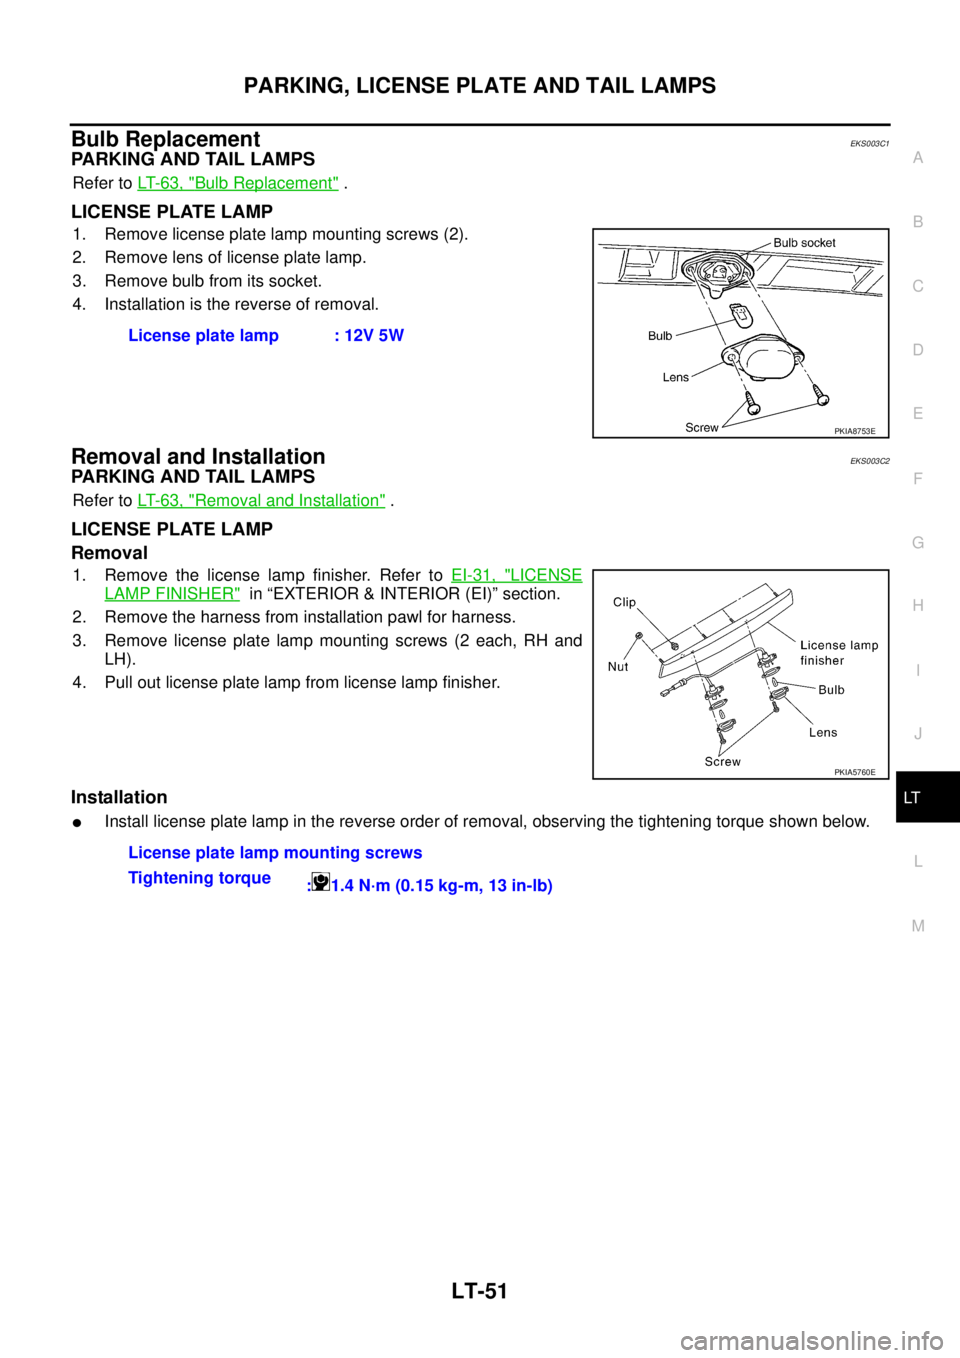
LICENSE PLATE LAMP
1. Remove license plate lamp mounting screws (2).
2. Remove lens of license plate lamp.
3. Remove bulb from its socket.
4. Installation is the reverse of removal.
Removal and Installation EKS003C2
PARKING AND TAIL LAMPS
Refer to LT- 6 3 , "Removal and Installation" .
LICENSE PLATE LAMP
Removal
1. Remove the license lamp finisher. Refer to EI-31, "LICENSE
LAMP FINISHER" in “EXTERIOR & INTERIOR (EI)” section.
2. Remove the harness from installation pawl for harness.
3. Remove license plate lamp mounting screws (2 each, RH and
LH).
4. Pull out license plate lamp from license lamp finisher.
Installation
�Install license plate lamp in the reverse order of removal, observing the tightening torque shown below.License plate lamp : 12V 5W
PKIA8753E
PKIA5760E
License plate lamp mounting screws
Tightening torque
: 1.4 N·m (0.15 kg-m, 13 in-lb)
Page 4133 of 4179
FRONT FOG LAMP
LT-55
C
D
E
F
G
H
I
J
L
MA
B
LT
Bulb Replacement EKS003DI
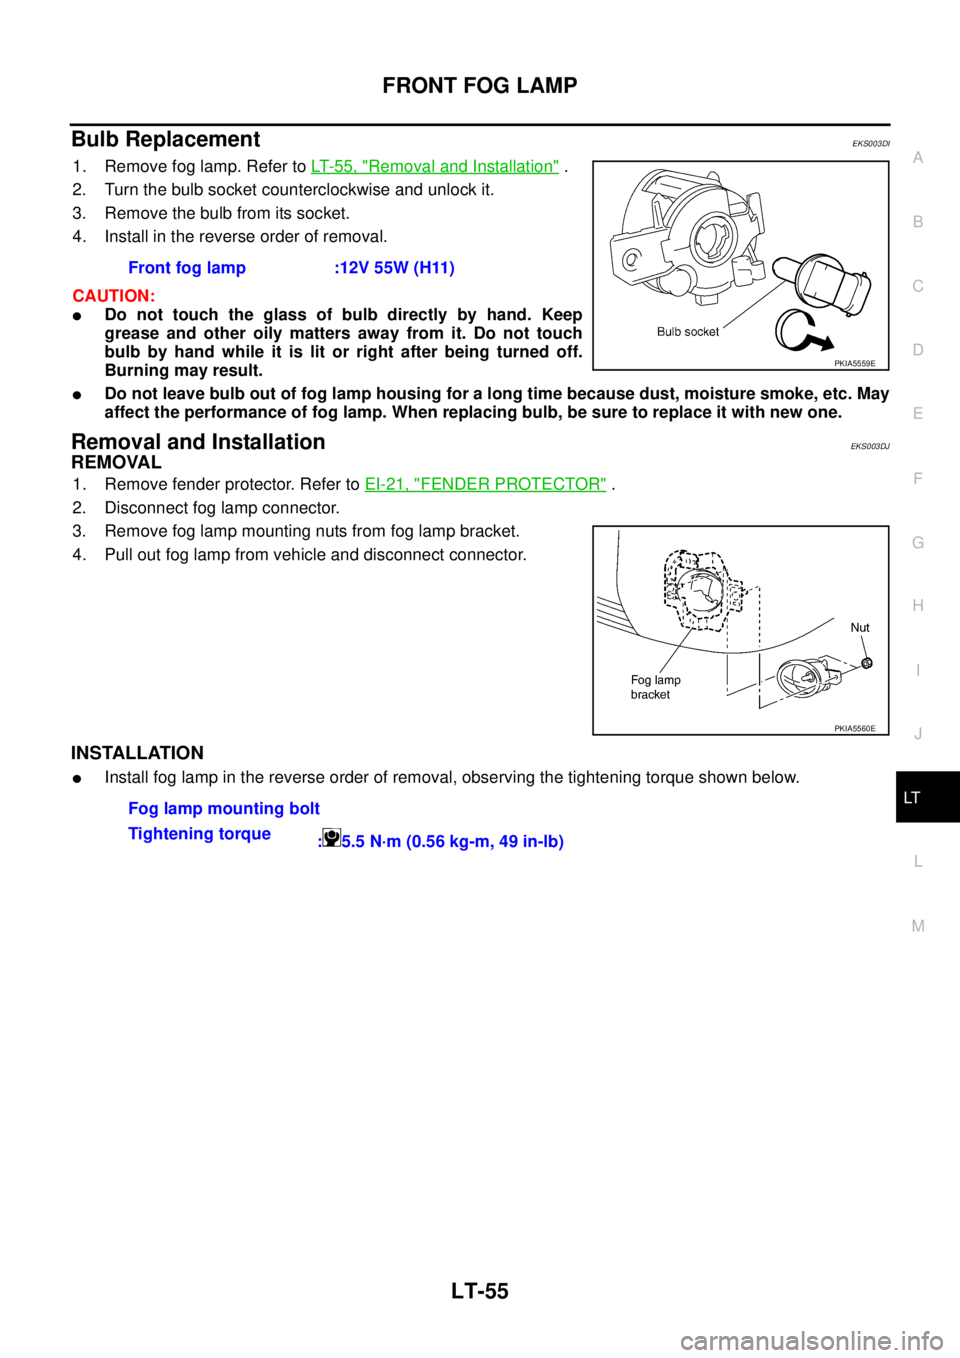
1. Remove fog lamp. Refer to LT- 5 5 , "Removal and Installation" .
2. Turn the bulb socket counterclockwise and unlock it.
3. Remove the bulb from its socket.
4. Install in the reverse order of removal.
CAUTION:
�Do not touch the glass of bulb directly by hand. Keep
grease and other oily matters away from it. Do not touch
bulb by hand while it is lit or right after being turned off.
Burning may result.
�Do not leave bulb out of fog lamp housing for a long time because dust, moisture smoke, etc. May
affect the performance of fog lamp. When replacing bulb, be sure to replace it with new one.
Removal and Installation EKS003DJ
REMOVAL
1. Remove fender protector. Refer to EI-21, "FENDER PROTECTOR" .
2. Disconnect fog lamp connector.
3. Remove fog lamp mounting nuts from fog lamp bracket.
4. Pull out fog lamp from vehicle and disconnect connector.
INSTALLATION
�Install fog lamp in the reverse order of removal, observing the tightening torque shown below.Front fog lamp :12V 55W (H11)
PKIA5559E
PKIA5560E
Fog lamp mounting bolt
Tightening torque
: 5.5 N·m (0.56 kg-m, 49 in-lb)
Page 4137 of 4179
REAR FOG LAMP
LT-59
C
D
E
F
G
H
I
J
L
MA
B
LT
Bulb ReplacementEKS0015L
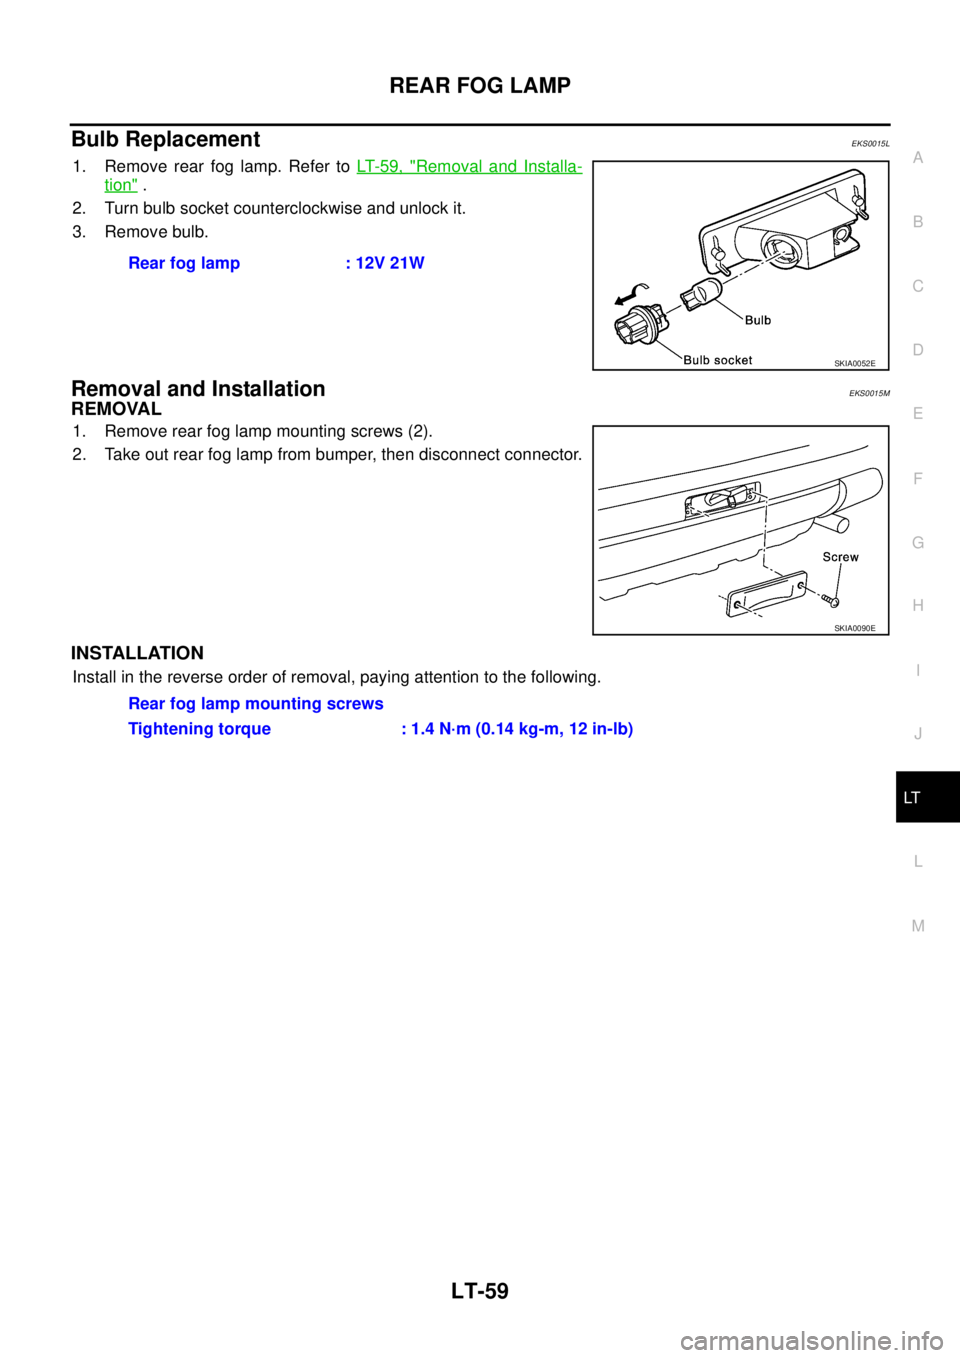
1. Remove rear fog lamp. Refer to LT- 5 9 , "Removal and Installa-
tion" .
2. Turn bulb socket counterclockwise and unlock it.
3. Remove bulb.
Removal and InstallationEKS0015M
REMOVAL
1. Remove rear fog lamp mounting screws (2).
2. Take out rear fog lamp from bumper, then disconnect connector.
INSTALLATION
Install in the reverse order of removal, paying attention to the following.Rear fog lamp : 12V 21W
SKIA0052E
SKIA0090E
Rear fog lamp mounting screws
Tightening torque : 1.4 N·m (0.14 kg-m, 12 in-lb)
Page 4138 of 4179
LT-60
CLEARANCE LAMP/TAIL LAMP
CLEARANCE LAMP/TAIL LAMPPFP:26010
Bulb Replacement (Clearance Lamp)EKS001UR
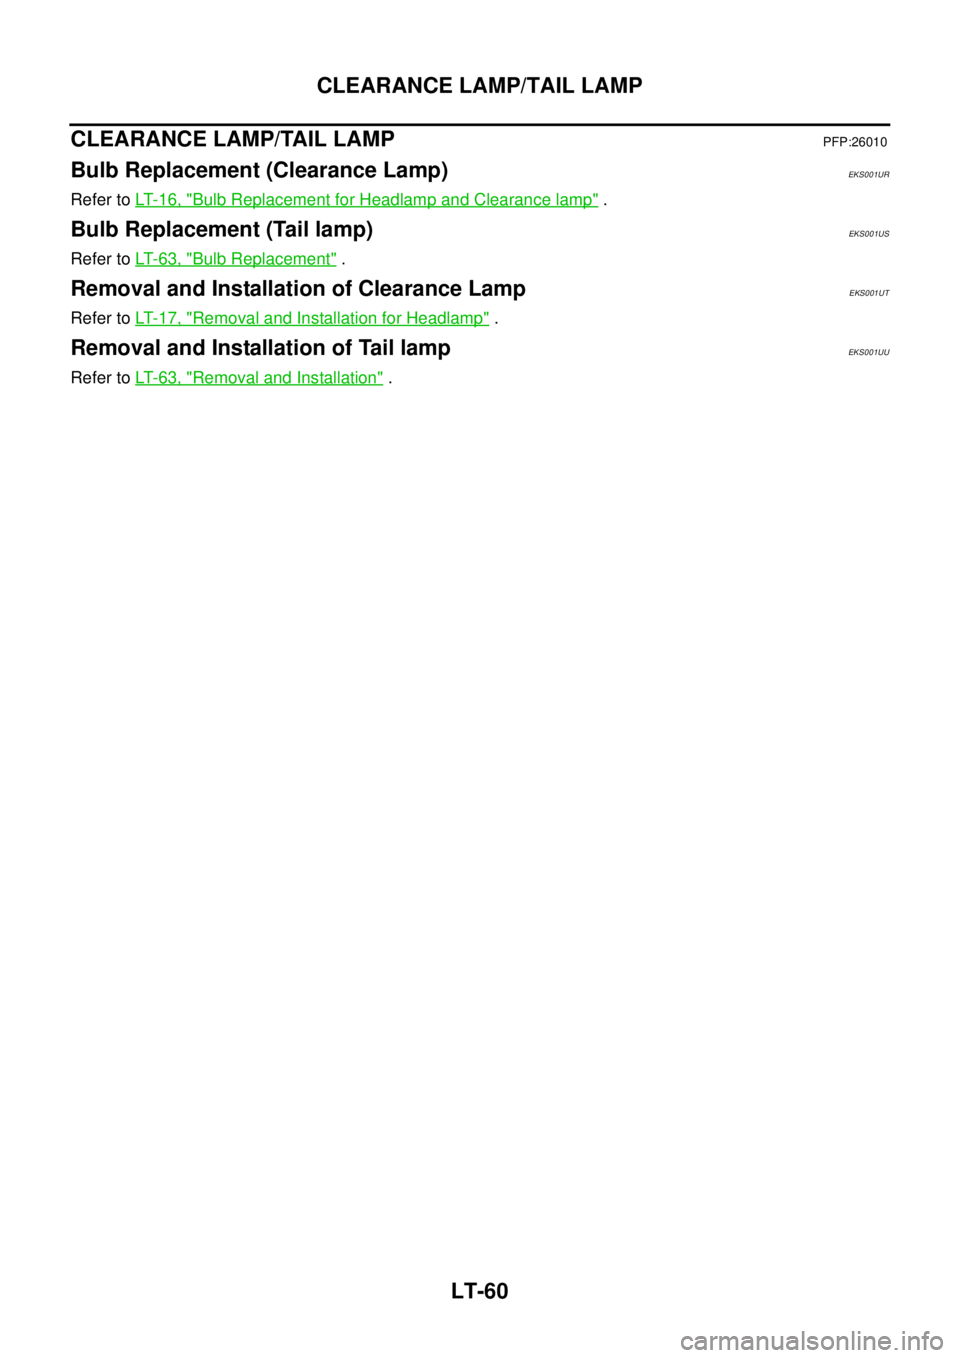
Refer to LT- 1 6 , "Bulb Replacement for Headlamp and Clearance lamp" .
Bulb Replacement (Tail lamp)EKS001US
Refer to LT- 6 3 , "Bulb Replacement" .
Removal and Installation of Clearance LampEKS001UT
Refer to LT- 1 7 , "Removal and Installation for Headlamp" .
Removal and Installation of Tail lampEKS001UU
Refer to LT- 6 3 , "Removal and Installation" .
Page 4139 of 4179
HIGH-MOUNTED STOP LAMP
LT-61
C
D
E
F
G
H
I
J
L
MA
B
LT
HIGH-MOUNTED STOP LAMPPFP:26590
Bulb ReplacementEKS0034W
Refer to LT- 4 3 , "Bulb Replacement" .
Removal and InstallationEKS0034X
Refer to LT- 4 3 , "Removal and Installation" .
Page 4141 of 4179
REAR COMBINATION LAMP
LT-63
C
D
E
F
G
H
I
J
L
MA
B
LT
Bulb ReplacementEKS00164
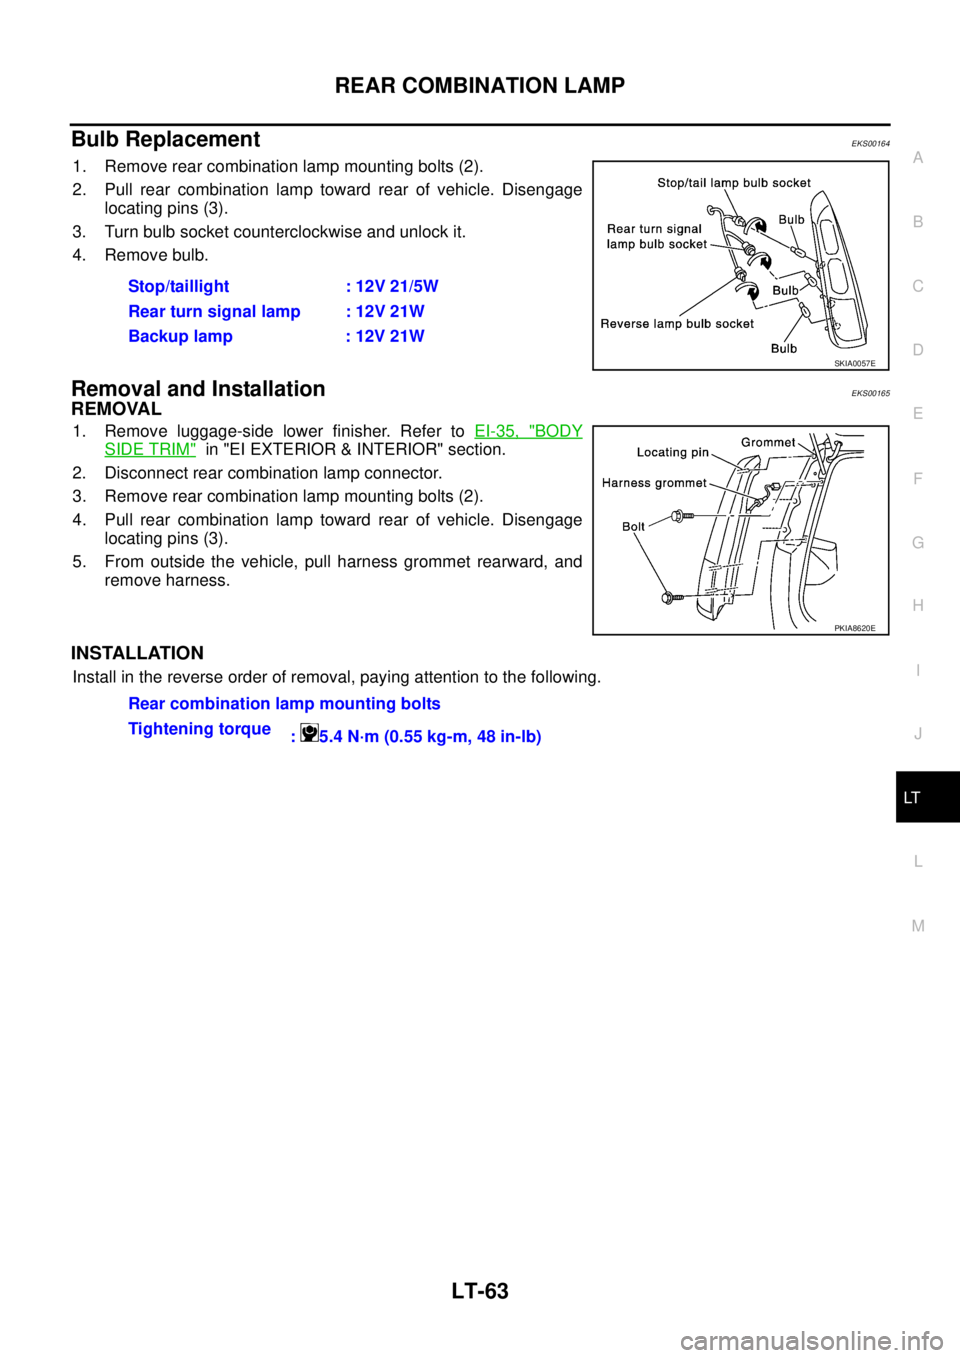
1. Remove rear combination lamp mounting bolts (2).
2. Pull rear combination lamp toward rear of vehicle. Disengage
locating pins (3).
3. Turn bulb socket counterclockwise and unlock it.
4. Remove bulb.
Removal and InstallationEKS00165
REMOVAL
1. Remove luggage-side lower finisher. Refer to EI-35, "BODY
SIDE TRIM" in "EI EXTERIOR & INTERIOR" section.
2. Disconnect rear combination lamp connector.
3. Remove rear combination lamp mounting bolts (2).
4. Pull rear combination lamp toward rear of vehicle. Disengage
locating pins (3).
5. From outside the vehicle, pull harness grommet rearward, and
remove harness.
INSTALLATION
Install in the reverse order of removal, paying attention to the following.Stop/taillight : 12V 21/5W
Rear turn signal lamp : 12V 21W
Backup lamp : 12V 21W
SKIA0057E
PKIA8620E
Rear combination lamp mounting bolts
Tightening torque
: 5.4 N·m (0.55 kg-m, 48 in-lb)
Page 4143 of 4179
ASHTRAY ILLUMINATION
LT-65
C
D
E
F
G
H
I
J
L
MA
B
LT
ASHTRAY ILLUMINATIONPFP:25860
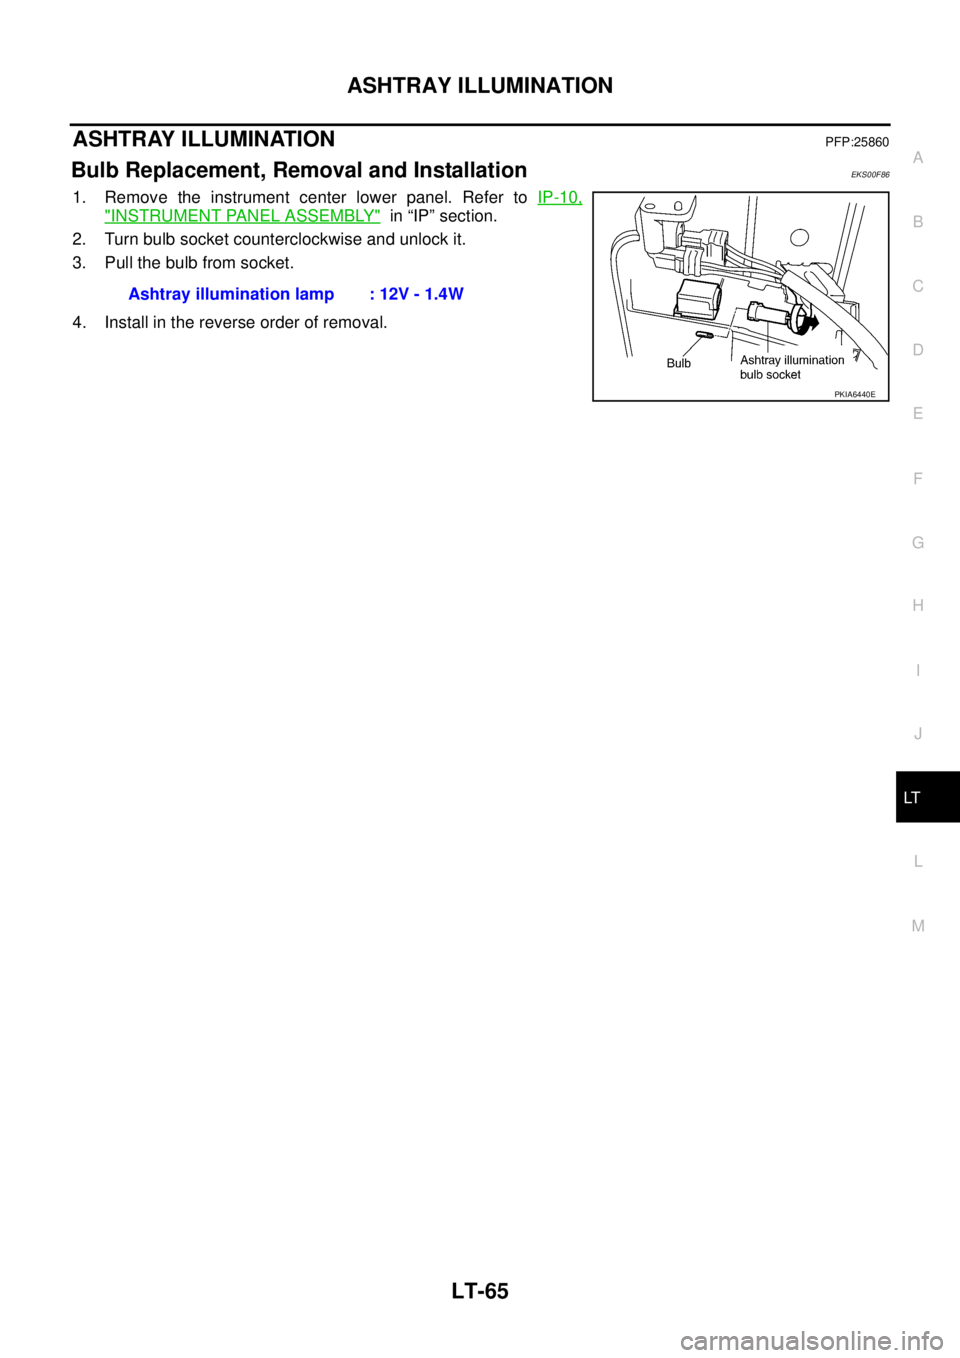
Bulb Replacement, Removal and InstallationEKS00F86
1. Remove the instrument center lower panel. Refer to IP-10,
"INSTRUMENT PANEL ASSEMBLY" in “IP” section.
2. Turn bulb socket counterclockwise and unlock it.
3. Pull the bulb from socket.
4. Install in the reverse order of removal.Ashtray illumination lamp : 12V - 1.4W
PKIA6440E
Page 4164 of 4179
LT-86
INTERIOR ROOM LAMP
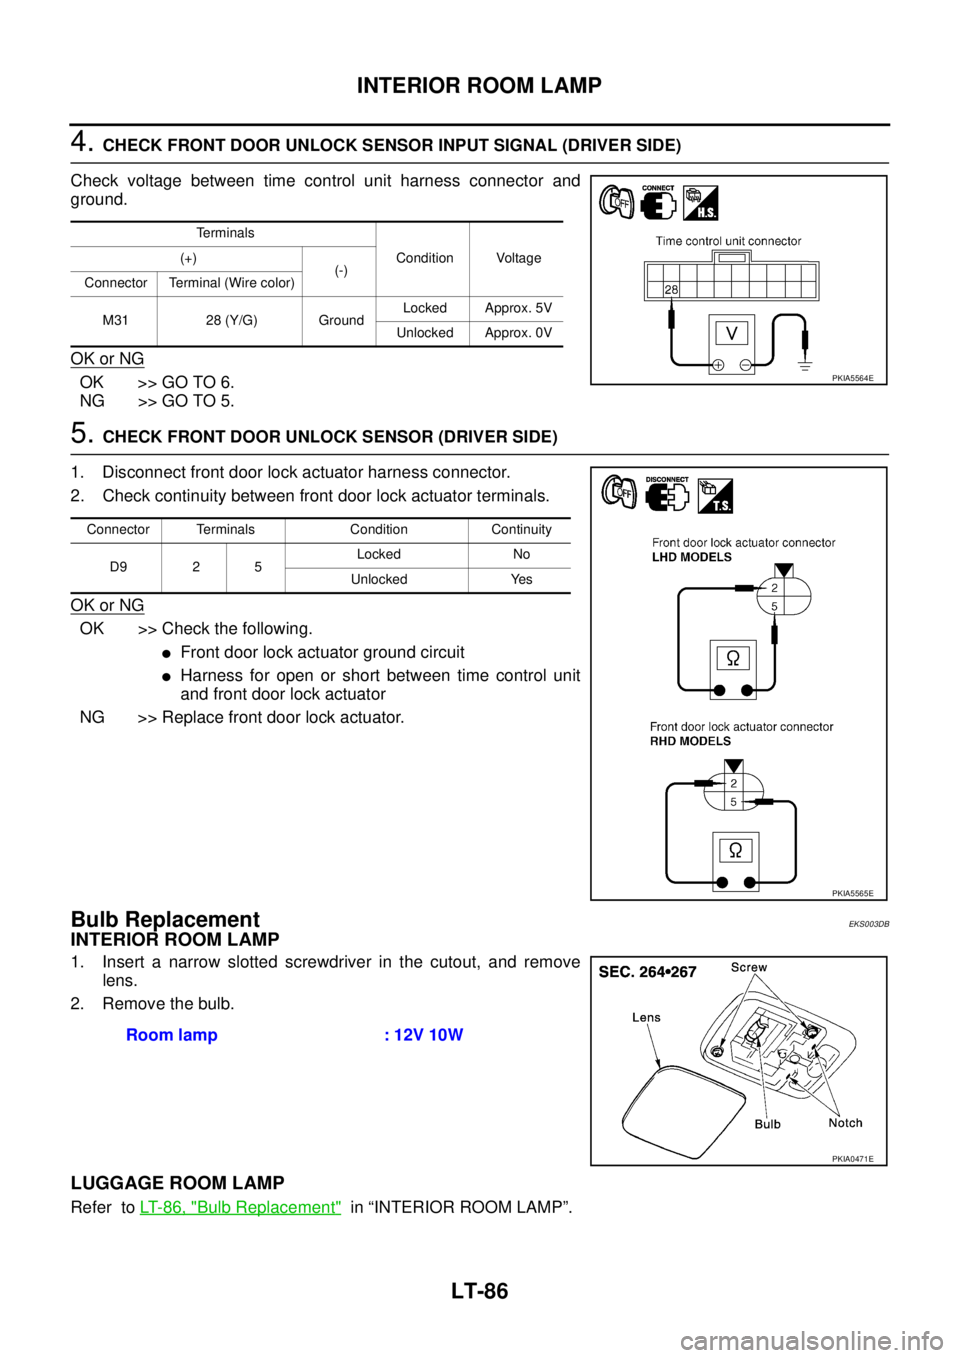
4. CHECK FRONT DOOR UNLOCK SENSOR INPUT SIGNAL (DRIVER SIDE)
Check voltage between time control unit harness connector and
ground.
OK or NG
OK >> GO TO 6.
NG >> GO TO 5.
5. CHECK FRONT DOOR UNLOCK SENSOR (DRIVER SIDE)
1. Disconnect front door lock actuator harness connector.
2. Check continuity between front door lock actuator terminals.
OK or NG
OK >> Check the following.
�Front door lock actuator ground circuit
�Harness for open or short between time control unit
and front door lock actuator
NG >> Replace front door lock actuator.
Bulb Replacement EKS003DB
INTERIOR ROOM LAMP
1. Insert a narrow slotted screwdriver in the cutout, and remove
lens.
2. Remove the bulb.
LUGGAGE ROOM LAMP
Refer to LT- 8 6 , "Bulb Replacement" in “INTERIOR ROOM LAMP”.
Terminals
Condition Voltage (+)
(-)
Connector Terminal (Wire color)
M31 28 (Y/G) GroundLocked Approx. 5V
Unlocked Approx. 0V
PKIA5564E
Connector Terminals Condition Continuity
D9 2 5Locked No
Unlocked Yes
PKIA5565E
Room lamp : 12V 10W
PKIA0471E