Page 2522 of 3066

MA-30
ENGINE MAINTENANCE (YD22DDTI)
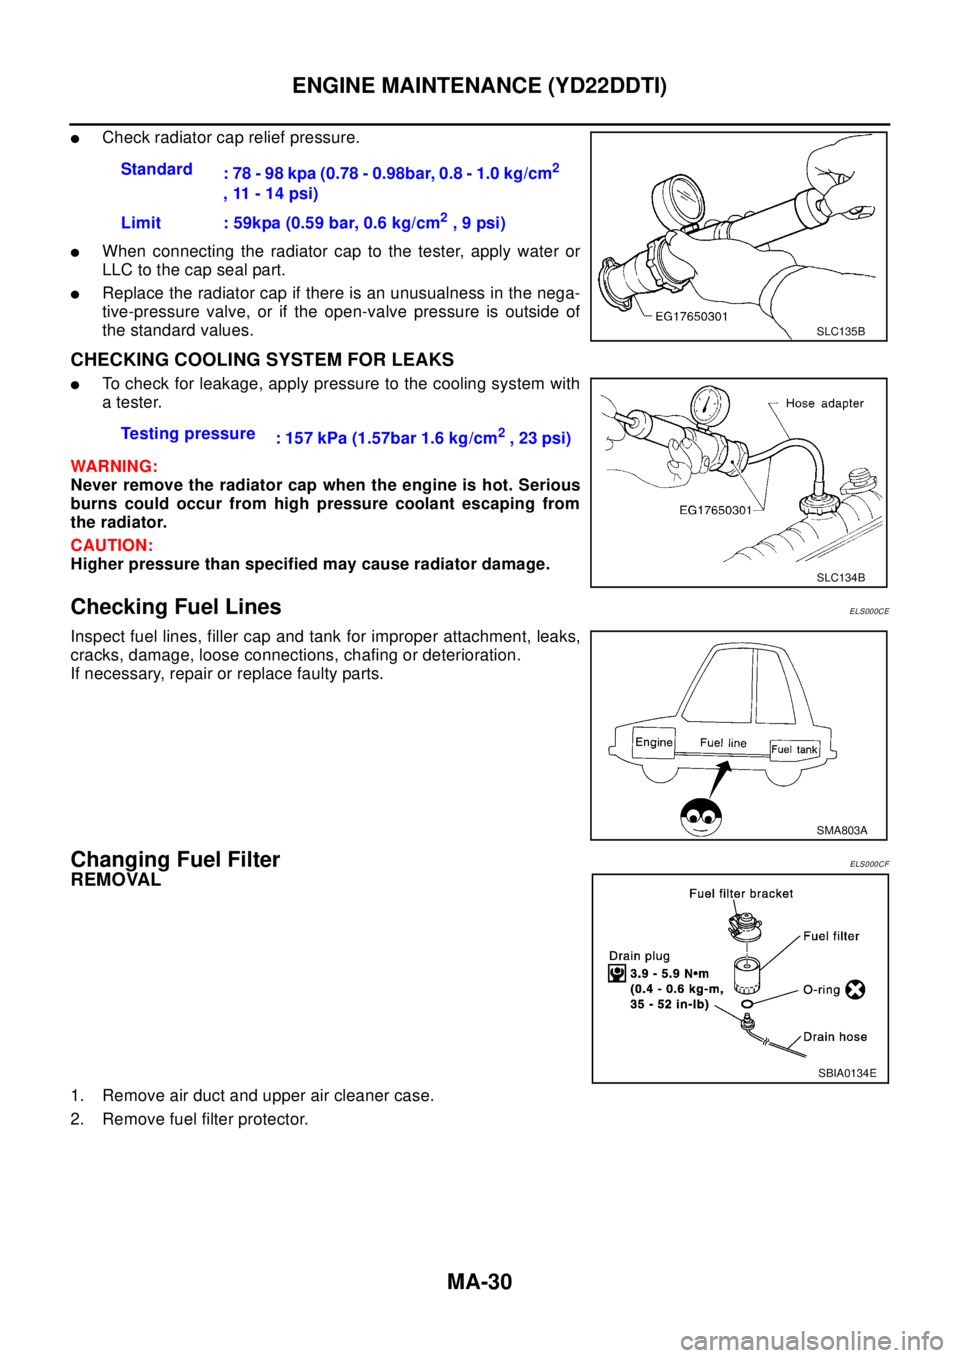
lCheck radiator cap relief pressure.
lWhen connecting the radiator cap to the tester, apply water or
LLC to the cap seal part.
lReplace the radiator cap if there is an unusualness in the nega-
tive-pressure valve, or if the open-valve pressure is outside of
the standard values.
CHECKING COOLING SYSTEM FOR LEAKS
lTo check for leakage, apply pressure to the cooling system with
atester.
WAR NIN G:
Never remove the radiator cap when the engine is hot. Serious
burns could occur from high pressure coolant escaping from
the radiator.
CAUTION:
Higher pressure than specified may cause radiator damage.
Checking Fuel LinesELS000CE
Inspect fuel lines, filler cap and tank for improper attachment, leaks,
cracks, damage, loose connections, chafing or deterioration.
If necessary, repair or replace faulty parts.
Changing Fuel FilterELS000CF
REMOVAL
1. Remove air duct and upper air cleaner case.
2. Remove fuel filter protector.Standard
: 78 - 98 kpa (0.78 - 0.98bar, 0.8 - 1.0 kg/cm
2
,11-14psi)
Limit : 59kpa (0.59 bar, 0.6 kg/cm
2,9psi)
SLC135B
Testing pressure
: 157 kPa (1.57bar 1.6 kg/cm2,23psi)
SLC134B
SMA803A
SBIA0134E
Page 2523 of 3066

ENGINE MAINTENANCE (YD22DDTI)
MA-31
C
D
E
F
G
H
I
J
K
MA
B
MA
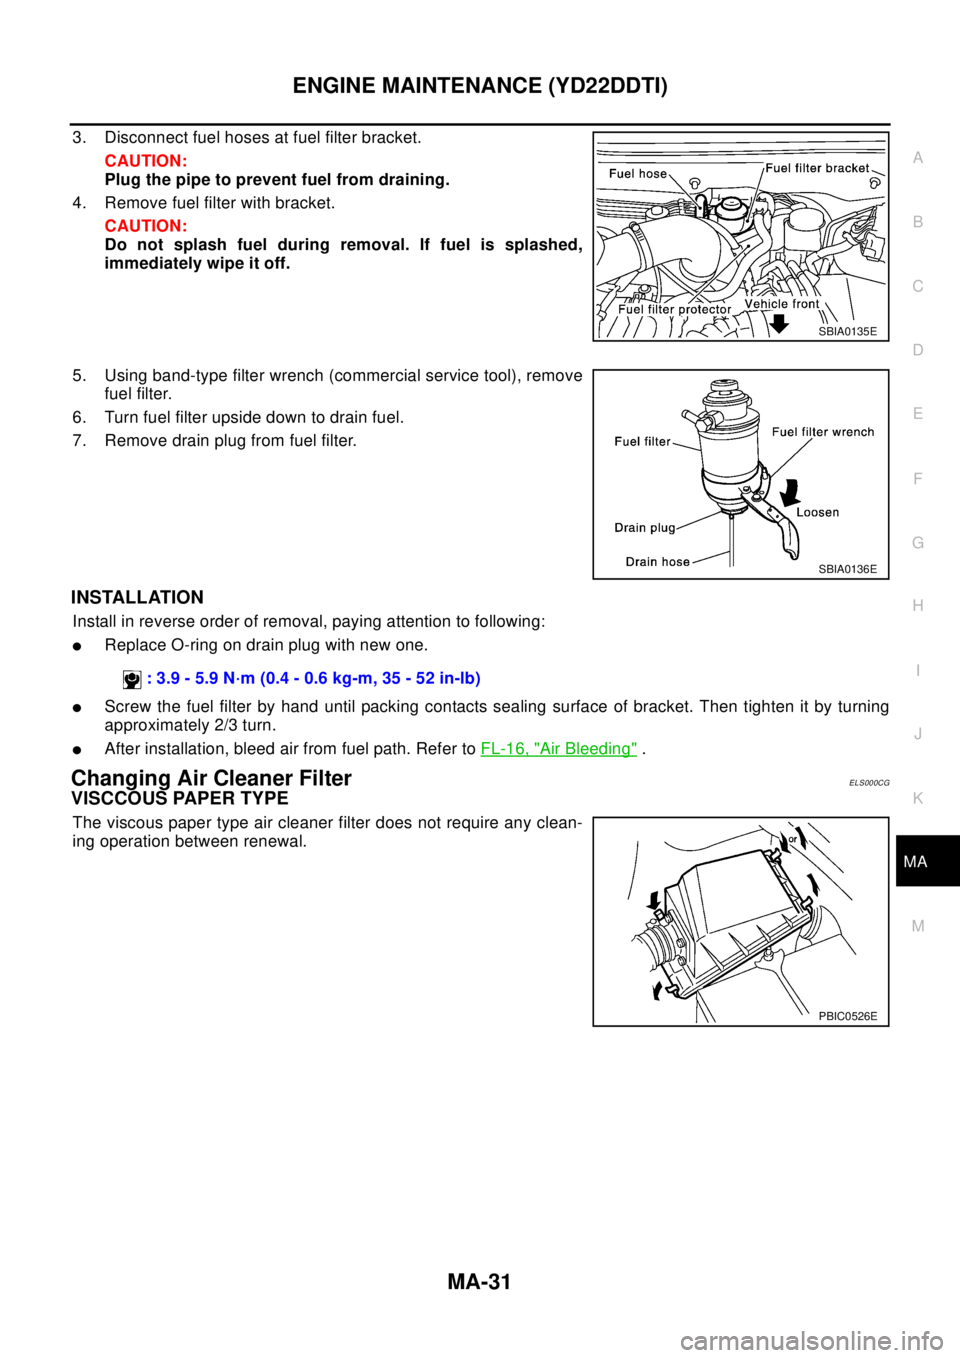
3. Disconnect fuel hoses at fuel filter bracket.
CAUTION:
Plug the pipe to prevent fuel from draining.
4. Remove fuel filter with bracket.
CAUTION:
Do not splash fuel during removal. If fuel is splashed,
immediately wipe it off.
5. Using band-type filter wrench (commercial service tool), remove
fuel filter.
6. Turn fuel filter upside down to drain fuel.
7. Remove drain plug from fuel filter.
INSTALLATION
Install in reverse order of removal, paying attention to following:
lReplace O-ring on drain plug with new one.
lScrew the fuel filter by hand until packing contacts sealing surface of bracket. Then tighten it by turning
approximately 2/3 turn.
lAfter installation, bleed air from fuel path. Refer toFL-16, "Air Bleeding".
Changing Air Cleaner FilterELS000CG
VISCCOUS PAPER TYPE
The viscous paper type air cleaner filter does not require any clean-
ing operation between renewal.
SBIA0135E
SBIA0136E
: 3.9 - 5.9 N·m (0.4 - 0.6 kg-m, 35 - 52 in-lb)
PBIC0526E
Page 2526 of 3066

MA-34
ENGINE MAINTENANCE (YD22DDTI)
4. Remove the O-ring from the filter body.
lPush the O-ring in one direction, lift the slack part using fin-
gers, and remove the O-ring from the filter body.
CAUTION:
Do not use wires or flat-bladed screwdrivers etc. as they
may cause damage to the filter body.
INSTALLATION
1. Completely remove all foreign objects adhering to the inside of the filter body or O-ring mounting area
(body side and bracket side).
2. Install the oil filter element and O-ring to the filter body.
lPush the oil filter element into the filter body completely.
3. Install the filter body to the oil filter bracket.
4. After warming up the engine, check for engine oil leakage.
5. Check oil level and add engine oil. Refer toMA-32, "
Changing Engine Oil".
Draining WaterELS000CJ
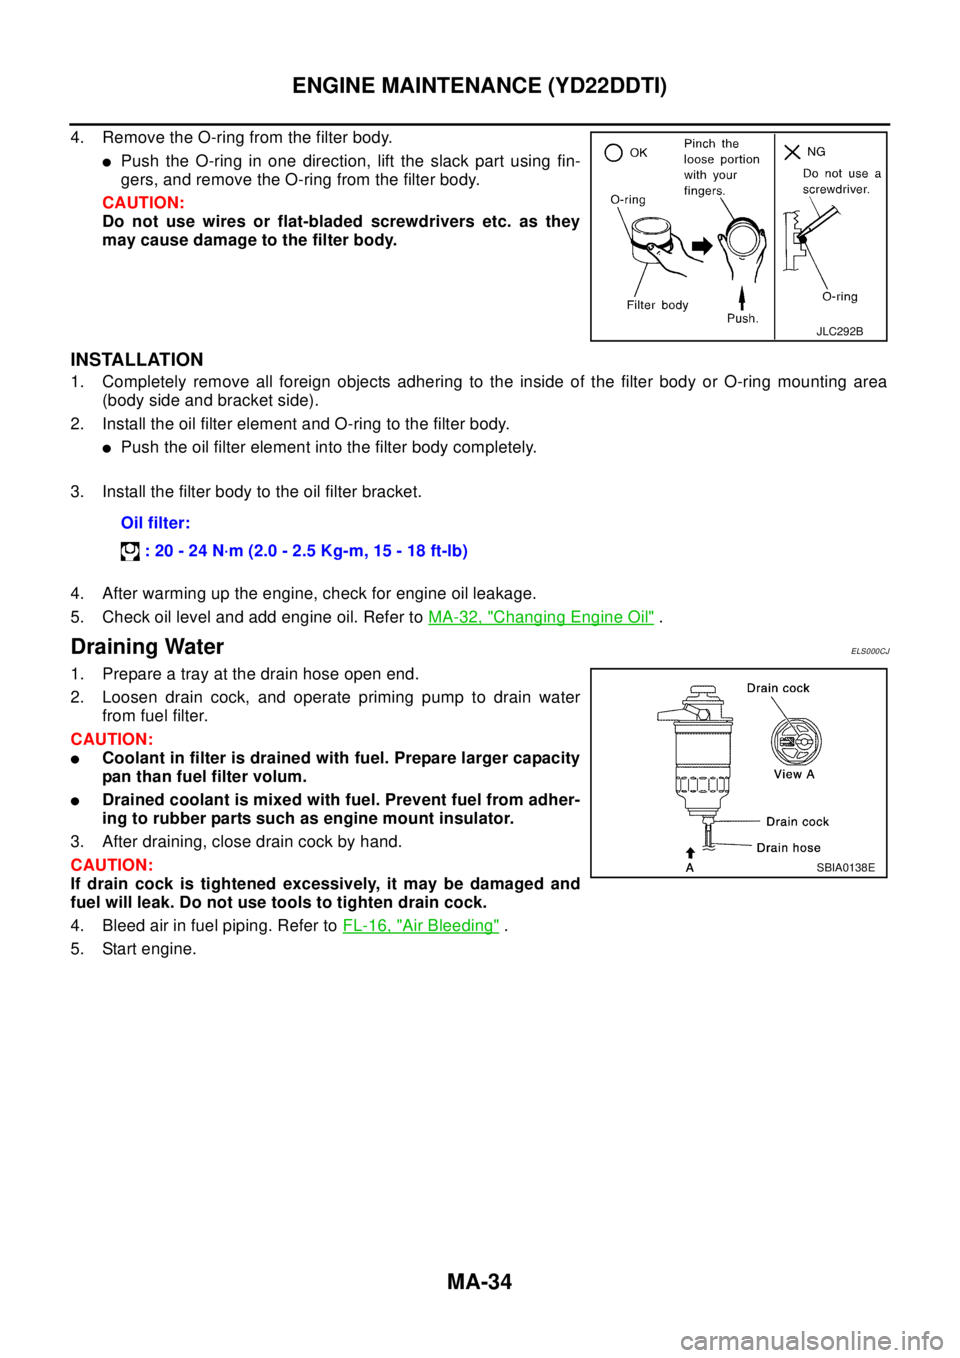
1. Prepare a tray at the drain hose open end.
2. Loosen drain cock, and operate priming pump to drain water
from fuel filter.
CAUTION:
lCoolant in filter is drained with fuel. Prepare larger capacity
pan than fuel filter volum.
lDrained coolant is mixed with fuel. Prevent fuel from adher-
ing to rubber parts such as engine mount insulator.
3. After draining, close drain cock by hand.
CAUTION:
If drain cock is tightened excessively, it may be damaged and
fuel will leak. Do not use tools to tighten drain cock.
4. Bleed air in fuel piping. Refer toFL-16, "
Air Bleeding".
5. Start engine.
JLC292B
Oil filter:
:20-24N·m(2.0-2.5Kg-m,15-18ft-lb)
SBIA0138E