2003 NISSAN SENTRA cooling
[x] Cancel search: coolingPage 140 of 224
If your vehicle is overheating (indicated by an
extremely high temperature gauge reading) , or if
you feel a lack of engine power, detect abnormal
noise, etc. take the following steps.
WARNING
cDo not continue to drive if your vehicle
overheats. Doing so could cause a ve-
hicle fire.
cTo avoid the danger of being scalded,
never remove the radiator cap while the
engine is still hot. When the radiator
cap is removed, pressurized hot water
will spurt out, possibly causing serious
injury.
cDo not open the hood if steam is com-
ing out.
1. Move the vehicle safely off the road, apply
the parking brake and move the shift lever to
N (Neutral) (manual transmission) or to P
(Park) (automatic transmission) .
Do not stop the engine.
2. Turn off the air conditioner (if so equipped) .
Open all the windows, move the heater or air
conditioner temperature control to maximum
hot and fan control to high speed.3. Get out of the vehicle. Look and listen for
steam or coolant escaping from the radiator
before opening the hood. (If steam or cool-
ant is escaping, turn off the engine.) Wait
until no steam or coolant can be seen before
proceeding.
4. Open the engine hood.
WARNING
If steam or water is coming from the en-
gine, stand clear to prevent getting
burned.
5. Visually check drive belts for damage or
looseness. Also check if the cooling fan is
running. The radiator hoses and radiator
should not leak water. If coolant is leaking,
the water pump belt is missing or loose, or
the cooling fan does not run, stop the en-
gine.
WARNING
Be careful not to allow your hands, hair,
jewelry or clothing to come into contact
with, or get caught in, engine belts or the
engine cooling fan. The engine cooling
fan can start at any time when the coolant
temperature is high.6. After the engine cools down, check the cool-
ant level in the reservoir tank with the engine
running. Add coolant to the reservoir tank if
necessary. Have your vehicle repaired at a
NISSAN dealer.
IF YOUR VEHICLE OVERHEATS
6-10In case of emergency
ZREVIEW COPY:Ð2003 Sentra(b15)
Owners Manual(owners)ÐUSA English(nna)
12/20/02Ðcathy
X
Page 142 of 224
cWhen towing automatic transmission
models with the front wheels on towing
dollies, or when towing manual trans-
mission models with the front wheels
on the ground:
c
Turn the ignition key to the OFF posi-
tion, and secure the steering wheel in
a straight-ahead position with a rope
or similar device. Never secure the
steering wheel by turning the ignition
key to the LOCK position. This may
damage the steering lock mechanism.
cMove the gearshift lever to the N
(Neutral) position.
c
When towing automatic or manual trans-
mission models with the rear wheels on
the ground (if you do not use towing dol-
lies): Always release the parking brake.
VEHICLE RECOVERY (freeing a stuck
vehicle)
WARNING
cStand clear of a stuck vehicle.
c
Do not spin your tires at high speed. This
could cause them to explode and result
in serious injury. Parts of your vehicle
could also overheat and be damaged.
CAUTION
cTow chains or cables must be attached
only to the main structural members of
the vehicle.
cPulling devices should be routed so
they do not touch any part of the sus-
pension, steering, brake or cooling
systems.
cAlways pull the cable straight out from
the front or rear of the vehicle. Never
pull the vehicle at an angle.
cPulling devices such as ropes or canvas
straps are not recommended for use in
vehicle towing or recovery.
FLAT TOWING
Towing your vehicle with all four wheels on the
ground is sometimes called flat towing. This
method is sometimes used when towing a vehicle
behind a recreational vehicle, such as a motor
home.
CAUTION
cFailure to follow these guidelines can
result in severe transmission damage.
cWhenever flat towing your vehicle, al-
ways tow forward, never backward.
Automatic Transmission
CAUTION
cDO NOT tow any automatic transmis-
sion vehicle with all four wheels on the
ground (flat towing) . Doing so WILL
DAMAGE internal transmission parts
due to lack of transmission lubrication.
cFor emergency towing procedures refer
to “Towing Recommended by Nissan”
earlier in this chapter.
To tow a vehicle equipped with an automatic
transmission, an appropriate vehicle dollyMUST
be placed under the towed vehicle’s drive
wheels.Alwaysfollow the dolly manufacturer’s
recommendations when using their product.
Manual Transmission
cAlways tow with the manual transmission in
Neutral.
cAfter towing 500 miles, start and idle the en-
gine with the transmission in Neutral for two
minutes. Failure to idle the engine after every
500 miles of towing may cause damage to the
transmission’s internal parts.
6-12In case of emergency
ZREVIEW COPY:Ð2003 Sentra(b15)
Owners Manual(owners)ÐUSA English(nna)
12/20/02Ðcathy
X
Page 149 of 224

8 Maintenance and do-it-yourself
Maintenance requirements..........................8-2
General maintenance..............................8-2
Explanation of general maintenance items.........8-2
Maintenance precautions...........................8-5
Engine compartment check locations................8-7
Engine cooling system.............................8-9
Checking engine coolant level...................8-9
Changing engine coolant.......................8-10
Engine oil........................................8-12
Checking engine oil level.......................8-12
Changing engine oil...........................8-13
Changing engine oil filter.......................8-14
Automatic transmission fluid.......................8-15
Temperature conditions for checking.............8-16
Power steering fluid...............................8-18
Brake and clutch fluid.............................8-18
Brake fluid....................................8-19
Clutch fluid...................................8-19
Window washer fluid.............................8-20
Window washer fluid reservoir..................8-20
Battery..........................................8-20
Jump starting.................................8-22
Drive belts.......................................8-22
Spark plugs......................................8-23Replacing spark plugs.........................8-23
Air cleaner.......................................8-24
In-cabin Microfilter (if so equipped)..............8-25
Windshield wiper blades..........................8-28
Cleaning.....................................8-28
Replacing....................................8-28
Parking brake and brake pedal.....................8-29
Checking parking brake........................8-29
Checking brake pedal..........................8-29
Brake booster.................................8-30
Fuses...........................................8-31
Engine compartment...........................8-31
Passenger compartment.......................8-32
Keyfob battery replacement........................8-33
Lights...........................................8-34
Headlights....................................8-34
Fog lights (if so equipped)......................8-35
Exterior and interior lights.......................8-36
Wheels and tires.................................8-39
Tire pressure..................................8-39
Types of tires..................................8-40
Tire chains....................................8-41
Changing wheels and tires.....................8-42
ZREVIEW COPY:Ð2003 Sentra(b15)
Owners Manual(owners)ÐUSA English(nna)
12/20/02Ðcathy
X
Page 153 of 224
When performing any inspection or maintenance
work on your vehicle, always take care to prevent
serious accidental injury to yourself or damage to
the vehicle. The following are general precau-
tions which should be closely observed.
WARNING
cPark the vehicle on a level surface, ap-
ply the parking brake securely and
block the wheels to prevent the vehicle
from moving. For manual transmission
models, move the shift lever to N (Neu-
tral) . For automatic transmission mod-
els, move the selector lever to P (Park) .
cBe sure the ignition key is in the OFF or
LOCK position when performing any
parts replacement or repairs.
cNever leave the engine or automatic
transmission related component har-
nesses disconnected while the ignition
switch is in the ON position.
cNever connect or disconnect the battery
or any transistorized component while
the ignition switch is in the ON position.cYour vehicle is equipped with an auto-
matic engine cooling fan. It may come
on at any time without warning, even if
the ignition key is in the OFF position
and the engine is not running. To avoid
injury, always disconnect the negative
battery cable before working near the
fan.
cIf you must work with the engine run-
ning, keep your hands, clothing, hair
and tools away from moving fans, belts
and any other moving parts.
cIt is advisable to secure or remove any
loose clothing and remove any jewelry,
such as rings, watches, etc. before
working on your vehicle.
cAlways wear eye protection whenever
you work on your vehicle.
cIf you must run the engine in an en-
closed space such as a garage, be sure
there is proper ventilation for exhaust
gases to escape.
cNever get under the vehicle while it is
supported only by a jack. If it is neces-
sary to work under the vehicle, support
it with safety stands.cKeep smoking materials, flame and
sparks away from the fuel tank and
battery.
cOn gasoline engine models with the
multiport fuel injection (MFI) system,
the fuel filter or fuel lines should be
serviced by a NISSAN dealer because
the fuel lines are under high pressure
even when the engine is off.
CAUTION
cDo not work under the hood while the
engine is hot. Turn the engine off and
wait until it cools down.
cAvoid contact with used engine oil and
coolant. Improperly disposed engine
oil, engine coolant and/or other vehicle
fluids can damage the environment. Al-
ways conform to local regulations for
disposal of vehicle fluid.
This “Maintenance and do-it-yourself” section
gives instructions regarding only those items
which are relatively easy for an owner to perform.
A genuine NISSAN service manual is also avail-
able. See “Owner’s Manual/Service Manual or-
der information” in the “Technical and consumer
information” section of this manual.
MAINTENANCE PRECAUTIONS
Maintenance and do-it-yourself8-5
ZREVIEW COPY:Ð2003 Sentra(b15)
Owners Manual(owners)ÐUSA English(nna)
12/20/02Ðcathy
X
Page 157 of 224
The engine cooling system is filled at the factory
with a high-quality, year-round, anti-freeze cool-
ant solution. The anti-freeze solution contains
rust and corrosion inhibitors; therefore, additional
engine cooling system additives are not neces-
sary.
WARNING
cNever remove the radiator cap when the
engine is hot. Serious burns could be
caused by high pressure fluid escaping
from the radiator.
cThe radiator is equipped with a pres-
sure type radiator cap. To prevent en-
gine damage, use only a genuine
NISSAN radiator cap.
Outside temperature
down toGenuine
NISSAN
Anti-freeze
coolant or
equivalentDemineral-
ized or dis-
tilled water
°C °F
-35 -30 50% 50%
CAUTION
When adding or replacing coolant, be sure
to use only a Genuine Nissan Anti-Freeze
coolant (green) or equivalent with the
proper mixture ratio of 50% anti-freeze
and 50% demineralized or distilled water.
The use of other types of coolant solu-
tions or coolant colors, such as orange,
may damage the engine cooling system.
CHECKING ENGINE COOLANT
LEVEL
Check the coolant levelin the reservoir when
the engine is cold.If the coolant level is below
the MIN level, add coolant to the MAX level. If the
reservoir is empty, check the coolant level in the
radiatorwhen the engine is cold.If there is
insufficient coolant in the radiator, fill the radiator
with coolant up to the filler opening and also add
it to the reservoir up to the MAX level.
If the cooling system frequently requires
coolant, have it checked by a NISSAN
dealer.
WDI0168
ENGINE COOLING SYSTEM
Maintenance and do-it-yourself8-9
ZREVIEW COPY:Ð2003 Sentra(b15)
Owners Manual(owners)ÐUSA English(nna)
12/20/02Ðcathy
X
Page 158 of 224
CHANGING ENGINE COOLANT
Major cooling system repairs should be per-
formed by a NISSAN dealer. The service proce-
dures can be found in the NISSAN Service
Manual.
Improper servicing can result in reduced
heater performance and engine overheat-
ing.
WARNING
cTo avoid the danger of being scalded,
never change the coolant when the en-
gine is hot.
cNever remove the radiator cap when the
engine is hot. Serious burns could be
caused by high pressure fluid escaping
from the radiator.
cAvoid direct skin contact with used
coolant. If skin contact is made, wash
thoroughly with soap or hand cleaner
as soon as possible.
cKeep coolant out of the reach of chil-
dren and pets.Engine coolant must be disposed of prop-
erly. Check your local regulations.
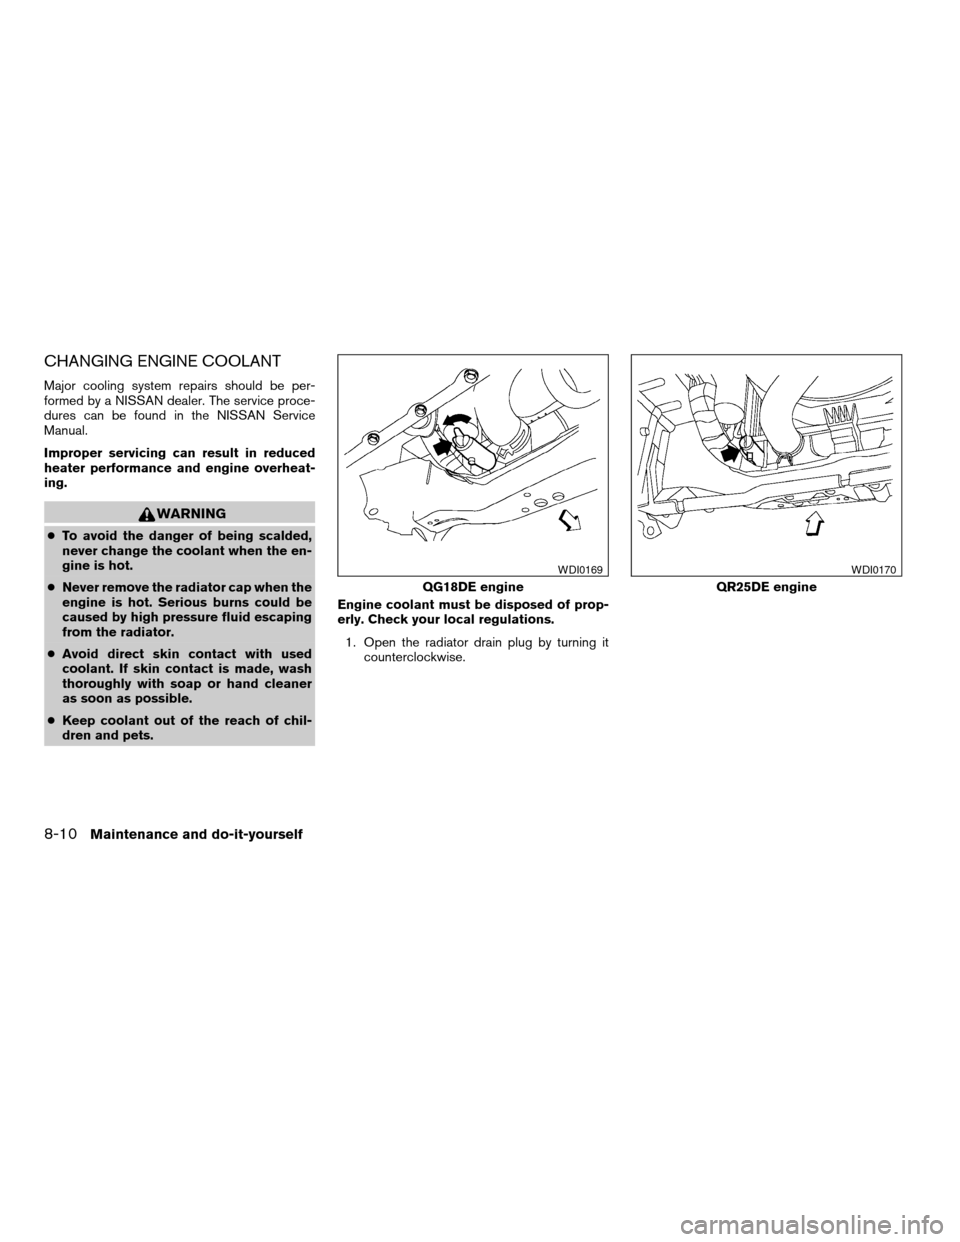
1. Open the radiator drain plug by turning it
counterclockwise.
QG18DE engine
WDI0169
QR25DE engine
WDI0170
8-10Maintenance and do-it-yourself
ZREVIEW COPY:Ð2003 Sentra(b15)
Owners Manual(owners)ÐUSA English(nna)
12/20/02Ðcathy
X
Page 159 of 224

2. Open the drain plug on the engine block.
3. Open the radiator cap to drain the coolant.
cWaste coolant must be disposed of prop-
erly.
cCheck your local regulations.
4. Flush the cooling system by running fresh
water through the radiator.
5. Close the drain plugs on the radiator and the
engine block securely.6. See the “Technical and consumer informa-
tion” section for cooling system capacity. Fill
the radiator slowly with the proper mixture of
coolant and water. Fill the reservoir tank up
to the MAX level.
7. For QG18DE engine only, open and close
the air release plug(s) to release air. Then fill
the radiator again and install the radiator
cap.8. Start the engine, and warm it up until it
reaches normal operating temperature.
Then race the engine two or three times
under no load. Watch the engine coolant
temperature gauge for signs of overheating.
9. Stop the engine. After it completely cools
down, refill the radiator up to the filler open-
ing. Fill the reservoir tank up to the MAX
level.
10. For QG18DE engine only, open and close
the air release plug(s) to release air. Then fill
the radiator again and install the radiator
cap.
11. Check the drain plugs on the radiator and
the engine block for any sign of leakage. For
QG18DE only, also check the air release
plug for any sign of leakage.
QG18DE engine
WDI0171
QG18DE engine
WDI0172
Maintenance and do-it-yourself8-11
ZREVIEW COPY:Ð2003 Sentra(b15)
Owners Manual(owners)ÐUSA English(nna)
12/20/02Ðcathy
X
Page 163 of 224
CAUTION
Be careful not to burn yourself. The engine
oil may be hot.
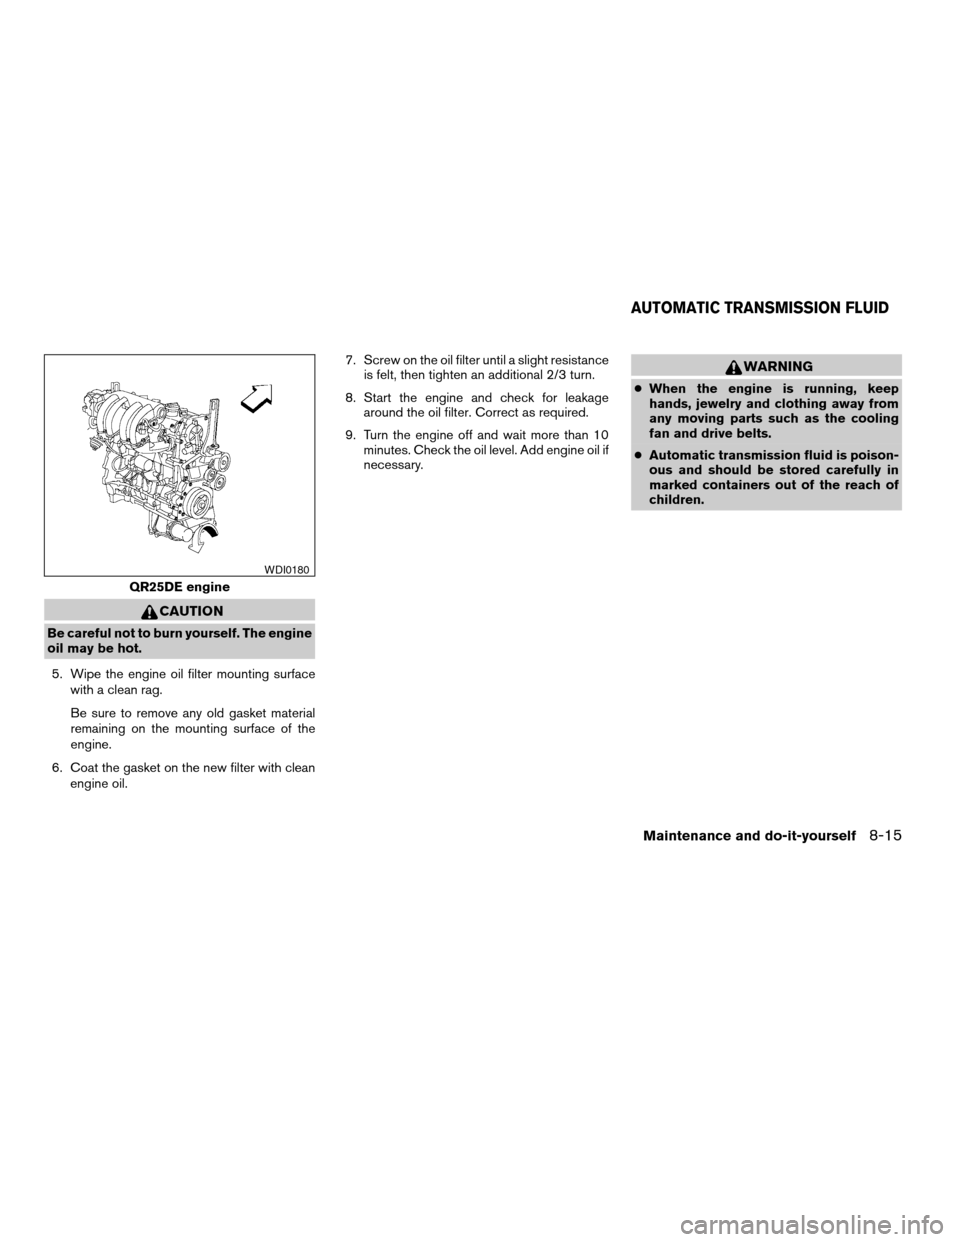
5. Wipe the engine oil filter mounting surface
with a clean rag.
Be sure to remove any old gasket material
remaining on the mounting surface of the
engine.
6. Coat the gasket on the new filter with clean
engine oil.7. Screw on the oil filter until a slight resistance
is felt, then tighten an additional 2/3 turn.
8. Start the engine and check for leakage
around the oil filter. Correct as required.
9. Turn the engine off and wait more than 10
minutes. Check the oil level. Add engine oil if
necessary.
WARNING
cWhen the engine is running, keep
hands, jewelry and clothing away from
any moving parts such as the cooling
fan and drive belts.
cAutomatic transmission fluid is poison-
ous and should be stored carefully in
marked containers out of the reach of
children.
QR25DE engine
WDI0180
AUTOMATIC TRANSMISSION FLUID
Maintenance and do-it-yourself8-15
ZREVIEW COPY:Ð2003 Sentra(b15)
Owners Manual(owners)ÐUSA English(nna)
12/20/02Ðcathy
X