Page 167 of 265

AWD LOCK SWITCH OPERATIONSThe AWD system is used to select AUTO, LOCK depending on the driving conditions.
AWD system electronically controls the coupling.
Push the AWD LOCK switch to move between each mode AUTO and LOCK, depending on driving
conditions.AWD LOCK
switchWheel drivenAWD LOCK
indicator
lightUse conditions
AUTO (OFF)Distribution of torque to the front and
rear wheels changes automatically,
depending on road conditions en-
countered [100:0]↔[50:50].
This results in improved driving stabil-
ity.Goes off. For driving on paved or slippery roads
LOCK (ON) *1 ALL wheel drive AWD LOCK For driving on rough roads
*1 LOCK mode will change to AUTO mode automatically, when the vehicle is accelerated or the vehicle speed is
over approximately 19 MPH (30 km/h). The AWD LOCK indicator light does not go off.�If the AWD LOCK switch is operated while accelerating or decelerating, or if the key switch is
turned off while in the AUTO or LOCK position, you may feel a jerk. This is normal.
�The oil temperature of power train parts will increase if the vehicle is continuously operated under
conditions where the difference in rotation between the front and rear wheels is large (wheel slip)
such as when driving the vehicle on rough roads through sand, mud or freeing a stuck vehicle. In
these cases, the AWD warning light blinks rapidly and the AWD mode changes to 2WD to protect
the power train parts. If you stop driving with the engine idling and wait until the warning light stops
blinking, the AWD returns to the AUTO mode.
WARNING
�Do not start engine while in the
AUTO or LOCK mode in the following
cases:
When on free roller or jacking up the
front tire with the rear tires on the
ground.
�When driving straight, shift the AWD
lock switch to AUTO or LOCK. Do not
operate the AWD lock switch when
making a turn or reversing.
�Do not operate the AWD lock switch
(AUTO and LOCK) with the front
wheel spinning.
�Engine idling speed is high while
warming up the engine. Be especially
careful when starting or driving on
slippery surfaces with the AWD lock
switch set in OFF (AUTO).
�When turning the vehicle in LOCK
mode on paved roads, you may feel a
braking effect. This is a normal con-
dition of the AWD model.
5-18
Starting and driving
�
03.1.28/Z50-D/V5.0
�
Page 180 of 265

Jacking up vehicle and removing the
damaged tireCarefully read the caution label attached to
the jack body and the following instruc-
tions.
1. Place the jack directly under the jack-up point
as illustrated above so that top of the jack
contacts the vehicle at the jack up point.
Align the jack head between the two notches
in the front or the rear as shown. Also fit the
groove of the jack head between the notches
as shown.The jack should be used on level firm
ground.
2. Loosen each wheel nut one or two turns by
turning counterclockwise with the wheel nut
wrench.Do not remove the wheel nuts
until the tire is off the ground.
3. Carefully raise the vehicle until the tire clears
the ground. To lift the vehicle, securely hold
the jack lever and rod with both hands as
shown above. Remove the wheel nuts, and
then remove the tire.
WARNING
�Never get under the vehicle while it is
supported only by the jack.
�Use only the jack provided with your
vehicle to lift the vehicle. Do not use
the jack provided with your vehicle
on other vehicles.
The jack is designed only for lifting
your vehicle during a tire change.
SCE0435
CE1092
In case of emergency
6-5
�
03.1.28/Z50-D/V5.0
�
Page 182 of 265

For models equipped with the low tire
pressure warning system:
After adjusting tire pressure to the COLD tire
pressure, the display of the tire pressure infor-
mation may show higher pressure than the
COLD tire pressure after the vehicle has been
driven more than 1 mile (1.6 km). This is because
the tire pressurizes as the tire temperature rises.
This does not indicate a system malfunction.
WARNING
Retighten the wheel nuts when the ve-
hicle has been driven for 600 miles
(1,000 km) (also in cases of a flat tire,
etc.).
Stowing the damaged tire and toolsSecurely store the spare tire and jacking equip-
ment in the vehicle.
WARNING
�Always make sure that the spare tire
and jacking equipment are properly
secured after use. Such items can
become dangerous projectiles in an
accident or sudden stop.
�The T-type spare tire and small sizespare tire are designed for emer-
gency use. See “Wheels and tires” in
the “8. Maintenance and do-it-
yourself” section.
SCE0436
In case of emergency
6-7
�
03.1.28/Z50-D/V5.0
�
Page 189 of 265
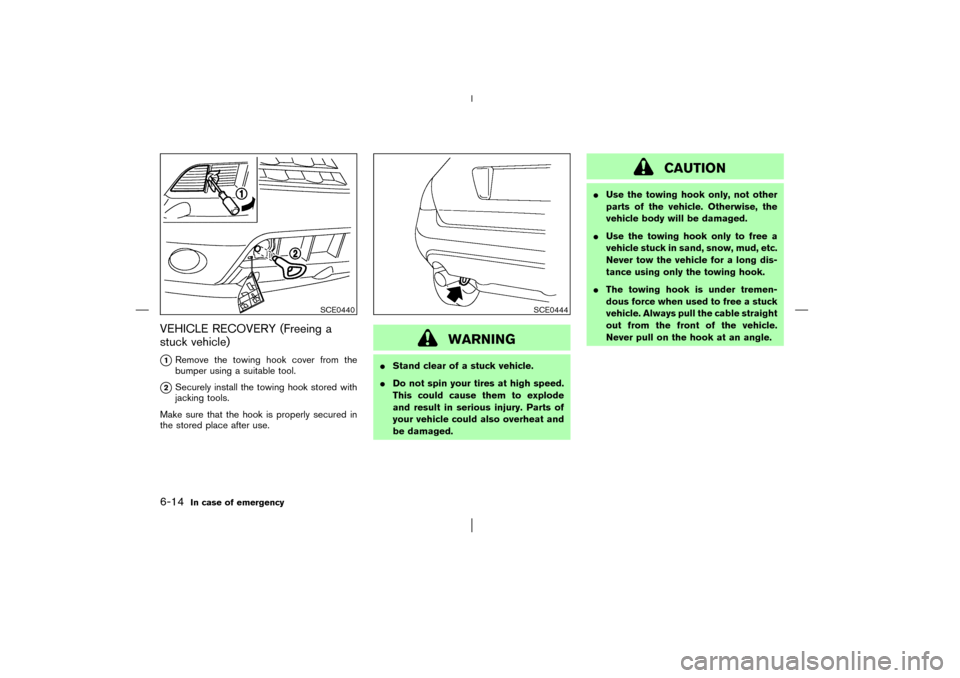
VEHICLE RECOVERY (Freeing a
stuck vehicle)
�1Remove the towing hook cover from the
bumper using a suitable tool.
�2Securely install the towing hook stored with
jacking tools.
Make sure that the hook is properly secured in
the stored place after use.
WARNING
�Stand clear of a stuck vehicle.
�Do not spin your tires at high speed.
This could cause them to explode
and result in serious injury. Parts of
your vehicle could also overheat and
be damaged.
CAUTION
�Use the towing hook only, not other
parts of the vehicle. Otherwise, the
vehicle body will be damaged.
�Use the towing hook only to free a
vehicle stuck in sand, snow, mud, etc.
Never tow the vehicle for a long dis-
tance using only the towing hook.
�The towing hook is under tremen-
dous force when used to free a stuck
vehicle. Always pull the cable straight
out from the front of the vehicle.
Never pull on the hook at an angle.
SCE0440
SCE0444
6-14
In case of emergency
�
03.1.28/Z50-D/V5.0
�