Page 106 of 265

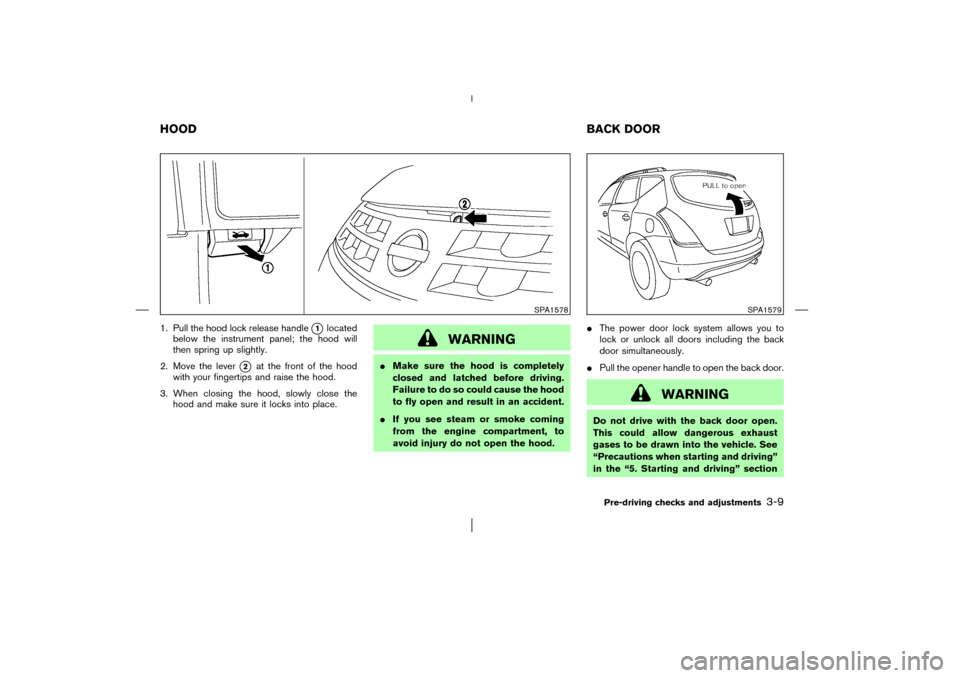
1. Pull the hood lock release handle
�1
located
below the instrument panel; the hood will
then spring up slightly.
2. Move the lever
�2
at the front of the hood
with your fingertips and raise the hood.
3. When closing the hood, slowly close the
hood and make sure it locks into place.
WARNING
�Make sure the hood is completely
closed and latched before driving.
Failure to do so could cause the hood
to fly open and result in an accident.
�If you see steam or smoke coming
from the engine compartment, to
avoid injury do not open the hood.�The power door lock system allows you to
lock or unlock all doors including the back
door simultaneously.
�Pull the opener handle to open the back door.
WARNING
Do not drive with the back door open.
This could allow dangerous exhaust
gases to be drawn into the vehicle. See
“Precautions when starting and driving”
in the “5. Starting and driving” section
SPA1578
SPA1579
HOODBACK DOOR
Pre-driving checks and adjustments
3-9
�
03.1.28/Z50-D/V5.0
�
Page 108 of 265

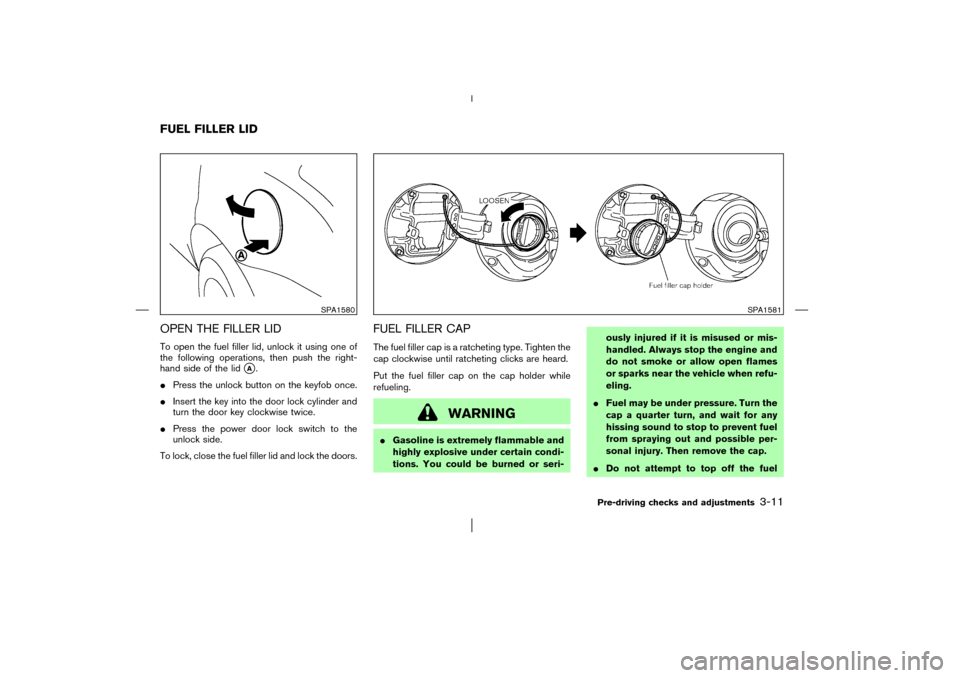
OPEN THE FILLER LIDTo open the fuel filler lid, unlock it using one of
the following operations, then push the right-
hand side of the lid
�A.
�Press the unlock button on the keyfob once.
�Insert the key into the door lock cylinder and
turn the door key clockwise twice.
�Press the power door lock switch to the
unlock side.
To lock, close the fuel filler lid and lock the doors.
FUEL FILLER CAPThe fuel filler cap is a ratcheting type. Tighten the
cap clockwise until ratcheting clicks are heard.
Put the fuel filler cap on the cap holder while
refueling.
WARNING
�Gasoline is extremely flammable and
highly explosive under certain condi-
tions. You could be burned or seri-ously injured if it is misused or mis-
handled. Always stop the engine and
do not smoke or allow open flames
or sparks near the vehicle when refu-
eling.
�Fuel may be under pressure. Turn the
cap a quarter turn, and wait for any
hissing sound to stop to prevent fuel
from spraying out and possible per-
sonal injury. Then remove the cap.
�Do not attempt to top off the fuel
SPA1580
SPA1581
FUEL FILLER LID
Pre-driving checks and adjustments
3-11
�
03.1.28/Z50-D/V5.0
�
Page 120 of 265

When you use this system, make sure the engine
is running.
If you use the system with the engine not
running (ignition ONor ACC) for a long
time, it will use up all the battery power,
and the engine will not start.
Reference symbols:
“ENTER” button
This is a button on the control panel.
“Display” key
This is a select key on the screen. By
selecting this key you can proceed to the
next function.NAMES OF THE COMPONENTS1. “TRIP” drive computer button; refer to page
4-3.
2. “FUEL ECON” button; refer to page 4-4.
3. Clock adjust button; refer to page 4-3.
4. “TRIP RESET” button; refer to page 4-3.
5. “E/M” button; refer to page 4-4.
6. “MAINT” maintenance button; refer to page
4-5.
7. “SETTING” button; refer to page 4-6.8. JOYSTICK and “ENTER” push button; refer
to page 4-3.
9. “PREV” previous button; refer to page 4-3.
10.“DAY/NIGHT” brightness control button; re-
fer to page 4-6.
To turn off the screen, push the “DAY/NIGHT”
button for more than approximately 1.5 seconds.
The screen will change to “CONFIRM DISPLAY
OFF YES or NO”.
HOW TO USE JOYSTICK AND
“ENTER” BUTTONChoose an item on the display using the joystick.
Push the “ENTER” button only when the use of
it is instructed on the display.HOW TO USE “PREV” BUTTONFinish setup:
If you touch“PREV”button after the setup is
completed, the setup will start over.
HOW TO USE “TRIP” BUTTONWhen the “TRIP” button is pushed, the following
modes will display on the screen.
TRIP 1 (TIME, DIST, AVG)→TRIP 2 (TIME,
DIST, AVG)→OFF
You can set the two kinds of journey time (TIME
— max 99 hours 59 minutes), trip odometer
(DIST — mile or km) and average speed (AVG —
MPH or km/h).
To reset the TRIP 1 or TRIP 2, push the “TRIP”
button or the “TRIP RESET” button for more
than approximately 1.5 seconds.
SAA0644
Display screen, heater, air conditioner and audio systems
4-3
�
03.1.28/Z50-D/V5.0
�
Page 122 of 265

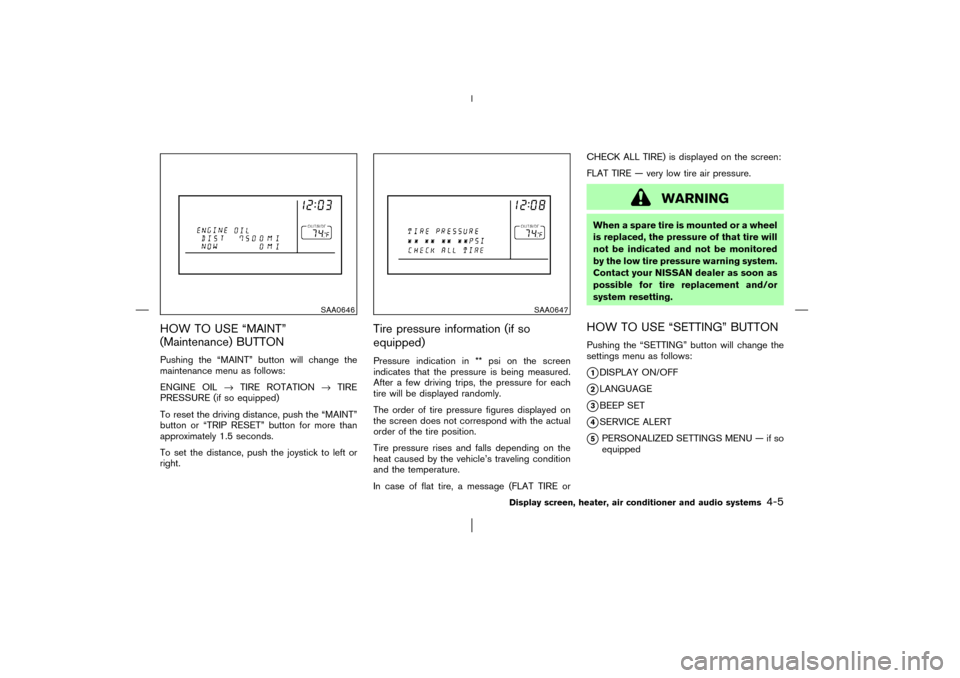
HOW TO USE “MAINT”
(Maintenance) BUTTONPushing the “MAINT” button will change the
maintenance menu as follows:
ENGINE OIL→TIRE ROTATION→TIRE
PRESSURE (if so equipped)
To reset the driving distance, push the “MAINT”
button or “TRIP RESET” button for more than
approximately 1.5 seconds.
To set the distance, push the joystick to left or
right.
Tire pressure information (if so
equipped)Pressure indication in ** psi on the screen
indicates that the pressure is being measured.
After a few driving trips, the pressure for each
tire will be displayed randomly.
The order of tire pressure figures displayed on
the screen does not correspond with the actual
order of the tire position.
Tire pressure rises and falls depending on the
heat caused by the vehicle’s traveling condition
and the temperature.
In case of flat tire, a message (FLAT TIRE orCHECK ALL TIRE) is displayed on the screen:
FLAT TIRE — very low tire air pressure.
WARNING
When a spare tire is mounted or a wheel
is replaced, the pressure of that tire will
not be indicated and not be monitored
by the low tire pressure warning system.
Contact your NISSAN dealer as soon as
possible for tire replacement and/or
system resetting.HOW TO USE “SETTING” BUTTONPushing the “SETTING” button will change the
settings menu as follows:�1DISPLAY ON/OFF
�2LANGUAGE
�3BEEP SET
�4SERVICE ALERT
�5PERSONALIZED SETTINGS MENU — if so
equipped
SAA0646
SAA0647
Display screen, heater, air conditioner and audio systems
4-5
�
03.1.28/Z50-D/V5.0
�
Page 123 of 265

Display ON/OFFTo turn off the screen, select the OFF key of the
“Display ON/OFF” using the joystick.
The screen will change to “CONFIRM DISPLAY
OFF YES or NO”.
If YES key is selected using the joystick, the
screen will turn off after 2 beep sound and
approximately 1 second.
To turn on the screen, push the “SETTING”, trip
control, air conditioner (except rear window de-
froster button) or audio button.LanguageThe language can be changed to “English” or
“Franc¸ ais” using the joystick.Beep setIf the beep set “OFF” key is selected using the
joystick, the beep sound will not operate. (except
some caution beep sounds)Service alertIf the service alert “ON” key is selected, the
information will be operated when the engine oil
and the tire rotation reaches the preset driving
distance.
Personalized setting menu (if so
equipped)You can set the electronic systems as follows
using the joystick.
Slide back DR seat on exit:
The driver’s seat automatically moves back and
returns to the original position for exceptional
ease of exit and entry.
Return all settings to default:
When this key is selected and turned on using
the joystick, all settings made by personalized
setting menu will return to the initial conditions.“DAY/NIGHT” BUTTONTo change the display brightness, push the
“DAY/NIGHT” button. Pushing the button again
will change the display to DAY or NIGHT dis-
play. Then, adjust the brightness moving the
joystick right or left.
If no operation is done within 10 seconds, or if
the “PREV” button is pushed, the display will
return to the previous display.
4-6
Display screen, heater, air conditioner and audio systems
�
03.1.28/Z50-D/V5.0
�
Page 124 of 265
When you use this system, make sure the engine
is running.
If you use the system with the engine not
running (ignition ONor ACC) for a long
time, it will use up all the battery power,
and the engine will not start.
Reference symbols:
“ENTER” button
This is a button on the control panel.
“Display” key
This is a select key on the screen. By
selecting this key you can proceed to the
next function.
SAA0648
CONTROL PANEL BUTTONS —
WITH NAVIGATION SYSTEM
Display screen, heater, air conditioner and audio systems
4-7
�
03.1.28/Z50-D/V5.0
�
Page 125 of 265

NAMES OF THE COMPONENTS1. “TRIP” drive computer button; refer to page
4-8.
2. “SETTING” button; refer to page 4-10.
3. Joystick and “ENTER” push button; refer to
page 4-8.
4. “PREV” previous button; refer to page 4-8.
5. “DAY/NIGHT” brightness control button; re-
fer to page 4-14.
6 - 10. For Navigation system control buttons;
refer to the separate Navigation Own-
er’s Manual.HOW TO USE JOYSTICK AND
“ENTER” BUTTONChoose an item on the display using the joystick
and push the “ENTER” button for operation.HOW TO USE “PREV” BUTTONThis has two functions.
�Go back to the previous display (cancel).
If you touch “PREV” button during setup, the
setup will be canceled and/or the display will
return to the previous screen.
�Finish setup.If you touch this button after the setup is com-
pleted, the setup will start over, and the display
will return to the climate control or Audio mode,
and Navigation screen.
SETTING UP THE START-UP
SCREENWhen you turn the ignition key to ACC, the
SYSTEM START-UP warning is displayed on
the screen. Read the warning and select the
“I AGREE” (English) or “ENTER” (Franc¸ ais) key
then push the “ENTER” button.
If you do not push the “ENTER” button, this
system will not proceed to the next step display.
If you do not touch the button or screen key for
more than 1 minute on the TRIP, SETTING or
START-UP screen, the screen will change to
TRIP screen automatically.
To proceed to the next step, refer to the separate
Navigation system Owner’s Manual.HOW TO USE THE “TRIP” BUTTONWhen the “TRIP” button is pushed, the following
models will display on the screen.
Warning message (if there are any)→TRIP 1
(Elapsed Time, Driving Distance, Average
Speed)→TRIP 2→FUEL ECONOMY (Aver-
age Fuel Economy, Distance to Empty)→MAINTENANCE (Engine Oil, Tire Rotation and
Tire Pressure — if so equipped)→OFF.
Trip 1, trip 2 and fuel economy itemsTo reset the TRIP 1, TRIP 2 and FUEL
ECONOMY, select the “RESET” key using the
joystick and push the “ENTER” button or push
the “TRIP” button for more than approximately
1.5 seconds.
SAA0654
4-8
Display screen, heater, air conditioner and audio systems
�
03.1.28/Z50-D/V5.0
�
Page 126 of 265
Maintenance itemsYou can set the engine oil and the tire rotation
interval.
And the tire pressure will appear on the screen
(if the tire pressure system is equipped).
To display the setting of the maintenance inter-
val, select the “Engine Oil” or “Tire Rotation” key
using the joystick and push the “ENTER” button.To set the maintenance interval, select the
“Maintenance Schedule” key by using the joy-
stick and push the joystick to right or left.
To reset the maintenance interval, select the
“RESET” key using the joystick and push the
“ENTER” button.
To display the MAINTENANCE INFORMATION,
automatically when setting trip distance is
reached, select the “Display Maintenance Noti-
fication” key and push the “ENTER” button.
SAA0695
SAA0655
SAA0656
Display screen, heater, air conditioner and audio systems
4-9
�
03.1.28/Z50-D/V5.0
�