2003 NISSAN FRONTIER steering
[x] Cancel search: steeringPage 142 of 272
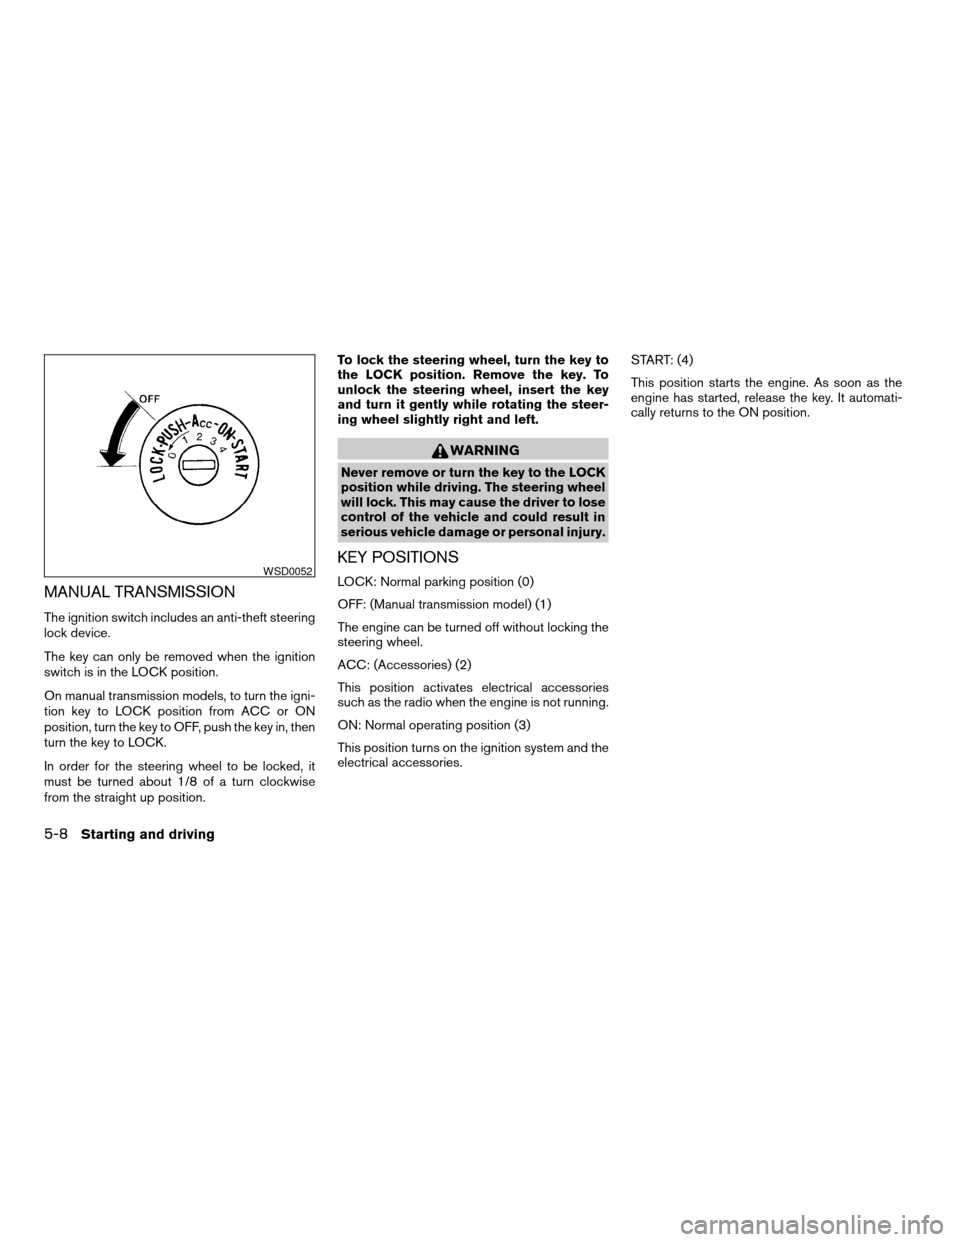
MANUAL TRANSMISSION
The ignition switch includes an anti-theft steering
lock device.
The key can only be removed when the ignition
switch is in the LOCK position.
On manual transmission models, to turn the igni-
tion key to LOCK position from ACC or ON
position, turn the key to OFF, push the key in, then
turn the key to LOCK.
In order for the steering wheel to be locked, it
must be turned about 1/8 of a turn clockwise
from the straight up position.To lock the steering wheel, turn the key to
the LOCK position. Remove the key. To
unlock the steering wheel, insert the key
and turn it gently while rotating the steer-
ing wheel slightly right and left.
WARNING
Never remove or turn the key to the LOCK
position while driving. The steering wheel
will lock. This may cause the driver to lose
control of the vehicle and could result in
serious vehicle damage or personal injury.
KEY POSITIONS
LOCK: Normal parking position (0)
OFF: (Manual transmission model) (1)
The engine can be turned off without locking the
steering wheel.
ACC: (Accessories) (2)
This position activates electrical accessories
such as the radio when the engine is not running.
ON: Normal operating position (3)
This position turns on the ignition system and the
electrical accessories.START: (4)
This position starts the engine. As soon as the
engine has started, release the key. It automati-
cally returns to the ON position.WSD0052
5-8Starting and driving
ZREVIEW COPY:Ð2003 Truck/Frontier(d22)
Owners Manual(owners)ÐUSA English(nna)
01/15/03Ðarosenma
X
Page 148 of 272

Shift lock release
If the battery is discharged, the shift selector lever
may not be moved from the P (Park) position even
with the brake pedal depressed and the shift
selector lever button pushed.
To move the shift selector lever, release the shift
lock and push the shift selector lever button. The
shift selector lever can be moved to N (Neutral) .
However, the steering wheel will be locked un-
less the ignition switch is turned to the ON posi-
tion.
To release the shift lock, complete the following
procedure:
1. Turn the ignition key to the LOCK position
and remove the key.
2. Apply the parking brake.
3. Remove the shift lock cover
sA.
4. Insert a small screwdriver in the shift lock
slot, and push down
sB.
5. Push the shift selector lever button
sCand
move the shift selector lever to N (Neutral)
position
sDwhile holding down the shift
lock.
6. Turn the key to the ON position to unlock the
steering wheel. Now the vehicle may be
moved to the desired location.If the shift selector lever cannot be moved out of
P (Park) , have a NISSAN dealer check the auto-
matic transmission system as soon as possible.
Accelerator downshift
— in D position —
For passing or hill climbing, depress the accel-
erator pedal to the floor. This shifts the transmis-
sion down into a lower gear, depending on the
vehicle speed.
Overdrive switch (KA24DE engine
type a)
ON: For typical driving, push the over-
drive switch ON
with the se-
lector lever in the D (Drive) position.
The transmission is upshifted into
OVERDRIVE as the vehicle speed
increases.
Overdrive does not engage until the engine
has reached operating temperature.
WSD0069
5-14Starting and driving
ZREVIEW COPY:Ð2003 Truck/Frontier(d22)
Owners Manual(owners)ÐUSA English(nna)
01/15/03Ðarosenma
X
Page 153 of 272
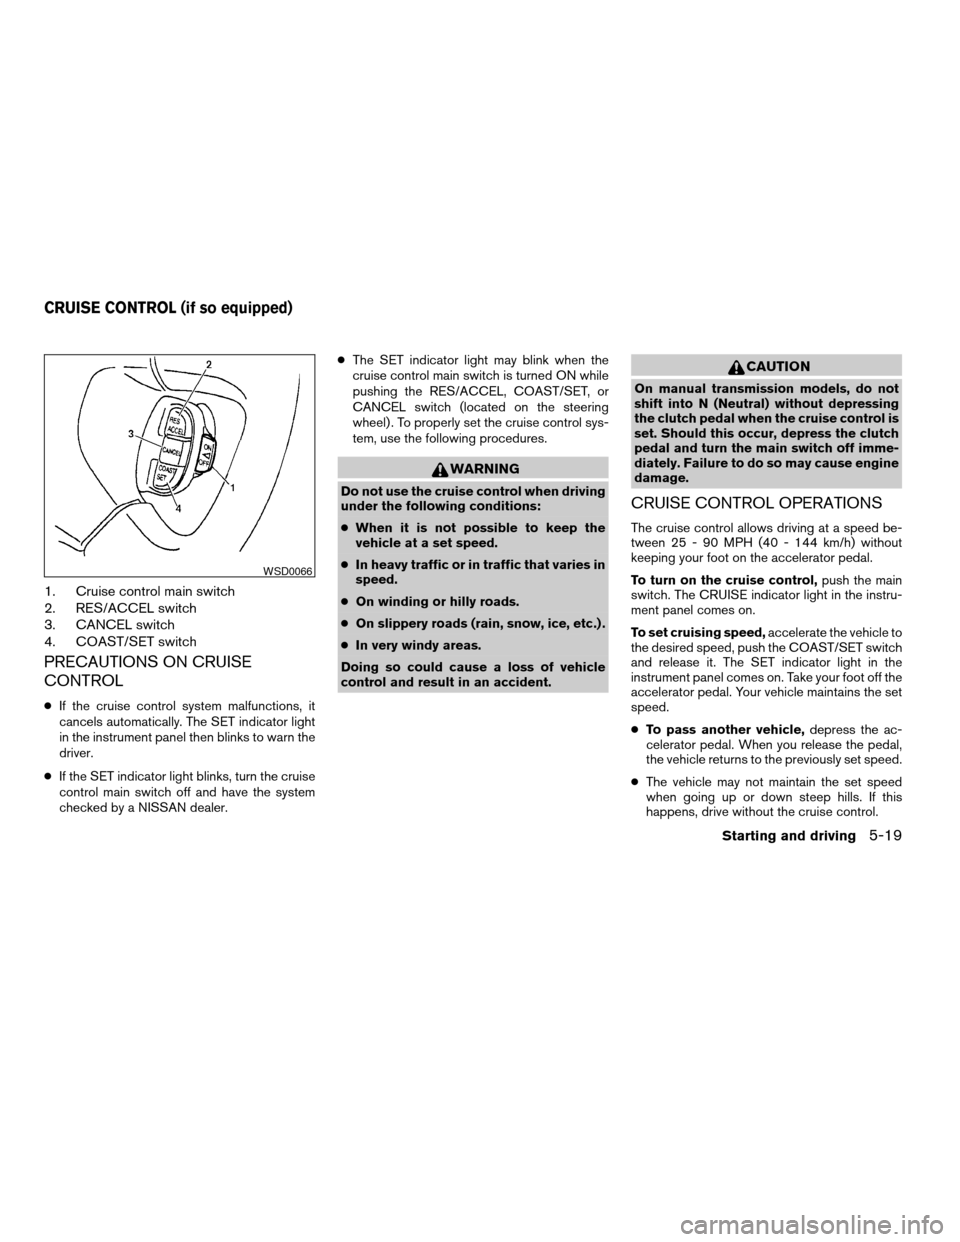
1. Cruise control main switch
2. RES/ACCEL switch
3. CANCEL switch
4. COAST/SET switch
PRECAUTIONS ON CRUISE
CONTROL
cIf the cruise control system malfunctions, it
cancels automatically. The SET indicator light
in the instrument panel then blinks to warn the
driver.
cIf the SET indicator light blinks, turn the cruise
control main switch off and have the system
checked by a NISSAN dealer.cThe SET indicator light may blink when the
cruise control main switch is turned ON while
pushing the RES/ACCEL, COAST/SET, or
CANCEL switch (located on the steering
wheel) . To properly set the cruise control sys-
tem, use the following procedures.
WARNING
Do not use the cruise control when driving
under the following conditions:
cWhen it is not possible to keep the
vehicle at a set speed.
cIn heavy traffic or in traffic that varies in
speed.
cOn winding or hilly roads.
cOn slippery roads (rain, snow, ice, etc.) .
cIn very windy areas.
Doing so could cause a loss of vehicle
control and result in an accident.
CAUTION
On manual transmission models, do not
shift into N (Neutral) without depressing
the clutch pedal when the cruise control is
set. Should this occur, depress the clutch
pedal and turn the main switch off imme-
diately. Failure to do so may cause engine
damage.
CRUISE CONTROL OPERATIONS
The cruise control allows driving at a speed be-
tween 25 - 90 MPH (40 - 144 km/h) without
keeping your foot on the accelerator pedal.
To turn on the cruise control,push the main
switch. The CRUISE indicator light in the instru-
ment panel comes on.
To set cruising speed,accelerate the vehicle to
the desired speed, push the COAST/SET switch
and release it. The SET indicator light in the
instrument panel comes on. Take your foot off the
accelerator pedal. Your vehicle maintains the set
speed.
cTo pass another vehicle,depress the ac-
celerator pedal. When you release the pedal,
the vehicle returns to the previously set speed.
cThe vehicle may not maintain the set speed
when going up or down steep hills. If this
happens, drive without the cruise control.
WSD0066
CRUISE CONTROL (if so equipped)
Starting and driving5-19
ZREVIEW COPY:Ð2003 Truck/Frontier(d22)
Owners Manual(owners)ÐUSA English(nna)
01/15/03Ðarosenma
X
Page 160 of 272
2.Manual transmission models:
Place the shift lever in the R (Reverse) posi-
tion. When parking on an uphill grade, place
the shift lever in 1st gear.
Automatic transmission models:
Move the shift selector lever to the P (Park)
position.
3. To help prevent the vehicle from rolling into
traffic when parked on an incline, it is a good
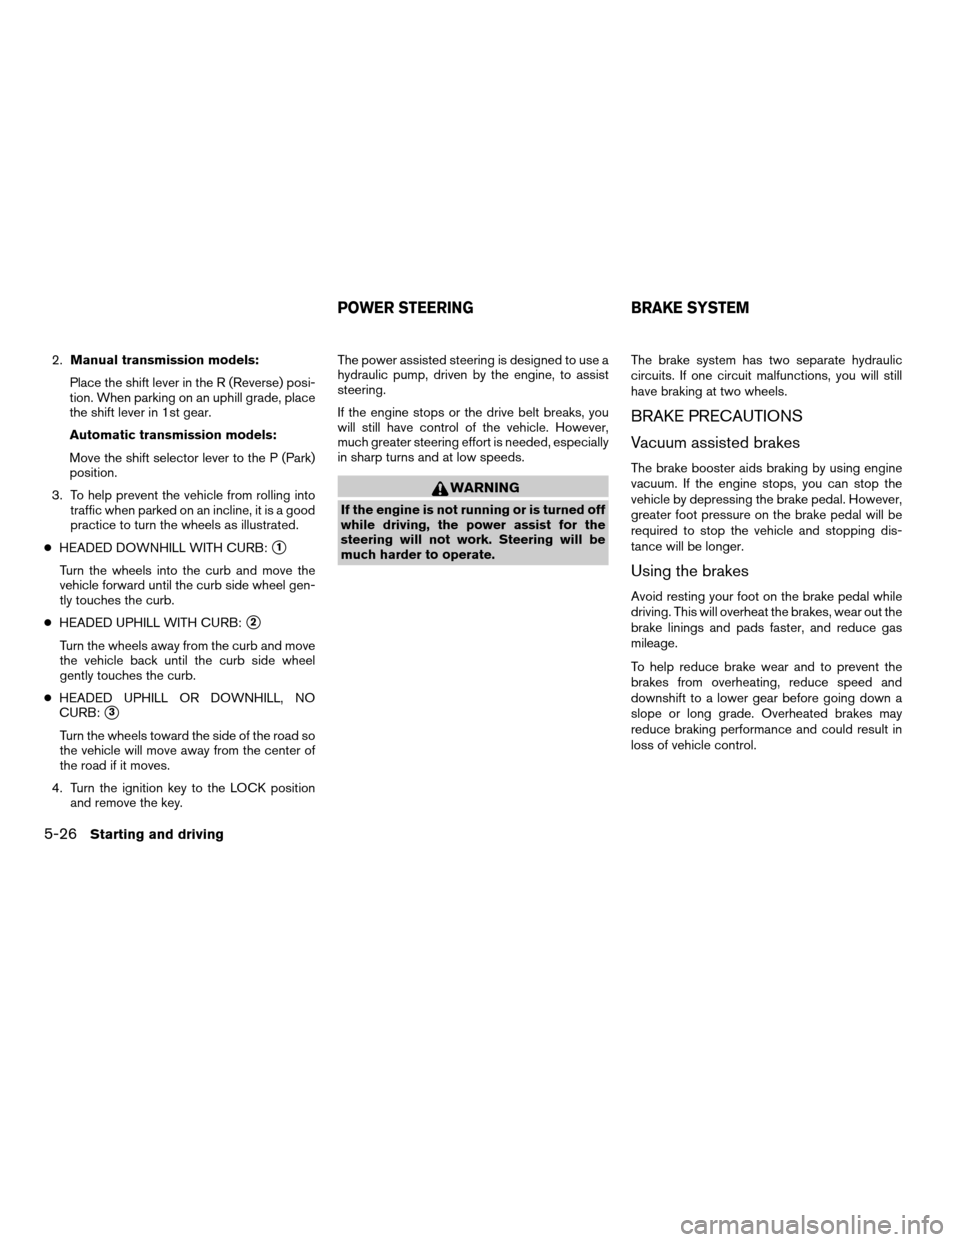
practice to turn the wheels as illustrated.
cHEADED DOWNHILL WITH CURB:
s1
Turn the wheels into the curb and move the
vehicle forward until the curb side wheel gen-
tly touches the curb.
cHEADED UPHILL WITH CURB:
s2
Turn the wheels away from the curb and move
the vehicle back until the curb side wheel
gently touches the curb.
cHEADED UPHILL OR DOWNHILL, NO
CURB:
s3
Turn the wheels toward the side of the road so
the vehicle will move away from the center of
the road if it moves.
4. Turn the ignition key to the LOCK position
and remove the key.The power assisted steering is designed to use a
hydraulic pump, driven by the engine, to assist
steering.
If the engine stops or the drive belt breaks, you
will still have control of the vehicle. However,
much greater steering effort is needed, especially
in sharp turns and at low speeds.
WARNING
If the engine is not running or is turned off
while driving, the power assist for the
steering will not work. Steering will be
much harder to operate.The brake system has two separate hydraulic
circuits. If one circuit malfunctions, you will still
have braking at two wheels.
BRAKE PRECAUTIONS
Vacuum assisted brakes
The brake booster aids braking by using engine
vacuum. If the engine stops, you can stop the
vehicle by depressing the brake pedal. However,
greater foot pressure on the brake pedal will be
required to stop the vehicle and stopping dis-
tance will be longer.
Using the brakes
Avoid resting your foot on the brake pedal while
driving. This will overheat the brakes, wear out the
brake linings and pads faster, and reduce gas
mileage.
To help reduce brake wear and to prevent the
brakes from overheating, reduce speed and
downshift to a lower gear before going down a
slope or long grade. Overheated brakes may
reduce braking performance and could result in
loss of vehicle control.
POWER STEERING BRAKE SYSTEM
5-26Starting and driving
ZREVIEW COPY:Ð2003 Truck/Frontier(d22)
Owners Manual(owners)ÐUSA English(nna)
01/16/03Ðcathy
X
Page 161 of 272
WARNING
cWhile driving on a slippery surface, be
careful when braking, accelerating or
downshifting. Abrupt braking or accel-
erating could cause the wheels to skid
and result in an accident.
cIf the engine is not running or is turned
off while driving, the power assist for
the brakes will not work. Braking will be
harder.
Wet brakes
When the vehicle is washed or driven through
water, the brakes may get wet. As a result, your
braking distance will be longer and the vehicle
may pull to one side during braking.
To dry the brakes, drive the vehicle at a safe
speed while lightly pressing the brake pedal to
heat up the brakes. Do this until the brakes return
to normal. Avoid driving the vehicle at high
speeds until the brakes function correctly.
ANTI-LOCK BRAKE SYSTEM (ABS)
The anti-lock brake system controls the brakes at
each wheel so the wheels do not lock when
braking abruptly or when braking on slippery sur-
faces. The system detects the rotation speed at
each wheel and varies the brake fluid pressure toprevent each wheel from locking and sliding. By
preventing wheel lockup, the system helps the
driver maintain steering control and helps to mini-
mize swerving and spinning on slippery surfaces.
Using the system (4-wheel ABS)
Depress the brake pedal and hold it down.
WARNING
Do not pump the brake pedal. Doing so
may result in increased stopping
distances.
Normal operation
The anti-lock brake system does not operate at
speeds below3-6MPH(5-10km/h) . (The
speeds vary according to road conditions.)
When driving, the anti-lock brake system con-
trols the wheels so they will not lock when brak-
ing abruptly or when braking on a slippery road.
Thus, difficult steering and swerving of the ve-
hicle due to locked wheels is minimized. The
system detects the wheel rotation rate and elec-
tronically controls the pressure applied to each
brake. Slight vibration on the brake pedal accom-
panied by noise usually occurs while the ABS
system is operating. Such vibration and noise
encountered during abrupt braking is not a prob-
lem, but indicates that the system is functioningproperly. However, the pulsation may indicate
that road conditions are hazardous and extra care
is required while driving.
Self-test feature
The anti-lock brake system consists of electronic
sensors and hydraulic solenoids controlled by a
computer. The computer has a built-in diagnostic
feature that tests the system each time you start
the engine and move the vehicle at a low speed in
forward or reverse. When the self-test occurs,
you may hear a ‘‘clunk’’ noise and/or feel a pulsa-
tion in the brake pedal. This is normal and is not
an indication of any malfunction. If the computer
senses any malfunction, it switches the anti-lock
brake system off and turns on the ABS brake
warning light on the instrument panel. The brake
system then operates normally, but without anti-
lock assistance.
If a malfunction occurs in the system, the anti-
lock function will not operate, but the standard
vehicle brake system will continue to operate
normally. The ABS brake warning light will then
come on.
If the light comes on during the self-test or while
driving, take the vehicle to a NISSAN dealer for
repair.
Starting and driving5-27
ZREVIEW COPY:Ð2003 Truck/Frontier(d22)
Owners Manual(owners)ÐUSA English(nna)
01/15/03Ðarosenma
X
Page 163 of 272
wheel which distributes the driving power to the
other drive wheel. If the vehicle is operated with
the vehicle dynamic control system off, all VDC
and TCS functions will be turned off. The brake
LSD system and ABS will still operate with the
VDC system OFF. If the brake LSD system or the
ABS is activated, the slip indicator light will blink
and you may hear a clunk noise and/or feel a
pulsation in the brake pedal. This is normal.
While the VDC system is operating, you may feel
a pulsation in the brake pedal and hear a noise or
vibration from under the hood. This is normal and
indicates that the VDC system is working prop-
erly.
The computer has a built in diagnostic feature
that tests the system each time you start the
engine and move the vehicle forward or in reverse
at a slow speed. When the self-test occurs, you
may hear a clunk noise and/or feel a pulsation in
the brake pedal. This is normal and is not an
indication of a malfunction.WARNING
cThe vehicle dynamic control system is
designed to help improve driving stabil-
ity but does not prevent accidents due
to abrupt steering operation at high
speeds or by careless or dangerous
driving techniques. Reduce vehicle
speed and be especially careful when
driving and cornering on slippery sur-
faces and always drive carefully.
cIf suspension parts such as shock ab-
sorbers, struts, springs and bushings
are not standard equipment or are ex-
tremely deteriorated, the vehicle dy-
namic control off indicator light may
come on.
cWhen driving on extremely inclined sur-
faces such as higher banked corners,
the vehicle dynamic control system may
not operate properly or the vehicle dy-
namic control off indicator light may
come on. Do not drive on these types of
roads.
cIf the tires other than the recommended
ones are used, the vehicle dynamic con-
trol system may not operate properly or
the vehicle dynamic control off indica-
tor light may come on.cThe vehicle dynamic control system is
not a substitute for winter tires or tire
chains on a snow covered road.
Starting and driving5-29
ZREVIEW COPY:Ð2003 Truck/Frontier(d22)
Owners Manual(owners)ÐUSA English(nna)
01/15/03Ðarosenma
X
Page 165 of 272
SPECIAL WINTER EQUIPMENT
It is recommended that the following items be
carried in the vehicle during winter:
cA scraper and stiff-bristled brush to remove
ice and snow from the windows and wiper
blades.
cA sturdy, flat board to be placed under the jack
to give it firm support.
cA shovel to dig the vehicle out of snowdrifts.
cExtra window washer fluid to refill the reservoir
tank.
DRIVING ON SNOW OR ICE
WARNING
cWet ice (32°F, 0°C and freezing rain) ,
very cold snow or ice can be slick and
very hard to drive on. The vehicle will
have much less traction or “grip” under
these conditions. Try to avoid driving on
wet ice until the road is salted or
sanded.
cWhatever the condition, drive with cau-
tion. Accelerate and slow down with
care. If accelerating or downshifting too
fast, the drive wheels will lose even
more traction.cAllow more stopping distance under
these conditions. Braking should be
started sooner than on dry pavement.
cAllow greater following distances on
slippery roads.
cWatch for slippery spots (glare ice) .
These may appear on an otherwise
clear road in shaded areas. If a patch of
ice is seen ahead, brake before reach-
ing it. Try not to brake while on the ice,
and avoid any sudden steering
maneuvers.
cDo not use the cruise control on slip-
pery roads.
cSnow can trap dangerous exhaust
gases under your vehicle. Keep snow
clear of the exhaust pipe and from
around your vehicle.
ENGINE BLOCK HEATER (if so
equipped)
An engine block heater to assist in extreme cold
temperature starting is available through a
NISSAN dealer.
WARNING
Do not use your heater with an un-
grounded electrical system or two-
pronged (cheater) adapters. You can be
injured by an electrical shock if you use an
ungrounded connection.
Starting and driving5-31
ZREVIEW COPY:Ð2003 Truck/Frontier(d22)
Owners Manual(owners)ÐUSA English(nna)
01/15/03Ðarosenma
X
Page 168 of 272
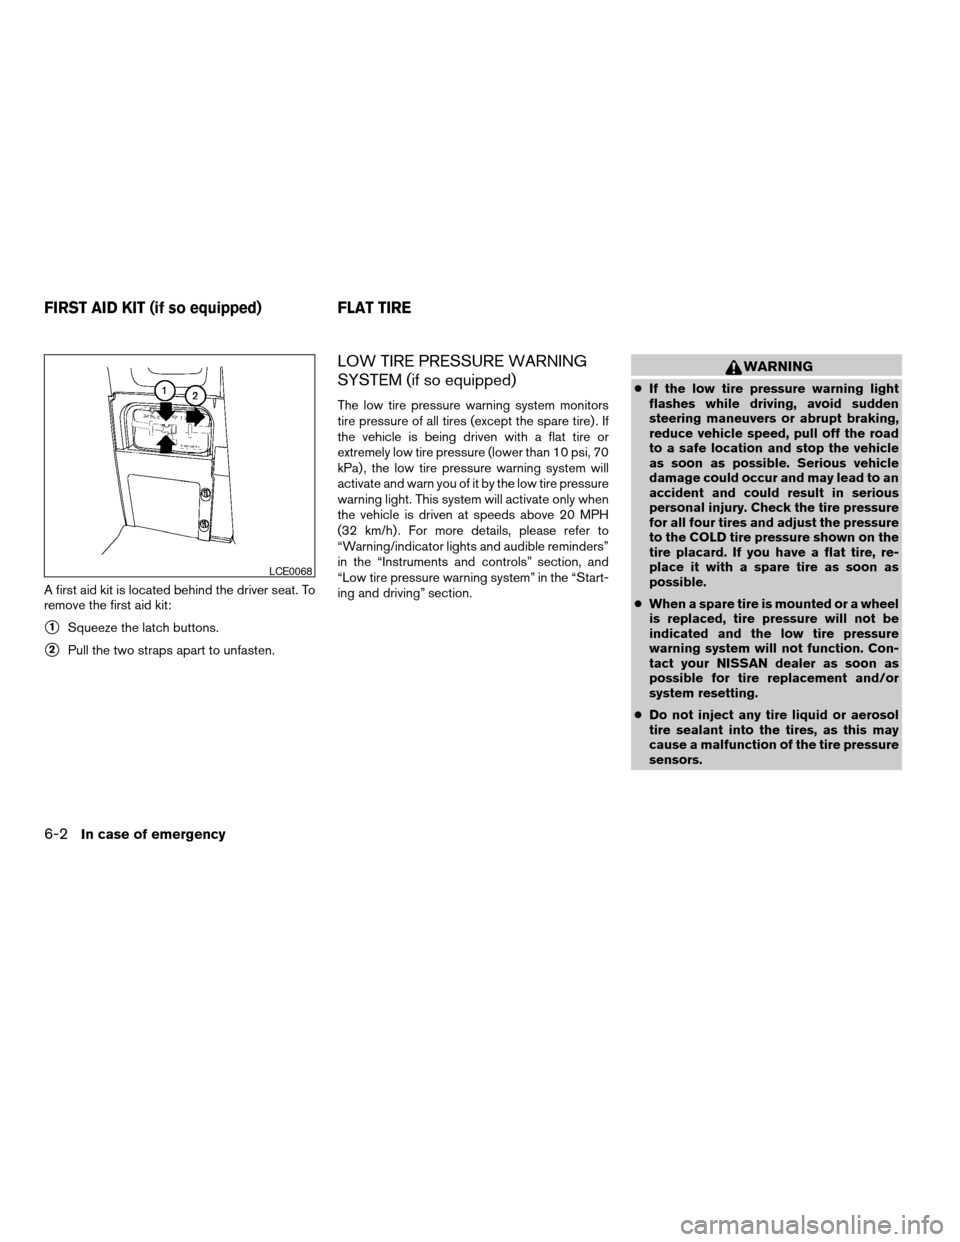
A first aid kit is located behind the driver seat. To
remove the first aid kit:
s1Squeeze the latch buttons.
s2Pull the two straps apart to unfasten.
LOW TIRE PRESSURE WARNING
SYSTEM (if so equipped)
The low tire pressure warning system monitors
tire pressure of all tires (except the spare tire) . If
the vehicle is being driven with a flat tire or
extremely low tire pressure (lower than 10 psi, 70
kPa) , the low tire pressure warning system will
activate and warn you of it by the low tire pressure
warning light. This system will activate only when
the vehicle is driven at speeds above 20 MPH
(32 km/h) . For more details, please refer to
“Warning/indicator lights and audible reminders”
in the “Instruments and controls” section, and
“Low tire pressure warning system” in the “Start-
ing and driving” section.
WARNING
cIf the low tire pressure warning light
flashes while driving, avoid sudden
steering maneuvers or abrupt braking,
reduce vehicle speed, pull off the road
to a safe location and stop the vehicle
as soon as possible. Serious vehicle
damage could occur and may lead to an
accident and could result in serious
personal injury. Check the tire pressure
for all four tires and adjust the pressure
to the COLD tire pressure shown on the
tire placard. If you have a flat tire, re-
place it with a spare tire as soon as
possible.
cWhen a spare tire is mounted or a wheel
is replaced, tire pressure will not be
indicated and the low tire pressure
warning system will not function. Con-
tact your NISSAN dealer as soon as
possible for tire replacement and/or
system resetting.
cDo not inject any tire liquid or aerosol
tire sealant into the tires, as this may
cause a malfunction of the tire pressure
sensors.
LCE0068
FIRST AID KIT (if so equipped) FLAT TIRE
6-2In case of emergency
ZREVIEW COPY:Ð2003 Truck/Frontier(d22)
Owners Manual(owners)ÐUSA English(nna)
01/15/03Ðarosenma
X