2003 NISSAN FRONTIER instrument panel
[x] Cancel search: instrument panelPage 50 of 272
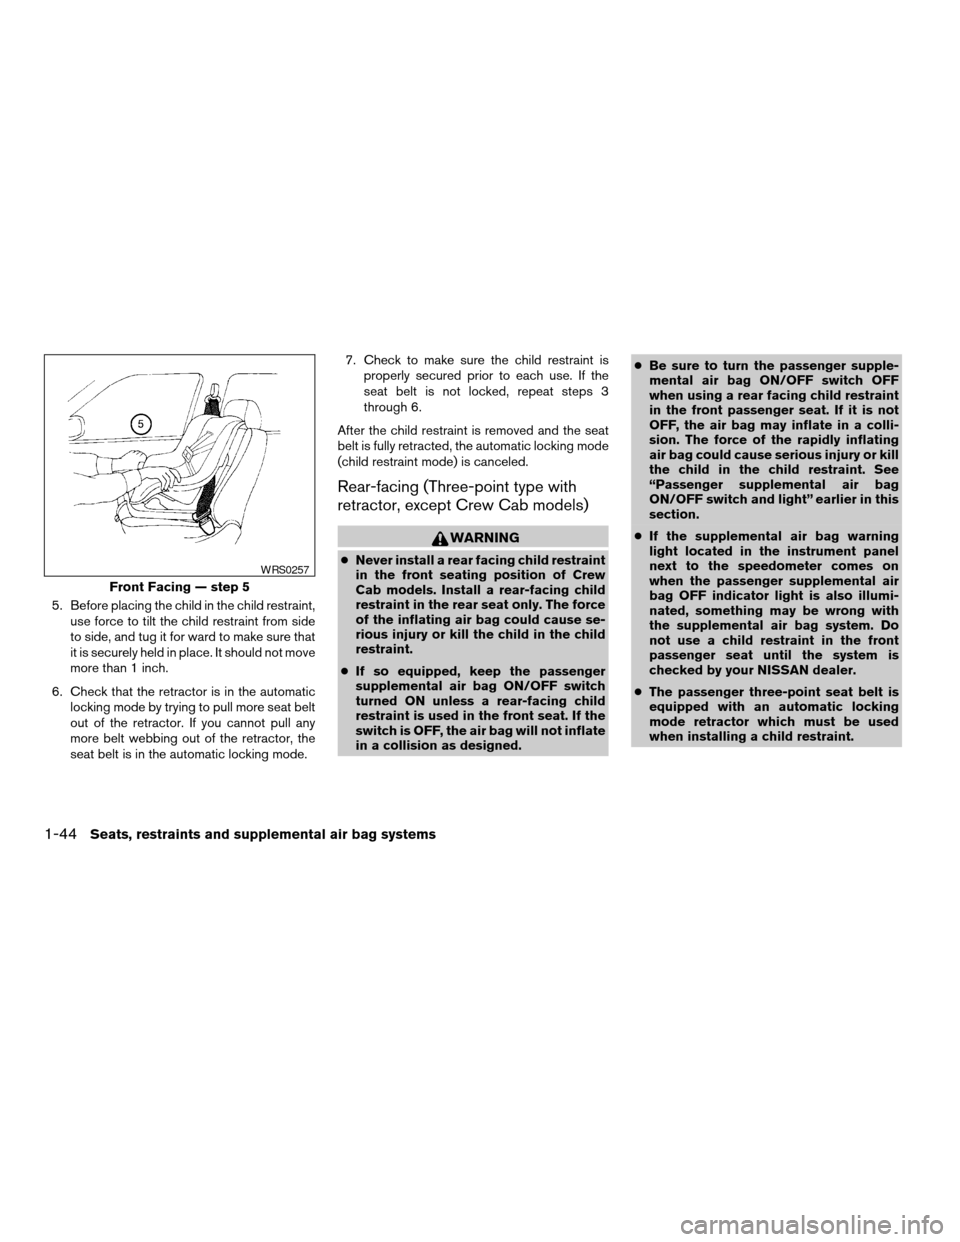
5. Before placing the child in the child restraint,
use force to tilt the child restraint from side
to side, and tug it for ward to make sure that
it is securely held in place. It should not move
more than 1 inch.
6. Check that the retractor is in the automatic
locking mode by trying to pull more seat belt
out of the retractor. If you cannot pull any
more belt webbing out of the retractor, the
seat belt is in the automatic locking mode.7. Check to make sure the child restraint is
properly secured prior to each use. If the
seat belt is not locked, repeat steps 3
through 6.
After the child restraint is removed and the seat
belt is fully retracted, the automatic locking mode
(child restraint mode) is canceled.
Rear-facing (Three-point type with
retractor, except Crew Cab models)
WARNING
cNever install a rear facing child restraint
in the front seating position of Crew
Cab models. Install a rear-facing child
restraint in the rear seat only. The force
of the inflating air bag could cause se-
rious injury or kill the child in the child
restraint.
cIf so equipped, keep the passenger
supplemental air bag ON/OFF switch
turned ON unless a rear-facing child
restraint is used in the front seat. If the
switch is OFF, the air bag will not inflate
in a collision as designed.cBe sure to turn the passenger supple-
mental air bag ON/OFF switch OFF
when using a rear facing child restraint
in the front passenger seat. If it is not
OFF, the air bag may inflate in a colli-
sion. The force of the rapidly inflating
air bag could cause serious injury or kill
the child in the child restraint. See
“Passenger supplemental air bag
ON/OFF switch and light” earlier in this
section.
cIf the supplemental air bag warning
light located in the instrument panel
next to the speedometer comes on
when the passenger supplemental air
bag OFF indicator light is also illumi-
nated, something may be wrong with
the supplemental air bag system. Do
not use a child restraint in the front
passenger seat until the system is
checked by your NISSAN dealer.
cThe passenger three-point seat belt is
equipped with an automatic locking
mode retractor which must be used
when installing a child restraint.
Front Facing — step 5
WRS0257
1-44Seats, restraints and supplemental air bag systems
ZREVIEW COPY:Ð2003 Truck/Frontier(d22)
Owners Manual(owners)ÐUSA English(nna)
01/13/03Ðarosenma
X
Page 55 of 272

2 Instruments and controls
Instrument panel...................................2-2
Meters and gauges................................2-3
Speedometer and odometer.....................2-3
Tachometer....................................2-5
Engine coolant temperature gauge...............2-5
Fuel gauge....................................2-6
Compass and outside temperature display
(if so equipped)...................................2-6
Outside temperature display.....................2-7
Compass display...............................2-7
Warning/indicator lights and audible reminders.......2-9
Checking bulbs................................2-9
Warning lights................................2-10
Indicator lights................................2-13
Audible reminders.............................2-15
Security systems.................................2-15
Vehicle security system (if so equipped)..........2-15
Windshield wiper and washer switch...............2-18
Switch operation..............................2-18
Rear window defroster switch
(Crew Cab models only)..........................2-19
Headlight and turn signal switch....................2-20Headlight control switch........................2-20
Fog light switch (if so equipped)...................2-22
Hazard warning flasher switch.....................2-22
Cargo lamp switch...............................2-23
Horn............................................2-23
Vehicle dynamic control (VDC) off switch
(if so equipped)..................................2-23
Power outlet (if so equipped)......................2-24
Storage.........................................2-25
Storage compartment..........................2-25
Cup holders..................................2-25
Glove box....................................2-26
Console box..................................2-26
Grocery hooks (King Cab only)..................2-27
Windows........................................2-28
Power windows (if so equipped)................2-28
Manual windows..............................2-30
Rear sliding window (if so equipped)............2-30
Interior lights.....................................2-30
Map lights (if so equipped)........................2-32
Illuminated entry system...........................2-32
Battery saver..................................2-32
ZREVIEW COPY:Ð2003 Truck/Frontier(d22)
Owners Manual(owners)ÐUSA English(nna)
01/15/03Ðarosenma
X
Page 56 of 272

1. Headlight/turn signal switch
2. Meters and gauges
3. Windshield wiper/washer switch
4. Power point
5. Heater and air conditioner
6. Passenger air bag ON/OFF switch
light (if so equipped)
7. Passenger air bag ON/OFF switch (if
so equipped)
8. Front passenger supplemental air bag
9. Glove box
10. Audio system
11. Hazard warning flasher switch
12. Automatic/manual selector lever
13. Transfer case shift lever (if so
equipped)
14. Parking brake release lever
15. Cruise control main/set switch (if so
equipped)
16. Driver supplemental air bag
17. Steering wheel switch for audio con-
trols (if so equipped)
18. Vehicle dynamics control (VDC) off
switch (if so equipped)
19. Cargo lamp switch
WIC0427
INSTRUMENT PANEL
2-2Instruments and controls
ZREVIEW COPY:Ð2003 Truck/Frontier(d22)
Owners Manual(owners)ÐUSA English(nna)
01/13/03Ðarosenma
X
Page 66 of 272
cIf the light comes on while driving,
avoid sudden steering maneuvers or
abrupt braking, reduce vehicle speed,
pull off the road to a safe location and
stop the vehicle as soon as possible.
Serious vehicle damage could occur
and may lead to an accident and result
in serious personal injury. Check the
tire pressure for all 4 wheels and adjust
the pressure to the COLD tire pressure
shown on the tire placard. If the light
still comes on while driving after adjust-
ing the tire pressure, a tire may be flat. If
you have a flat tire, replace it with a
spare tire as soon as possible.
cWhen a spare tire is mounted or a wheel
is replaced, tire pressure will not be
indicated and the low tire pressure
warning system will not function. Con-
tact your NISSAN dealer as soon as
possible for tire replacement and/or
system resetting.
CAUTION
cThe low tire pressure warning system is
not a substitute for the regular tire pres-
sure check. Be sure to check the tire
pressure regularly.cIf the vehicle is being driven at speeds
of less than 20 MPH (32 km/h) , the low
tire pressure warning system may not
operate correctly.
cBe sure to install the specified size of
tires to the 4 wheels correctly.
Low washer fluid warning light
(if so equipped)
This light comes on when the washer fluid is at a
low level. Add washer fluid as necessary. See the
“Maintenance and do-it-yourself” section of this
manual.
Passenger supplemental air
bag OFF indicator light (except
Crew Cab models)
The passenger supplemental air bag is equipped
with an ON/OFF switch. The switch is located in
the center of the instrument panel. When the
switch is turned to the ON position, the passen-
ger supplemental air bag is enabled and could
inflate in a frontal collision. When the switch is
turned to the OFF position, the passenger
supplemental air bag is disabled and will not
inflate in a frontal collision. The passenger
supplemental air bag OFF indicator light on the
instrument panel illuminates when the passenger
supplemental air bag ON/OFF switch is turned tothe OFF position. The driver’s side supplemental
air bag always remains enabled and is not af-
fected by the passenger supplemental air bag
ON/OFF switch. The key for the passenger
supplemental air bag ON/OFF switch should not
be left in the switch. Remove the key after turning
the switch in the desired position. Do not leave a
key in the switch. See “Passenger supplemental
air bag ON/OFF switch and light” in the “Seats,
restraints and supplemental air bag systems”
section for details.
Seat belt warning light and
chime
The light and chime remind you to fasten your
seat belts. The light illuminates whenever the
ignition key is turned to the ON or START position
and remains illuminated until the driver’s seat belt
is fastened. At the same time, the chime sounds
for about 7 seconds unless the driver’s seat belt
is securely fastened.
Refer to “Seat belts” in the “Seats, restraints and
supplemental air bag systems” section for pre-
cautions on seat belt usage.
Supplemental air bag warning
light
When the ignition key is in the ON or START
position, the supplemental air bag warning light
2-12Instruments and controls
ZREVIEW COPY:Ð2003 Truck/Frontier(d22)
Owners Manual(owners)ÐUSA English(nna)
01/14/03Ðarosenma
X
Page 74 of 272

HEADLIGHT CONTROL SWITCH
Lighting
s1When turning the switch to theposi-
tion, the front parking, tail, license plate and
instrument panel lights come on.
s2When turning the switch to theposi-
tion, the headlights come on and all the other
lights remain on.
Headlight beam select
s1To select the high beam function, push the
lever forward. The high beam lights come on
and the
light illuminates.
s2Pull the lever back to select the low beam.
s3Pulling and releasing the lever flashes the
headlight high beams on and off.
Type A
WIC0242
Type B
WIC0243WIC0244
HEADLIGHT AND TURN SIGNAL
SWITCH
2-20Instruments and controls
ZREVIEW COPY:Ð2003 Truck/Frontier(d22)
Owners Manual(owners)ÐUSA English(nna)
01/15/03Ðarosenma
X
Page 75 of 272
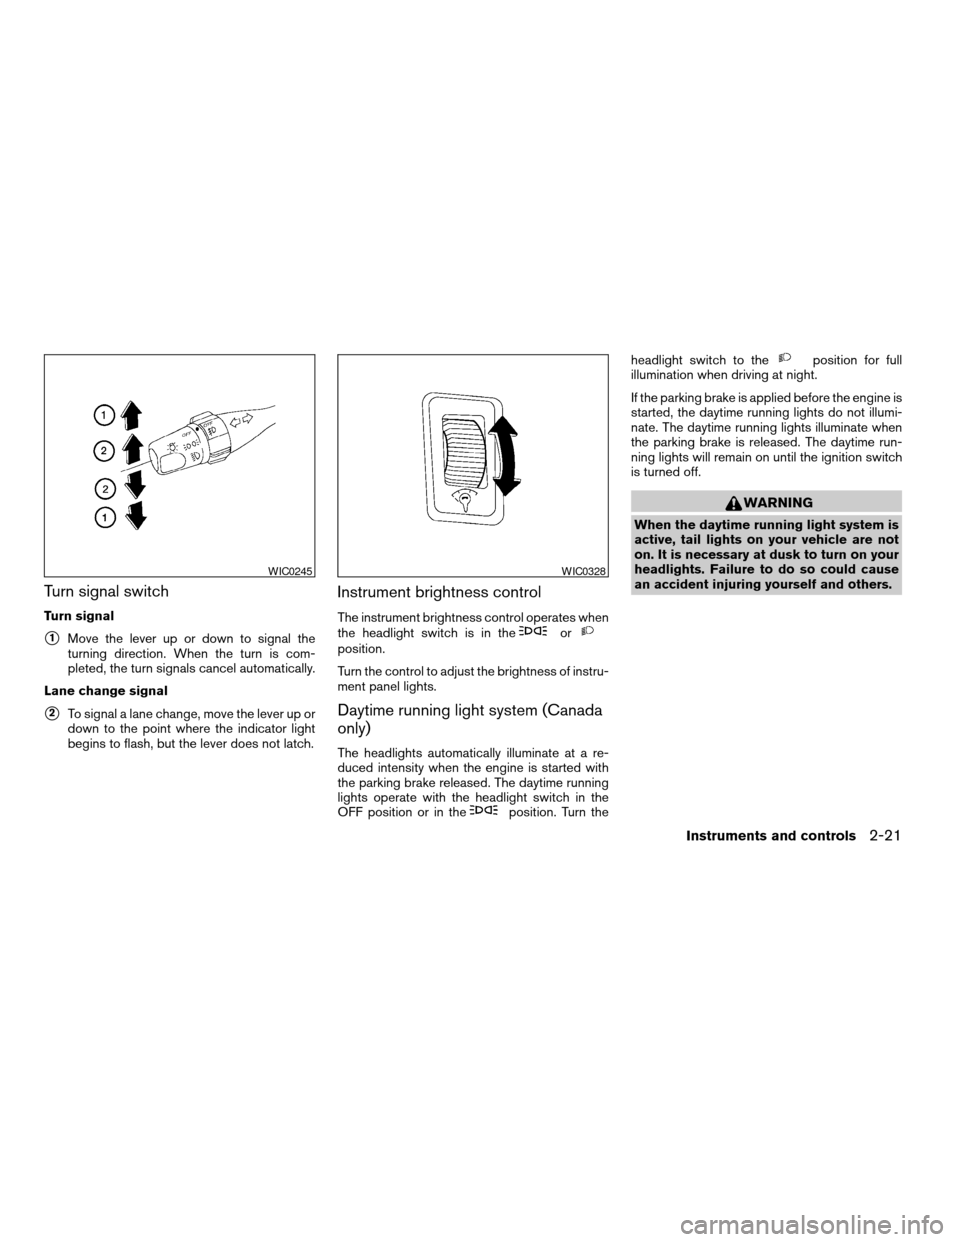
Turn signal switch
Turn signal
s1Move the lever up or down to signal the
turning direction. When the turn is com-
pleted, the turn signals cancel automatically.
Lane change signal
s2To signal a lane change, move the lever up or
down to the point where the indicator light
begins to flash, but the lever does not latch.
Instrument brightness control
The instrument brightness control operates when
the headlight switch is in theorposition.
Turn the control to adjust the brightness of instru-
ment panel lights.
Daytime running light system (Canada
only)
The headlights automatically illuminate at a re-
duced intensity when the engine is started with
the parking brake released. The daytime running
lights operate with the headlight switch in the
OFF position or in the
position. Turn theheadlight switch to the
position for full
illumination when driving at night.
If the parking brake is applied before the engine is
started, the daytime running lights do not illumi-
nate. The daytime running lights illuminate when
the parking brake is released. The daytime run-
ning lights will remain on until the ignition switch
is turned off.
WARNING
When the daytime running light system is
active, tail lights on your vehicle are not
on. It is necessary at dusk to turn on your
headlights. Failure to do so could cause
an accident injuring yourself and others.
WIC0245WIC0328
Instruments and controls2-21
ZREVIEW COPY:Ð2003 Truck/Frontier(d22)
Owners Manual(owners)ÐUSA English(nna)
01/15/03Ðarosenma
X
Page 79 of 272
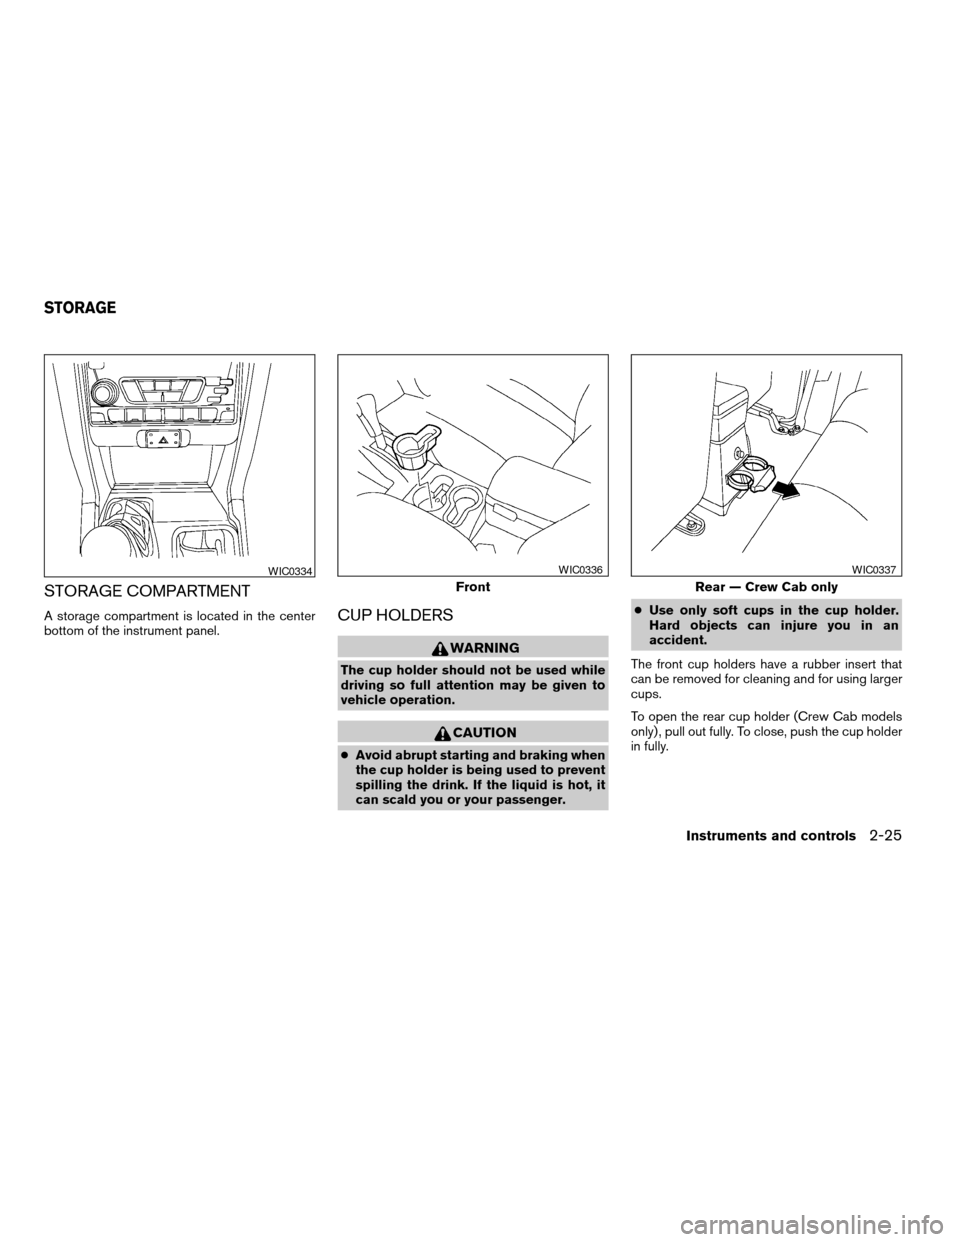
STORAGE COMPARTMENT
A storage compartment is located in the center
bottom of the instrument panel.CUP HOLDERS
WARNING
The cup holder should not be used while
driving so full attention may be given to
vehicle operation.
CAUTION
cAvoid abrupt starting and braking when
the cup holder is being used to prevent
spilling the drink. If the liquid is hot, it
can scald you or your passenger.cUse only soft cups in the cup holder.
Hard objects can injure you in an
accident.
The front cup holders have a rubber insert that
can be removed for cleaning and for using larger
cups.
To open the rear cup holder (Crew Cab models
only) , pull out fully. To close, push the cup holder
in fully.
WIC0334
Front
WIC0336
Rear — Crew Cab only
WIC0337
STORAGE
Instruments and controls2-25
ZREVIEW COPY:Ð2003 Truck/Frontier(d22)
Owners Manual(owners)ÐUSA English(nna)
01/15/03Ðarosenma
X
Page 82 of 272
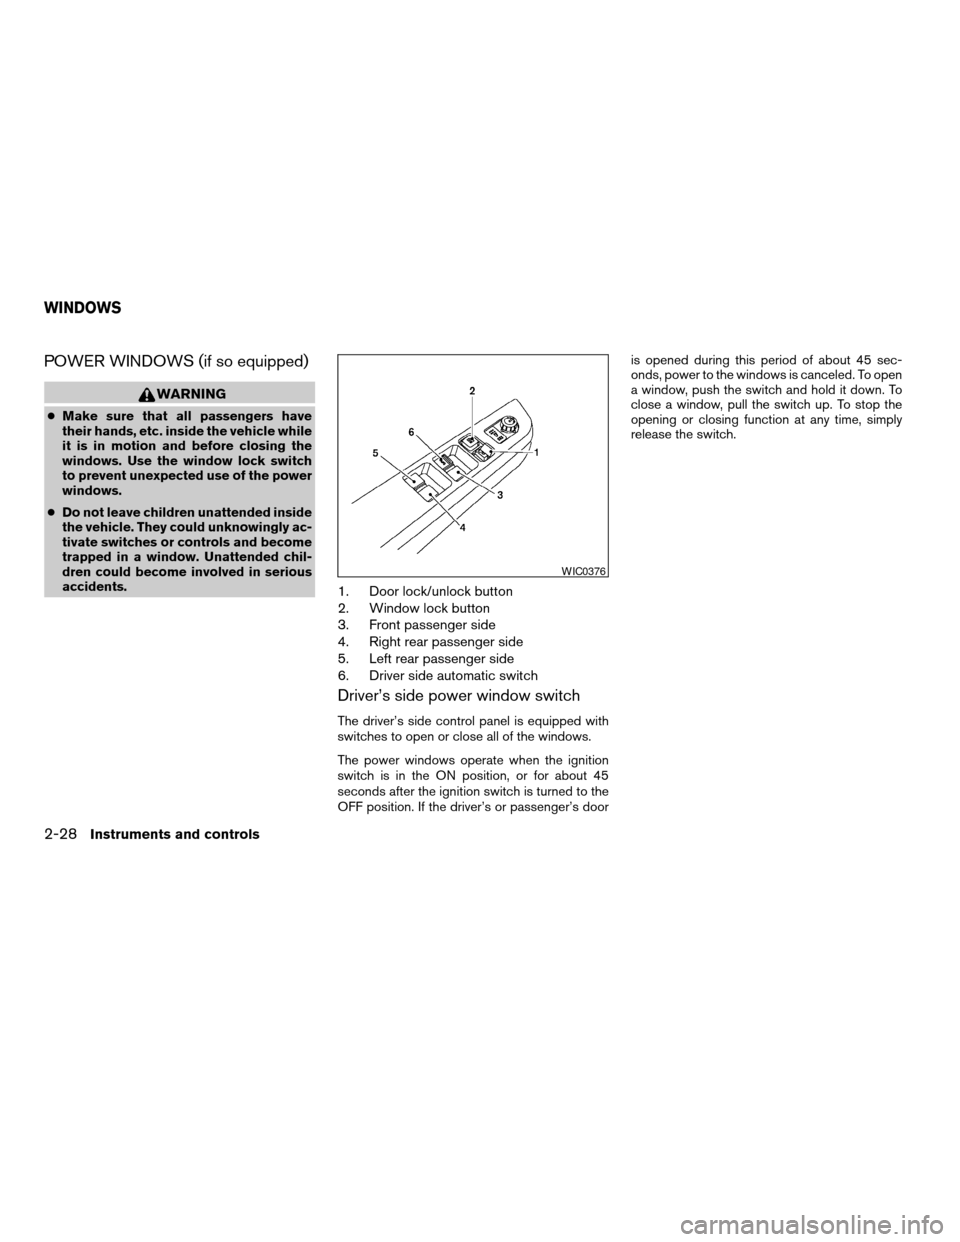
POWER WINDOWS (if so equipped)
WARNING
cMake sure that all passengers have
their hands, etc. inside the vehicle while
it is in motion and before closing the
windows. Use the window lock switch
to prevent unexpected use of the power
windows.
cDo not leave children unattended inside
the vehicle. They could unknowingly ac-
tivate switches or controls and become
trapped in a window. Unattended chil-
dren could become involved in serious
accidents.
1. Door lock/unlock button
2. Window lock button
3. Front passenger side
4. Right rear passenger side
5. Left rear passenger side
6. Driver side automatic switch
Driver’s side power window switch
The driver’s side control panel is equipped with
switches to open or close all of the windows.
The power windows operate when the ignition
switch is in the ON position, or for about 45
seconds after the ignition switch is turned to the
OFF position. If the driver’s or passenger’s dooris opened during this period of about 45 sec-
onds, power to the windows is canceled. To open
a window, push the switch and hold it down. To
close a window, pull the switch up. To stop the
opening or closing function at any time, simply
release the switch.
WIC0376
WINDOWS
2-28Instruments and controls
ZREVIEW COPY:Ð2003 Truck/Frontier(d22)
Owners Manual(owners)ÐUSA English(nna)
01/15/03Ðarosenma
X