2003 NISSAN ALTIMA seat adjustment
[x] Cancel search: seat adjustmentPage 35 of 256
s2Move the shoulder belt anchor to the desired
position so the belt passes over the center of
the shoulder.
WARNING
cAfter adjustment, release the adjust-
ment button and try to move the shoul-
der belt anchor up and down to make
sure it is securely fixed in position.
cThe shoulder belt anchor height should
be adjusted to the position best for you.
Failure to do so may reduce the effec-
tiveness of the entire restraint system
and increase the chance or severity of
injury in an accident.
SEAT BELT EXTENDERS
If, because of body size or driving position, it is
not possible to properly fit the lap-shoulder belt
and fasten it, an extender is available which is
compatible with the installed seat belts. The ex-
tender adds approximately 8 inches (200 mm) of
length and may be used for either the driver or
front passenger seating position. See a NISSAN
dealer for assistance if an extender is required.
WARNING
cOnly NISSAN seat belt extenders, made
by the same company which made the
original equipment seat belts, should
be used with NISSAN seat belts.
cAdults and children who can use the
standard seat belt should not use an
extender. Such unnecessary use could
result in serious personal injury in the
event of an accident.
cNever use seat belt extenders to install
child restraints. If the child restraint is
not secured properly, the child could be
seriously injured in a collision or a sud-
den stop.
SEAT BELT MAINTENANCE
cTo clean the seat belt webbing,apply a
mild soap solution or any solution recom-
mended for cleaning upholstery or carpet.
Then wipe with a cloth and allow the seat
belts to dry in the shade. Do not allow the
seat belts to retract until they are completely
dry.
cIf dirt builds up in the shoulder belt
guideof the seat belt anchors, the seat
belts may retract slowly. Wipe the shoulder
belt guide with a clean, dry cloth.cPeriodically check to see that the seat
belt and the metal components,such as
buckles, tongues, retractors, flexible wires
and anchors, work properly. If loose parts,
deterioration, cuts or other damage on the
webbing is found, the entire seat belt as-
sembly should be replaced.
Seats, restraints and supplemental air bag systems1-29
ZREVIEW COPY:Ð2003 Altima(l30)
Owners Manual(owners)ÐUSA English(nna)
04/21/03Ðdebbie
X
Page 37 of 256
cChoose only a restraint with a label certifying
that it complies with Federal Motor Vehicle
Safety Standard 213 or Canadian Motor
Vehicle Safety Standard 213.
cCheck the child restraint in your vehicle to be
sure it is compatible with the vehicle’s seat
and seat belt system.
cIf the child restraint is compatible with your
vehicle, place your child in the child restraint
and check the various adjustments to be
sure the child restraint is compatible with
your child. Always follow all recommended
procedures.
All U.S. states and provinces of Canada
require that infants and small children be
restrained in an approved child restraint at
all times while the vehicle is being oper-
ated.
WARNING
cImproper use of a child restraint can
increase the risk or severity of injury for
both the child and other occupants of
the vehicle.cFollow all of the child restraint manu-
facturer’s instructions for installation
and use. When purchasing a child re-
straint, be sure to select one which will
fit your child and vehicle. It may not be
possible to properly install some types
of child restraints in your vehicle.
cIf the child restraint is not anchored
properly, the risk of a child being in-
jured in a collision or a sudden stop
greatly increases.
cAdjustable seatbacks should be posi-
tioned to fit the child restraint, but as
upright as possible.
cAfter attaching the child restraint, test it
before you place the child in it. Tilt it
from side to side. Try to tug it forward
and check to see if the belt holds the
restraint in place. The child restraint
should not move more than 1 inch. If the
restraint is not secure, tighten the belt
as necessary, or put the restraint in an-
other seat and test it again.cFor a front-facing child restraint, check
to make sure the shoulder belt does not
go in front of the child’s face or neck. If
it does, put the shoulder belt behind the
child restraint. If you must install a front
facing child restraint in the front seat,
see “Installation on front passenger
seat” later in this section.
cWhen your child restraint is not in use,
keep it secured with a seat belt to pre-
vent it from being thrown around in
case of a sudden stop or accident.
CAUTION
Remember that a child restraint left in a
closed vehicle can become very hot.
Check the seating surface and buckles
before placing your child in the child
restraint.
Seats, restraints and supplemental air bag systems1-31
ZREVIEW COPY:Ð2003 Altima(l30)
Owners Manual(owners)ÐUSA English(nna)
04/21/03Ðdebbie
X
Page 92 of 256

1. Master key (black) with transponder
chip
2. Valet key (red) with transponder chip
3. Key number plate
4. Transponder chip
A key number plate is supplied with your keys.
Record the key number and keep it in a safe place
(such as your wallet) , not in the vehicle. If you lose
your keys, see a NISSAN dealer for duplicates by
using the key number. NISSAN does not record
key numbers so it is very important to keep track
of your key number plate.
A key number is only necessary when you have
lost all keys and do not have one to duplicatefrom. If you still have a key, your NISSAN dealer
can duplicate it.
NISSAN VEHICLE IMMOBILIZER
SYSTEM (NVIS) KEYS
You can only drive your vehicle using the master
or valet keys which are registered to the NISSAN
Vehicle Immobilizer System components in your
vehicle. These keys have a transponder chip in
the key head.
The master key can be used for all the locks.
The valet key cannot be used for the trunk lid,
glove box lock or rear seatback lock.
To protect belongings when you leave a key with
someone, give them the valet key only.
Never leave these keys in the vehicle.
Additional or replacement keys:
If you still have a key, the key number is not
necessary when you need extra NISSAN Vehicle
Immobilizer System keys. Your dealer can dupli-
cate your existing key. As many as five NVIS keys
can be used with one vehicle. You should bring all
NVIS keys that you have to your NISSAN dealer
for registration. This is because the registration
process will erase the memory of all key codes
previously registered into the NISSAN Vehicle
Immobilizer System. After the registration pro-cess, these components will only recognize keys
coded into the NISSAN Vehicle Immobilizer Sys-
tem (NVIS) during registration. Any key that is not
given to your dealer at the time of registration will
no longer be able to start your vehicle.
WPD0128
KEYS
3-2Pre-driving checks and adjustments
ZREVIEW COPY:Ð2003 Altima(l30)
Owners Manual(owners)ÐUSA English(nna)
04/21/03Ðdebbie
X
Page 93 of 256
WARNING
cAlways have the doors locked while
driving. Along with the use of seat belts,
this provides greater safety in the event
of an accident by helping to prevent
persons from being thrown from the
vehicle. This also helps keep children
and others from unintentionally open-
ing the doors, and will help keep out
intruders.
cBefore opening any door, always look
for and avoid oncoming traffic.
cDo not leave children unattended inside
the vehicle. They could unknowingly ac-
tivate switches or controls. Unattended
children could become involved in seri-
ous accidents.
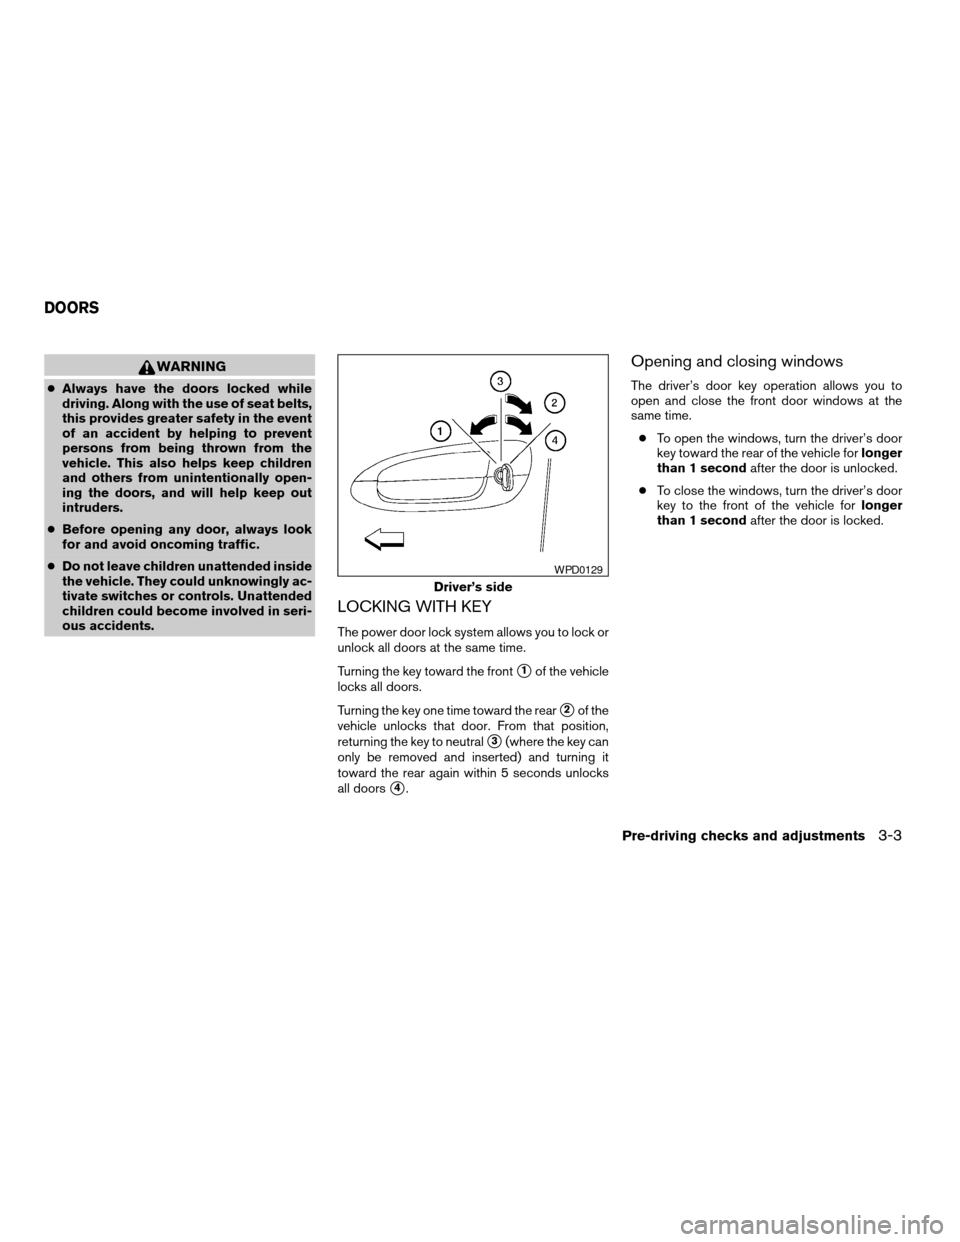
LOCKING WITH KEY
The power door lock system allows you to lock or
unlock all doors at the same time.
Turning the key toward the front
s1of the vehicle
locks all doors.
Turning the key one time toward the rear
s2of the
vehicle unlocks that door. From that position,
returning the key to neutral
s3(where the key can
only be removed and inserted) and turning it
toward the rear again within 5 seconds unlocks
all doors
s4.
Opening and closing windows
The driver’s door key operation allows you to
open and close the front door windows at the
same time.
cTo open the windows, turn the driver’s door
key toward the rear of the vehicle forlonger
than 1 secondafter the door is unlocked.
cTo close the windows, turn the driver’s door
key to the front of the vehicle forlonger
than 1 secondafter the door is locked.
Driver’s side
WPD0129
DOORS
Pre-driving checks and adjustments3-3
ZREVIEW COPY:Ð2003 Altima(l30)
Owners Manual(owners)ÐUSA English(nna)
04/21/03Ðdebbie
X
Page 101 of 256
OPENER OPERATION
WARNING
cDo not drive with the trunk lid open. This
could allow dangerous exhaust gases
to be drawn into the vehicle. See “Ex-
haust gas” in the “Starting and driving”
section of this manual.cClosely supervise children when they
are around cars to prevent them from
playing and becoming locked in the
trunk where they could be seriously in-
jured. Keep the car locked, with the rear
seatback and trunk lid securely latched
when not in use, and prevent children’s
access to car keys.
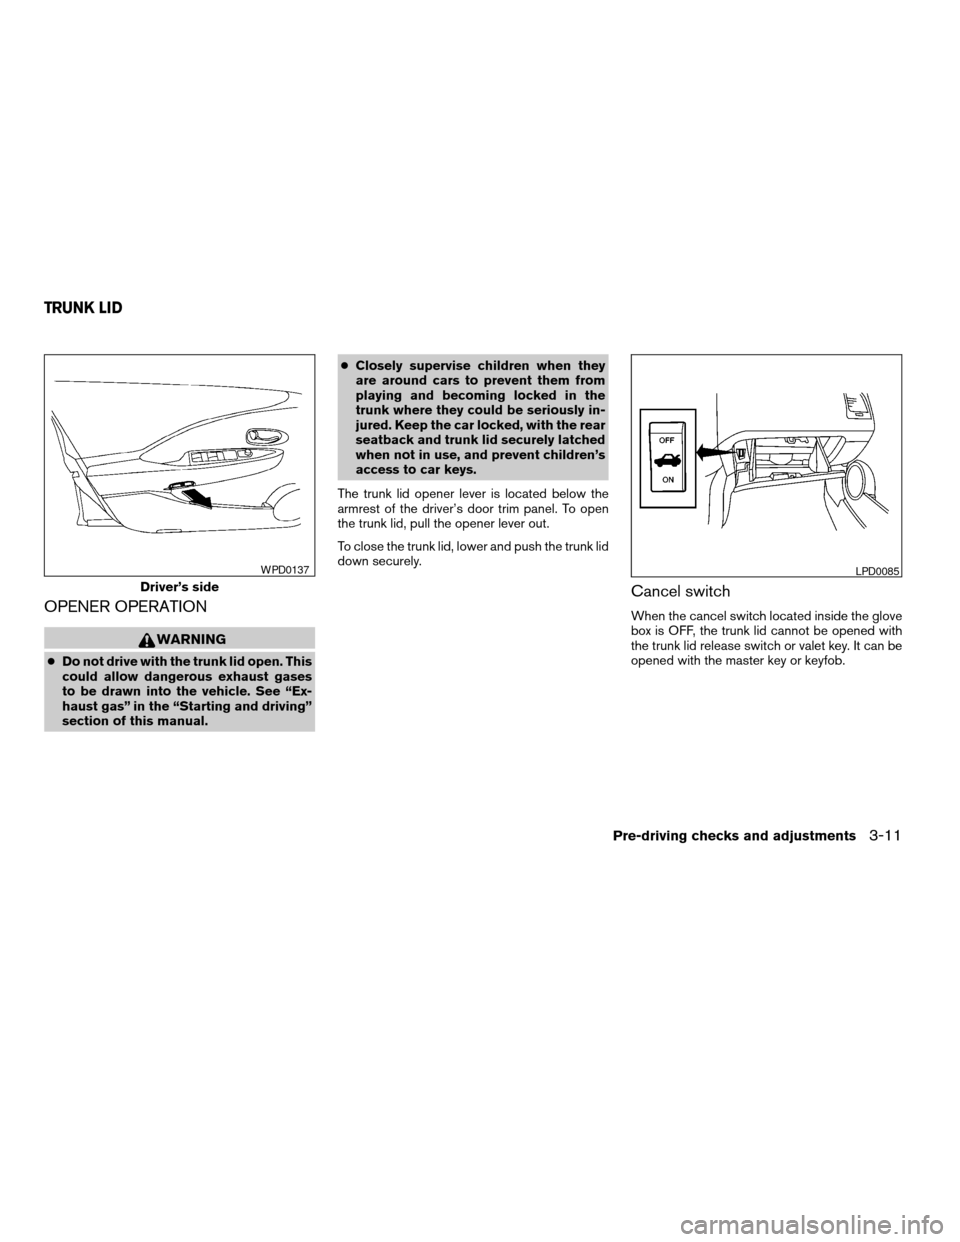
The trunk lid opener lever is located below the
armrest of the driver’s door trim panel. To open
the trunk lid, pull the opener lever out.
To close the trunk lid, lower and push the trunk lid
down securely.
Cancel switch
When the cancel switch located inside the glove
box is OFF, the trunk lid cannot be opened with
the trunk lid release switch or valet key. It can be
opened with the master key or keyfob.
Driver’s side
WPD0137LPD0085
TRUNK LID
Pre-driving checks and adjustments3-11
ZREVIEW COPY:Ð2003 Altima(l30)
Owners Manual(owners)ÐUSA English(nna)
04/21/03Ðdebbie
X
Page 102 of 256
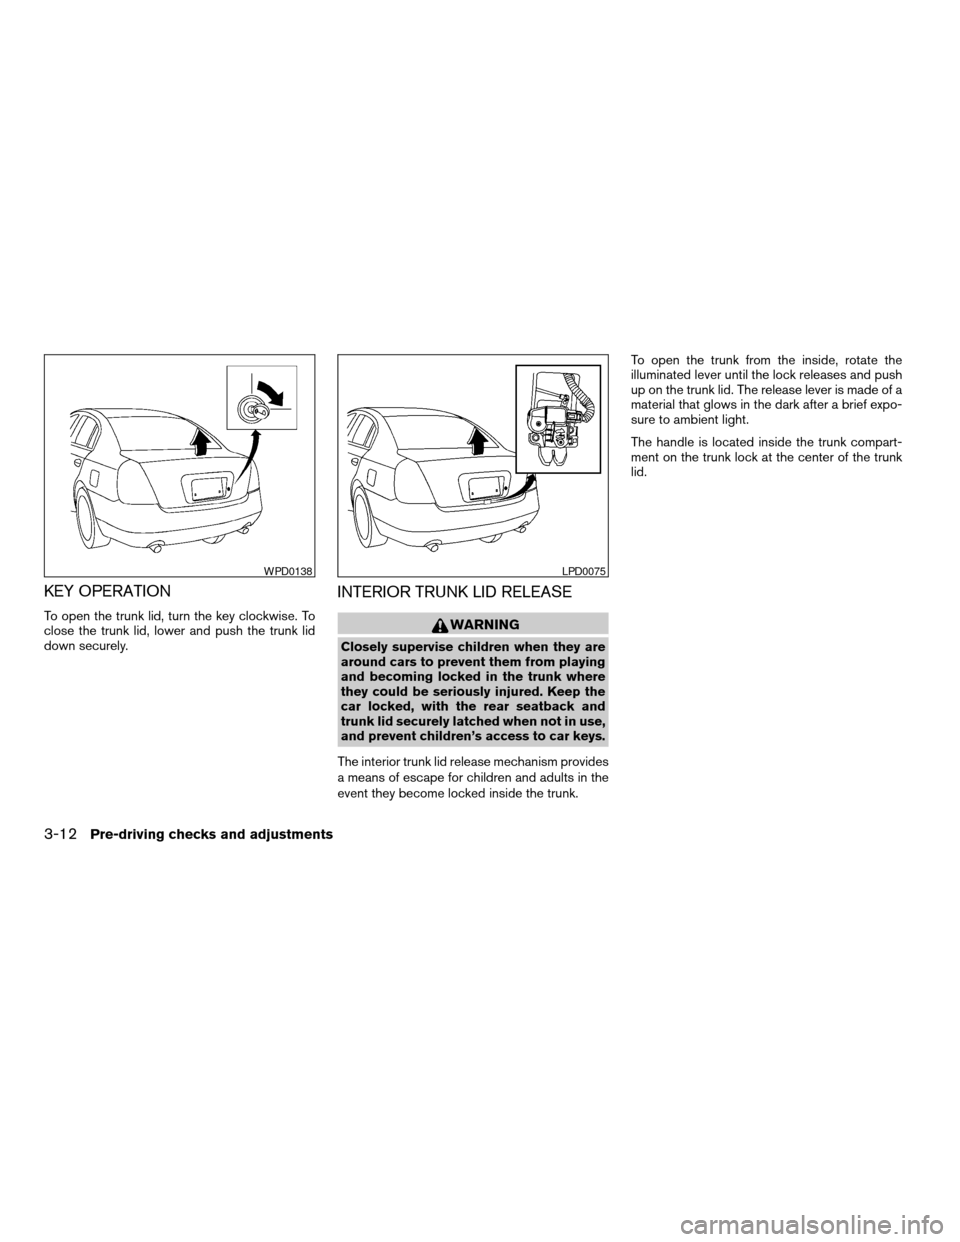
KEY OPERATION
To open the trunk lid, turn the key clockwise. To
close the trunk lid, lower and push the trunk lid
down securely.
INTERIOR TRUNK LID RELEASE
WARNING
Closely supervise children when they are
around cars to prevent them from playing
and becoming locked in the trunk where
they could be seriously injured. Keep the
car locked, with the rear seatback and
trunk lid securely latched when not in use,
and prevent children’s access to car keys.
The interior trunk lid release mechanism provides
a means of escape for children and adults in the
event they become locked inside the trunk.To open the trunk from the inside, rotate the
illuminated lever until the lock releases and push
up on the trunk lid. The release lever is made of a
material that glows in the dark after a brief expo-
sure to ambient light.
The handle is located inside the trunk compart-
ment on the trunk lock at the center of the trunk
lid.
WPD0138LPD0075
3-12Pre-driving checks and adjustments
ZREVIEW COPY:Ð2003 Altima(l30)
Owners Manual(owners)ÐUSA English(nna)
04/21/03Ðdebbie
X
Page 103 of 256
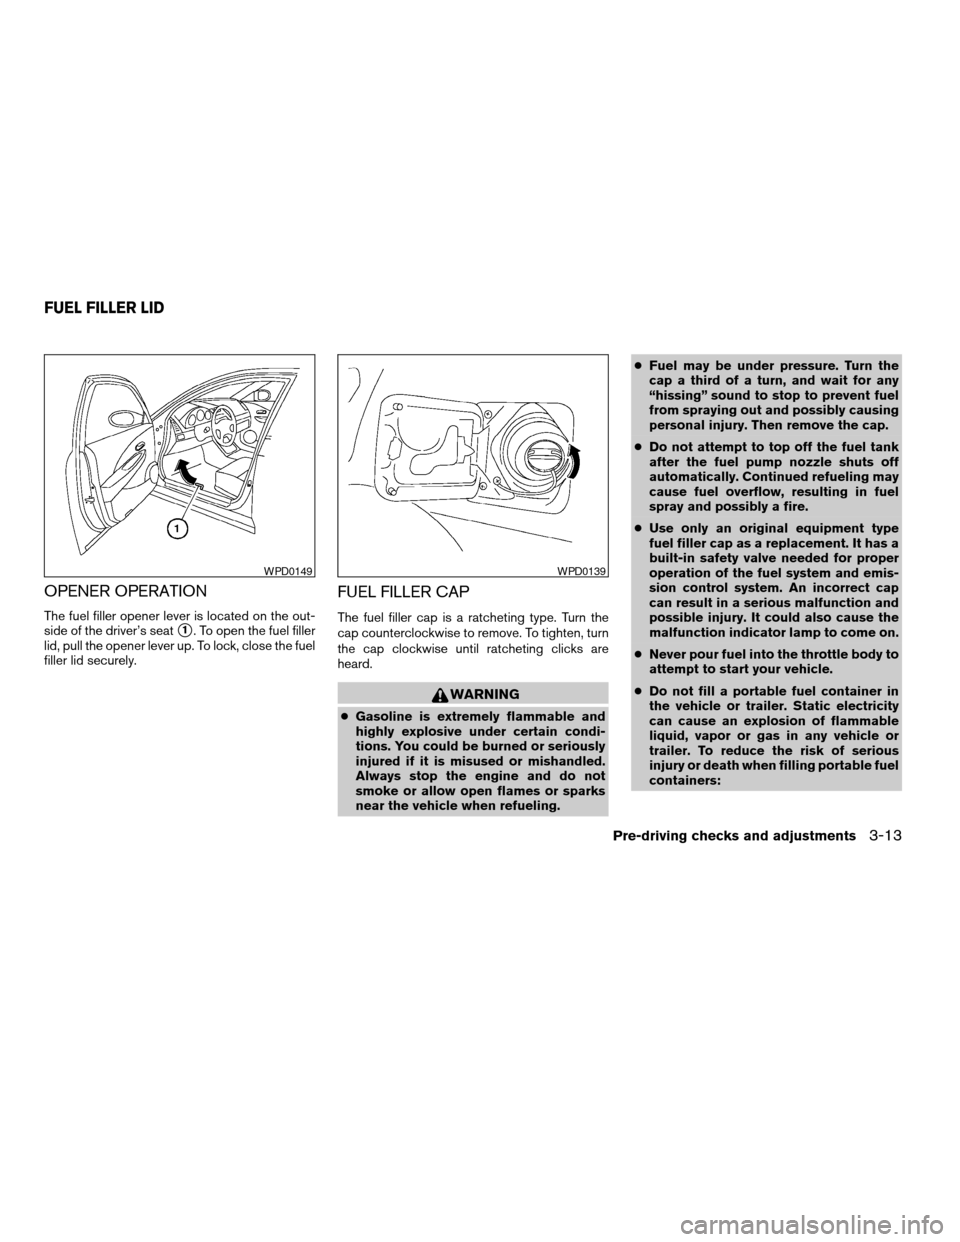
OPENER OPERATION
The fuel filler opener lever is located on the out-
side of the driver’s seat
s1. To open the fuel filler
lid, pull the opener lever up. To lock, close the fuel
filler lid securely.
FUEL FILLER CAP
The fuel filler cap is a ratcheting type. Turn the
cap counterclockwise to remove. To tighten, turn
the cap clockwise until ratcheting clicks are
heard.
WARNING
cGasoline is extremely flammable and
highly explosive under certain condi-
tions. You could be burned or seriously
injured if it is misused or mishandled.
Always stop the engine and do not
smoke or allow open flames or sparks
near the vehicle when refueling.cFuel may be under pressure. Turn the
cap a third of a turn, and wait for any
“hissing” sound to stop to prevent fuel
from spraying out and possibly causing
personal injury. Then remove the cap.
cDo not attempt to top off the fuel tank
after the fuel pump nozzle shuts off
automatically. Continued refueling may
cause fuel overflow, resulting in fuel
spray and possibly a fire.
cUse only an original equipment type
fuel filler cap as a replacement. It has a
built-in safety valve needed for proper
operation of the fuel system and emis-
sion control system. An incorrect cap
can result in a serious malfunction and
possible injury. It could also cause the
malfunction indicator lamp to come on.
cNever pour fuel into the throttle body to
attempt to start your vehicle.
cDo not fill a portable fuel container in
the vehicle or trailer. Static electricity
can cause an explosion of flammable
liquid, vapor or gas in any vehicle or
trailer. To reduce the risk of serious
injury or death when filling portable fuel
containers:
WPD0149WPD0139
FUEL FILLER LID
Pre-driving checks and adjustments3-13
ZREVIEW COPY:Ð2003 Altima(l30)
Owners Manual(owners)ÐUSA English(nna)
04/21/03Ðdebbie
X
Page 105 of 256
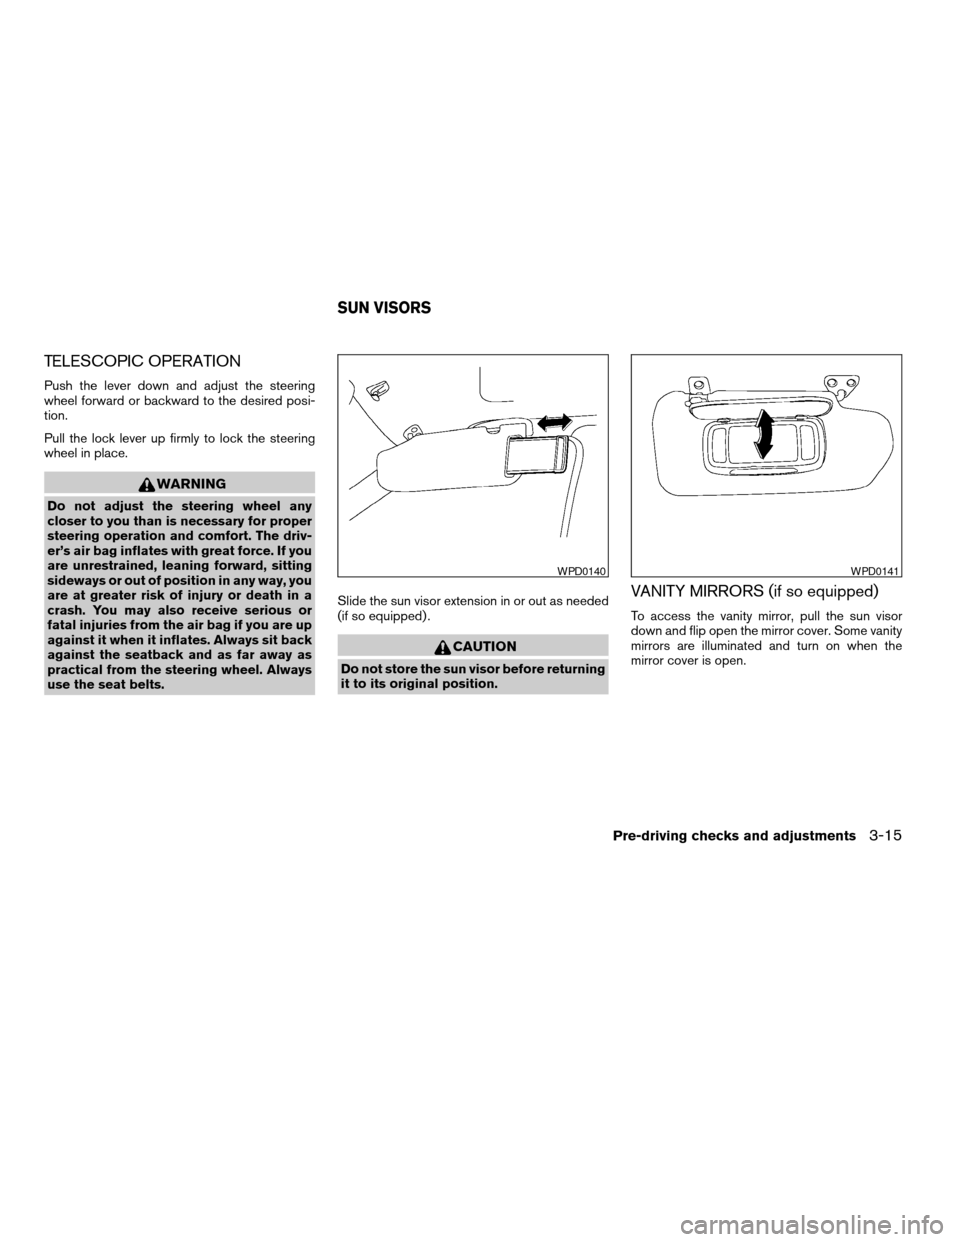
TELESCOPIC OPERATION
Push the lever down and adjust the steering
wheel forward or backward to the desired posi-
tion.
Pull the lock lever up firmly to lock the steering
wheel in place.
WARNING
Do not adjust the steering wheel any
closer to you than is necessary for proper
steering operation and comfort. The driv-
er’s air bag inflates with great force. If you
are unrestrained, leaning forward, sitting
sideways or out of position in any way, you
are at greater risk of injury or death in a
crash. You may also receive serious or
fatal injuries from the air bag if you are up
against it when it inflates. Always sit back
against the seatback and as far away as
practical from the steering wheel. Always
use the seat belts.Slide the sun visor extension in or out as needed
(if so equipped) .
CAUTION
Do not store the sun visor before returning
it to its original position.
VANITY MIRRORS (if so equipped)
To access the vanity mirror, pull the sun visor
down and flip open the mirror cover. Some vanity
mirrors are illuminated and turn on when the
mirror cover is open.
WPD0140WPD0141
SUN VISORS
Pre-driving checks and adjustments3-15
ZREVIEW COPY:Ð2003 Altima(l30)
Owners Manual(owners)ÐUSA English(nna)
04/21/03Ðdebbie
X