2003 Mercury Marauder service
[x] Cancel search: servicePage 7 of 232

Any of this information could potentially including information regarding
how the driver operates the vehicle potentially including but not limited
to information regarding vehicle speed, brake or accelerator application
or steering input. This information may be stored during regular
operation or in a crash or near crash event.
This stored information may be read out and used by:
²Ford Motor Company.
²service and repair facilities.
²law enforcement or government agencies.
²others who may assert a right or obtain your consent to know such
information.
Special instructions
For your added safety, your vehicle is fitted with sophisticated electronic
controls.
Please read the sectionSupplemental Restraint System (SRS)
in theSeating and safety restraintschapter. Failure to follow
the specific warnings and instructions could result in personal injury.
Front seat mounted rear facing child or infant seats should
NEVERbe used in front of a passenger side air bag unless the
air bag can be and is turned OFF.
Notice to owners of Severe Duty vehicles
Before you drive your vehicle, be sure to read the ªSevere Duty Owner's
Guide Supplement.º This book contains important operation and
maintenance information.
Introduction
7
Page 11 of 232

should turn off. (A driving cycle consists of a cold engine startup
followed by mixed city/highway driving.) No additional vehicle service is
required.
If the light remains on, have your vehicle serviced at the first available
opportunity.
Light is blinking:
Engine misfire is occurring which could damage your catalytic converter.
You should drive in a moderate fashion (avoid heavy acceleration and
deceleration) and have your vehicle serviced at the first available
opportunity.
Under engine misfire conditions, excessive exhaust temperatures
could damage the catalytic converter, the fuel system, interior
floor coverings or other vehicle components, possibly causing a fire.
Check fuel cap
Illuminates when the fuel cap is not
installed correctly. Check the fuel
cap for proper installation. When
the fuel filler cap is properly
re-installed, the light(s) will turn off
after a period of normal driving. Continuing to operate the vehicle with
the check fuel cap light on, or a mis-installed fuel cap can activate the
Service Engine Soon/Check Enginewarning light.
It may take a long period of time for the system to detect an
improperly installed fuel filler cap.
For more information, refer toFuel filler capin theMaintenance and
specificationschapter.
Brake system warning
To confirm the brake system
warning light is functional, it will
momentarily illuminate when the
ignition is turned to the ON position
(alternatively for some vehicles
when the ignition is moved from the ON position to START position, the
light will momentarily illuminate prior to reaching the START position).
It also illuminates if the parking brake is engaged. If the brake system
warning light does not illuminate as described, seek service immediately.
CHECK
FUEL
CAP
!
BRAKE
Instrument Cluster
11
Page 12 of 232

Illumination after the parking brake is released indicates low brake fluid
level or a brake system malfunction and the brake system should be
serviced immediately by a qualified technician.
Refer toBrakesin theDrivingchapter for more information.
Anti-lock brake system (ABS)
To confirm the anti-lock brake
system (ABS) warning light is
functional it will momentarily
illuminate when the ignition is
turned to the ON position
(alternatively for some vehicles when the ignition is moved from the ON
position to the START position, the light will momentarily illuminate just
prior to reaching the START position). If the light remains on, continues
to flash or fails to illuminate, have the ABS serviced immediately. If the
ABS light remains on, it means the anti-lock brake system has
malfunctioned and is disabled, however, the normal brake system will
still function unless the brake warning light also remains illuminated and
parking brake is off. Refer toBrakesin theDrivingchapter for more
information.
Safety belt
Illuminates to remind you to fasten
your safety belts. For more
information, refer to theSeating
and safety restraintschapter.
Air bag readiness
Illuminates to confirm that the air
bags (front or side) are operational.
If the light fails to illuminate,
continues to flash or remains on,
have the system serviced immediately.
Charging system
Illuminates when the battery is not
charging properly.
ABS
AIR
BAG
Instrument Cluster
12
Page 13 of 232

Engine coolant temperature
Illuminates when the engine coolant
temperature is high. Stop the
vehicle as soon as safely possible,
switch off the engine and let it cool.
Never remove the coolant recovery cap while the engine is
running or hot.
Refer toEngine coolantin theMaintenance and specifications
chapter. If light stays on or continues to turn on after the vehicle warms
up, have your vehicle serviced.
Traction ControlYactive (if equipped)
Illuminates when the Traction
Controlysystem is active. It will be
lit for a minimum of four seconds or
for the duration of the Traction
Controlyevent.
For more information, refer to the
Drivingchapter.
Air suspension
Illuminates when the air suspension
switch is turned OFF, the load limit
is exceeded or the air suspension
system requires servicing.
Low fuel
Illuminates when the fuel level in
the fuel tank is at, or near, empty
(refer toFuel gaugein this chapter
for more information).
O/D off
Illuminates when the overdrive
function has been turned OFF using
the Transmission Control Switch
(TCS) on the gearshift. If the light
does not come on or the light flashes steadily, have your vehicle serviced
as soon as possible, damage to the transmission could occur.
AIR
SUSP
LOW
FUEL
O/D
OFF
Instrument Cluster
13
Page 32 of 232

²Tighten very loose tapes by inserting a finger or pencil into the hole
and turning the hub.
²Remove loose labels before inserting tapes.
²Do not leave tapes in the cassette player for a long time when not
being played.
RADIO FREQUENCY INFORMATION
The Federal Communications Commission (FCC) and the Canadian Radio
and Telecommunications Commission(CRTC) establish the frequencies
AM and FM stations may use for their broadcasts. Allowable frequencies
are:
AM 530, 540±1600, 1610 kHz
FM 87.7, 87.9±107.7, 107.9 MHz
Not all frequencies are used in a given area.
RADIO RECEPTION FACTORS
Three factors can affect radio reception:
²Distance/strength.The further an FM signal travels, the weaker it is.
The listenable range of the average FM station is approximately 40 km
(24 miles). This range can be affected by ªsignal modulation.º Signal
modulation is a process radio stations use to increase their
strength/volume relative to other stations.
²Terrain.Hills, mountains and tall buildings between your vehicle's
antenna and the radio station signal can cause FM reception problems.
Static can be caused on AM stations by power lines, electric fences,
traffic lights and thunderstorms. Moving away from an interfering
structure (out of its ªshadowº) returns your reception to normal.
²Station overload.Weak signals are sometimes captured by stronger
signals when you pass a broadcast tower. A stronger signal may
temporarily overtake a weaker signal and play while the weak station
frequency is displayed.
The audio system automatically switches to single channel reception if it
will improve the reception of a station normally received in stereo.
AUDIO SYSTEM WARRANTIES AND SERVICE
Refer to theWarranty Guidefor audio system warranty information.
If service is necessary, see your dealer or a qualified technician.
Entertainment Systems
32
Page 40 of 232

Flash to pass
Pull toward you slightly to activate
and release to deactivate.
PANEL DIMMER CONTROL
Use to adjust the brightness of the
instrument panel during headlight
and parklamp operation.
²Rotate the thumbwheel from left
to right to brighten the
instrument panel.
²Rotate the thumbwheel from right
to left to dim the instrument
panel.
Domelamp Control
The panel dimmer control also controls the domelamp operation.
²Rotate the thumbwheel fully to the right, past detent to activate the
domelamp.
²In order to turn off the domelamp, rotate the thumbwheel to the left.
AIMING THE HEADLAMPS
The headlamps on your vehicle are properly aimed at the assembly plant.
If your vehicle has been in an accident the alignment of your headlamps
should be checked by a qualified service technician.
Vertical aim adjustment
1. Park the vehicle on a level surface approximately 7.6 meters (25 feet)
from a vertical wall or screen directly in front of it.
Lights
40
Page 50 of 232

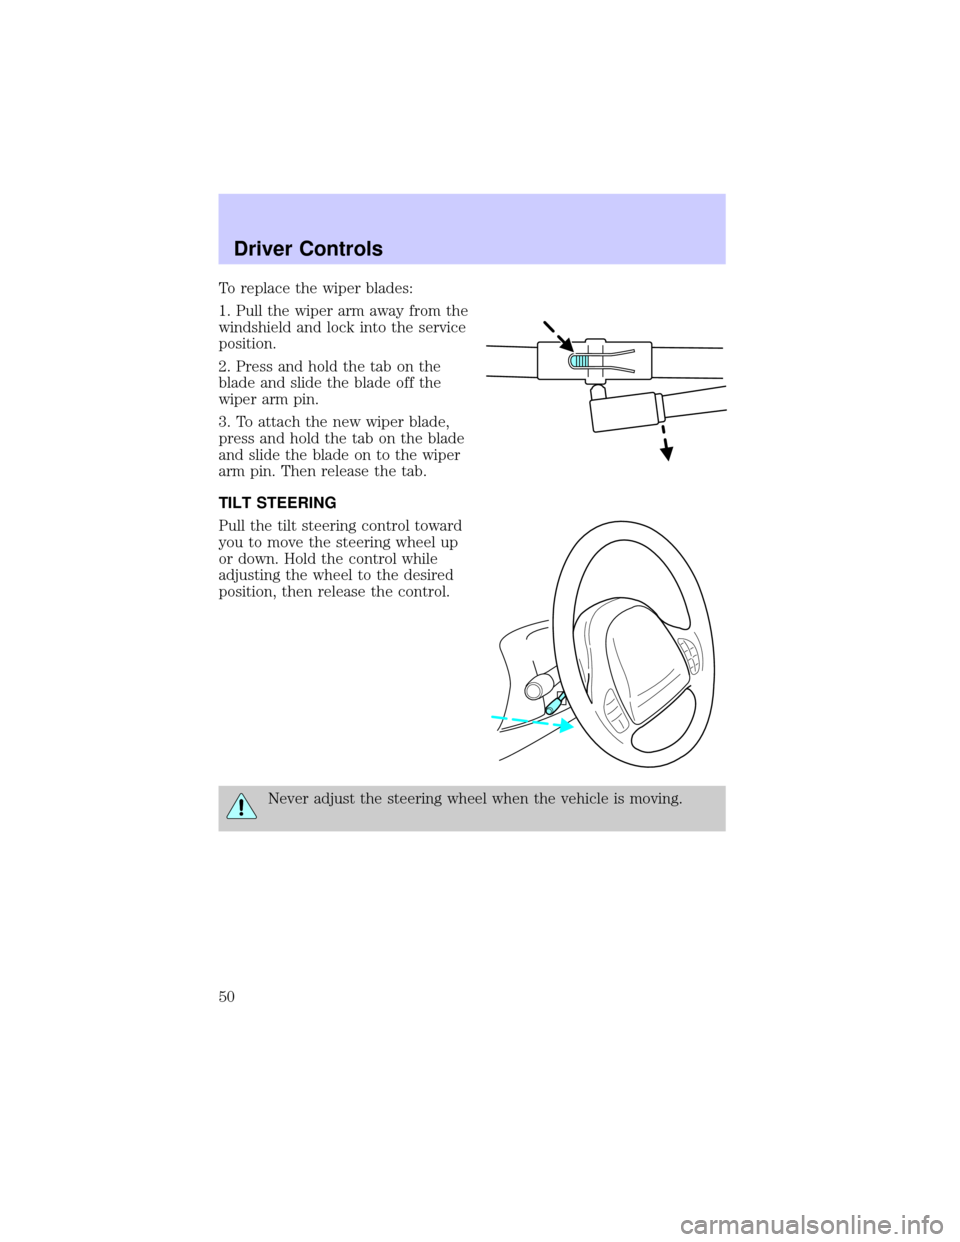
To replace the wiper blades:
1. Pull the wiper arm away from the
windshield and lock into the service
position.
2. Press and hold the tab on the
blade and slide the blade off the
wiper arm pin.
3. To attach the new wiper blade,
press and hold the tab on the blade
and slide the blade on to the wiper
arm pin. Then release the tab.
TILT STEERING
Pull the tilt steering control toward
you to move the steering wheel up
or down. Hold the control while
adjusting the wheel to the desired
position, then release the control.
Never adjust the steering wheel when the vehicle is moving.
Driver Controls
50
Page 80 of 232

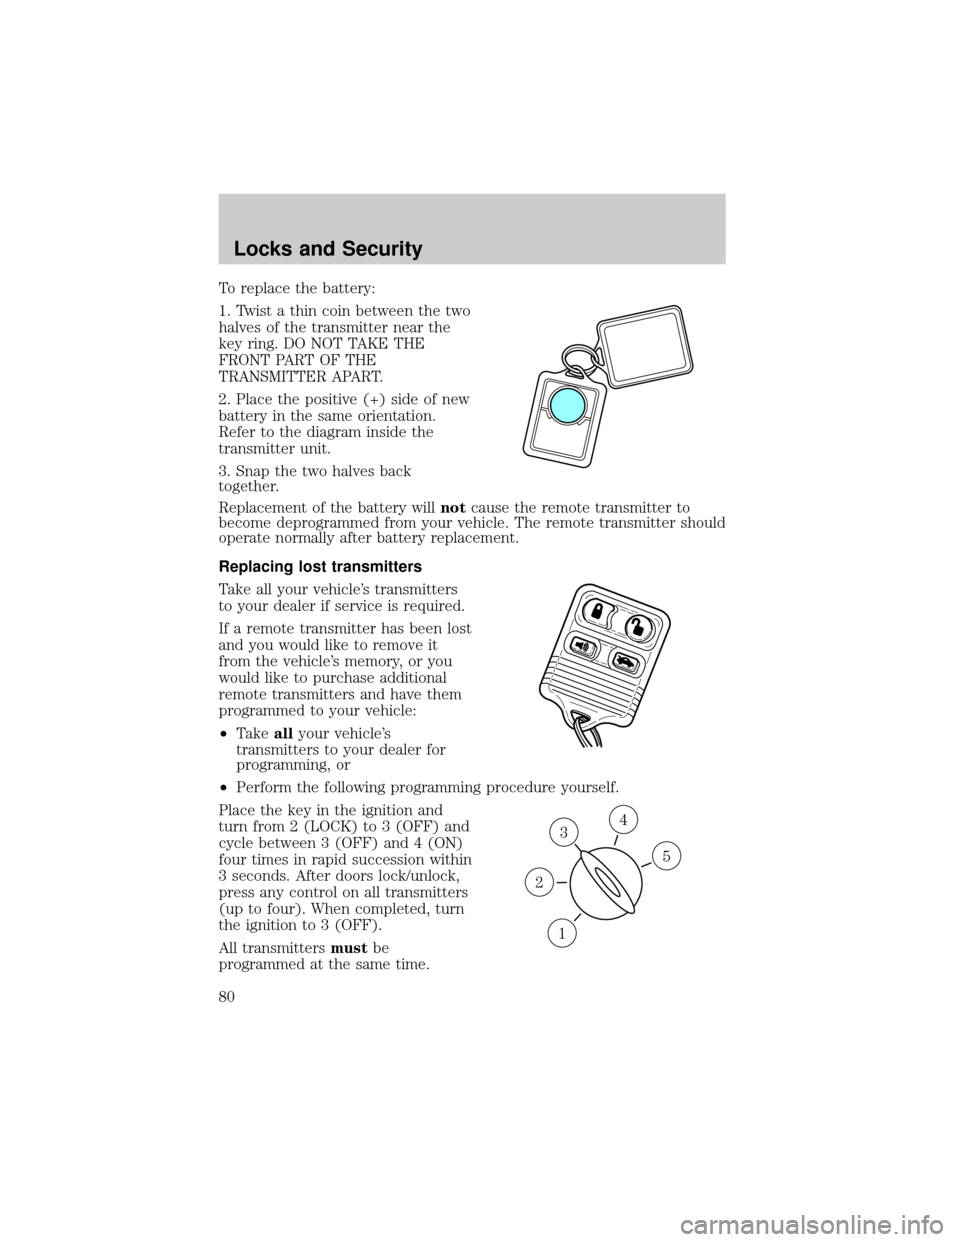
To replace the battery:
1. Twist a thin coin between the two
halves of the transmitter near the
key ring. DO NOT TAKE THE
FRONT PART OF THE
TRANSMITTER APART.
2. Place the positive (+) side of new
battery in the same orientation.
Refer to the diagram inside the
transmitter unit.
3. Snap the two halves back
together.
Replacement of the battery willnotcause the remote transmitter to
become deprogrammed from your vehicle. The remote transmitter should
operate normally after battery replacement.
Replacing lost transmitters
Take all your vehicle's transmitters
to your dealer if service is required.
If a remote transmitter has been lost
and you would like to remove it
from the vehicle's memory, or you
would like to purchase additional
remote transmitters and have them
programmed to your vehicle:
²Takeallyour vehicle's
transmitters to your dealer for
programming, or
²Perform the following programming procedure yourself.
Place the key in the ignition and
turn from 2 (LOCK) to 3 (OFF) and
cycle between 3 (OFF) and 4 (ON)
four times in rapid succession within
3 seconds. After doors lock/unlock,
press any control on all transmitters
(up to four). When completed, turn
the ignition to 3 (OFF).
All transmittersmustbe
programmed at the same time.
3
1
2
5
4
Locks and Security
80