Page 100 of 304
100 Controls in detailGood visibility
Headlamp cleaning system*
The switch is located on the center con-
sole.
1Headlamp washer switch�
Switch on ignition.
�
Briefly press upper part of switch1.
Warning!
G
Exercise care when using the passenger
side exterior rear view mirror. The mirror
surface is convex (outwardly curved surface
for a wider field of view). Objects in mirror
are closer than they appear. Check your in-
side rear view mirror or glance over your
shoulder before changing lanes.!Electrolyte drops coming into contact
with the vehicle paint finish can be
completely removed only while in the
liquid state by applying plenty of water.
Page 101 of 304
101 Controls in detail
Good visibility
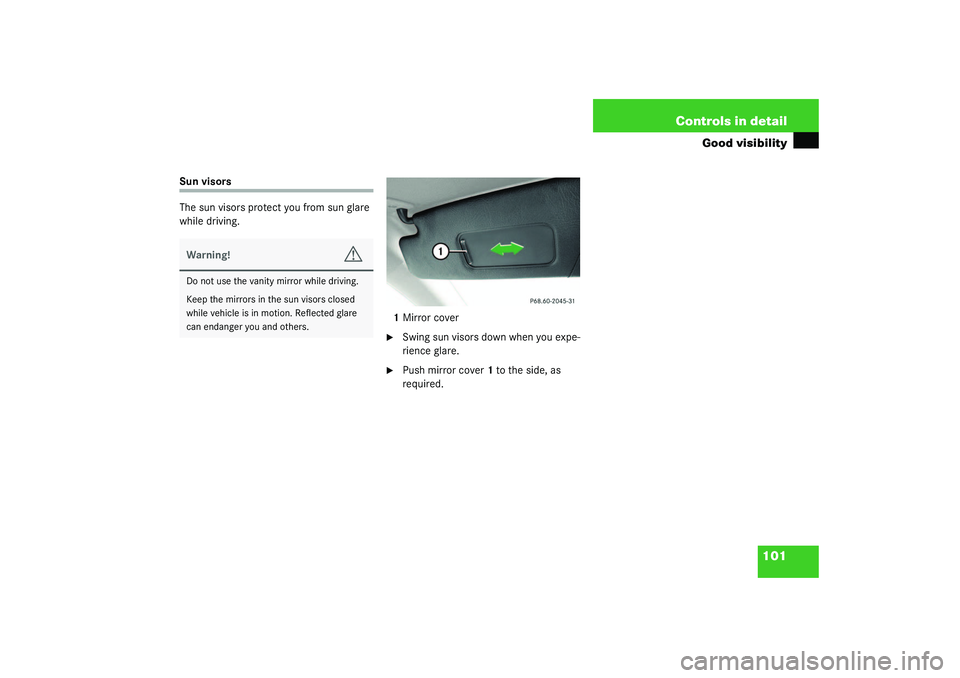
Sun visors
The sun visors protect you from sun glare
while driving.
1Mirror cover
�
Swing sun visors down when you expe-
rience glare.
�
Push mirror cover1 to the side, as
required.
Warning!
G
Do not use the vanity mirror while driving.
Keep the mirrors in the sun visors closed
while vehicle is in motion. Reflected glare
can endanger you and others.
Page 146 of 304
 or airbags deploy,
�
i")
146 Controls in detailUseful featuresEmergency calls
An emergency call is initiated automatical-
ly:�
following an accident in which the
emergency tensioning detractors
(ETDs) or airbags deploy,
�
if the anti-theft alarm or the tow-away
alarm stays on for more than
20 seconds. See anti-theft alarm sys-
tem (
�page 71) and tow-away alarm
(
�page 72).An emergency call can also be initiated
manually by opening the cover next to the
inside rear view mirror labeled SOS, then
briefly pressing the button located under
the cover. See below for instructions on
initiating an emergency call manually.Once the emergency call is in progress, the
indicator lamp in the SOS button will begin
to flash. All information relevant to the
emergency, such as the location of the ve-
hicle (determined by the GPS satellite loca-
tion system), vehicle model, identification
number and color are generated.
A voice connection between the Response
Center and the occupants of the vehicle
will be established automatically soon af-
ter the emergency call has been initiated.
When a voice connection is established the
audio system mutes. The Response Center
will attempt to determine more precisely
the nature of the accident provided they
can speak to an occupant of the vehicle.
Warning!
G
The Tele Aid control unit is located under the
driver’s seat. If there is accumulation of wa-
ter or other liquid in this area, the Tele Aid
control unit could suffer an electrical short
circuit making the system inoperative. In
this case the indicator lamp in the SOS but-
ton does not illuminate during or remains il-
luminated after the system self-check. Have
the system checked at the nearest Mer-
cedes-Benz Center as soon as possible.
Page 153 of 304

153 Controls in detail
Useful features
Programming or reprogramming the
integrated remote control�
Turn key in the steering lock to
position1 or2.
�
Hold the end of the hand-held transmit-
ter of the device you wish to train
approximately 2 to 5 inches (5 cm to
12 cm) away from the surface of the in-
tegrated remote control located on the
inside rear view mirror, keeping the in-
dicator lamp in view.
�
Using both hands, simultaneously push
the hand-held transmitter button and
the desired integrated remote control
button. Do not release the buttons until
completing next step.
�
The indicator lamp on the integrated
remote control will flash, first slowly
and then rapidly. The rapid flashing
lamp indicates successful program-
ming of the new frequency signal.
�
When the indicator lamp flashes rapid-
ly, release both buttons.
�
To program the remaining two buttons,
repeat the steps above.
iFor operation in the USA only: This de-
vice complies with Part 15 of the
FCC Rules. Operation is subject to the
following two conditions:
(1) This device may not cause harmful
interference, and
(2) this device must accept any inter-
ference received, including interfer-
ence that may cause undesired
operation.
Any unauthorized modification to this
device could void the user’s authority
to operate the equipment.
iIf, after several attempts, you do not
successfully program the integrated re-
mote control device to learn the signal
of the hand-held transmitter, the ga-
rage door opener could be equipped
with the “rolling code feature”.
Page 189 of 304

189 Operation
Vehicle care
Engine cleaning
Prior to cleaning the engine compartment,
make sure to protect electrical compo-
nents and connectors from contact with
water and cleaning agents.
Corrosion protection, such as MB Anticor-
rosion Wax should be applied to the engine
compartment after every engine cleaning.
Before applying, all control linkage bush-
ings and joints should be lubricated. The
poly-V-belt and all pulleys should be pro-
tected from any wax. Vehicle washing
Do not use hot water or wash your vehicle
in direct sunlight. Use only a mild car wash
detergent, such as Mercedes-Benz ap-
proved Car Shampoo.
Thoroughly spray the vehicle with a dif-
fused jet of water. Direct only a very weak
spray towards the ventilation intake. Use
plenty of water and rinse the sponge and
chamois frequently.
Rinse with clear water and thoroughly dry
with a chamois. Do not allow cleaning
agents to dry on the finish.
Due to the width of the vehicle, fold in out-
side mirrors prior to running the vehicle
through an automatic car wash to prevent
damage to the mirrors.
In the winter, thoroughly remove all traces
of road salt as soon as possible.
When washing the underbody, do not for-
get to clean the inner sides of the wheels.Ornamental moldings
For regular cleaning and care of very dirty
chrome-plated parts, use a chrome clean-
er.
Headlamps, tail lamps, turn signal
lenses
Use a mild car wash detergent, such as
Mercedes-Benz approved Car Shampoo,
with plenty of water.
To prevent scratches, never apply strong
force and use only a soft, non-scratchy
cloth when cleaning the lenses. Do not at-
tempt to wipe dirty lenses with a dry cloth
or sponge.
Page 222 of 304

222 Practical hintsReplacing bulbsRear lamps Notes on bulb replacement
�
Use only 12-volt bulbs of the same type
and with the specified watt rating.
�
Switch lights off before changing a bulb
to prevent short circuits.
�
Always use a clean lint-free cloth when
handling bulbs.
�
Your hands should be dry and free of oil
and grease.
�
If the newly installed bulb does not light
up, visit an authorized Mercedes-Benz
Center.
�
Have the LEDs and bulbs for the follow-
ing lamps replaced by an authorized
Mercedes-Benz Center.�
Additional turn signals in the
exterior rear view mirrors
�
High mounted brake lamp
�
Xenon* lamps
�
Front fog lamps
Lamp
Type
7
Brake lamp
1154 / 32 cp
8
High mounted brake
lamp
LED
9
Backup lamp
1154 / 32 cp
10
Turn signal lamp
1156 NA
11
Tail, parking, stand-
ing and side marker
lamp
67 / 4 cp
12
License plate lamps
C5W
13
Rear fog lamp,
driver’s side
1155 / 32 cp
Warning!
G
Keep bulbs out of reach of children.
Bulbs and bulb sockets can be very hot.
Allow the lamp to cool down before
changing a bulb.
Halogen lamps contain pressurized gas.
A bulb can explode if you:�
touch or move it when hot
�
drop the bulb
�
scratch the bulb
Wear eye and hand protection.
Because of high voltage in xenon lamps, it is
dangerous to replace the bulb or repair the
lamp and its components. We recommend
that you have such work done by a qualified
technician.
Page 285 of 304

285 Index
A
ABS 22, 66, 279
ABS control 67
Malfunction indicator lamp 196
Warning lamp 196
Accelerator position, automatic
transmission* 98
Accident
In case of 46
Activating
Air conditioning 107
Air recirculation mode 105
Anti-theft alarm system 71
Climate control 103
ESP 70
Exterior headlamps 43
Hazard warning flasher 85
Headlamps 43
High beams 85
Ignition 29
Immobilizer 71
Rear window defroster 105
Residual heat 107
Seat heater* 81
Tow-away alarm 72
Windshield wipers 44Activating automatic central locking 79
Adding
Coolant 176, 177
Engine oil 175
Additional turn signals 221
Adjusting 30
Air distribution 104
Air volume 104
Backrest tilt 32, 33
Exterior rear view mirror 35
Head restraint height 32
Inside rear view mirror 35
Instrument cluster illumination 88
Manual seat 31
Mirrors 35
Seat cushion tilt 33
Seat fore and aft adjustment 31, 33
Seat height 31, 33
Seats 30
Telescoping steering column* 34
Adjusting headlamp aim
Horizontal headlamp aim 227
Vertical headlamp aim 226
Air conditioning 106
Activating 107
Deactivating 106Air conditioning refrigerant 271
Air distribution
Adjusting 104
Air pressure see Tire inflation
pressure 181
Air recirculation mode 105
Activating 105
Deactivating 105
Air volume
Adjusting 104
AIRBAG OFF indicator lamp 205
Airbags 53
BabySmart airbag deactivation
system 279
BabySmart
TM deactivation
system 62
Children 54
Front 56
Passenger 56
Safety guidelines 55
Side impact 57
Alarm
Audible 65, 71
Canceling 71
Visual 71
Page 286 of 304
 279
Anticorrosion/antifreeze 274
Antiglare
Automatic 99
Antilock brake system (ABS) 279
Anti-theft alarm system")
286 IndexAlarm system
Anti-theft 71
Alignment bolt 240
Alignment bolt (vehicle tool kit) 279
Anticorrosion/antifreeze 274
Antiglare
Automatic 99
Antilock brake system (ABS) 279
Anti-theft alarm system
Arming 71
Canceling alarm 71
Disarming 71
Anti-theft systems 71
Anti-theft alarm system 71
Immobilizer 71
Tow-away alarm 72
Aquaplaning see Hydroplaning 163
Armrest
Storage compartment 141
Ashtray 142
ATF (automatic transmission fluid)* 176
Audio system
Audio and telephone, operation 111
Button and soft key operation 115
Cassette mode 118
CD mode 120Operating and display elements 112
Operating safety 111
Operation 115
Radio mode 116
Switching off 115
Switching on 115
Telephone operation 123
Audio systems 111
Automatic antiglare for rear view
mirror 99
Automatic central locking
Activating 79
Deactivating 79
Factory setting 78
Individual setting 79
Automatic lighting control
Activating 86
Deactivating 86
Automatic locking when driving 78
Automatic transmission* 93
Accelerator position 98
Emergency operation (Limp Home
Mode) 98
Fluid level 176
Gear ranges 95
Gear selector lever position 96Gear shifting malfunctions 98
Kickdown 98
Manual shifting 94
One-touch gearshifting 94
Program mode selector switch 97
Selector lever position 93
Starting with 41
Transmission fluid 176
Winter program mode 97
B
BabySmart
TM
Airbag deactivation system 62
Compatible child seats 62, 279
Self-test 63
BabySmart
TM airbag deactivation
system 279
Backrest tilt 31
Backup lamps 222, 225
Bulbs 222
BAS 68, 279
BAS/ESP
Malfunction indicator lamp 194
Batteries, Remote control
Check lamp 75
Batteries, remote control
Changing 212