Page 28 of 304
28 Getting startedUnlockingThe “Getting started” section provides an
overview of the vehicle’s most basic func-
tions. First-time Mercedes-Benz owners
should pay special attention to the infor-
mation given here.
If you are already familiar with the basic
functions described here, the “Controls in
detail” section will help you with further in-
formation. The corresponding page refer-
ences are at the end of each segment.
UnlockingUnlocking with the remote controlRemote control with folding key1Release button for key
2‹
Lock button
3
Œ
Unlock button
4
Â
Panic button (
�page 65)
�
Press unlock button
Œ
on the re-
mote control.
All turn signal lamps blink once. The
locking knobs in the doors move up.
�
Press release button1 on the remote
control.
The key folds out.
�
Get in the vehicle and insert the key in
the steering lock (
�page 29).
Page 29 of 304

29 Getting started
Unlocking
Steering lock positionsSteering lock0For removing key
The steering is locked when the key is
removed from the steering lock. If nec-
essary, move steering wheel slightly to
allow the locking mechanism to en-
gage.
1Power supply to some electrical con-
sumers, such as seat adjustment
2Ignition (power supply for all electrical
consumers) and driving position
3Starting position
Warning!
G
When leaving the vehicle, always remove the
key from the steering lock and lock the vehi-
cle. Do not leave children unattended in the
vehicle, or with access to an unlocked vehi-
cle. Unsupervised use of vehicle equipment
may cause an accident and/or serious per-
sonal injury.iThe key can only be withdrawn in
position0.
If necessary, move steering wheel
slightly to allow the key to be turned
clockwise to position1.
Vehicles with automatic transmission:
The key can only be removed from the
steering lock with the gear selector
lever in positionP.
!To prevent accelerated battery dis-
charge and a possible dead battery,
always remove the key from the
steering lock.
Page 30 of 304

30 Getting startedAdjusting
AdjustingSeats
The seats can be adjusted either manually
or electrically, depending on the vehicle’s
equipment.Warning!
G
All seat, head restraint, steering wheel, and
rear view mirror adjustments, as well as fas-
tening of seat belts, must be done before
the vehicle is put into motion.
Warning!
G
Do not adjust the driver’s seat while driving.
Adjusting the seat while driving could cause
the driver to lose control of the vehicle.
Never ride in a moving vehicle with the seat
back reclined. Sitting in an excessively re-
clined position can be dangerous. You could
slide under the seat belt in a collision. If you
slide under it, the belt would apply force at
the abdomen or neck. That could cause se-
rious or fatal injuries. The seat back and seat
belts provide the best restraint when the
wearer is in an upright position and belts are
properly positioned on the body. Your seat
must be adjusted so that you can correctly
fasten your seat belt (
�page 37).
Never place hands under the seat or near
any moving parts while a seat is being ad-
justed.
Warning!
G
When leaving the vehicle, always remove the
key from the steering lock and lock your ve-
hicle.
The power seats* can also be operated with
the driver’s or passenger door open. Do not
leave children unattended in the vehicle, or
with access to an unlocked vehicle. Unsu-
pervised use of vehicle equipment may
cause an accident and/or serious personal
injury.
Page 32 of 304

32 Getting startedAdjusting�
Let go of handle4. The seat should
make an audible click.
Backrest tilt
�
Turn handwheel2 forward or backward
until your arms are slightly angled
when holding the steering wheel.Head restraint height
�
Adjust the height of the head restraints
by pulling them upwards manually.
�
For a lower position, press release
button1 and push down on the head
restraints manually.
More information can be found in the
“Controls in detail” section (
�page 82).Power seat*
�
Switch on the ignition by turning the
key in the steering lock to position2.
or
�
Open the driver’s or passenger door.
The seat adjustment switches are located
on the outer sides of the seats.
1Seat height
2Seat fore and aft adjustment
3Seat cushion tilt
4Backrest tilt
iWhen moving the seat, be sure that
there are no items in the footwell or
behind the seats. Otherwise you could
damage the seats.
Warning!
G
For your protection, drive only with properly
positioned head restraints.
Adjust head restraint to support the back of
the head approximately at ear level.
Do not drive the vehicle without the seat
head restraints. Head restraints are intend-
ed to help reduce injuries during an acci-
dent.
Page 34 of 304

34 Getting startedAdjustingTelescoping steering column* Steering wheel adjustment
1Adjustment handle
�
To unlock the steering column, pull out
handle1 as far as it will go.
�
Move the steering wheel to the desired
position.
�
Push handle1 back to its original posi-
tion to relock the steering wheel. You
should hear an audible click.
The steering wheel is again fixed into
place.
Warning!
G
Do not adjust the steering wheel while driv-
ing. Adjusting the steering wheel while driv-
ing, or driving without the adjustment
locked could cause the driver to lose control
of the vehicle.
When leaving the vehicle, always remove the
key from the steering lock and lock your ve-
hicle.
Do not leave children unattended in the ve-
hicle, or with access to an unlocked vehicle.
Unsupervised use of vehicle equipment may
cause an accident and/or serious personal
injury.
!Do not drive the vehicle until you have
properly locked the steering column.
If the indicator lamp
_
comes on
while the engine is running, the steer-
ing column is not locked properly
(
�page 200).
Page 40 of 304

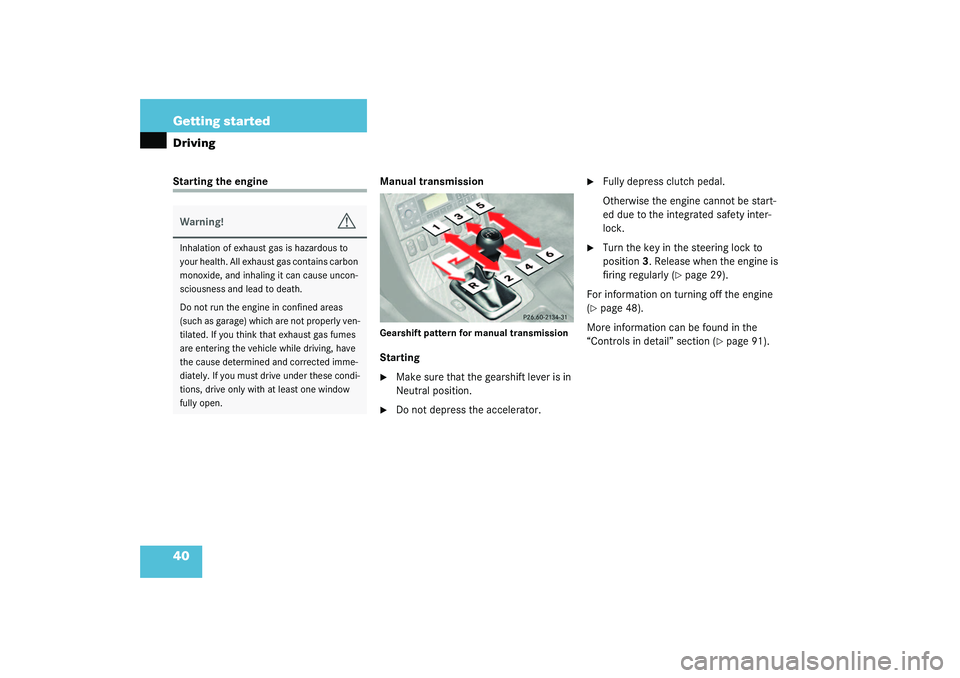
40 Getting startedDrivingStarting the engine Manual transmission
Gearshift pattern for manual transmissionStarting�
Make sure that the gearshift lever is in
Neutral position.
�
Do not depress the accelerator.
�
Fully depress clutch pedal.
Otherwise the engine cannot be start-
ed due to the integrated safety inter-
lock.
�
Turn the key in the steering lock to
position3. Release when the engine is
firing regularly (
�page 29).
For information on turning off the engine
(
�page 48).
More information can be found in the
“Controls in detail” section (
�page 91).
Warning!
G
Inhalation of exhaust gas is hazardous to
your health. All exhaust gas contains carbon
monoxide, and inhaling it can cause uncon-
sciousness and lead to death.
Do not run the engine in confined areas
(such as garage) which are not properly ven-
tilated. If you think that exhaust gas fumes
are entering the vehicle while driving, have
the cause determined and corrected imme-
diately. If you must drive under these condi-
tions, drive only with at least one window
fully open.
Page 41 of 304

41 Getting started
Driving
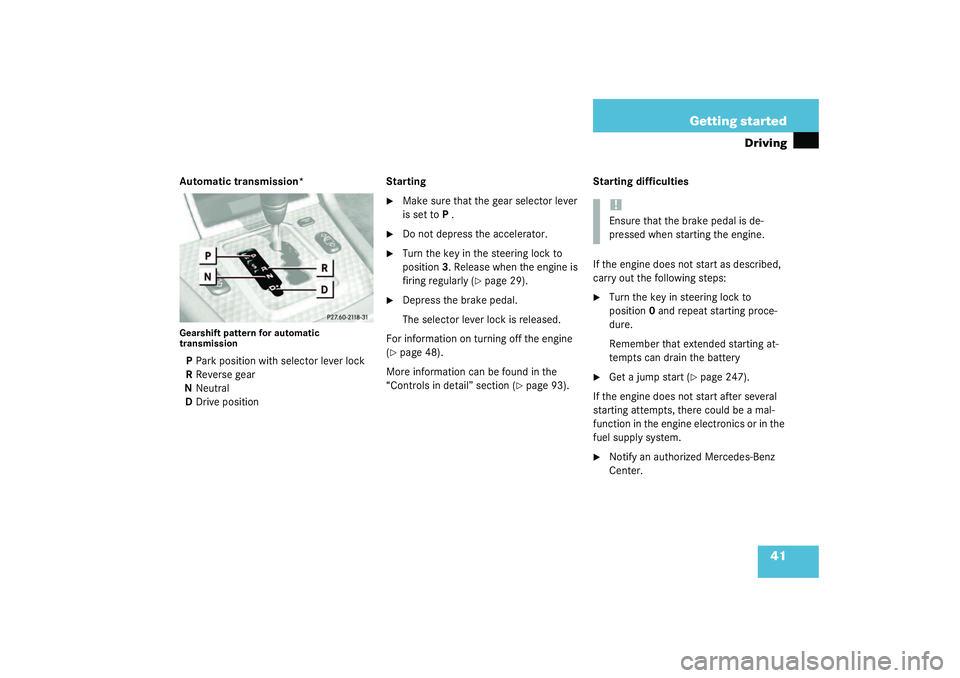
Automatic transmission*Gearshift pattern for automatic
transmissionPPark position with selector lever lock
RReverse gear
NNeutral
DDrive positionStarting
�
Make sure that the gear selector lever
is set toP .
�
Do not depress the accelerator.
�
Turn the key in the steering lock to
position3. Release when the engine is
firing regularly (
�page 29).
�
Depress the brake pedal.
The selector lever lock is released.
For information on turning off the engine
(
�page 48).
More information can be found in the
“Controls in detail” section (
�page 93).Starting difficulties
If the engine does not start as described,
carry out the following steps:
�
Turn the key in steering lock to
position0 and repeat starting proce-
dure.
Remember that extended starting at-
tempts can drain the battery
�
Get a jump start (
�page 247).
If the engine does not start after several
starting attempts, there could be a mal-
function in the engine electronics or in the
fuel supply system.
�
Notify an authorized Mercedes-Benz
Center.!Ensure that the brake pedal is de-
pressed when starting the engine.
Page 42 of 304

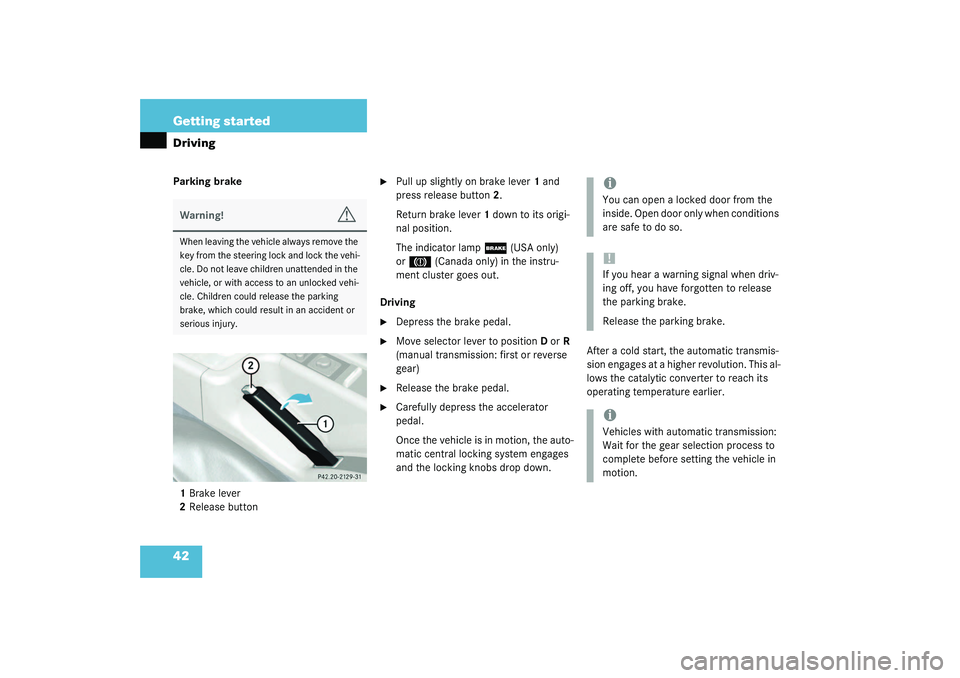
42 Getting startedDrivingParking brake
1Brake lever
2Release button
�
Pull up slightly on brake lever1 and
press release button2.
Return brake lever1 down to its origi-
nal position.
The indicator lamp
;
(USA only)
or
3
(Canada only) in the instru-
ment cluster goes out.
Driving
�
Depress the brake pedal.
�
Move selector lever to positionD orR
(manual transmission: first or reverse
gear)
�
Release the brake pedal.
�
Carefully depress the accelerator
pedal.
Once the vehicle is in motion, the auto-
matic central locking system engages
and the locking knobs drop down.After a cold start, the automatic transmis-
sion engages at a higher revolution. This al-
lows the catalytic converter to reach its
operating temperature earlier.
Warning!
G
When leaving the vehicle always remove the
key from the steering lock and lock the vehi-
cle. Do not leave children unattended in the
vehicle, or with access to an unlocked vehi-
cle. Children could release the parking
brake, which could result in an accident or
serious injury.
iYou can open a locked door from the
inside. Open door only when conditions
are safe to do so.!If you hear a warning signal when driv-
ing off, you have forgotten to release
the parking brake.
Release the parking brake.iVehicles with automatic transmission:
Wait for the gear selection process to
complete before setting the vehicle in
motion.