Page 83 of 376

83 Controls in detail
Locking and unlocking
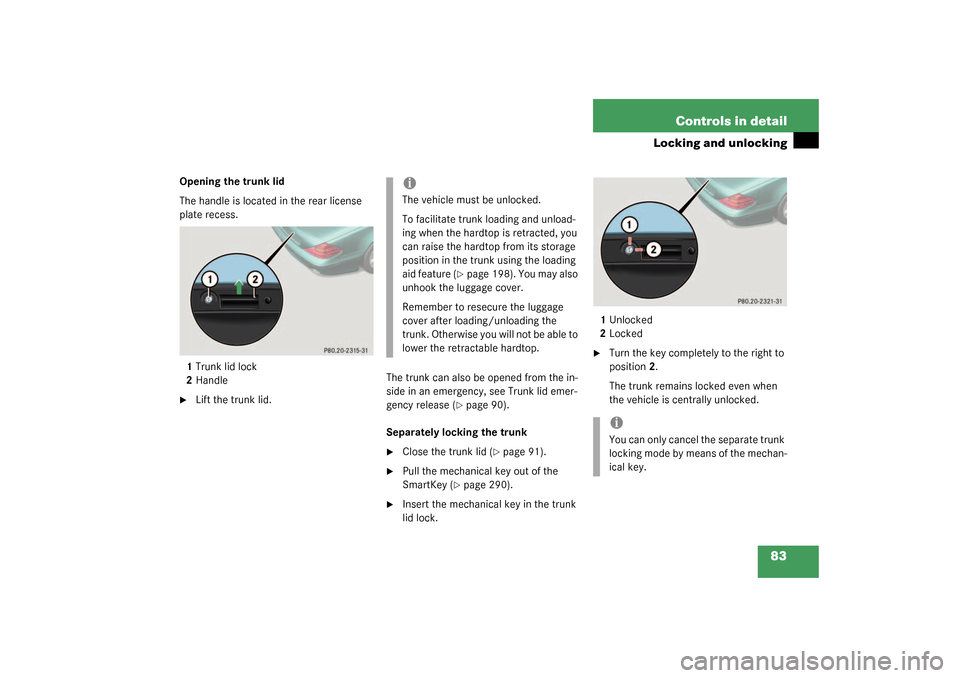
Opening the trunk lid
The handle is located in the rear license
plate recess.
1Trunk lid lock
2Handle �
Lift the trunk lid.The trunk can also be opened from the in-
side in an emergency, see Trunk lid emer-
gency release (
�page 90).
Separately locking the trunk
�
Close the trunk lid (
�page 91).
�
Pull the mechanical key out of the
SmartKey (
�page 290).
�
Insert the mechanical key in the trunk
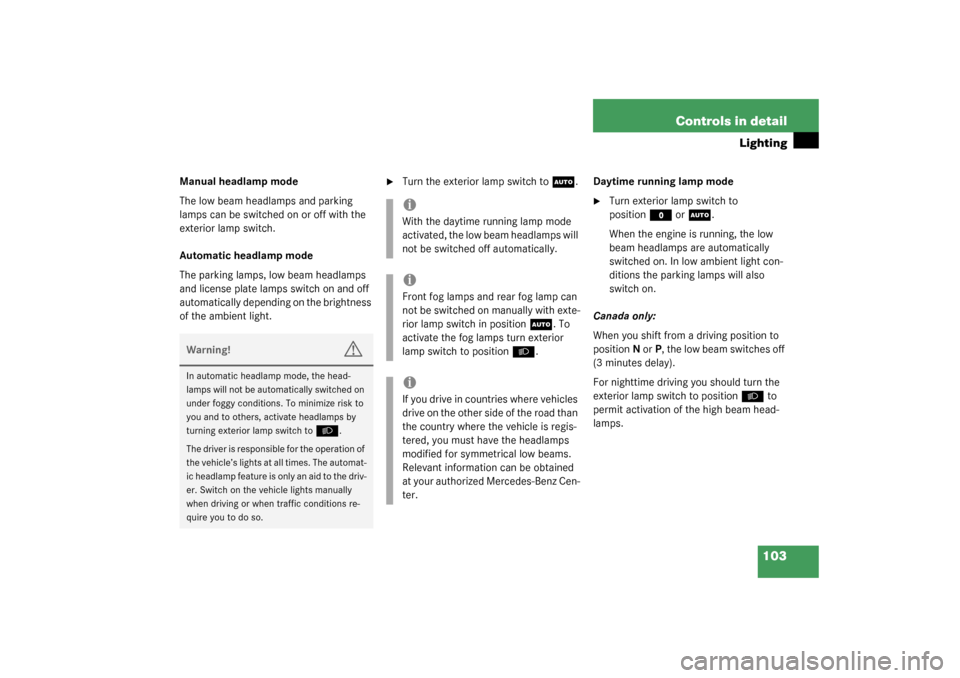
lid lock.1Unlocked
2Locked
�
Turn the key completely to the right to
position2.
The trunk remains locked even when
the vehicle is centrally unlocked.
iThe vehicle must be unlocked.
To facilitate trunk loading and unload-
ing when the hardtop is retracted, you
can raise the hardtop from its storage
position in the trunk using the loading
aid feature (
�page 198). You may also
unhook the luggage cover.
Remember to resecure the luggage
cover after loading/unloading the
trunk. Otherwise you will not be able to
lower the retractable hardtop.
iYou can only cancel the separate trunk
locking mode by means of the mechan-
ical key.
Page 88 of 376

88 Controls in detailLocking and unlockingUnlocking the trunk lid
The handle is located in the rear license
plate recess.�
Pull on the handle and lift up the trunk
lid.
The vehicle unlocks the trunk lid only.Locking the vehicle
1Trunk lock button
�
Press the lock button at door
(�page 49) or trunk.Closing the side windows
�
Press and hold lock button at door
(�page 49) until the side windows are
closed.
iIf the vehicle was previously centrally
locked, the trunk lid will lock automati-
cally when closed. The turn signals will
flash three times to confirm locking.
To prevent a possible inadvertent lock-
out, the trunk lid will open automatical-
ly if a KEYLESS-GO card is recognized
inside the trunk.
Warning!
G
When closing the windows, be sure that
there is no danger of anyone being harmed
by the closing procedure.
If potential danger exists, proceed as fol-
lows:�
Release the lock button.
�
Pull on the door handle and hold firmly.
The side windows will open for as long
as the door handle is held but the door
is not opened.
Page 102 of 376
102 Controls in detailLighting
LightingFor notes on how to switch on the head-
lamps and use the turn signals, see the
“Getting started” section (
�page 43).
Exterior lamp switch
The exterior lamp switch is located on the
dashboard to the left of the steering wheel.M
Off
U
Automatic headlamp mode
C
Parking lamps, license plate lamps
and instrument panel lamps
B
Low beam or high beam headlamps
ˆ
Standing lamps, right
‚
Standing lamps, left
iIf you remove the key and open the
driver’s door while the parking lamps or
low beam headlamps are switched on,
then �
a warning sounds
�
$
appears in the speedometer
display field
�
the message
Turn lamps off
ap-
pears in the tachometer display
field
iWith the daytime running lamp mode
activated and the engine running, the
low beam headlamps cannot be
switched off manually.
To activate the daytime running lamp
mode, see “Setting daytime running
lamp mode (USA only)” (
�page 124).
Page 103 of 376

103 Controls in detail
Lighting
Manual headlamp mode
The low beam headlamps and parking
lamps can be switched on or off with the
exterior lamp switch.
Automatic headlamp mode
The parking lamps, low beam headlamps
and license plate lamps switch on and off
automatically depending on the brightness
of the ambient light.
�
Turn the exterior lamp switch to
U
.Daytime running lamp mode
�
Turn exterior lamp switch to
position
M
or
U
.
When the engine is running, the low
beam headlamps are automatically
switched on. In low ambient light con-
ditions the parking lamps will also
switch on.
Canada only:
When you shift from a driving position to
positionN orP, the low beam switches off
(3 minutes delay).
For nighttime driving you should turn the
exterior lamp switch to position
B
to
permit activation of the high beam head-
lamps.
Warning!
G
In automatic headlamp mode, the head-
lamps will not be automatically switched on
under foggy conditions. To minimize risk to
you and to others, activate headlamps by
turning exterior lamp switch to
B
.
The driver is responsible for the operation of
the vehicle’s lights at all times. The automat-
ic headlamp feature is only an aid to the driv-
er. Switch on the vehicle lights manually
when driving or when traffic conditions re-
quire you to do so.
iWith the daytime running lamp mode
activated, the low beam headlamps will
not be switched off automatically.iFront fog lamps and rear fog lamp can
not be switched on manually with exte-
rior lamp switch in position
U
. To
activate the fog lamps turn exterior
lamp switch to position
B
.
iIf you drive in countries where vehicles
drive on the other side of the road than
the country where the vehicle is regis-
tered, you must have the headlamps
modified for symmetrical low beams.
Relevant information can be obtained
at your authorized Mercedes-Benz Cen-
ter.
Page 124 of 376

124 Controls in detailControl systemLighting submenu
Access the
Lighting
submenu via the
Set-
tings
menu. Use the
Lighting
submenu to
change the lamp and lighting settings on
your vehicle. The following functions are
available:Setting daytime running lamp mode
(USA only)
�
Move the selection marker with button æ
or
ç
to the
Lighting
sub-
menu.
�
Press button
j
or
k
repeatedly
until you see this message in the left
display:
Light circuit Headlamp
mode
.
The selection marker is on the current
setting.
�
Press
æ
or
ç
t o s e l e c t m a n u a l o r
daytime running lamp (constant) mode.
This function is not available in coun-
tries where daytime running lamps are
mandatory.With daytime running lamp mode se-
lected and the exterior lamp switch at
position0, the following lamps will
come on automatically when the en-
gine is turned on:
�
Parking lamps and low beam head-
lamps
�
License plate lamps
Function
Page
Set daytime running lamp mode
(USA only)
124
Set locator lighting
125
Exterior lamps delayed
switch-off
125
Interior lighting delayed
switch-off
127
iIf you turn the exterior lamp switch to
another position, the corresponding
lamp(s) will switch on.
For safety reasons, resetting the Lighting
submenu to factory settings
(
�page 111) will not reset the daytime
running lamp mode.
In the right display you will then see the
message:
Cannot be fully reset to
factory settings while driv.!
.
Page 125 of 376

125 Controls in detail
Control system
Setting locator lighting
During darkness, the following lamps will
come on when the exterior lamp switch is
in position
U
, the locator lighting fea-
ture is activated, and the vehicle is un-
locked by remote control:
�
the parking lamps
�
the tail lamps
�
the license plate lamps
�
the front fog lamps
To activate locator lighting:
�
Make sure that the locator lighting fea-
ture is set to
ON (see below).
�
Turn the exterior lamp switch to posi-
tion
U
.
The locator lighting switches off when the
driver’s door is opened. It switches off au-
tomatically after a period of approximately
40 seconds.
�
Move the selection marker with button æ
or
ç
to the
Lighting
sub-
menu
�
Press button
j
or
k
repeatedly
until you see this message in the left
display:
Locator lighting
.
The selection marker is on the current
setting.
�
Press
æ
or
ç
to select the de-
sired setting.
The locator lighting will be switched on
or off.Setting night security illumination
(Exterior lamps delayed switch-off)
Use the
Headlamps delayed switch-off
function to set whether and for how long
you would like the exterior lamps to illumi-
nate during darkness after all doors are
closed. When the delayed switch-off fea-
ture is activated and the exterior lamp
switch is in position
U
, the following
lamps will remain lit after you remove the
key from the starter switch:
�
the parking lamps
�
the tail lamps
�
the license plate lamps
�
the front fog lamps
To activate night security illumination:
�
Select delayed switch-off period (see
below).
�
Turn the exterior lamp switch to posi-
tion
U
.
Page 296 of 376
296 Practical hintsReplacing bulbsFront lamps Rear lamps
Lamp
Type
1
Additional turn
signal
LED
2
Turn signal lamp
1156 A
3
Low beam
1
1Vehicles with Bi-Xenon* headlamps: Low beam
and high beam use the same D2S-35W lamp. Do
not replace the Xenon and Bi-Xenon* bulbs your-
self. See your authorized Mercedes-Benz Center.
Xenon D2S-35 W
4
High beam
H7 (55 W)
Parking and
standing lamps
W 5 W
5
Fog lamp
HB4/9006 (55 W)
6
Side marker
lamp
W 5 W
Lamp
Type
7
Rear fog lamp,
driver’s side;
replacement
P 21 W
1156/32 cp
8
High mounted
brake lamp
LED
9
Backup lamp;
replacement
P 21 W
1156/32 cp
10
Tail, parking and
standing lamp,
side marker
LED
11
Tail, parking and
standing lamp,
brake lamp
LED
12
License plate
lamps
C 5 W
13
Turn signal
lamp;
replacement
P 21 W
1156/32 cp
Page 300 of 376
300 Practical hintsReplacing bulbs�
Gently push bulb into socket, turn
counterclockwise and remove.
�
Insert new bulb and reinstall bulb sock-
et.
The bulb socket should audibly click
into place.
�
Reinstall trim.License plate lamp
1Screws
�
Switch off the lights.
�
Loosen both screws and remove lamp.
�
Replace the bulb and reinstall lamp.
�
Retighten the screws.
��