Page 111 of 376
111 Controls in detail
Control system
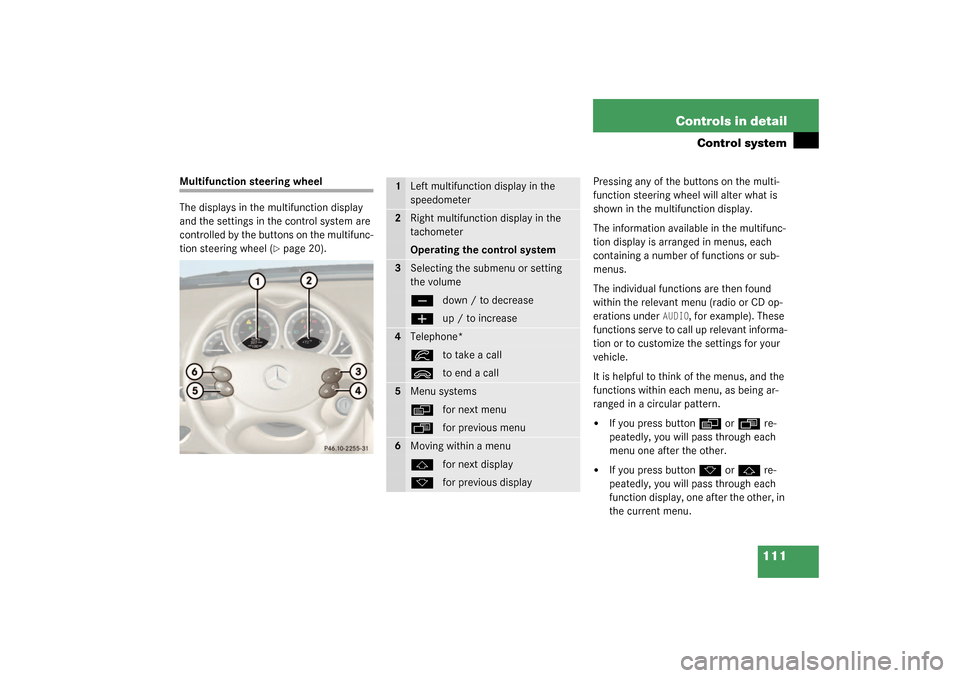
Multifunction steering wheel
The displays in the multifunction display
and the settings in the control system are
controlled by the buttons on the multifunc-
tion steering wheel (
�page 20).Pressing any of the buttons on the multi-
function steering wheel will alter what is
shown in the multifunction display.
The information available in the multifunc-
tion display is arranged in menus, each
containing a number of functions or sub-
menus.
The individual functions are then found
within the relevant menu (radio or CD op-
erations under
AUDIO
, for example). These
functions serve to call up relevant informa-
tion or to customize the settings for your
vehicle.
It is helpful to think of the menus, and the
functions within each menu, as being ar-
ranged in a circular pattern.
�
If you press button
è
or
ÿ
re-
peatedly, you will pass through each
menu one after the other.
�
If you press button
k
or
j
re-
peatedly, you will pass through each
function display, one after the other, in
the current menu.
1
Left multifunction display in the
speedometer
2
Right multifunction display in the
tachometerOperating the control system
3
Selecting the submenu or setting
the volumeç
down / to decrease
æ
up / to increase
4
Telephone*í
to take a call
ì
to end a call
5
Menu systemsè
for next menu
ÿ
for previous menu
6
Moving within a menuj
for next display
k
for previous display
Page 112 of 376
112 Controls in detailControl systemIn the
Settings
menu, instead of functions
you will find a number of submenus for
calling up and changing settings. For in-
structions on using these submenus, see
the “Settings menu” section (
�page 119).
The number of menus available in the sys-
tem depends on which optional equipment
is installed in your vehicle.The menus are described on the following
pages.
Page 115 of 376
115 Controls in detail
Control system
Standard display menu
You can select the functions in the stan-
dard display menu with button
k
or
j
.
The following functions are available:
Display digital speedometer
�
Press button
j
once.
The current vehicle speed is shown in
the right display field.
AUDIO menu
The functions in the
AUDIO
menu operate
the audio equipment which you currently
have turned on.
If no audio equipment is currently turned
on the message
AUDIO off
is shown in the
right display.
The following functions are available:
iThe headings used in the menus table
are designed to facilitate navigation
within the system and are not neces-
sarily identical to those shown in the
control system displays.
The first function displayed in each
menu will automatically show you
which part of the system you are in.
Function
Page
Call up digital speedometer
115
Call up FSS
242
Check tire pressure*
236
Check engine oil level
228
Function
Page
Select radio station
116
Operate CD player
116
Page 116 of 376

116 Controls in detailControl systemSelect radio station�
Turn on the radio. Refer to the separate
operating instructions.
�
Press button
è
or
ÿ
repeatedly
until you see the currently tuned sta-
tion in the right display.
1Station frequency
2Waveband setting
3Setting for station selection using
memory
�
Press button
k
or
j
repeatedly
until the desired station is found.
The type of search depends on the set-
ting for the station tuning
(
�page 128):
�
Memory: the next stored station is
selected (SP)
�
Station searchOperate the CD player
�
Turn on the radio and select the CD
player. Refer to the separate operating
instructions.
�
Press button
è
or
ÿ
repeatedly
until the settings for the CD currently
being played are shown in the right dis-
play field.
1Current track
2Current CD (for CD changer)
�
Press button
k
or
j
repeatedly
until the desired track is selected.
iYou can only store new stations using
the designated feature on the radio.
Refer to the separate operating instruc-
tions.
You can also operate the radio in the
usual manner.
Page 117 of 376
117 Controls in detail
Control system
NAVI menu
The
NAVI
menu contains the functions
needed to operate your navigation system.
�
Press button
è
or
ÿ
repeatedly
until you see the message NAVI
in the
left display.
The message shown is the right display
field depends on the status of the naviga-
tion system:
�
If the navigation system is off, the mes-
sage
NAVI OFF
is shown in the display.
�
If the navigation system is on, the mes-
sage
NAVI READY
is shown in the dis-
play.
Please refer to the COMAND manual for in-
structions on how to activate the route
guidance system.
Distronic* menu
Use the Distronic menu to display the cur-
rent settings for your Distronic system.
What information is shown in the left dis-
play field depends on whether the Distron-
ic system is active or inactive.
Please refer to the “Driving systems” sec-
tion of this manual (
�page 171) for in-
structions on how to activate Distronic.
�
Press button
è
or
ÿ
repeatedly
until you see one of the following two
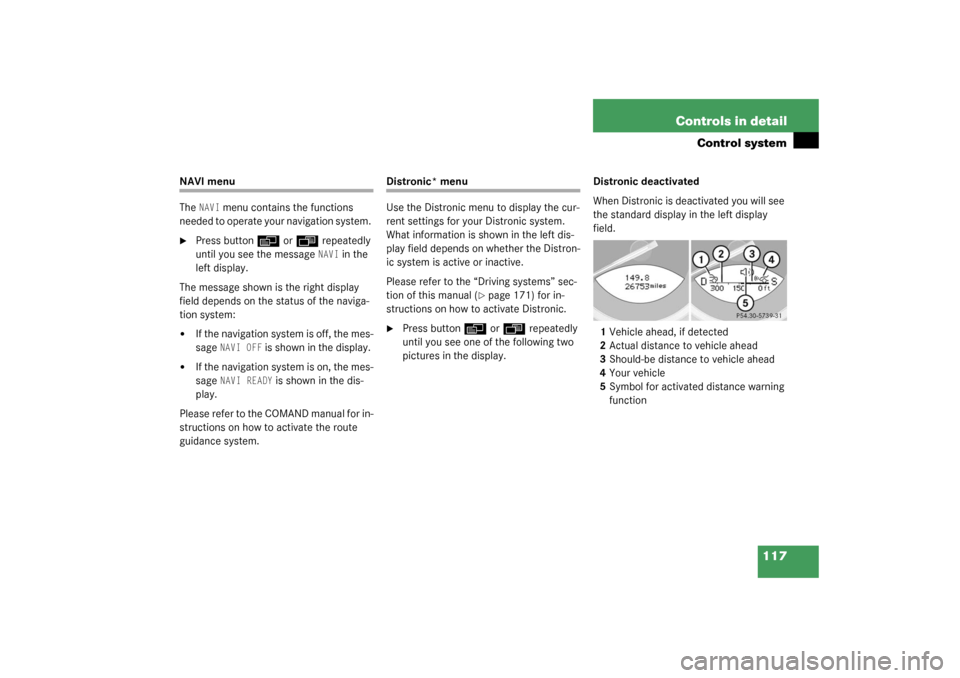
pictures in the display.Distronic deactivated
When Distronic is deactivated you will see
the standard display in the left display
field.
1Vehicle ahead, if detected
2Actual distance to vehicle ahead
3Should-be distance to vehicle ahead
4Your vehicle
5Symbol for activated distance warning
function
Page 118 of 376
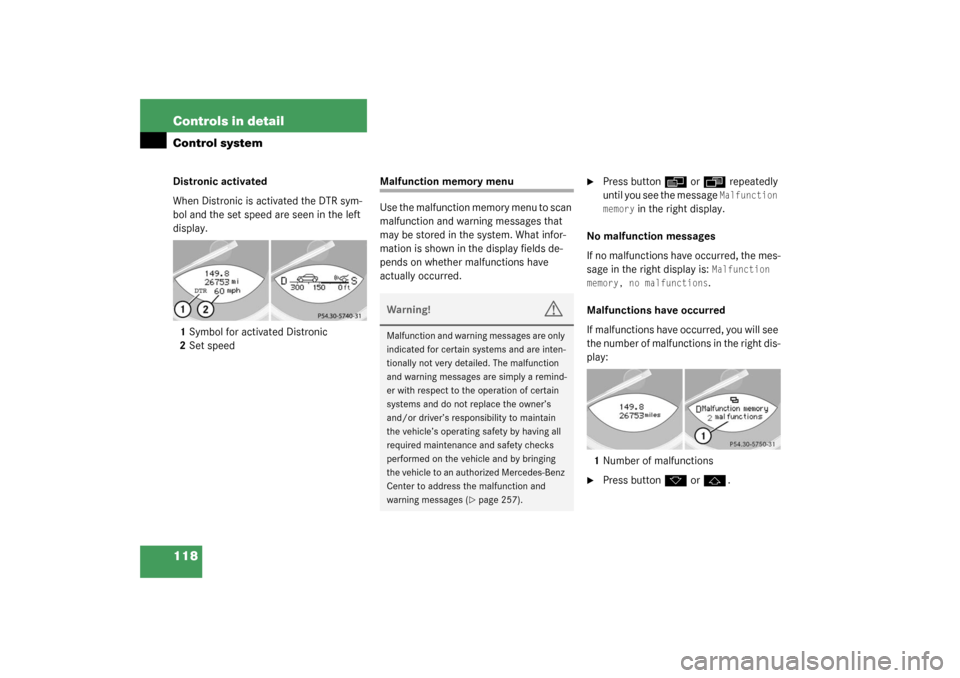
118 Controls in detailControl systemDistronic activated
When Distronic is activated the DTR sym-
bol and the set speed are seen in the left
display.
1Symbol for activated Distronic
2Set speed
Malfunction memory menu
Use the malfunction memory menu to scan
malfunction and warning messages that
may be stored in the system. What infor-
mation is shown in the display fields de-
pends on whether malfunctions have
actually occurred.
�
Press button
è
or
ÿ
repeatedly
until you see the message Malfunction
memory
in the right display.
No malfunction messages
If no malfunctions have occurred, the mes-
sage in the right display is:
Malfunction
memory, no malfunctions.
Malfunctions have occurred
If malfunctions have occurred, you will see
the number of malfunctions in the right dis-
play:
1Number of malfunctions
�
Press button
k
or
j
.
Warning!
G
Malfunction and warning messages are only
indicated for certain systems and are inten-
tionally not very detailed. The malfunction
and warning messages are simply a remind-
er with respect to the operation of certain
systems and do not replace the owner’s
and/or driver’s responsibility to maintain
the vehicle’s operating safety by having all
required maintenance and safety checks
performed on the vehicle and by bringing
the vehicle to an authorized Mercedes-Benz
Center to address the malfunction and
warning messages (
�page 257).
Page 119 of 376
119 Controls in detail
Control system
The stored messages will now be displayed
in order. See the “Practical hints” section
for malfunction and warning messages
(�page 257).
Should any malfunctions occur while driv-
ing, the number of malfunctions will reap-
pear in the right display field when the key
in the starter switch is turned to position0
or removed from the starter switch.
Settings menu
In the
Settings
menu there are two func-
tions:
�
The function
Reset to factory set-
tings using reset button
, with which
you can reset all the settings to those
set at the factory.
�
A collection of submenus with which
you can make individual settings for
your vehicle.
�
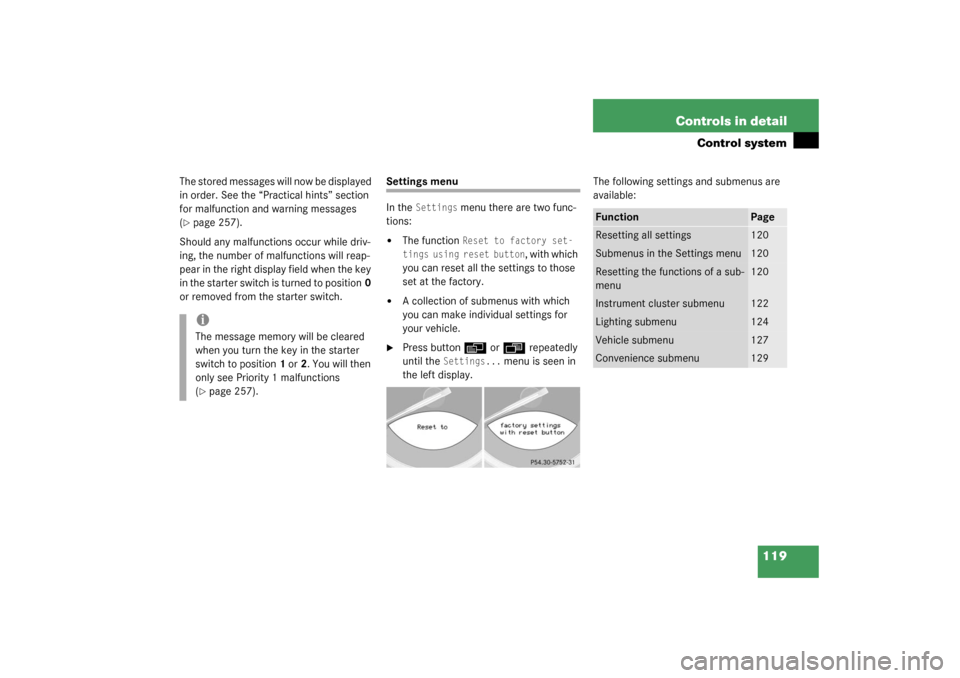
Press button
è
or
ÿ
repeatedly
until the
Settings...
menu is seen in
the left display.The following settings and submenus are
available:
iThe message memory will be cleared
when you turn the key in the starter
switch to position1 or2. You will then
only see Priority 1 malfunctions
(�page 257).
Function
Page
Resetting all settings
120
Submenus in the Settings menu
120
Resetting the functions of a sub-
menu
120
Instrument cluster submenu
122
Lighting submenu
124
Vehicle submenu
127
Convenience submenu
129
Page 122 of 376
122 Controls in detailControl systemInstrument cluster submenu
Access the
Inst. cluster
menu via the
Settings
menu. Use the
Inst. cluster
submenu to change the instrument cluster
display settings. The following functions
are available:Selecting time display mode
�
Move the selection marker with the æ
or
ç
button to the
Inst.
cluster
submenu.
�
Press button
j
or
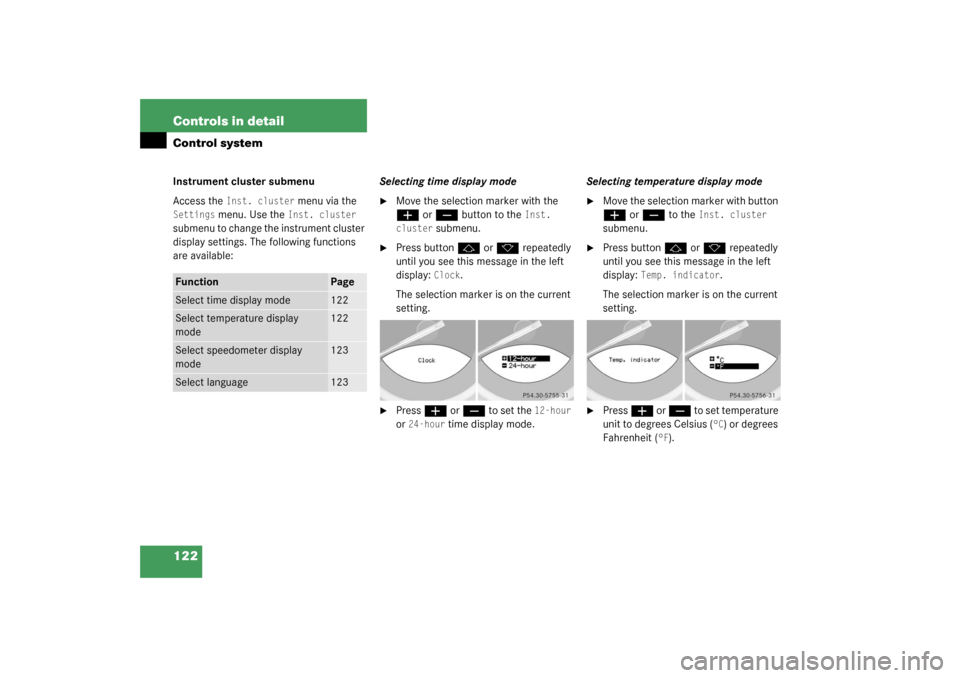
k
repeatedly
until you see this message in the left
display:
Clock
.
The selection marker is on the current
setting.
�
Press
æ
or
ç
to set the
12-hour
or
24-hour
time display mode.Selecting temperature display mode
�
Move the selection marker with button æ
or
ç
to the
Inst. cluster
submenu.
�
Press button
j
or
k
repeatedly
until you see this message in the left
display:
Temp. indicator
.
The selection marker is on the current
setting.
�
Press
æ
or
ç
to set temperature
unit to degrees Celsius (
°C) or degrees
Fahrenheit (
°F).
Function
Page
Select time display mode
122
Select temperature display
mode
122
Select speedometer display
mode
123
Select language
123