Page 282 of 376
282 Practical hintsWhat to do if …Left display
Right display
Possible cause
Possible solution
Tire pressure
control activated!
Pressure display after
driving several mins.
The tire pressure is being checked.
H
Reactivate
tire press. monit
.
The tire inflation pressure monitor* is de-
activated.
�
Activate the tire inflation pressure
monitor* (
�page 237).
Tire press. monit.
currently inactive
The tire inflation pressure monitor* is un-
able to monitor the tire pressure due to:�
the presence of several wheel sensors
in the vehicle
�
excessive wheel sensor temperatures
�
a nearby radio interference source
�
unrecognized wheel sensors mounted
�
Check the tire pressure at the next
service station.
Warning!
G
Do not drive with a flat tire. A flat tire affects
the ability to steer or brake the vehicle.
You may lose control of the vehicle. Contin-
ued driving with a flat tire will cause exces-
sive heat build-up and possibly a fire.
Page 283 of 376
283 Practical hints
What to do if …
Left display
Right display
Possible cause
Possible solution
H
Tire press. monit.
Visit workshop!
The tire inflation pressure monitor is
malfunctioning.
A wheel without proper sensor was
installed.
�
Have the tire inflation pressure monitor
checked by an authorized Mercedes-Benz
Center.
�
Change the wheel.
Tire pressure, RL
Caution
tire defect!
The left rear tire is rapidly deflating.
�
Carefully bring the vehicle to a halt, avoiding
abrupt steering and braking maneuvers.
�
Change the wheel (
�page 312).
Tire pressure, RL
Check tires!
The left rear tire pressure is low.
�
Carefully bring the vehicle to a halt.
�
Check the tire pressure.
�
Change the wheel (
�page 312).
Warning!
G
Do not drive with a flat tire. A flat tire affects
the ability to steer or brake the vehicle. You
may lose control of the vehicle.
Continued driving with a flat tire will cause
excessive heat build-up and possibly a fire.
Page 284 of 376
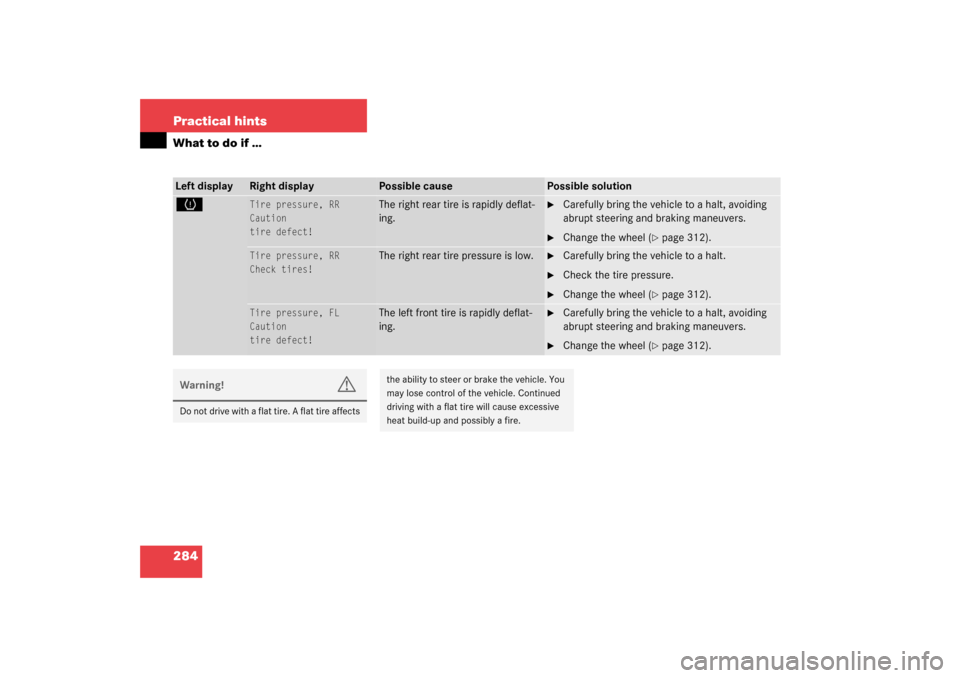
284 Practical hintsWhat to do if …Left display
Right display
Possible cause
Possible solution
H
Tire pressure, RR
Caution
tire defect!
The right rear tire is rapidly deflat-
ing.
�
Carefully bring the vehicle to a halt, avoiding
abrupt steering and braking maneuvers.
�
Change the wheel (
�page 312).
Tire pressure, RR
Check tires!
The right rear tire pressure is low.
�
Carefully bring the vehicle to a halt.
�
Check the tire pressure.
�
Change the wheel (
�page 312).
Tire pressure, FL
Caution
tire defect!
The left front tire is rapidly deflat-
ing.
�
Carefully bring the vehicle to a halt, avoiding
abrupt steering and braking maneuvers.
�
Change the wheel (
�page 312).
Warning!
G
Do not drive with a flat tire. A flat tire affects
the ability to steer or brake the vehicle. You
may lose control of the vehicle. Continued
driving with a flat tire will cause excessive
heat build-up and possibly a fire.
Page 285 of 376
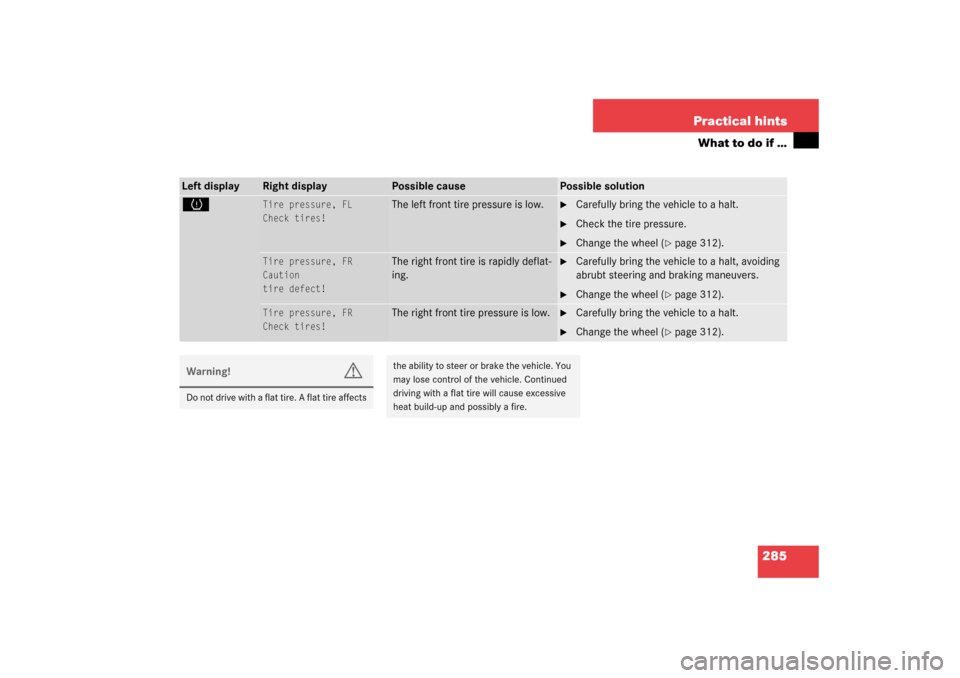
285 Practical hints
What to do if …
Left display
Right display
Possible cause
Possible solution
H
Tire pressure, FL
Check tires!
The left front tire pressure is low.
�
Carefully bring the vehicle to a halt.
�
Check the tire pressure.
�
Change the wheel (
�page 312).
Tire pressure, FR
Caution
tire defect!
The right front tire is rapidly deflat-
ing.
�
Carefully bring the vehicle to a halt, avoiding
abrubt steering and braking maneuvers.
�
Change the wheel (
�page 312).
Tire pressure, FR
Check tires!
The right front tire pressure is low.
�
Carefully bring the vehicle to a halt.
�
Change the wheel (
�page 312).
Warning!
G
Do not drive with a flat tire. A flat tire affects
the ability to steer or brake the vehicle. You
may lose control of the vehicle. Continued
driving with a flat tire will cause excessive
heat build-up and possibly a fire.
Page 286 of 376

286 Practical hintsWhat to do if …Left display
Right display
Possible cause
Possible solution
I
Remove key!
You have forgotten to remove the
key.
�
Remove the key from the starter switch.
Replace key
The batteries in the key are dead.
�
Change the batteries (
�page 293).
Automat. light on
Remove key!
�
Remove the key from the starter switch.
A
Reserve fuel
The fuel level has dropped below
the reserve mark.
�
Refuel at the next gas station (
�page 225).
The fuel cap is not closed tightly.
�
Check the fuel cap (
�page 225).
J
Door open!
You are attempting to drive with
one or more doors open.
�
Close the doors.
C
Raise
roll-over bar
The roll bar is malfunctioning.
�
Raise the roll bar using the roll bar switch
(�page 61).
�
Have the roll bar checked by an authorized
Mercedes-Benz Center.
G
Display defective
Visit workshop!
The displays for several systems
have malfunctioned. Some sys-
tems themselves may also have
malfunctioned.
�
Have the electronic systems checked by an au-
thorized Mercedes-Benz Center.
Page 287 of 376
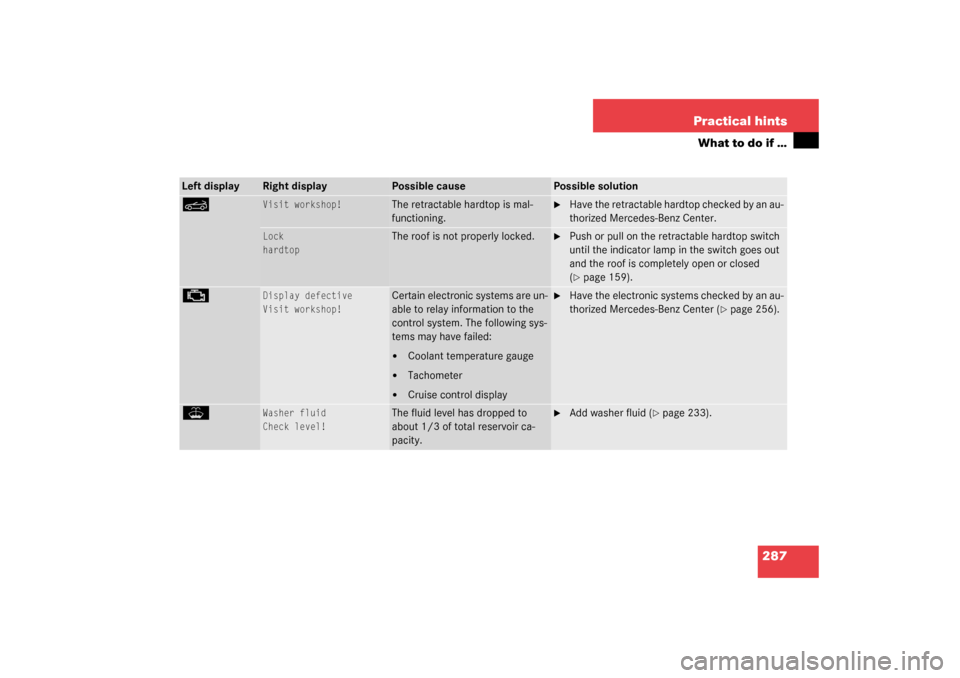
287 Practical hints
What to do if …
Left display
Right display
Possible cause
Possible solution
K
Visit workshop!
The retractable hardtop is mal-
functioning.
�
Have the retractable hardtop checked by an au-
thorized Mercedes-Benz Center.
Lock
hardtop
The roof is not properly locked.
�
Push or pull on the retractable hardtop switch
until the indicator lamp in the switch goes out
and the roof is completely open or closed
(�page 159).
±
Display defective
Visit workshop!
Certain electronic systems are un-
able to relay information to the
control system. The following sys-
tems may have failed:�
Coolant temperature gauge
�
Tachometer
�
Cruise control display
�
Have the electronic systems checked by an au-
thorized Mercedes-Benz Center (
�page 256).
W
Washer fluid
Check level!
The fluid level has dropped to
about 1/3 of total reservoir ca-
pacity.
�
Add washer fluid (
�page 233).
Page 305 of 376
.
This distributes the TIREFIT sealant ma-
terial inside the tire.
�
Take the electric air pump")
305 Practical hints
Flat tire
�
Drive the vehicle back and forth very
slowly approximately 30 ft (10 m).
This distributes the TIREFIT sealant ma-
terial inside the tire.
�
Take the electric air pump out of the
trunk.
1Flap
2Air hose with pressure gauge and vent
screw
3Union nut
4Electrical plug
�
Open flap 1 on air pump.
�
Pull out electrical plug 4 and air hose
with the pressure gauge 2.
�
Screw the air hose 2 onto the tire valve.
�
Insert electrical plug 4 into vehicle ci-
gar lighter socket.
�
Turn the key in the ignition to position
1 (
�page 29).
or
�
Press the KEYLESS-GO* start/stop
button on the selector lever once. Do
not depress brake pedal.
�
Press I on the electric air pump switch.
The electric air pump should now
switch on and inflate the tire.
After 5 minutes, the pressure gauge must
display at least 26 psi (1.8 bar). The air
hose and the union nut can become hot
during inflation. Please exercise appropri-
ate caution.
�
If this tire pressure is not attained, turn
off the electric air pump, detach the air
hose from the tire valve, and again
drive vehicle back and forth very slowly
approximately 30 ft (10 m).
This serves to better distribute the
TIREFIT sealant material inside the tire.
�
Inflate the tire again.
Warning!
G
Observe safety instructions on air pump la-
bel.
Page 310 of 376
. The air
hose can become hot during inflation.
Please exercise appropriate caution.�
If this t")
310 Practical hintsFlat tireAfter 5 minutes, the pressure gauge must
display at least 26 psi (1.8 bar). The air
hose can become hot during inflation.
Please exercise appropriate caution.�
If this tire pressure is not attained, turn
off the electric air pump, detach the fill-
er hose from the tire valve, and drive
vehicle back and forth very slowly ap-
proximately 30 ft (10 m).
This serves to better distribute the
TIREFIT sealant material inside the tire.
�
Unscrew the air pump’s air hose5 from
flange6 of the TIREFIT container.
�
Inflate the tire again.
�
After attaining a tire pressure of 26 psi
(1.8 bar), press0 on electric air pump
switch8.
The electric air pump should now be
switched off.
�
Turn the key in the ignition to
position0 (
�page 29).
or
�
Press the KEYLESS-GO* start/stop
button (
�page 30) on the selector le-
ver once. Do not depress brake pedal.
�
Detach the electric air pump.
The air hose may still be hot. Please ex-
ercise appropriate caution.
�
Store the electrical plug and the air
hose behind the flap and place the air
pump back in the trunk.
�
Close the trunk lid.
�
Drive away immediately.
The TIREFIT sealant will distribute itself
evenly inside the tire.
Warning!
G
If a tire pressure of 26 psi (1.8 bar) is not at-
tained, tire is too severely damaged for
TIREFIT to provide a reliable tire repair.
In this case, TIREFIT cannot properly seal
the tire.
Do not drive the vehicle.
Contact the nearest Mercedes-Benz Center
or call Roadside Assistance.
Warning!
G
Do not exceed vehicle speed of
50 mph (80 km / h). A TIREFIT repair is not
designed to operate at higher speeds.
The sticker must be attached on the instru-
ment cluster where it will be easily seen by
the driver.
Vehicle handling characteristics may
change. Adapt your driving accordingly.