Page 90 of 416
90 Controls in detailLocking and unlocking
Important notes on using KEYLESS-GO�
Always carry the KEYLESS-GO card
with you.
�
Never store the KEYLESS-GO card to-
gether with:�
Electronic items such as a cellular
phone or another KEYLESS-GO card
�
Metallic objects such as coins or
metal foil
Doing so could impair the function of
the KEYLESS-GO system.
�
Always take a SmartKey with you in
case of a malfunction in the
KEYLESS-GO system.
�
To lock or unlock the vehicle, the card
must be located outside the vehicle
within approximately 3 ft. (1 m) of a
door or the trunk lid.
�
In order to start the engine with the
KEYLESS-GO card:�
The KEYLESS-GO card must be lo-
cated in the vehicle.
�
All doors must be closed.
�
If you have started the engine with the
KEYLESS-GO start/stop button, you
can only turn it off again with this but-
ton, even if you have put the SmartKey
in the starter switch in the meantime.
�
This does not apply if, after starting, the
selector lever is still in positionP. The
SmartKey will then have priority over
the card and the vehicle’s electrical
system will operate according to the
position of the SmartKey in the starter
switch, even stopping the engine.
Warning!
G
When leaving the vehicle, always remove the
SmartKey from the starter switch, take the
KEYLESS-GO card (if so equipped) with you
and lock the vehicle. Do not leave children
unattended in the vehicle, or with access to
an unlocked vehicle. Unsupervised use of
vehicle equipment may cause an accident
and/or serious personal injury.!To prevent possible malfunction, avoid
exposing the KEYLESS-GO card to high
levels of electromagnetic radiation.
Page 104 of 416
104 Controls in detailSeats
SeatsInformation on seat adjustment can be
found in the “Getting started” section,
(�page 34).
Lumbar support
You can adjust the contour of the seat’s
lumbar support to best support your spine.
The thumbwheel is located on the lower
side of the seat.
1Thumbwheel�
Make sure the ignition is switched on.
All the lamps in the instrument cluster
should light up.
�
Set the lumbar support between 0
and 5.
Easy-entry/exit feature
With the easy-entry/exit feature activated,
the steering wheel tilts upwards and the
driver’s seat moves to the rear.
This allows easier entry into and exit from
the vehicle when the driver’s door is
opened. However, the engine must be
turned off.
When the SmartKey is inserted in the start-
er switch or you have pressed the
KEYLESS-GO* start/stop button once and
the driver’s door is closed, the steering
wheel and the driver’s seat return to their
last set positions.
Page 107 of 416
107 Controls in detailSeats
Power head restraints, rear*
You can fold the rear head restraints back-
ward or forward using head restraint fold-
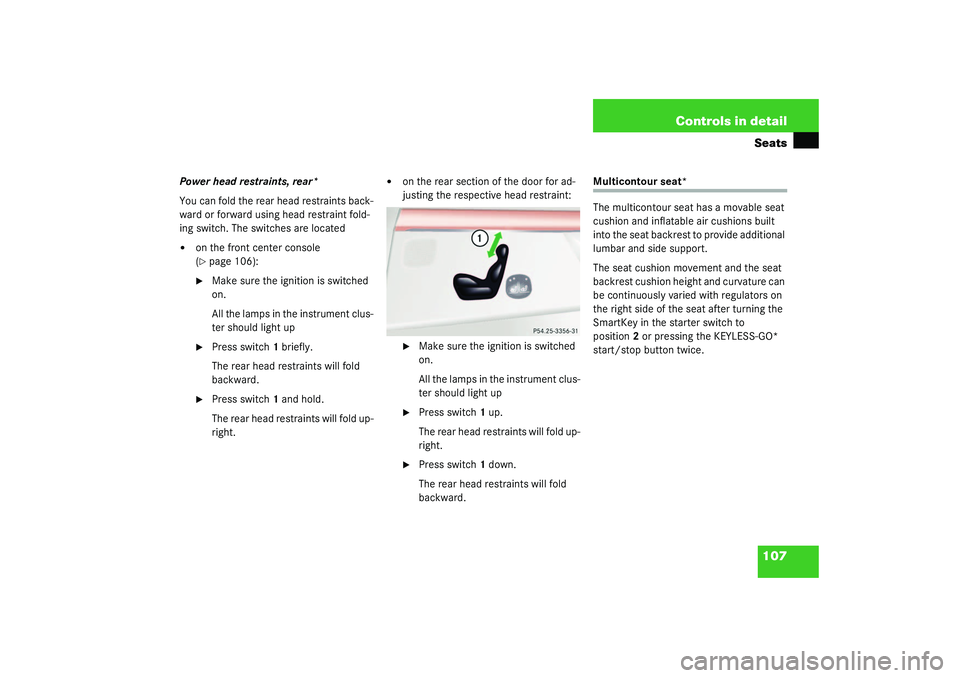
ing switch. The switches are located�
on the front center console
(�page 106):
�
Make sure the ignition is switched
on.
All the lamps in the instrument clus-
ter should light up
�
Press switch1 briefly.
The rear head restraints will fold
backward.
�
Press switch1 and hold.
The rear head restraints will fold up-
right.
�
on the rear section of the door for ad-
justing the respective head restraint:�
Make sure the ignition is switched
on.
All the lamps in the instrument clus-
ter should light up
�
Press switch1 up.
The rear head restraints will fold up-
right.
�
Press switch1 down.
The rear head restraints will fold
backward.
Multicontour seat*
The multicontour seat has a movable seat
cushion and inflatable air cushions built
into the seat backrest to provide additional
lumbar and side support.
The seat cushion movement and the seat
backrest cushion height and curvature can
be continuously varied with regulators on
the right side of the seat after turning the
SmartKey in the starter switch to
position2 or pressing the KEYLESS-GO*
start/stop button twice.
Page 120 of 416
120 Controls in detailLighting
LightingFor notes on how to switch on the head-
lamps and use the turn signals, see the
“Getting started” section (
�page 46).
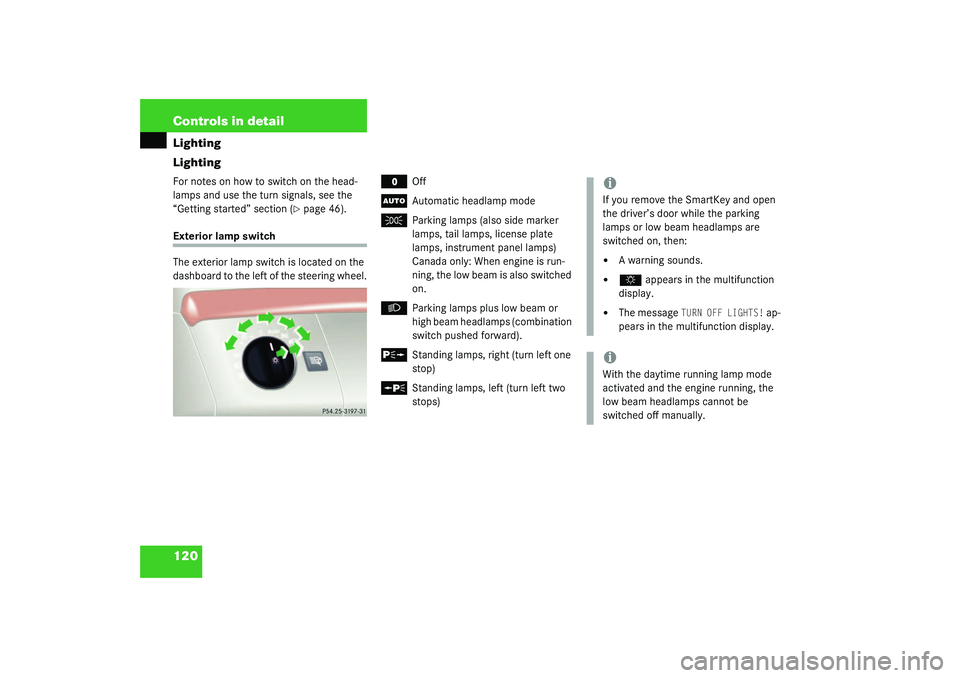
Exterior lamp switch
The exterior lamp switch is located on the
dashboard to the left of the steering wheel.
M
Off
U
Automatic headlamp mode
C
Parking lamps (also side marker
lamps, tail lamps, license plate
lamps, instrument panel lamps)
Canada only: When engine is run-
ning, the low beam is also switched
on.
B
Parking lamps plus low beam or
high beam headlamps (combination
switch pushed forward).
ˆ
Standing lamps, right (turn left one
stop)
‚
Standing lamps, left (turn left two
stops)
iIf you remove the SmartKey and open
the driver’s door while the parking
lamps or low beam headlamps are
switched on, then: �
A warning sounds.
�
$
appears in the multifunction
display.
�
The message
TURN OFF LIGHTS!
ap-
pears in the multifunction display.
iWith the daytime running lamp mode
activated and the engine running, the
low beam headlamps cannot be
switched off manually.
Page 153 of 416
153 Controls in detail
Control system
�
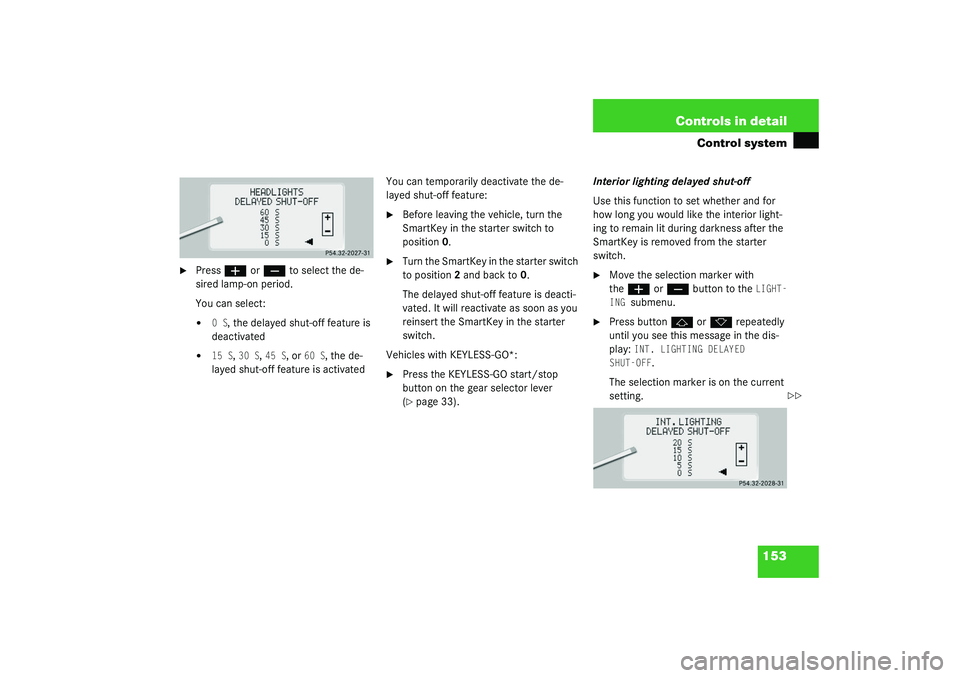
Press
æ
or
ç
to select the de-
sired lamp-on period.
You can select:
�
0 S
, the delayed shut-off feature is
deactivated
�
15 S
, 30 S
, 45 S
, or
60 S
, the de-
layed shut-off feature is activatedYou can temporarily deactivate the de-
layed shut-off feature:
�
Before leaving the vehicle, turn the
SmartKey in the starter switch to
position0.
�
Turn the SmartKey in the starter switch
to position2 and back to0.
The delayed shut-off feature is deacti-
vated. It will reactivate as soon as you
reinsert the SmartKey in the starter
switch.
Vehicles with KEYLESS-GO*:
�
Press the KEYLESS-GO start/stop
button on the gear selector lever
(�page 33).Interior lighting delayed shut-off
Use this function to set whether and for
how long you would like the interior light-
ing to remain lit during darkness after the
SmartKey is removed from the starter
switch.
�
Move the selection marker with
the
æ
or
ç
button to the
LIGHT-
ING
submenu.
�
Press button
j
or
k
repeatedly
until you see this message in the dis-
play:
INT. LIGHTING DELAYED
SHUT-OFF
.
The selection marker is on the current
setting.
��
Page 163 of 416
163 Controls in detail
Automatic transmission
Gear selector lever position
Effect
P
Park position
Selector position when the vehicle
is parked. Only place selector lever
in positionP when vehicle is
stopped. The park position is not in-
tended to serve as a brake when
the vehicle is parked. Rather, the
driver should always set the park-
ing brake in addition to placing the
selector lever in positionP to se-
cure the vehicle.
The SmartKey can only be removed
from the starter switch with the se-
lector lever in positionP. With the
SmartKey removed, the selector le-
ver is locked in positionP.
Effect
R
Reverse gear
Place selector lever in positionR only
when vehicle is stopped.
N
Neutral
No power is transmitted from the en-
gine to the drive axle. When the
brakes are released, the vehicle can
be moved freely (pushed or towed).
To avoid damage to the transmission,
never engageN while driving.
If the ESP is deactivated or malfunc-
tioning:
Only move selector lever toN if the
vehicle is in danger of skidding (e.g.
on icy roads).
D
Drive
The transmission shifts automatical-
ly. All five forward gears are avail-
able.
!Coasting the vehicle, or driving for any
other reason with selector lever inN
can result in transmission damage that
is not covered by the Mercedes-Benz
Limited Warranty.Warning!
G
Getting out of your vehicle with the selector
lever not fully engaged in positionP is dan-
gerous. Also, positionP alone is not intend-
ed to or capable of preventing your vehicle
from moving, possibly hitting people or ob-
jects.
Always set the parking brake in addition to
shifting to positionP (
�page 44).
When parked on an incline, turn the front
wheels towards the road curb.
Page 165 of 416
165 Controls in detail
Automatic transmission
Accelerator position
Your driving style influences the transmis-
sion’s shifting behavior:
Less throttle Earlier upshifting
More throttle Later upshifting
Kickdown
Use kickdown when you want maximum
acceleration.�
Press the accelerator past the point of
resistance.
The transmission shifts into a lower
gear.
�
Ease on the accelerator when you have
reached the desired speed.
The transmission shifts up again.Emergency operation (Limp home
mode)
If vehicle acceleration worsens or the
transmission no longer shifts, the trans-
mission is most likely operating in limp
h o m e ( e m e r g e n c y o p e r a t i o n ) m o d e . I n t h i s
mode, only 2nd gear and reverse gear can
be activated.�
Stop the vehicle.
�
Move selector lever toP.
�
Turn off the engine.
�
Wait at least ten seconds before re-
starting.
�
Restart the engine.
�
Move selector lever to positionD (for
2nd gear) orR.
�
Have the transmission checked at an
authorized Mercedes-Benz Center as
soon as possible.
Page 167 of 416
167 Controls in detail
Automatic transmission
Warm up the engine smoothly. Do not
place full load on the engine until the oper-
ating temperature has been reached. Shift
into reverse gear only when the vehicle is
stopped.Downshifting
�
Press the button located on the left
side of the steering wheel.
or
�
Briefly press the selector lever to the
right in the D-direction.
The transmission shifts to the next low-
er gear.
Warm up the engine smoothly. Do not
place full load on the engine until the oper-
ating temperature has been reached. Shift
into reverse gear only when the vehicle is
stopped.Deactivating steering wheel gearshift
control
�
Press the program mode selector
switch repeatedly until
S or
C for
automatic shift program appears in the
tachometer display field.
Manual gear shifting is deactivated.
!Avoid spinning of a drive wheel for an
extended period when driving off on
slippery surface. This may cause seri-
ous damage to the drivetrain which is
not covered by the Mercedes-Benz
Limited Warranty.
Warning!
G
On slippery road surfaces, never downshift
in order to obtain braking action. This could
result in drive wheel slip and reduced vehi-
cle control. Your vehicle’s ABS will not pre-
vent this type of loss of control.
iAt each engine start, the transmission
will go into the last shift program mode
selected (S or C). Program modeM is
not stored and will not be recalled
when engine is restarted.