Page 70 of 416
70 Safety and SecurityOccupant safetySelf-test BabySmart
TM
without special
child seat installed
After turning the SmartKey in the starter
switch to position1 or2 or pressing the
KEYLESS-GO* (if so equipped) start/stop
button once or twice, the
“PASSENGER AIRBAG OFF” indicator
lamp1 located in the center console lights
up for approximately 6 seconds and then
goes out.
If the indicator lamp should not come on or
is continuously lit, the system is not func-
tioning. You must see an authorized
Mercedes-Benz Center before seating any
child on the passenger seat.
For more information see (�page 294).
Warning!
G
The BabySmart
TM airbag deactivation sys-
tem will ONLY work with a special child seat
designed to operate with it. It will not work
with child seats which are not BabySmart
TM
compatible.
Never place anything between seat cushion
and child seat (e.g. pillow), since it reduces
the effectiveness of the deactivation sys-
tem. The bottom of the child seat must
make full contact with the passenger seat
cushion. An incorrectly mounted child seat
could cause injuries to the child in case of an
accident, instead of protecting the child.
Follow the manufacturer’s instructions for
installation of special child seats.
Warning!
G
When using a BabySmart
TM compatible
child seat on the front passenger seat, the
passenger front airbag will not deploy only if
the PASSENGER AIRBAG OFF indicator lamp
remains illuminated.
Please be sure to check the indicator every
time you use the special system child seat.
Should the light go out while the restraint is
installed, please check installation. If the
light remains out, do not use the
BabySmart
TM restraint to transport children
on the front passenger seat until the system
has been repaired.
Do not place powered-on laptops, cell
phones and like electronic devices on the
front passenger seat. Signals from such de-
vices may interfere with the BabySmart
TM
system. Such signal interference may cause
the PASSENGER AIRBAG OFF indicator lamp
not to come on during self-test or be contin-
uously lit, indicating that the system is not
functioning.
Page 107 of 416
107 Controls in detailSeats
Power head restraints, rear*
You can fold the rear head restraints back-
ward or forward using head restraint fold-
ing switch. The switches are located�
on the front center console
(�page 106):
�
Make sure the ignition is switched
on.
All the lamps in the instrument clus-
ter should light up
�
Press switch1 briefly.
The rear head restraints will fold
backward.
�
Press switch1 and hold.
The rear head restraints will fold up-
right.
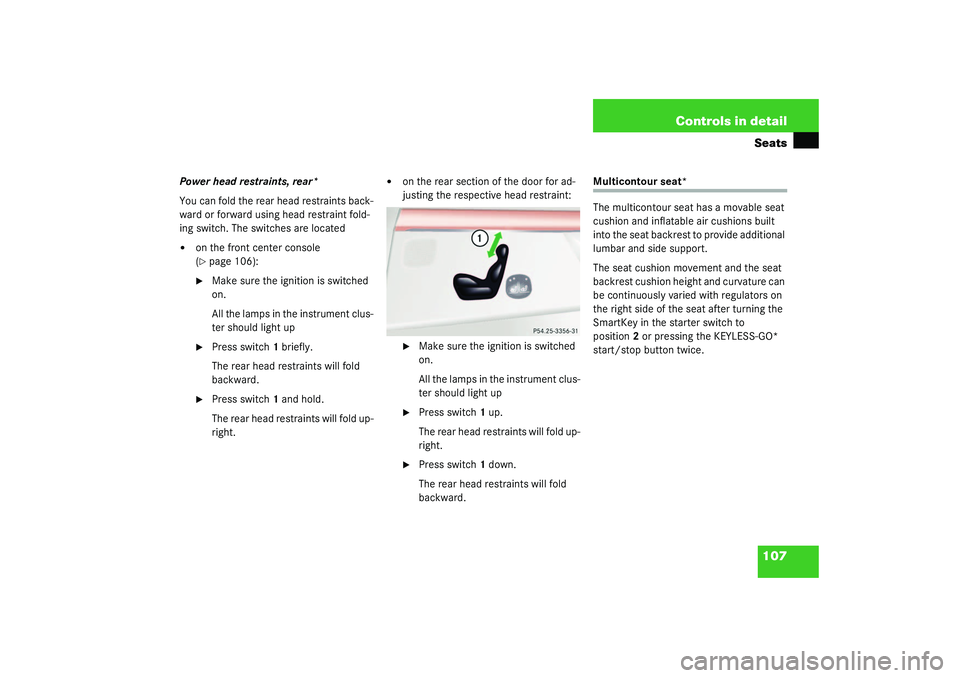
�
on the rear section of the door for ad-
justing the respective head restraint:�
Make sure the ignition is switched
on.
All the lamps in the instrument clus-
ter should light up
�
Press switch1 up.
The rear head restraints will fold up-
right.
�
Press switch1 down.
The rear head restraints will fold
backward.
Multicontour seat*
The multicontour seat has a movable seat
cushion and inflatable air cushions built
into the seat backrest to provide additional
lumbar and side support.
The seat cushion movement and the seat
backrest cushion height and curvature can
be continuously varied with regulators on
the right side of the seat after turning the
SmartKey in the starter switch to
position2 or pressing the KEYLESS-GO*
start/stop button twice.
Page 126 of 416
126 Controls in detailLightingSwitching rear interior lights on�
Press switch2.
The rear compartment lighting is
switched on.
Switching rear interior lights off
�
Press switch2.
The rear compartment lighting is
switched off.
Front reading lamps
Switching on
�
Press switch 1 or 3.
The corresponding reading lamp is
switched on.
Switching off
�
Press switch 1 or 3.
The corresponding reading lamp is
switched off.
Courtesy lighting
For better orientation in the dark, courtesy
lamps will illuminate the interior of your ve-
hicle as follows:
With parking lamps switched on:�
the door entry lamps
�
the driver and passenger footwells
With SmartKey in starter switch position1:
�
the door entry lamps
�
the center consoleiIf you turn the SmartKey in the starter
switch to position0 and switch off the
headlamps, the door entry lamps will
remain lit for approximately five min-
utes.
Page 173 of 416
173 Controls in detail
Good visibility
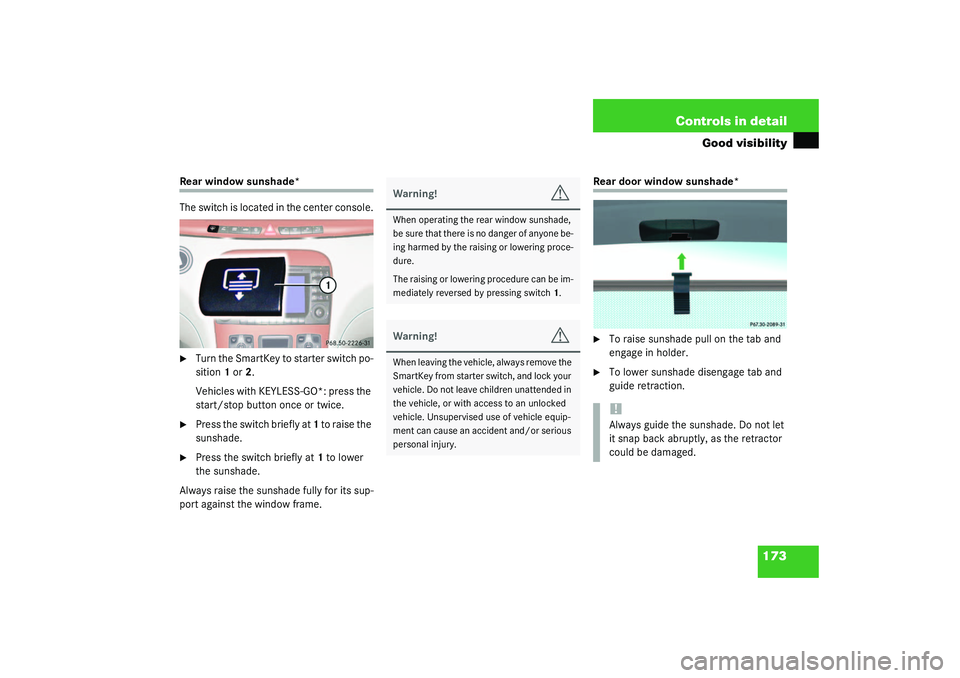
Rear window sunshade*
The switch is located in the center console.�
Turn the SmartKey to starter switch po-
sition 1 or 2.
Vehicles with KEYLESS-GO*: press the
start/stop button once or twice.
�
Press the switch briefly at 1 to raise the
sunshade.
�
Press the switch briefly at 1 to lower
the sunshade.
Always raise the sunshade fully for its sup-
port against the window frame.
Rear door window sunshade*�
To raise sunshade pull on the tab and
engage in holder.
�
To lower sunshade disengage tab and
guide retraction.
Warning!
G
When operating the rear window sunshade,
b e s u r e t h a t t h e r e i s n o d a n g e r o f a n y o n e b e -
ing harmed by the raising or lowering proce-
dure.
The raising or lowering procedure can be im-
mediately reversed by pressing switch1.Warning!
G
When leaving the vehicle, always remove the
SmartKey from starter switch, and lock your
vehicle. Do not leave children unattended in
the vehicle, or with access to an unlocked
vehicle. Unsupervised use of vehicle equip-
ment can cause an accident and/or serious
personal injury.
!Always guide the sunshade. Do not let
it snap back abruptly, as the retractor
could be damaged.
Page 186 of 416
186 Controls in detailAutomatic climate controlRear passenger compartment adjust-able air vents
Rear center console air vents
1Left center air vent
2Right center air vent
3Thumbwheel for center air vents with
adjustable booster blower
To open center air vents and to adjust the
booster blower:�
Turn thumbwheel3.Rear side air vents
4Rear side air vent, right and left
5Air volume control for rear side air vent
To open rear side air vents:
�
Turn thumbwheel5 towards the win-
dow.
iThe booster blower allows air volume
speed to the rear passenger compart-
ment to be increased at four different
levels.
The temperature at the air vents for
rear passenger compartment1 and2
is the same as at the dashboard center
air vents.
Page 187 of 416
187 Controls in detail
Automatic climate control
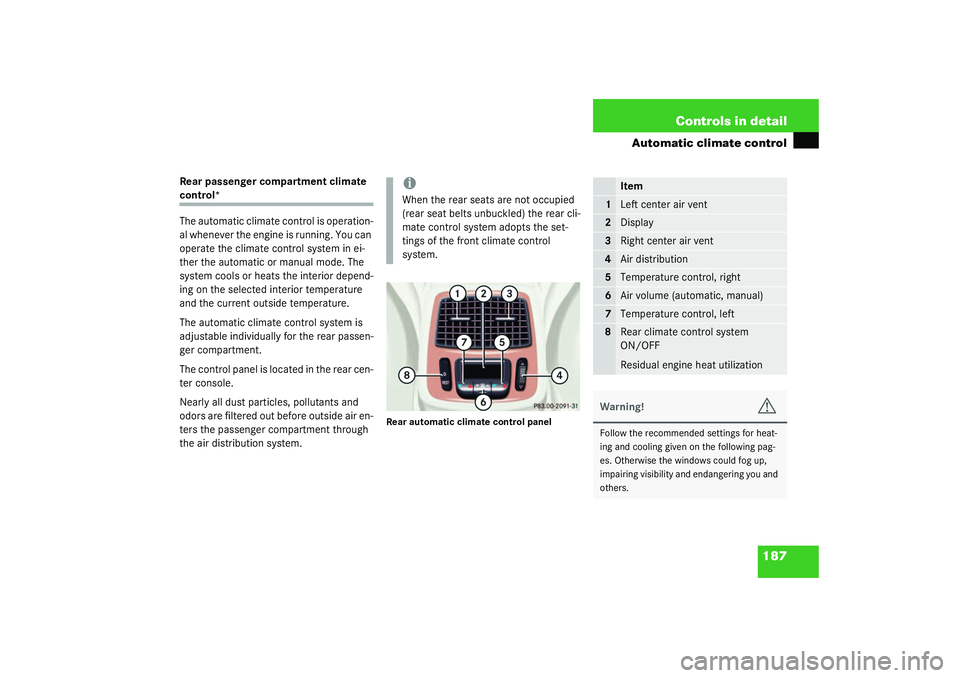
Rear passenger compartment climate control*
The automatic climate control is operation-
al whenever the engine is running. You can
operate the climate control system in ei-
ther the automatic or manual mode. The
system cools or heats the interior depend-
ing on the selected interior temperature
and the current outside temperature.
The automatic climate control system is
adjustable individually for the rear passen-
ger compartment.
The control panel is located in the rear cen-
ter console.
Nearly all dust particles, pollutants and
odors are filtered out before outside air en-
ters the passenger compartment through
the air distribution system.
Rear automatic climate control panel
iWhen the rear seats are not occupied
(rear seat belts unbuckled) the rear cli-
mate control system adopts the set-
tings of the front climate control
system.
Item
1
Left center air vent
2
Display
3
Right center air vent
4
Air distribution
5
Temperature control, right
6
Air volume (automatic, manual)
7
Temperature control, left
8
Rear climate control system
ON/OFF
Residual engine heat utilization
Warning!
G
Follow the recommended settings for heat-
ing and cooling given on the following pag-
es. Otherwise the windows could fog up,
impairing visibility and endangering you and
others.
Page 206 of 416
206 Controls in detailDriving systemsDeactivating Distronic
There are several ways to deactivate the
Distronic system:�
Briefly tip the cruise control lever in the
direction of arrow3 (
�page 203).
or
�
Step on the brake pedal.
Distronic will be deactivated. The last
speed set will be stored into memory.Distronic deactivates automatically when:
�
you set the parking brake
�
you drive slower than
25 mph (40 km/h)
�
the ESP is active (
�page 78) or you de-
activate the ESP
�
you move the transmission selector le-
ver into positionN
A signal will sound. The
DISTRONIC OFF
message appears in the multifunction
display for approximately five seconds.Setting the following distance in
Distronic
You can set the specified following dis-
tance for Distronic by varying the time set-
ting between 1.0 and 2.0 seconds. Using
this time setting and the current speed of
your vehicle, Distronic calculates and sets
the required following distance to the vehi-
cle ahead. The set distance will be shown
in the multifunction display field.
The thumbwheel for making the time set-
ting is located on the lower section of the
center console.
iThe following message will appear in
the multifunction display for approxi-
mately five seconds:
DISTRONIC OFF
.
The last stored speed is deleted when
you turn off the engine.
Warning!
G
Distronic switches off and releases the
brakes when the vehicle decelerates below
the minimum speed of approximately
25 mph (40 km / h) by operation of the sys-
tem. At that time the driver must apply the
brakes in order to reduce vehicle speed fur-
ther or bring it to a stop.
Page 221 of 416
221 Controls in detail
Driving systems
As your vehicle approaches an object, one
or more segments will light up, depending
on the distance between your vehicle and
the object. When the eighth segment lights
up, you have reached the minimum dis-
tance.�
Front area: An intermittent acoustic
warning will sound as the first red seg-
ment lights up and a constant acoustic
warning, both lasting a maximum of
three seconds, will sound for the eighth
segment, i.e. the second red segment.
�
Rear area: An intermittent acoustic
warning will sound as the first red seg-
ment lights up and a constant acoustic
warning, both lasting a maximum of
three seconds, will sound for the eighth
segment, i.e. the second red segment.
The signal is canceled when the selec-
tor lever is placed in position D orP.Switching the Parktronic system
on/off
You can switch off the Parktronic system
manually.
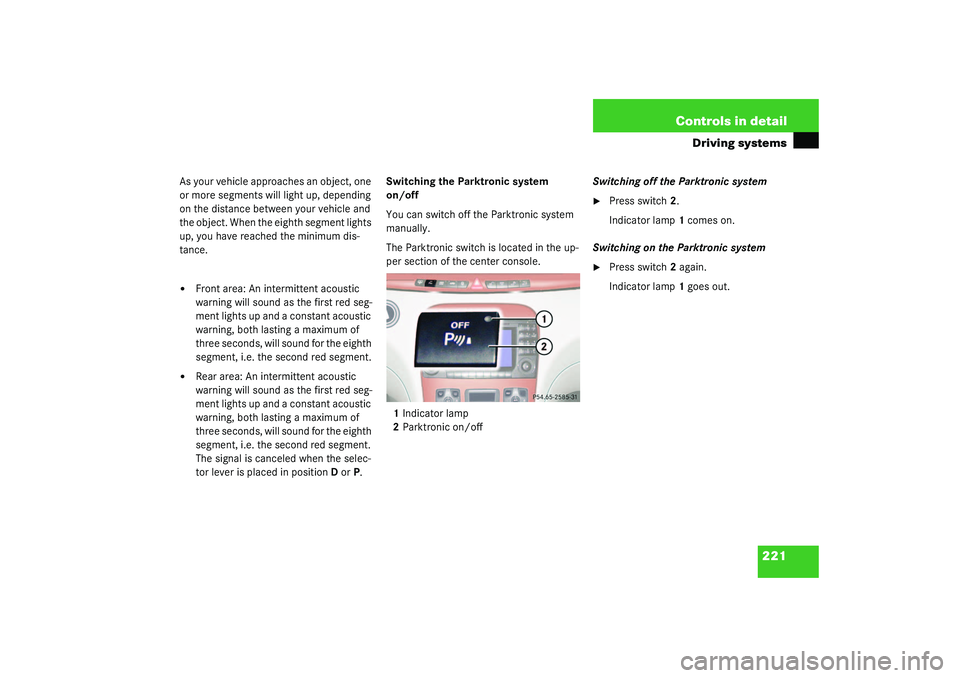
The Parktronic switch is located in the up-
per section of the center console.
1Indicator lamp
2Parktronic on/offSwitching off the Parktronic system
�
Press switch2.
Indicator lamp1 comes on.
Switching on the Parktronic system
�
Press switch2 again.
Indicator lamp1 goes out.