Page 75 of 321

monitors the vehicles traction (force of
adhesive friction between the tires and the
road surface) and")
75 Safety and Security
Driving and safety systems
ESP
The Electronic Stability Program (ESP)
monitors the vehicle's traction (force of
adhesive friction between the tires and the
road surface) and handling.
The ESP recognizes when a wheel is spin-
ning or if the vehicle starts to skid. By ap-
plying brakes to the appropriate wheel and
by limiting engine output, the ESP works to
stabilize the vehicle.
The 4-ETS/ESP warning lamp
v
in the
speedometer dial flashes when the ESP is
engaged.
The
¿
warning lamp in the instrument
cluster (�page 25) and the 4-ETS/ESP
warning lamp
v
in the speedometer
light up when you turn the key to
position2. They go out when the engine is
running.
Warning!
G
Never switch off the ESP when you see the
4-ETS/ESP-warning lamp
v
flashing in
the speedometer dial. In this case proceed
as follows:
�
While driving off, apply as little throttle
as possible.
�
While driving ease up on the accelera-
tor.
�
Adapt your speed and driving style to
the prevailing road conditions.
Failure to observe these guidelines could
cause the vehicle to skid.
The ESP cannot prevent accidents resulting
from excessive speed.
Warning!
G
The ESP cannot prevent the natural laws of
physics from acting on the vehicle, nor can
it increase the traction afforded. The ESP
cannot prevent accidents, including those
resulting from excessive speed in turns, fol-
lowing another vehicle too closely, or aqua-
planing. Only a safe, attentive, and skillful
driver can prevent accidents. The capabili-
ties of a ESP equipped vehicle must never be
exploited in a reckless or dangerous manner
which could jeopardize the user’s safety or
the safety of others.
Page 83 of 321
83 Controls in detail
Locking and unlocking
Seats
Memory function*
Lighting
Instrument cluster
Automatic transmission
Transmission control – LOW RANGE mode
Good visibility
Automatic climate control
Power windows
Sliding/pop-up roof*
Loading
Driving systems
Useful features
Page 89 of 321

89 Controls in detail
Locking and unlocking
Automatic central locking
The doors and the liftgate automatically
lock when the ignition is switched on and
the left front wheel turns at vehicle speeds
of approximately 9 mph (15 km/h) or
more.
If one of the front doors is then opened
from the inside, the vehicle is unlocked
centrally unless only the driver's door was
previously unlocked. The central locking button is located on
the lower center console.
Central locking button1Locking
2UnlockingActivating
�
Check that the ignition is switched on.
All the lamps in the instrument cluster
light up.
�
Press and hold upper part1 of the cen-
tral locking button for approximately
six seconds.
The automatic central locking is acti-
vated.
Deactivating
�
Check that the ignition is switched on.
All the lamps in the instrument cluster
light up.
�
Press and hold lower part2 of the cen-
tral locking button for approximately
six seconds.
The automatic central locking is deacti-
vated.
iThe doors unlock automatically after an
accident if the force of the impact ex-
ceeds a preset threshold.
To prevent the vehicle door locks from
locking, deactivate the automatic cen-
tral locking when the vehicle�
is pushed or
�
is on a test stand
Page 102 of 321
102 Controls in detailLighting
LightingFor notes on how to switch on the head-
lamps (
�page 46) and use the turn signals
(
�page 47), see the “Getting started” sec-
tion.
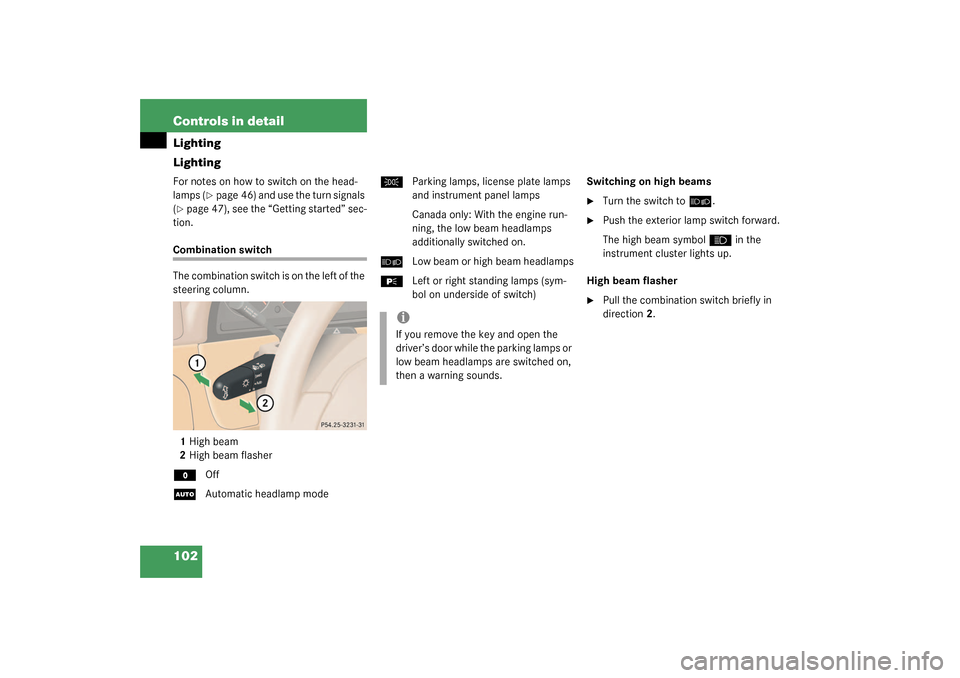
Combination switch
The combination switch is on the left of the
steering column.
1High beam
2High beam flasherM
Off
U
Automatic headlamp mode
C
Parking lamps, license plate lamps
and instrument panel lamps
Canada only: With the engine run-
ning, the low beam headlamps
additionally switched on.
õ
Low beam or high beam headlamps
ƒ
Left or right standing lamps (sym-
bol on underside of switch)Switching on high beams
�
Turn the switch to
õ
.
�
Push the exterior lamp switch forward.
The high beam symbol
A
in the
instrument cluster lights up.
High beam flasher
�
Pull the combination switch briefly in
direction2.
iIf you remove the key and open the
driver’s door while the parking lamps or
low beam headlamps are switched on,
then a warning sounds.
Page 104 of 321

104 Controls in detailLightingNight security illumination
When you turn off the engine and the last
door has been closed, the following lamps
will remain lit:�
Parking lamps
�
Tail lamps
�
License plate lamps
�
Front fog lamps
The combination switch must be set to
position
U
(�page 102).Deactivating night security illumination
temporarily
�
Before leaving the vehicle turn the key
in the steering lock to position0 then
turn it to position2 and back to0.
The night security illumination is deac-
tivated. It will reactivate as soon as you
reinsert the key in the steering lock.
Setting illumination time
1Switch for fog lamps
�
Stop the vehicle.
�
Make sure that the ignition is switched
on.
All the lamps in the instrument cluster
light up.
�
Turn combination switch to
position
M
.
�
Press upper part1 of switch until the
clock, located in the instrument clus-
ter, displays the actual illumination
time.
�
Press upper part1 of switch again.
Each time the switch is pressed, the il-
lumination time increases by
15 seconds. You can set the illumina-
tion time between 0 (off) and
60 seconds.
Approximately five seconds after pressing
the switch, the illumination time is set and
the clock is displayed again.
iYou can reactivate this function within
ten minutes by opening a door or the
liftgate.
If you do not open a door or the liftgate
after turning off the engine, the lamps
will automatically switch off after
60 seconds.
Page 105 of 321

105 Controls in detail
Lighting
Locator lighting
During darkness, the following lamps will
come on when the vehicle is unlocked by
remote control:�
Parking lamps
�
Tail lamps
�
License plate lamps
�
Front fog lamps
The combination switch must be set to
position
U
(�page 102).
The locator lighting switches off when the
driver’s door is opened. It switches off au-
tomatically after a period of approximately
40 seconds.
Fog lamps
The switch is located on the upper center
console.
1Front fog lamps
2Indicator lamp
3Front fog lamps and rear fog lampSwitching on front fog lamps
�
Check that the low beam headlamps
are switched on.
�
Press upper part1 of switch.
The green indicator lamp
‡
in the
instrument cluster lights up.
Switching on front fog lamps and rear
fog lamp
�
Check that the low beam headlamps
are switched on.
�
Press lower part3 of switch.
The green indicator lamp
‡
in the
instrument cluster lights up in addition
to the yellow indicator lamp2 in the
switch.
Switching off front fog lamps and rear
fog lamp
�
Press lower part3 of switch.
The green indicator lamp
‡
in the
instrument cluster and the yellow indi-
cator lamp2 in the switch go out.
iThe fog lamps can be switched on with
combination switch in position
õ
or U. Consult your state Motor Regula-
tions regarding allowable lamp opera-
tion.
Page 106 of 321
106 Controls in detailLightingSwitching off rear fog lamp�
Press upper part1 of switch.
The yellow indicator lamp2 in the
switch goes out.
Switching off front fog lamps
�
Press upper part1 of switch.
The green indicator lamp
‡
in the
instrument cluster goes out.
Hazard warning flasher
The hazard warning flasher can be activat-
ed with the ignition switched on or off. It is
activated automatically when an airbag is
deployed.
The switch is located on top of the steering
column.Hazard warning flasher switch
Switching on hazard warning flasher�
Press the hazard warning flasher
switch.
All the turn signals will blink.
Switching off hazard warning flasher
�
Press hazard warning flasher switch
again.iIf the hazard warning flasher was acti-
vated automatically, press the hazard
warning flasher switch twice to deacti-
vate.
Page 110 of 321
110 Controls in detailInstrument cluster
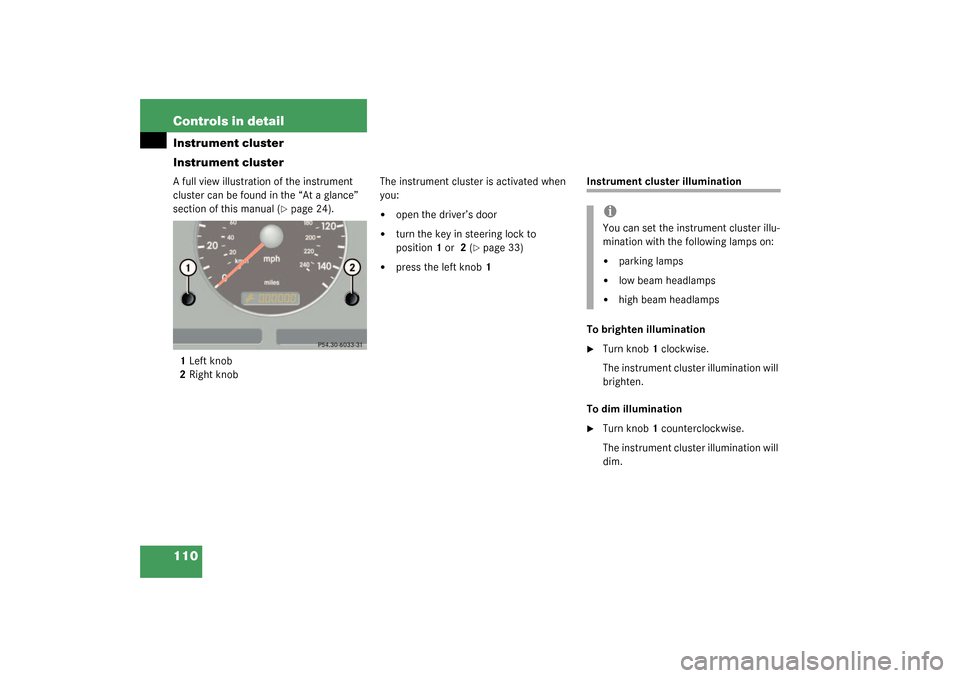
Instrument clusterA full view illustration of the instrument
cluster can be found in the “At a glance”
section of this manual (
�page 24).
1Left knob
2Right knobThe instrument cluster is activated when
you:
�
open the driver’s door
�
turn the key in steering lock to
position1 or 2 (
�page 33)
�
press the left knob1
Instrument cluster illumination
To brighten illumination�
Turn knob1 clockwise.
The instrument cluster illumination will
brighten.
To dim illumination
�
Turn knob1 counterclockwise.
The instrument cluster illumination will
dim.iYou can set the instrument cluster illu-
mination with the following lamps on:�
parking lamps
�
low beam headlamps
�
high beam headlamps