Page 216 of 321
216 OperationMaintenanceThe Mercedes-Benz Light Truck Center will
reset the service indicator following a com-
pleted service.Calling up the service indicator�
Within 1 second press knob1 twice.
The FSS display will appear for ten sec-
onds.
Resetting the service indicator
In the event that the service on your vehi-
cle is not carried out by an authorized Mer-
cedes-Benz Light Truck Center, you can
reset the service indicator yourself.�
Switch ignition on and immediately
press knob1 twice within one second.
The present status for days or distance
is displayed.
�
Within ten seconds turn the key in
steering lock to position0 (
�page 33).
�
Press and hold knob1 while switching
the ignition on.
The present status for days or distance
is displayed once more.
�
Continue to hold knob1.
After approximately 10 seconds a sig-
nal sounds, and the display shows
10 000 miles (Canada: 15 000 km) for
approximately 10 seconds.
�
Release knob1.
iIf the service indicator was inadvertent-
ly reset, have a Mercedes-Benz Light
Truck Center correct it.
Only reset if the proper service has
been performed. Resetting the system
without performing the proper service
as called for by the FSS will cause the
FSS to incorrectly determine the next
service interval which will result in en-
gine damage not covered by the Mer-
cedes-Benz Limited Warranty.
If the battery is disconnected, the days
of disconnection will not be included in
the count shown by the service indica-
tor. To arrive at the true service dead-
line, you will need to subtract these
days from the days shown in the ser-
vice indicator.
Do not confuse the service indicator
with the engine oil level indicator
:
.
Page 220 of 321
220 OperationVehicle careOrnamental moldings
For regular cleaning and care of very dirty
chrome-plated parts, use a chrome clean-
er.
Headlamps, tail lamps, turn signal
lenses
Use a mild car wash detergent, such as
Mercedes-Benz approved Car Shampoo,
with plenty of water.
To prevent scratches, never apply strong
force and use only a soft, non-scratchy
cloth when cleaning the lenses. Do not at-
tempt to wipe dirty lenses with a dry cloth
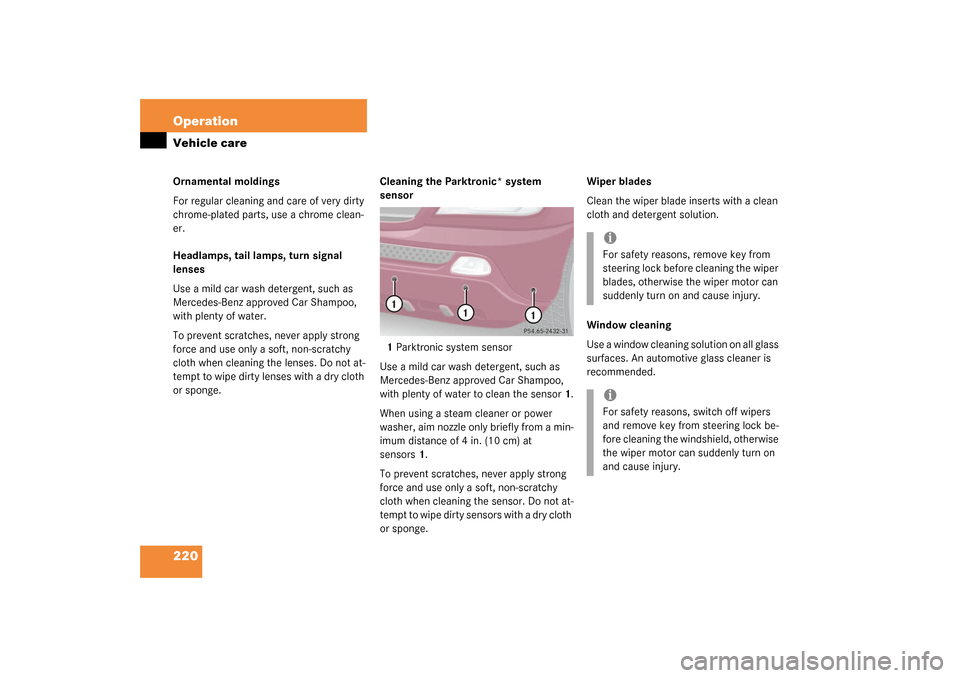
or sponge.Cleaning the Parktronic* system
sensor
1Parktronic system sensor
Use a mild car wash detergent, such as
Mercedes-Benz approved Car Shampoo,
with plenty of water to clean the sensor1.
When using a steam cleaner or power
washer, aim nozzle only briefly from a min-
imum distance of 4 in. (10 cm) at
sensors1.
To prevent scratches, never apply strong
force and use only a soft, non-scratchy
cloth when cleaning the sensor. Do not at-
tempt to wipe dirty sensors with a dry cloth
or sponge.Wiper blades
Clean the wiper blade inserts with a clean
cloth and detergent solution.
Window cleaning
Use a window cleaning solution on all glass
surfaces. An automotive glass cleaner is
recommended.
iFor safety reasons, remove key from
steering lock before cleaning the wiper
blades, otherwise the wiper motor can
suddenly turn on and cause injury.iFor safety reasons, switch off wipers
and remove key from steering lock be-
fore cleaning the windshield, otherwise
the wiper motor can suddenly turn on
and cause injury.
Page 221 of 321
221 Operation
Vehicle care
Light alloy wheels
Mercedes-Benz approved Wheel Care
should be used for regular cleaning of the
light alloy wheels.
If possible, clean wheels once a week with
Mercedes-Benz approved Wheel Care, us-
ing a soft bristle brush and a strong spray
of water.
Follow instructions on container.
Instrument cluster
Use a gentle dishwashing detergent or
mild detergent for delicate fabrics as a
washing solution. Wipe with a cloth moist-
ened in lukewarm solution. Do not use
scouring agents.Steering wheel and gear selector lever
Wipe with a damp cloth and dry thoroughly
or clean with Mercedes-Benz approved
Leather Care.
Cup holder
Use a gentle dishwashing detergent or
mild detergent for delicate fabrics as a
washing solution. Wipe with a cloth moist-
ened in lukewarm solution. Do not use
scouring agents.Hard plastic trim items
Pour Mercedes-Benz approved Interior
Care onto soft lint-free cloth and apply
with light pressure.
Headliner
Clean with soft bristle brush, or use a
dry-shampoo cleaner in case of excessive
dirt.
Seat belts
The webbing must not be treated with
chemical cleaning agents. Use only clear,
lukewarm water and soap. Do not dry the
webbing at temperatures above 176°F
(80°C) or in direct sunlight.
iUse only acid-free cleaning materials.
The acid could lead to corrosion.
Warning!
G
Do not bleach or dye seat belts as this may
severely weaken them. In a crash they may
not be able to provide adequate protection.
Page 224 of 321
224 Practical hintsWhat to do if …
What to do if …Lamps in instrument clusterGeneral information:
If a bulb in the instrument cluster fails to
light up during the bulb self-check when turning the key in steering lock to
position2, have it checked and replaced if
necessary.Problem
Possible cause
Suggested solution
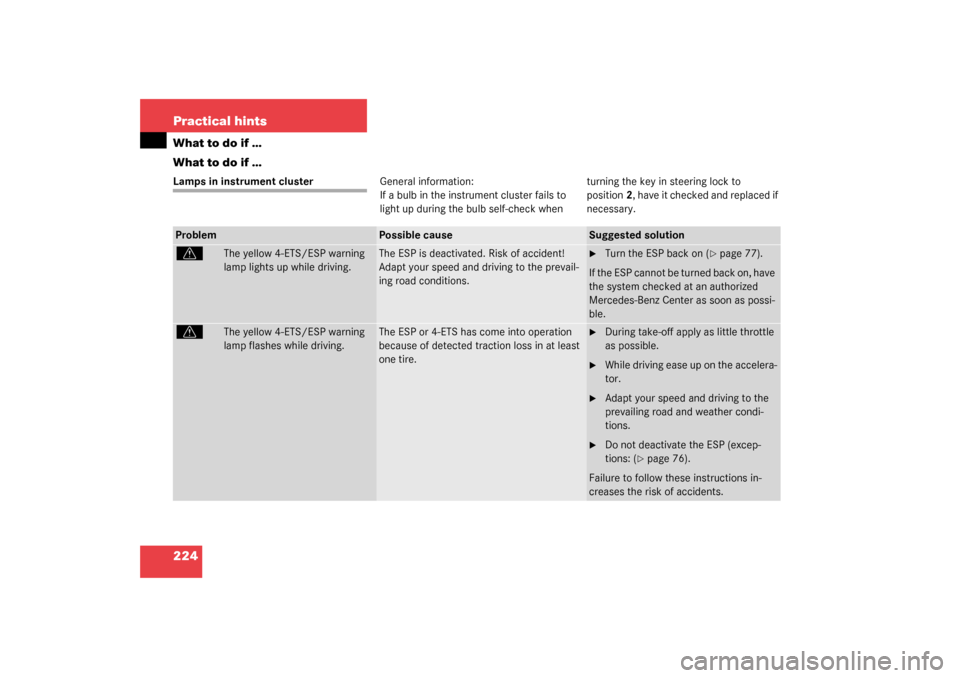
v
The yellow 4-ETS/ESP warning
lamp lights up while driving.
The ESP is deactivated. Risk of accident!
Adapt your speed and driving to the prevail-
ing road conditions.
�
Turn the ESP back on (
�page 77).
If the ESP cannot be turned back on, have
the system checked at an authorized
Mercedes-Benz Center as soon as possi-
ble.
v
The yellow 4-ETS/ESP warning
lamp flashes while driving.
The ESP or 4-ETS has come into operation
because of detected traction loss in at least
one tire.
�
During take-off apply as little throttle
as possible.
�
While driving ease up on the accelera-
tor.
�
Adapt your speed and driving to the
prevailing road and weather condi-
tions.
�
Do not deactivate the ESP (excep-
tions: (
�page 76).
Failure to follow these instructions in-
creases the risk of accidents.
Page 225 of 321

225 Practical hints
What to do if …
Problem
Possible cause
Suggested solution
-
The yellow ABS malfunction indi-
cator lamp comes on while driv-
ing.
ABS has detected a malfunction and has
switched off. The BAS, ESP, 4-ETS and EBP
are also switched off.
The brake system is still functioning normally
but without ABS available.
�
Continue driving with added caution.
Wheels will lock during hard braking
reducing steering capability.
�
Have the system checked at an autho-
rized Mercedes-Benz Light Truck Cen-
ter as soon as possible.
Failure to follow these instructions in-
creases the risk of an accident.
The charging voltage has fallen below
10 volts. The ABS has switched off.
When the voltage is above this value
again, the ABS is operational again.�
If necessary, have the generator and
the battery checked.
¿
The yellow malfunction indicator
lamp comes on while driving.
The ESP is no longer synchronized following
a voltage supply interuption (e.g. battery dis-
connected or discharged).
Synchronize the ESP:�
Turn the steering wheel from stop lim-
it to stop limit.
The indicator lamp goes out.
The charging voltage has fallen below
10 volts. The BAS and ESP have switched off.
When the voltage is above this value
again, the BAS and ESP are operational
again.�
If necessary, have the generator and
the battery checked.
Page 229 of 321
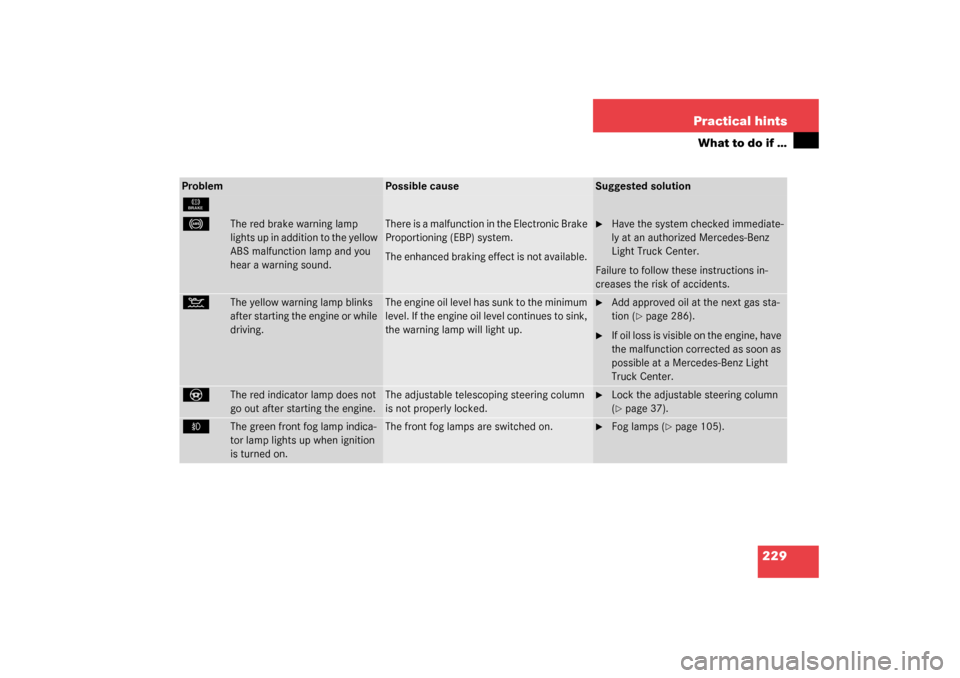
229 Practical hints
What to do if …
Problem
Possible cause
Suggested solution
É
-
The red brake warning lamp
lights up in addition to the yellow
ABS malfunction lamp and you
hear a warning sound.
There is a malfunction in the Electronic Brake
Proportioning (EBP) system.
The enhanced braking effect is not available.
�
Have the system checked immediate-
ly at an authorized Mercedes-Benz
Light Truck Center.
Failure to follow these instructions in-
creases the risk of accidents.
:
The yellow warning lamp blinks
after starting the engine or while
driving.
The engine oil level has sunk to the minimum
level. If the engine oil level continues to sink,
the warning lamp will light up.
�
Add approved oil at the next gas sta-
tion (
�page 286).
�
If oil loss is visible on the engine, have
the malfunction corrected as soon as
possible at a Mercedes-Benz Light
Truck Center.
_
The red indicator lamp does not
go out after starting the engine.
The adjustable telescoping steering column
is not properly locked.
�
Lock the adjustable steering column
(�page 37).
‡
The green front fog lamp indica-
tor lamp lights up when ignition
is turned on.
The front fog lamps are switched on.
�
Fog lamps (
�page 105).
Page 242 of 321
242 Practical hintsUnlocking/locking in an emergency
Unlocking/locking in an emergencyUnlocking the vehicle
Unlocking the driver’s door
If you are unable to unlock the driver’s
door using the remote control, open the
door using the key.
1Release button�
Press release button1 on the remote
control.
The key folds out.3Unlocking
4Locking
�
Remove the protective cap from the
door lock.
�
Unlock the door with the mechanical
key. To do so, push the mechanical key
in the lock until it stops and turn it to
the left.
iUnlocking and opening the driver’s
door with the mechanical key will trig-
ger the anti-theft alarm system. To can-
cel the alarm, do one of the following:�
Press button
Œ
or
‹
on the
remote control.
�
Insert the key in the steering lock.
Page 244 of 321

244 Practical hintsUnlocking/locking in an emergency�
Pull off battery cover2 in direction of
arrow.
�
Remove the batteries.
�
Using a lint-free cloth, insert new bat-
teries under the contact spring with the
plus (+) side facing up.
�
Press battery cover onto housing until
locked in place.
�
Push each button to assure proper op-
eration of the remote control.
If remote control does not function cor-
rectly after replacing the batteries, the
system may have to be resynchronized.Synchronizing remote control
�
Turn key in steering lock to position2,
then to position0 and remove.
�
Within 10 seconds, push and hold
button
‹
while pushing
button
Œ
five times.
�
Release the button, and press
‹
,
Œ
or
Š
once.
The remote control is resynchronized.
�
Recheck all of the remote control func-
tions.
Fuel filler flap
1Cover
2Lock rod�
Open cover1 in cargo area behind the
left trim panel.
�
Turn lock rod2 clockwise (arrow) to
the end stop.
�
Open the fuel filler flap.
iIf it is not possible to resynchronize the
remote control, have the system
checked at your authorized
Mercedes-Benz Light Truck Center.
iML 55 AMG:
First remove the spare wheel from its
holder (
�page 240).