Page 106 of 321
106 Controls in detailLightingSwitching off rear fog lamp�
Press upper part1 of switch.
The yellow indicator lamp2 in the
switch goes out.
Switching off front fog lamps
�
Press upper part1 of switch.
The green indicator lamp
‡
in the
instrument cluster goes out.
Hazard warning flasher
The hazard warning flasher can be activat-
ed with the ignition switched on or off. It is
activated automatically when an airbag is
deployed.
The switch is located on top of the steering
column.Hazard warning flasher switch
Switching on hazard warning flasher�
Press the hazard warning flasher
switch.
All the turn signals will blink.
Switching off hazard warning flasher
�
Press hazard warning flasher switch
again.iIf the hazard warning flasher was acti-
vated automatically, press the hazard
warning flasher switch twice to deacti-
vate.
Page 107 of 321

107 Controls in detail
Lighting
Interior lighting
1Left front interior lamp
2Right front interior lamp
3Automatic function off
4Automatic function on
5Rear interior lightingAutomatic control
Activating
�
Bring the rocker switch in center
position4.
Interior lamps (except cargo compart-
ment lamp) are switched on in dark-
ness when you�
unlock the vehicle
�
open a door
�
remove the key from the steering
lock
In addition, the entry/exit lamps in the
d oor tra ys wi ll com e on when y ou ope n
a door.
When all doors are closed and no key is
inserted in the steering lock, the interi-
or lamps are switched off after a brief
delay.Deactivating
�
Press lower part3 of rocker switch .
The interior lighting and the entry/exit
lamps remain switched off in darkness,
even when you�
unlock the vehicle
�
open a door
�
remove the key from the steering
lock
iIf the door remains open, the interior
lamps (except cargo compartment
lamp) switch off automatically after ap-
proximately 30 minutes.
Page 108 of 321
108 Controls in detailLightingManual control
Switching on front interior lamps�
Press on lamp lens1 or2.
The respective lamp switches on.
Switching off front interior lamps
�
Press on lamp lens1 or2 again.
The respective lamp switches off.
Operating rear interior lighting with
rocker switch
�
Press on upper part5 of rocker switch.
The rear interior lighting goes on.
�
Press on upper part5 of rocker switch
again.
The rear interior lighting goes off.
If the switch is pressed while the rear
interior lighting is on, the function is re-
versed.
Operating rear interior lighting with
lamp lens
Rear interior lighting�
Push on lamp lens (arrow) to switch
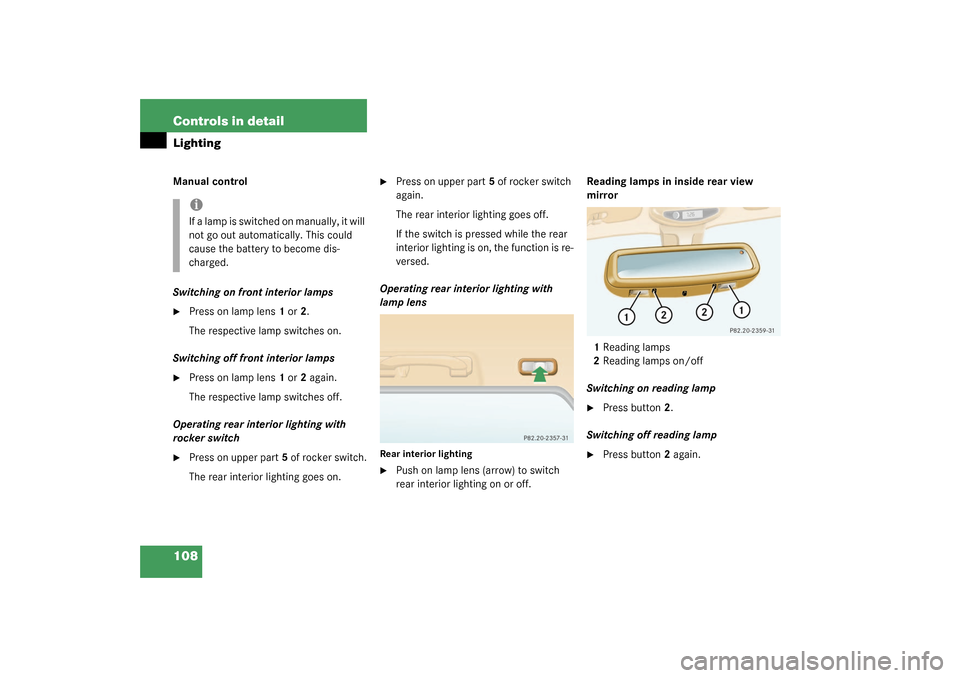
rear interior lighting on or off.Reading lamps in inside rear view
mirror
1Reading lamps
2Reading lamps on/off
Switching on reading lamp
�
Press button2.
Switching off reading lamp
�
Press button2 again.
iIf a lamp is switched on manually, it will
not go out automatically. This could
cause the battery to become dis-
charged.
Page 109 of 321
109 Controls in detail
Lighting
Cargo compartment lamp
1Switched off
2Switched on continuously
3Automatic controlSwitching off cargo compartment lamp
�
Slide the switch to position1.
The cargo compartment lamp is
switched off, even when the liftgate is
opened.
Switching on continuous cargo
compartment lamp
�
Slide the switch to position2.
The cargo compartment lamp is
switched on continuously.Automatic control
�
Slide the switch to position3.
The cargo compartment lamp is
switched on and off by opening or clos-
ing the liftgate.
iTo prevent the vehicle battery from be-
ing discharged, make sure that the
switch is not in position2 when leaving
the vehicle.
Page 117 of 321

117 Controls in detail
Automatic transmission
Accelerator position
Your driving style influences the transmis-
sion’s shifting behavior:
Less throttle Earlier upshifting
More throttle Later upshifting
Kickdown
Use kickdown when you want maximum
acceleration�
Press the accelerator past the point of
resistance.
The transmission shifts into a lower
gear.
�
Ease on the accelerator when you have
reached the desired speed.
The transmission shifts up again.
Towing a trailer
If you tow a trailer, note the following
points:�
Manually shift to a lower gear range
(4,3, 2, 1), if the transmission hunts
between gears on inclines
(�page 114).
A lower gear range and reduction of
speed reduces the change to overload
or overheat the engine.
�
At very steep inclines switch transfer
case to LOW RANGE mode
(�page 118).
For more information on trailer towing, see
the “Operation” section (
�page 192).Emergency operation (Limp Home
Mode)
If the vehicle acceleration worsens or the
transmission no longer shifts, the trans-
mission is most likely operating in limp
home mode. In this mode only 2nd gear
and reverse gear can be activated.�
Stop the vehicle.
�
Move selector lever to positionP.
�
Turn off the engine.
�
Wait at least ten seconds before re-
starting.
�
Move selector lever to position D (for
2nd gear) or R.
�
Have the transmission checked at an
authorized Mercedes-Benz Light Truck
Center as soon as possible.
Page 118 of 321

118 Controls in detailTransmission control – LOW RANGE mode
Transmission control – LOW RANGE modeIn the following situations you should
switch to LOW RANGE mode: �
during off-road driving
�
when crossing water
�
when towing up or down on steep gra-
dients
Switching on LOW RANGE modeLOW RANGE mode switch�
Stop the vehicle.
�
Move the selector lever to positionN.
�
Press on the upper part of the switch.
During the changeover the indicator
lamp (
�page 25) blinks three times.
Once the changeover is complete, the
indicator lamp lights up continuously.
Switching off LOW RANGE mode�
Stop the vehicle.
�
Move the selector lever to positionN.
�
Press on the upper part of the switch.
During the changeover the indicator
lamp (
�page 25) blinks three times.
Once the changeover is complete, the
indicator lamp goes out.
For information on driving safety systems
during LOW RANGE mode see the “Safety
and Security” section (
�page 71).
!Only switch the LOW RANGE mode on
or off, when the vehicle is�
at a complete standstill
�
the engine speed is less than
1500 rpm
Failure to do so may result in transmis-
sion or engine damage which is not
covered by the Mercedes-Benz Limited
Warranty.
!You should only operate the vehicle on
a single axle dynamometer for briefly
testing the brakes.
The key must be in steering lock
position1.
Page 119 of 321
 and for adjusting the rear view
mirrors (
�page 38) is found in the “Get-
ting started” sec")
119 Controls in detail
Good visibility
Good visibility
Information on the windshield wipers
(�page 47) and for adjusting the rear view
mirrors (
�page 38) is found in the “Get-
ting started” section.
Rear view mirror
Manually dimming inside rear view mir-
ror
1Lever�
Press lever1 backward.
The interior rear view mirror is dimmed.Automatic antiglare rear view mirror*
The reflection brightness of the exterior
rear view mirror on the driver’s side and
the inside rear view mirror will respond au-
tomatically to glare when:
�
the automatic antiglare function is acti-
vated (
�page 120)
�
the ignition is switched on
�
incoming light from headlamps falls on
the sensor in the inside rear view mir-
ror
The rear view mirror will not react if
�
reverse gear is engaged
�
the interior light is turned on
Warning!
G
The automatic antiglare function does not
react if incoming light is not aimed directly
at sensors in the inside rear view mirror.
The inside rear view mirror and the exterior
rear view mirror on the driver’s side do not
react, for example, if the cargo area is fully
loaded.
Glare can endanger you and others.Warning!
G
Exercise care when using the passenger
side exterior rear view mirror. The mirror
surface is convex (outwardly curved surface
for a wider field of view). Objects in mirror
are closer than they appear. Check your in-
side rear view mirror or glance over your
shoulder before changing lanes.
Page 120 of 321

120 Controls in detailGood visibility
Activating
1Button
2Indicator lamp�
Press button1.
The indicator lamp2 comes on.
Deactivating
�
Press button1 again.
The indicator lamp2 goes out.Folding exterior mirrors in and out*
The exterior rear view mirrors can vibrate if
they are not completely folded out.
The buttons are located on the upper cen-
ter console.
1Folds the exterior mirrors in
2Folds the exterior mirrors out
�
Check that the ignition is switched on.
All the lamps in the instrument cluster
light up.
Warning!
G
In the case of an accident, liquid electrolyte
may escape the mirror housing if the mirror
glass breaks.
Electrolyte has an irritating effect. Do not al-
low the liquid to come into contact with
eyes, skin, clothing, or the respiratory sys-
tem. In case it does, immediately flush af-
fected area with water, and seek medical
help if necessary.!Electrolyte drops coming into contact
with the vehicle paint finish can only be
completely removed while in their liq-
uid state and by applying plenty of wa-
ter.
��