Page 149 of 394
 and for setting the rear view
mirrors (
�page 38) is found in the “Get-
ting started” secti")
149 Controls in detail
Good visibility
Good visibility
Information on the windshield wipers
(�page 47) and for setting the rear view
mirrors (
�page 38) is found in the “Get-
ting started” section.
Rear view mirror
Automatic antiglare rear view mirror
The reflection brightness of the exterior
rear view mirror on the driver’s side and
the inside rear view mirror will respond au-
tomatically to glare when�
the ignition is switched on, and
�
incoming light from headlamps falls on
the sensor in the inside rear view mir-
ror.
The rear view mirror will not react if
�
reverse gear is engaged
�
the interior lighting is turned on
Warning!
G
The automatic antiglare function does not
react if incoming light is not aimed directly
at sensors in the inside rear view mirror.
The inside rear view mirror and the exterior
rear view mirror on the driver’s side do not
react, for example, if the rear window sun
shade* is in raised position.
Glare can endanger you and others.Warning!
G
In the case of an accident liquid electrolyte
may escape from the mirror housing if the
mirror glass breaks.
Electrolyte has an irritating effect. Do not al-
low the liquid to come into contact with
eyes, skin, clothing, or respiratory system.
In case it does, immediately flush affected
area with water, and seek medical help if
necessary.
Warning!
G
Exercise care when using the passenger
side exterior rear view mirror. The mirror
surface is convex (outwardly curved surface
for a wider field of view). Objects in mirror
are closer than they appear. Check your in-
side rear view mirror or glance over your
shoulder before changing lanes.!Electrolyte drops coming into contact
with the vehicle paint finish can be
completely removed only while in the
liquid state by applying plenty of water.
Page 157 of 394
1
and2 for the left side or7 and8 for the
right side to separately adjust the air tem-
p")
157 Controls in detail
Automatic climate control
Setting the temperature
Use temperature controls (
�page 155)1
and2 for the left side or7 and8 for the
right side to separately adjust the air tem-
perature on each side of the passenger
compartment. You should raise or lower
the temperature setting in small incre-
ments, preferably starting at 72°F (22°C).Increasing
�
Push temperature control2 and/or7.
The automatic climate control system
will correspondingly adjust the interior
air temperature.
Decreasing
�
Push temperature control1 and/or8.
The automatic climate control system
will correspondingly adjust the interior
air temperature.Adding outside air
�
Turn thumbwheel8 in dashboard
(�page 154) to increase flow of out-
side air through air vents for center, left
and right sides, as well as dashboard
top center and rear passenger com-
partment.
iWhen operating the climate control
system in automatic mode, you will
only rarely need to adjust the tempera-
ture, air volume and air distribution.
Page 162 of 394

162 Controls in detailAutomatic climate controlRear window defroster
The rear window defroster uses a large
amount of power. To keep battery drain to
a minimum, switch off the defroster as
soon as the rear window is clear. The de-
froster is automatically deactivated after
approximately 6 to 17 minutes of opera-
tion depending on the outside tempera-
ture.Activating
�
Press button
F
(�page 155).
The indicator lamp on the button lights
up.
Deactivating
�
Press button
F
(�page 155) again.
The indicator lamp on the button goes
out.
Warning!
G
Any accumulation of snow and ice should be
removed from the rear window before driv-
ing. Visibility could otherwise be impaired,
endangering you and others.
!If the rear window defroster switches
off too soon and the indicator lamp
starts blinking, this means that too
many electrical consumers are operat-
ing simultaneously and there is insuffi-
cient voltage in the battery. The system
responds automatically by deactivating
the rear window defroster.
As soon as the battery has sufficient
voltage, the rear window defroster au-
tomatically turns itself back on.
Page 172 of 394
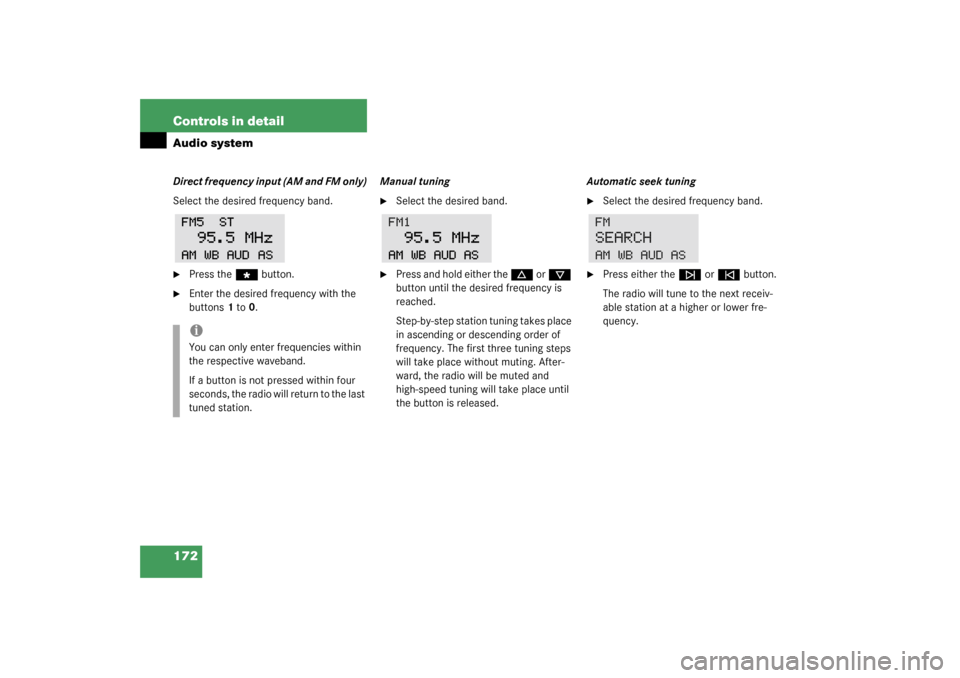
172 Controls in detailAudio systemDirect frequency input (AM and FM only)
Select the desired frequency band.�
Press the
“
button.
�
Enter the desired frequency with the
buttons 1 to 0.Manual tuning
�
Select the desired band.
�
Press and hold either the
d
or
c
button until the desired frequency is
reached.
Step-by-step station tuning takes place
in ascending or descending order of
frequency. The first three tuning steps
will take place without muting. After-
ward, the radio will be muted and
high-speed tuning will take place until
the button is released.Automatic seek tuning
�
Select the desired frequency band.
�
Press either the
f
or
e
button.
The radio will tune to the next receiv-
able station at a higher or lower fre-
quency.
iYou can only enter frequencies within
the respective waveband.
If a button is not pressed within four
seconds, the radio will return to the last
tuned station.
Page 174 of 394

174 Controls in detailAudio systemWeather band�
Press the
WB key.
The last weather band station is tuned
in.
�
Select the desired weather band sta-
tion with buttons 1 to 7.
If a station cannot be tuned in, a scan
is automatically started.
�
Press the
f
or
e
button. The
next receivable weather band station is
tuned in.
Cassette mode
Playing cassettes�
Press the
3
button.
The display folds down and the cas-
sette slot becomes visible.
�
Press the cassette into the slot until it
engages and tap it gently.
The cassette will be pulled in automati-
cally. The system switches to cassette
mode (
TAPE
). Track 1 will be played and
SIDE 1
appears in the display. Track 1
is the side of the cassette which is fac-
ing upward. The cassette deck will au-
tomatically detect the type of tape.
�
Fold the display back up and press gen-
tly on the display frame to lock in place.
or
�
If a cassette is already in the mecha-
nism, press the
j
button.
Track selection
�
Press the
TRK
key.
Upon selection of the track, the display
shows
SIDE 1
or
SIDE 2
corresponding-
ly.
�
You can switch track sides at any time.
The track side will be changed auto-
matically at the end of the tape.
iDo not press directly on the display
face.
iA warning signal will sound after
20 seconds if the display is left in the
down position. If the display is not
closed, a warning signal will sound and
the radio will be muted.
Page 179 of 394

179 Controls in detail
Audio system
1CD
2CD changer
3CD tray
4CD magazine�
Remove the magazine and pull the CD
tray fully out.
�
Place the CD in the recess of the tray,
label side up.
�
Push the tray into the magazine in the
direction shown by the arrow.
�
Push the magazine into the CD changer
in the direction shown by the arrow and
close the sliding door.
Playing CDs
�
Press the
i
button.
CD will appear on the display.
The CD most recently listened to will then
start playing at the point where it was last
switched off.
After the last track on a CD has finished,
the next CD is automatically played.Selecting CDs
�
You can select from among the CDs in
the CD magazine using buttons 1 to 6.CD a n d t h e m a g a z i n e s l o t n u m b e r o f t h e
s e l e c t e d C D a p p e a r o n t h e d i s p l a y . T h e
number of the current track is dis-
played after
TRACK
.
If there is no CD in the selected maga-
zine slot,
NO CD
appears on the display
with the corresponding slot number.
iCDs which have been inserted improp-
erly or are unreadable will not be
played.
Page 185 of 394

185 Controls in detail
Audio system
Speed dialing�
Input the desired entry number using
the number keys 1 to 0.
A maximum of two digits can be en-
tered.
If necessary, correct the last number
entered with the
CLR
key.
�
Press the
SND
key.
The telephone number stored under
that entry will be dialed. The number,
Land the full entry number will be
shown in the display.
Express dialing
�
Press one of the desired number but-
tons 1 to 0 longer than one second.
The telephone number saved under
that number will be dialed.Emergency call
�
Press button1 longer than one second.
�
A call will be placed to the saved num-
ber (e.g. 911).
You can make an emergency call to an
emergency rescue station with a mobile
communications network.
The emergency call will be placed as long
as the corresponding mobile communica-
tions network is available. To do this,
switch the telephone on if not already done
so.
The call will also be placed if the un-
lock-code is not entered.Emergency calls may not be possible with
all telephone networks or if certain net-
work services and/or telephone functions
are active. Check with your local network
operation company. It may take some time
to set up an emergency call.
To use this function you must ensure that
the number stored in memory location 1 is
the number to be dialed in case of emer-
gency.
If an emergency call cannot be connected,
the message
SYSTM BUSY
appears.
!Please be aware that button 1 might al-
ready be reserved for an emergency
call number.
!Please be aware that the 911 emergen-
cy call system is a public service. Using
it without due cause is a criminal of-
fense.
Page 187 of 394

187 Controls in detail
Power windows
Power windows
Opening and closing the windows
The side windows can be opened and
closed electrically. The switches for all the
side windows are on the driver’s door. The
switches for the respective windows are
on the front passenger door and on the
rear side trim panels.
1Left front window
2Right front window
3Left rear window
4Right rear window
�
Turn key in the starter switch to
position1 or2.
Opening the windows
�
Press switch to resistance point.
The window will move downwards until
you release the switch.
Closing the windows
�
Pull on switch.
The window will move upwards until
you release the switch.
Warning!
G
When closing the windows, make sure that
there is no danger of anyone being harmed
by the closing procedure.
The closing of the door windows can be im-
mediately halted by releasing the switch, or,
if switch was pulled past the resistance
point and released, by either pressing or
pulling the respective switch.
If the window encounters an obstruction
that blocks its path in a circumstance where
you pulled the switch past the resistance
point and released it to close the window,
the automatic reversal function will stop the
window and open it slightly.
If the window encounters an obstruction
that blocks its path in a circumstance where
you are closing the window by pulling the
switch to its resistance point and holding it
there, by pressing and holding button ‹
on the SmartKey, or by pressing and holding
the lock button (vehicles with
KEYLESS-GO*) on the door handle,
the automatic reversal function will not op-
erate.
When leaving the vehicle, always remove the
key from starter switch, take the SmartKey
with KEYLESS-GO* (if so equipped) with
you, and lock your vehicle. Do not leave chil-
dren unattended in the vehicle, or with ac-
cess to an unlocked vehicle. Unsupervised
use of vehicle equipment can cause an acci-
dent and/or serious personal injury.