Page 100 of 394

100 Controls in detailSeatsMulticontour seat*
Some models may be equipped with multi-
contour seats. This seat has a movable
seat cushion and inflatable air cushions
built into the seat backrest to provide addi-
tional lumbar and side support.
The seat cushion movement, backrest
cushion height and curvature can be con-
tinuously varied with regulators on the
right side of the seat after turning the
SmartKey in the starter switch to
position2 or pressing the KEYLESS-GO*
start/stop button twice.1Seat cushion depth
2Backrest bottom
3Backrest center
4Side bolster adjustment
Adjusting the multicontour seat in the or-
der listed above is recommended.
�
Make sure that the ignition is switched
on.
All lamps in the instrument cluster light
up.The seat cushion movement, backrest
cushion height and curvature can be ad-
justed with regulators1, 2 and3.
The side bolsters of the seat backrest can
be adjusted with rocker switch4:
�
Press to the left.
Side support will be increased.
�
Press to the right.
Side support will be decreased.iWhen the engine is turned off, the last
cushion setting is retained in memory,
and the cushion is automatically ad-
justed to this setting when the engine
is restarted.
Page 131 of 394

Use the
Headlamps delayed shut-off
function to set whether and for how long
you would l")
131 Controls in detail
Control system
Setting night security illumination
(Exterior lamps delayed shut-off)
Use the
Headlamps delayed shut-off
function to set whether and for how long
you would like the exterior lamps to illumi-
nate during darkness after all doors are
closed. When the delayed shut-off feature
is activated and the exterior lamp switch is
in position
U
, the following lamps will
remain lit after you remove the key from
the starter switch:
�
Parking lamps
�
Tail lamps
�
License plate lamps
�
Front fog lampsTo activate night security illumination:
�
Select delayed shut-off period (see be-
low).
�
Turn the exterior lamp switch to posi-
tion
U
.
To select delayed shut-off period:
�
Move the selection marker with
the
æ
or
ç
button to the
Light-
ing
submenu.
�
Press button
j
or
k
repeatedly
until you see this message in the dis-
play:
Headlamps delayed shut-off
.
The selection marker is on the current
setting.
�
Press
æ
or
ç
to select the de-
sired lamp-on period.You can select:
�
0 s
, the delayed shut-off feature is
deactivated
�
15 s
, 30 s
, 45 s
or
60 s
, the delayed
shut-off feature is activated
You can temporarily deactivate the de-
layed shut-off feature:
�
Before leaving the vehicle turn the key
in the starter switch to position0.
�
Then turn it to position2 and back
to0.
The delayed shut-off feature is deacti-
vated. It will reactivate as soon as you
reinsert the key in the starter switch.
For vehicles with KEYLESS-GO*:
�
Press the KEYLESS-GO start/stop but-
ton on the gear selector lever
(�page 33).
iYou can reactivate this function within
ten minutes by opening a door.
If you do not open a door after remov-
ing the key, the lamps will automatical-
ly switch off after 60 seconds.
Page 146 of 394

146 Controls in detailAutomatic transmissionAccelerator position
Your driving style influences the transmis-
sion’s shifting behavior:
Less throttle Earlier upshifting
More throttle Later upshifting
Kickdown
Use kickdown when you want maximum
acceleration.�
Press the accelerator past the point of
resistance.
The transmission shifts into a lower
gear.
�
Ease on the accelerator when you have
reached the desired speed.
The transmission shifts up again.Emergency operation (Limp Home
Mode)
If vehicle acceleration worsens or the
transmission no longer shifts, the trans-
mission is most likely operating in limp
home (emergency operation) mode. In this
mode, only 2nd gear and reverse gear can
be activated.�
Stop the vehicle.
�
Move selector lever toP.
�
Turn off the engine.
�
Wait at least ten seconds before re-
starting.
�
Move selector lever to positionD (for
2nd gear) orR.
�
Have the transmission checked at an
authorized Mercedes-Benz Center as
soon as possible.Steering wheel gearshift control
(Speedshift) and manual shift program
CLK 55 AMG
The CLK 55 AMG can be driven in both the
automatic and manual shift program
modes. In the manual shift program mode,
you can change the gears yourself on the
steering wheel or by using the selector le-
ver.
1Shift button
2Left button: downshift
3Right button: upshift
Page 148 of 394

148 Controls in detailAutomatic transmissionDownshifting�
Press button 2 located on the left side
of the steering wheel.
or
�
Briefly press the selector lever to the
left in the D-direction.
The transmission shifts to the next low-
er gear.
Warm up the engine gently. Do not place
full load on the engine until the operating
temperature has been reached. Shift into
reverse gear only when the vehicle is
stopped.Deactivating steering wheel gearshift
control
�
Press the program mode selector
switch repeatedly until the
S or
C for au-
tomatic shift program appears in the
speedometer display field.
Automatic gear shifting is activated.
Warning!
G
On slippery road surfaces, never downshift
in order to obtain braking action. This could
result in drive wheel slip and reduced vehi-
cle control. Your vehicle’s ABS will not pre-
vent this type of loss of control.
iAt each engine start, the transmission
will go into the last automatic shift pro-
gram mode selected (
S or
C). Program
mode
M is not stored and will not be re-
called when the engine is restarted.
Page 153 of 394

153 Controls in detail
Good visibility
Rear window sunshade*
The switch is located in the center console.�
Turn the key to starter switch position
1 or 2. Vehicles with KEYLESS-GO*:
press the start/stop button once or
twice.
�
Press the switch briefly at 1 to raise the
sunshade.
�
Press the switch briefly at 2 to lower
the sunshade.
Always raise the sunshade fully for its sup-
port against the window frame.
Warning!
G
When operating the rear window sunshade,
ma ke s ur e th a t th er e is no da nge r o f an y o ne
being harmed by the raising or lowering pro-
cedure.
The raising or lowering procedure can be im-
mediately halted by briefly pressing the up-
per or lower half of the switch.
Briefly press upper or lower half of the
switch again to raise or lower the rear win-
dow sunshade completely.
Warning!
G
When leaving the vehicle, always remove the
SmartKey from starter switch, and lock your
vehicle. Do not leave children unattended in
the vehicle, or with access to an unlocked
vehicle. Unsupervised use of vehicle equip-
ment may cause an accident and⁄or serious
personal injury.
Page 175 of 394
175 Controls in detail
Audio system
Cassette eject�
Press the eject button
3
.
The display will fold down and the cas-
sette will be ejected. The system will
switch back to radio mode
automatically.
�
Fold the display back up.Track search
Track search forward
�
Press the
f
button.
SEEK FWD
will appear in the display. The
track search will run the tape forward
to the start of the next track and switch
to play.Track search backward
�
Press the
e
button.
SEEK RWD
will appear on the display.
The track search will run the tape back-
ward to the start of the track currently
playing and switch to play.
Stopping track search
�
Press the
d
, c
, f
or
e
button.
The cassette will switch over to Play.
iThe cassette will not be ejected when
the system is switched off or switched
to another operating mode.
iThe cassette will not be ejected when
the system is switched off or switched
to another operating mode.
Page 176 of 394
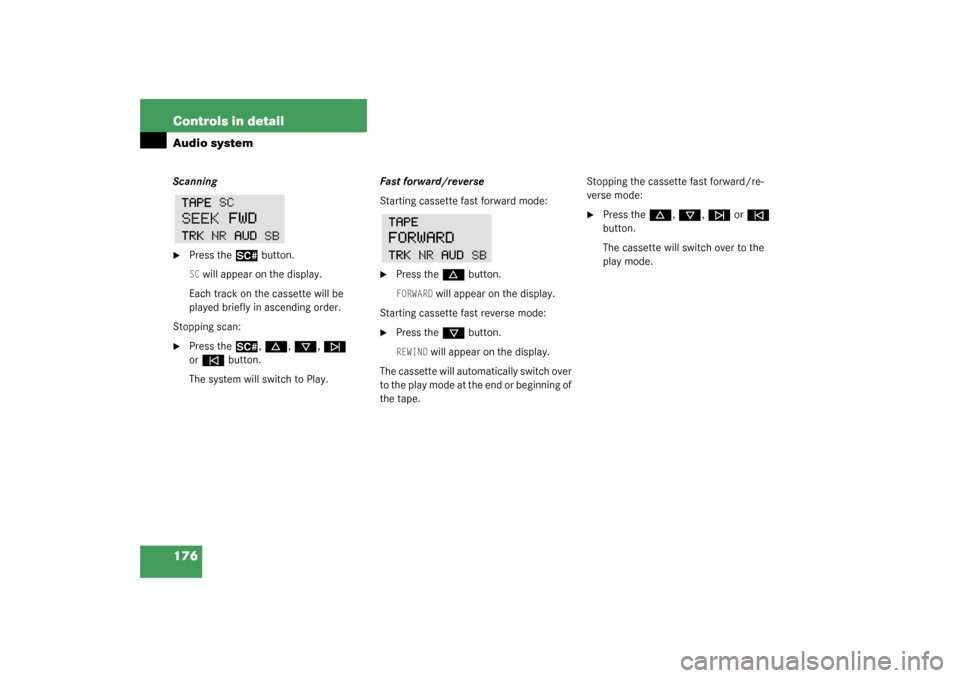
176 Controls in detailAudio systemScanning�
Press the
2
button.
SC will appear on the display.
Each track on the cassette will be
played briefly in ascending order.
Stopping scan:
�
Press the
2
, d
, c
, f
or
e
button.
The system will switch to Play.Fast forward/reverse
Starting cassette fast forward mode:
�
Press the
d
button.
FORWARD
will appear on the display.
Starting cassette fast reverse mode:
�
Press the
c
button.
REWIND
will appear on the display.
The cassette will automatically switch over
to the play mode at the end or beginning of
the tape.Stopping the cassette fast forward/re-
verse mode:
�
Press the
d
, c
, f
or
e
button.
The cassette will switch over to the
play mode.
Page 187 of 394

187 Controls in detail
Power windows
Power windows
Opening and closing the windows
The side windows can be opened and
closed electrically. The switches for all the
side windows are on the driver’s door. The
switches for the respective windows are
on the front passenger door and on the
rear side trim panels.
1Left front window
2Right front window
3Left rear window
4Right rear window
�
Turn key in the starter switch to
position1 or2.
Opening the windows
�
Press switch to resistance point.
The window will move downwards until
you release the switch.
Closing the windows
�
Pull on switch.
The window will move upwards until
you release the switch.
Warning!
G
When closing the windows, make sure that
there is no danger of anyone being harmed
by the closing procedure.
The closing of the door windows can be im-
mediately halted by releasing the switch, or,
if switch was pulled past the resistance
point and released, by either pressing or
pulling the respective switch.
If the window encounters an obstruction
that blocks its path in a circumstance where
you pulled the switch past the resistance
point and released it to close the window,
the automatic reversal function will stop the
window and open it slightly.
If the window encounters an obstruction
that blocks its path in a circumstance where
you are closing the window by pulling the
switch to its resistance point and holding it
there, by pressing and holding button ‹
on the SmartKey, or by pressing and holding
the lock button (vehicles with
KEYLESS-GO*) on the door handle,
the automatic reversal function will not op-
erate.
When leaving the vehicle, always remove the
key from starter switch, take the SmartKey
with KEYLESS-GO* (if so equipped) with
you, and lock your vehicle. Do not leave chil-
dren unattended in the vehicle, or with ac-
cess to an unlocked vehicle. Unsupervised
use of vehicle equipment can cause an acci-
dent and/or serious personal injury.