Page 290 of 394
290 Practical hintsWhat to do if …?
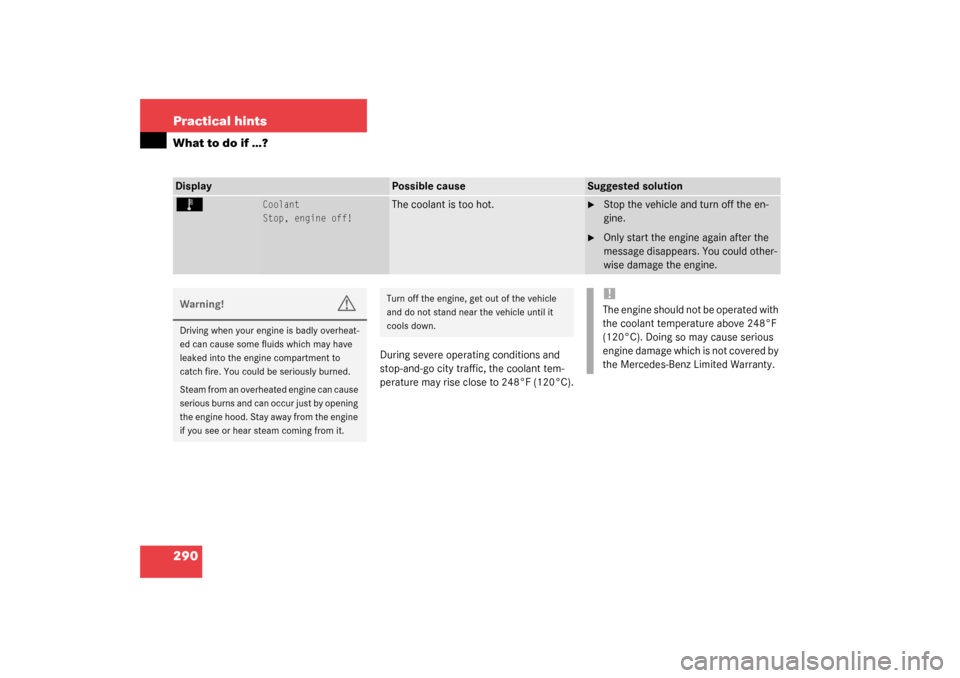
During severe operating conditions and
stop-and-go city traffic, the coolant tem-
perature may rise close to 248°F (120°C).
Display
Possible cause
Suggested solution
Ï
Coolant
Stop, engine off!
The coolant is too hot.
�
Stop the vehicle and turn off the en-
gine.
�
Only start the engine again after the
message disappears. You could other-
wise damage the engine.
Warning!
G
Driving when your engine is badly overheat-
ed can cause some fluids which may have
leaked into the engine compartment to
catch fire. You could be seriously burned.
Steam from an overheated engine can cause
serious burns and can occur just by opening
the engine hood. Stay away from the engine
if you see or hear steam coming from it.
Turn off the engine, get out of the vehicle
and do not stand near the vehicle until it
cools down.
!The engine should not be operated with
the coolant temperature above 248°F
(120°C). Doing so may cause serious
engine damage which is not covered by
the Mercedes-Benz Limited Warranty.
Page 296 of 394
296 Practical hintsWhat to do if …?Display
Possible cause
Suggested solution
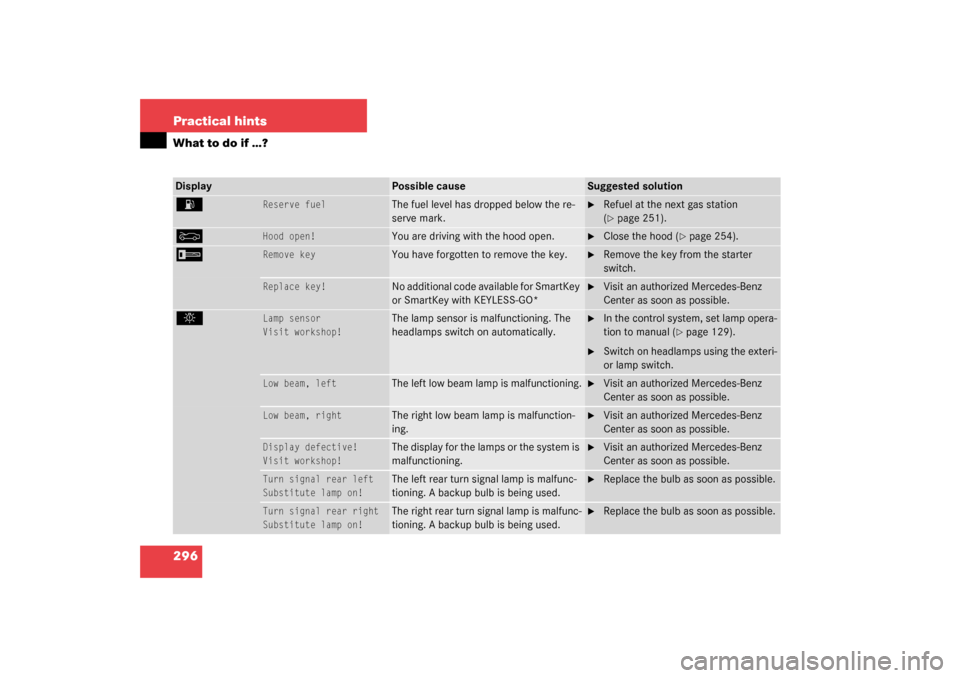
A
Reserve fuel
The fuel level has dropped below the re-
serve mark.
�
Refuel at the next gas station
(�page 251).
Y
Hood open!
You are driving with the hood open.
�
Close the hood (
�page 254).
I
Remove key
You have forgotten to remove the key.
�
Remove the key from the starter
switch.
Replace key!
No additional code available for SmartKey
or SmartKey with KEYLESS-GO*
�
Visit an authorized Mercedes-Benz
Center as soon as possible.
.
Lamp sensor
Visit workshop!
The lamp sensor is malfunctioning. The
headlamps switch on automatically.
�
In the control system, set lamp opera-
tion to manual (
�page 129).
�
Switch on headlamps using the exteri-
or lamp switch.
Low beam, left
The left low beam lamp is malfunctioning.
�
Visit an authorized Mercedes-Benz
Center as soon as possible.
Low beam, right
The right low beam lamp is malfunction-
ing.
�
Visit an authorized Mercedes-Benz
Center as soon as possible.
Display defective!
Visit workshop!
The display for the lamps or the system is
malfunctioning.
�
Visit an authorized Mercedes-Benz
Center as soon as possible.
Turn signal rear left
Substitute lamp on!
The left rear turn signal lamp is malfunc-
tioning. A backup bulb is being used.
�
Replace the bulb as soon as possible.
Turn signal rear right
Substitute lamp on!
The right rear turn signal lamp is malfunc-
tioning. A backup bulb is being used.
�
Replace the bulb as soon as possible.
Page 319 of 394

319 Practical hints
Replacing bulbs
Low beam and high beam bulb�
Switch off the lights.
�
Open the hood (
�page 253).
�
Turn housing cover1 or 2 counter-
clockwise and remove.
�
Turn bulb holder 4 or 5 with the bulb
counterclockwise and remove.
�
Press the bulb backwards and turn
counterclockwise out of the bulb hold-
er.
�
Press the new bulb into the holder and
twist it clockwise.
�
Place the bulb holder back into the
lamp and turn it clockwise.
�
Place the corresponding housing cov-
ers back on and turn them clockwise.Front turn signal lamp bulb
�
Switch off the lights.
�
Open the hood (
�page 253).
�
Twist bulb socket3 counterclockwise
and pull out.
�
Push bulb into socket, turn counter-
clockwise and remove.
�
Insert new bulb in socket, push in and
twist clockwise.
�
Reinsert bulb socket in lamp and twist
clockwise.Parking and standing lamp bulb
�
Switch off the lights.
�
Open the hood (
�page 253).
�
Turn housing cover2 counterclockwise
and remove.
�
Pull out the bulb socket with the bulb.
�
Pull the bulb out of the bulb socket.
�
Insert a new bulb in the socket.
�
Reinstall the bulb socket.
�
Align housing cover and click into
place.
Page 320 of 394
320 Practical hintsReplacing bulbsFront lamps Bi-Xenon*-type
1Bulb socket for turn signal lamp
2Housing cover for high beam lamp
3Housing cover for Bi-Xenon* lamp4High beam bulb
5Parking and standing lampHigh beam bulb
�
Switch off the lights.
�
Open the hood (
�page 253).
�
Turn housing cover2 counterclockwise
and remove.
�
Turn bulb holder 4 with the bulb coun-
terclockwise and remove.
�
Press the bulb backwards and turn
counterclockwise out of the bulb hold-
er.
�
Press the new bulb into the holder and
twist it clockwise.
�
Place the bulb holder back into the
lamp and turn it clockwise.
�
Place the housing cover 2 back on and
turn them clockwise.
Warning!
G
Do not remove the cover 3 for the Bi-Xenon*
headlamp. Because of high voltage in xenon
lamps, it is dangerous to replace the bulb or
repair the lamp and its components. We rec-
o mme nd t h at y ou ha ve s uc h w o rk do n e by a
qualified technician.
Page 321 of 394
321 Practical hints
Replacing bulbs
Front turn signal lamp bulb�
Switch off the lights.
�
Open the hood (
�page 253).
�
Twist bulb socket1 counterclockwise
and pull out.
�
Push bulb into socket, turn counter-
clockwise and remove.
�
Insert new bulb in socket, push in and
twist clockwise.
�
Reinsert bulb socket in lamp and twist
clockwise.Parking and standing lamp bulb
�
Switch off the lights.
�
Open the hood (
�page 253).
�
Turn housing cover2 counterclockwise
and remove.
�
Pull out the bulb socket with the bulb.
�
Pull the bulb out of the bulb socket.
�
Insert a new bulb in the socket.
�
Reinstall the bulb socket.
�
Align housing cover and click into
place.
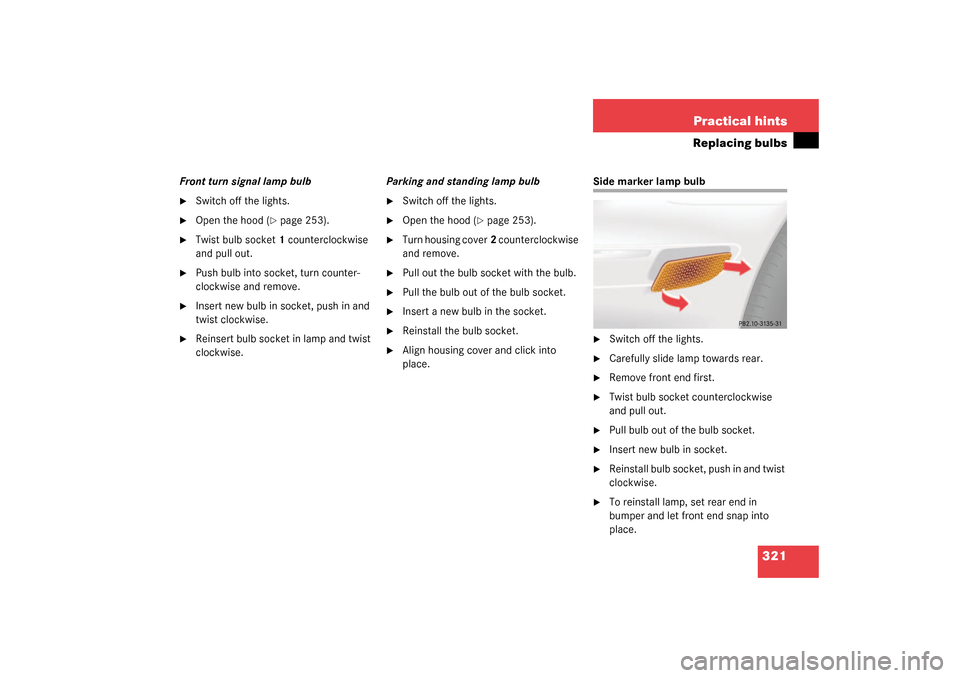
Side marker lamp bulb�
Switch off the lights.
�
Carefully slide lamp towards rear.
�
Remove front end first.
�
Twist bulb socket counterclockwise
and pull out.
�
Pull bulb out of the bulb socket.
�
Insert new bulb in socket.
�
Reinstall bulb socket, push in and twist
clockwise.
�
To reinstall lamp, set rear end in
bumper and let front end snap into
place.
Page 323 of 394
323 Practical hints
Replacing wiper blades
Replacing wiper blades
Removing�
Fold the wiper arm forward.
1Lock
2Unlock
�
Pull the tab in the direction of arrow2
and remove windshield wiper.
Installing�
Slide the wiper blade into the cutout on
the wiper arm.
�
Slide the tab back in the direction of
arrow1 until it audibly engages.
�
Fold the wiper arm backward to rest on
the windshield.
Warning!
G
For safety reasons, remove key from starter
switch before replacing a wiper blade, other-
wise the motor could suddenly turn on and
cause injury.
!Never open the hood when the wiper
arm is folded forward.
Do not allow the wiper arms to contact
the windshield glass without a wiper
blade inserted.
Make certain that the wiper blades are
properly installed. Improperly installed
wiper blades may cause windshield
damage.
For your convenience, we recommend
that you have this work carried out by
an authorized Mercedes-Benz Center.
Page 330 of 394
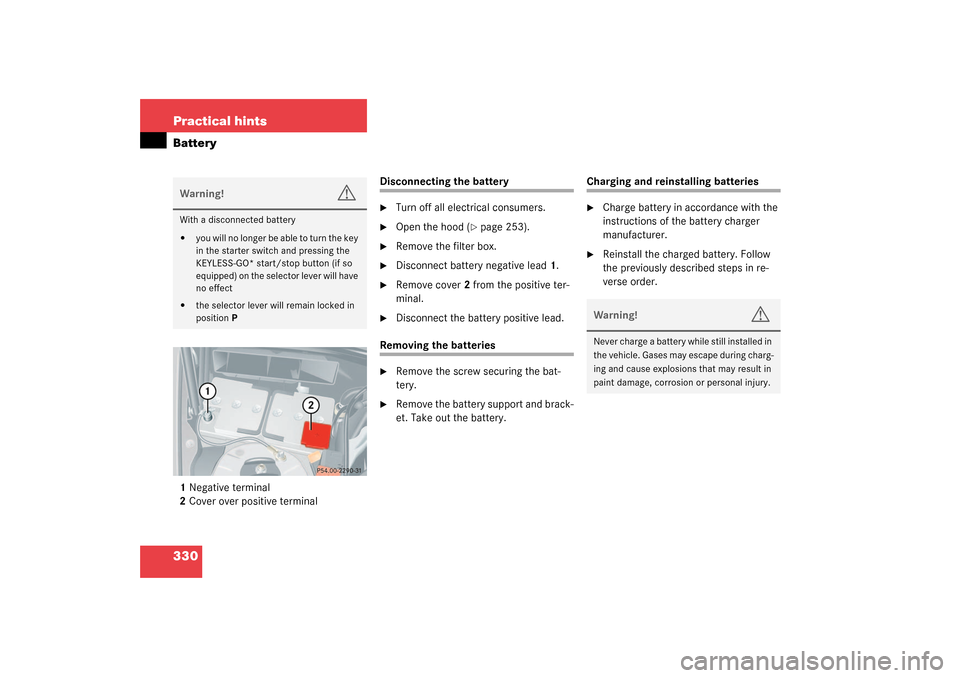
330 Practical hintsBattery1Negative terminal
2Cover over positive terminal
Disconnecting the battery�
Turn off all electrical consumers.
�
Open the hood (
�page 253).
�
Remove the filter box.
�
Disconnect battery negative lead1.
�
Remove cover 2 from the positive ter-
minal.
�
Disconnect the battery positive lead.
Removing the batteries�
Remove the screw securing the bat-
tery.
�
Remove the battery support and brack-
et. Take out the battery.
Charging and reinstalling batteries�
Charge battery in accordance with the
instructions of the battery charger
manufacturer.
�
Reinstall the charged battery. Follow
the previously described steps in re-
verse order.
Warning!
G
With a disconnected battery�
y o u w i l l n o l o n g e r b e a b l e t o t u r n t h e k e y
in the starter switch and pressing the
KEYLESS-GO* start/stop button (if so
equipped) on the selector lever will have
no effect
�
the selector lever will remain locked in
positionP
Warning!
G
Never charge a battery while still installed in
the vehicle. Gases may escape during charg-
ing and cause explosions that may result in
paint damage, corrosion or personal injury.
Page 377 of 394
377 Index
GPS 363
GPS see COMAND* 233
H
Hand-held transmitter
Programming integrated remote con-
trol 236
Hands-free microphone 27
Hard plastic trim items
Cleaning 273
Hazard warning flasher 108
Switching off 108
Switching on 108
Head restraints 97
Headlamp cleaning system* 259
Headlamps
Automatic control 106
Bi-Xenon 361
Cleaning 271
Cleaning system* 151, 259
Refilling washer fluid 259
Switching off 51
Switching on 46
Washer fluid 357
Washer system* 357
Headliner
Cleaning 273Heated seats* 101
Height adjustment
Head restraints 36
Steering wheel 37
High beam flasher 47, 108
High beam headlamps
Messages in display 298
Replacing bulbs 317, 319
Switching on 108
High mounted brake lamp 317
Hood 253
Closing 254
Message in display 296
Opening 253
Hydroplaning 245
I
Identification labels 342
Ignition 31, 33
Switching on 44
Immobilizer 79
Activating 79
Deactivating 79
Indicator lamps see Lamps, indicator and
warningInfant and child restraint systems 66
Installing 70
LATCH child seat mounts 71
Information
About service and warranty 10
Button for Tele Aid* 232
Inside rear view mirror
Adjusting 38
Antiglare 149
Installing
Infant and child restraint systems 70
Towing eye bolt 336
Wiper blades 323
Instrument cluster 22, 111, 363
Cleaning 273
Coolant temperature display 112
Illumination 111
Lamps in 276–280
Multifunction display 114
Outside temperature indicator 113
Selecting language 127
Instruments and controls see Cockpit 20