Page 105 of 384

105 Controls in detail
Memory function
Memory function
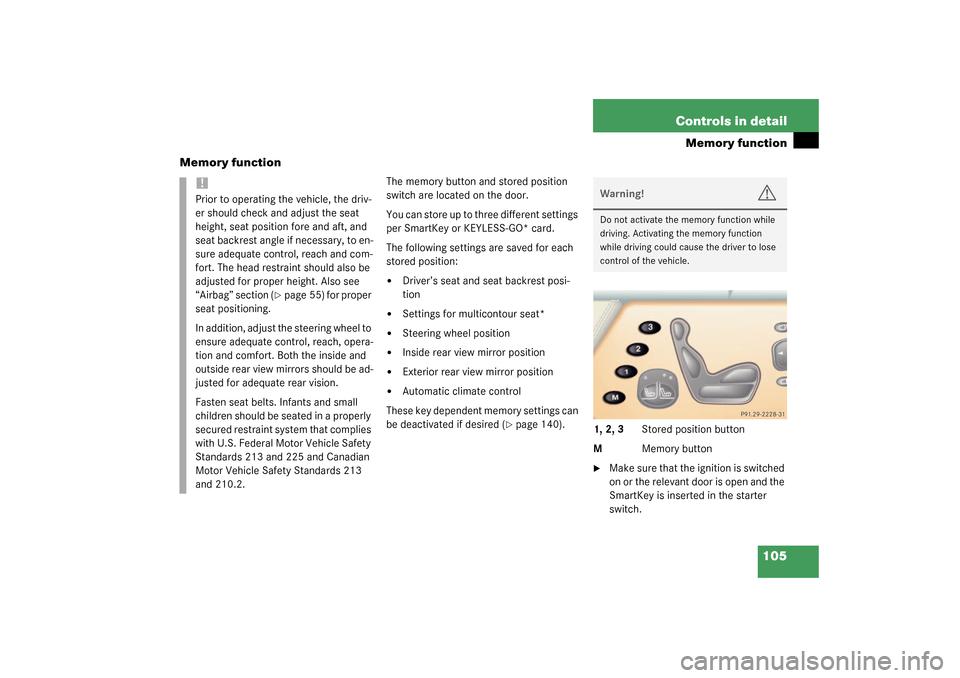
The memory button and stored position
switch are located on the door.
You can store up to three different settings
per SmartKey or KEYLESS-GO* card.
The following settings are saved for each
stored position:�
Driver’s seat and seat backrest posi-
tion
�
Settings for multicontour seat*
�
Steering wheel position
�
Inside rear view mirror position
�
Exterior rear view mirror position
�
Automatic climate control
These key dependent memory settings can
be deactivated if desired (
�page 140).
1, 2, 3 Stored position button
MMemory button
�
Make sure that the ignition is switched
on or the relevant door is open and the
SmartKey is inserted in the starter
switch.
!Prior to operating the vehicle, the driv-
er should check and adjust the seat
height, seat position fore and aft, and
seat backrest angle if necessary, to en-
sure adequate control, reach and com-
fort. The head restraint should also be
adjusted for proper height. Also see
“Airbag” section (
�page 55) for proper
seat positioning.
In addition, adjust the steering wheel to
ensure adequate control, reach, opera-
tion and comfort. Both the inside and
outside rear view mirrors should be ad-
justed for adequate rear vision.
Fasten seat belts. Infants and small
children should be seated in a properly
secured restraint system that complies
with U.S. Federal Motor Vehicle Safety
Standards 213 and 225 and Canadian
Motor Vehicle Safety Standards 213
and 210.2.
Warning!
G
Do not activate the memory function while
driving. Activating the memory function
while driving could cause the driver to lose
control of the vehicle.
Page 107 of 384

107 Controls in detail
Memory function
Storing exterior rear view mirror park-ing position
For easier parking you can adjust the pas-
senger exterior rear view mirror so that you
can see the right rear wheel as soon as you
engage reverse gearR.
For information on activating the parking
position, see “Setting parking position for
exterior rear view mirror” (
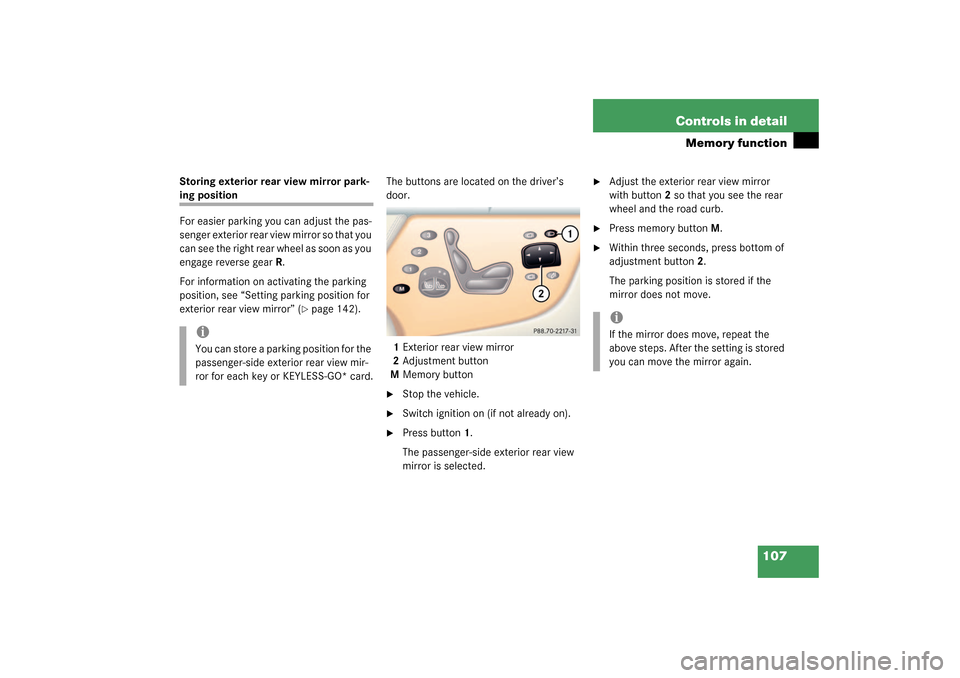
�page 142).The buttons are located on the driver’s
door.
1Exterior rear view mirror
2Adjustment button
MMemory button
�
Stop the vehicle.
�
Switch ignition on (if not already on).
�
Press button1.
The passenger-side exterior rear view
mirror is selected.
�
Adjust the exterior rear view mirror
with button2 so that you see the rear
wheel and the road curb.
�
Press memory button M.
�
Within three seconds, press bottom of
adjustment button2.
The parking position is stored if the
mirror does not move.
iYou can store a parking position for the
passenger-side exterior rear view mir-
ror for each key or KEYLESS-GO* card.
iIf the mirror does move, repeat the
above steps. After the setting is stored
you can move the mirror again.
Page 108 of 384

108 Controls in detailLighting
LightingFor notes on how to switch on the head-
lamps and use the turn signals, see the
“Getting started” section (
�page 46).
Exterior lamp switch
The exterior lamp switch is located on the
dashboard to the left of the steering wheel.
M
Off
U
Automatic headlamp mode
C
Parking lamps (also side marker
lamps, tail lamps, license plate
lamps, instrument panel lamps)
Canada only: When engine is run-
ning, the low beams are also
switched on.
B
Low beam plus parking lamps or
high beam headlamps (combination
switch pushed forward).
ˆ
Standing lamps, right (turn left one
stop)
‚
Standing lamps, left (turn left two
stops)
iIf you remove the key and open the
driver’s door while the parking lamps or
low beam headlamps are switched on,
then �
a warning sounds
�
$
appears in the multifunction
display
�
the message
TURN OFF LIGHTS!
ap-
pears in the multifunction display
iWith the daytime running lamp mode
activated and the engine running, the
low beam headlamps cannot be
switched off manually.
Page 111 of 384

111 Controls in detail
Lighting
Combination switch
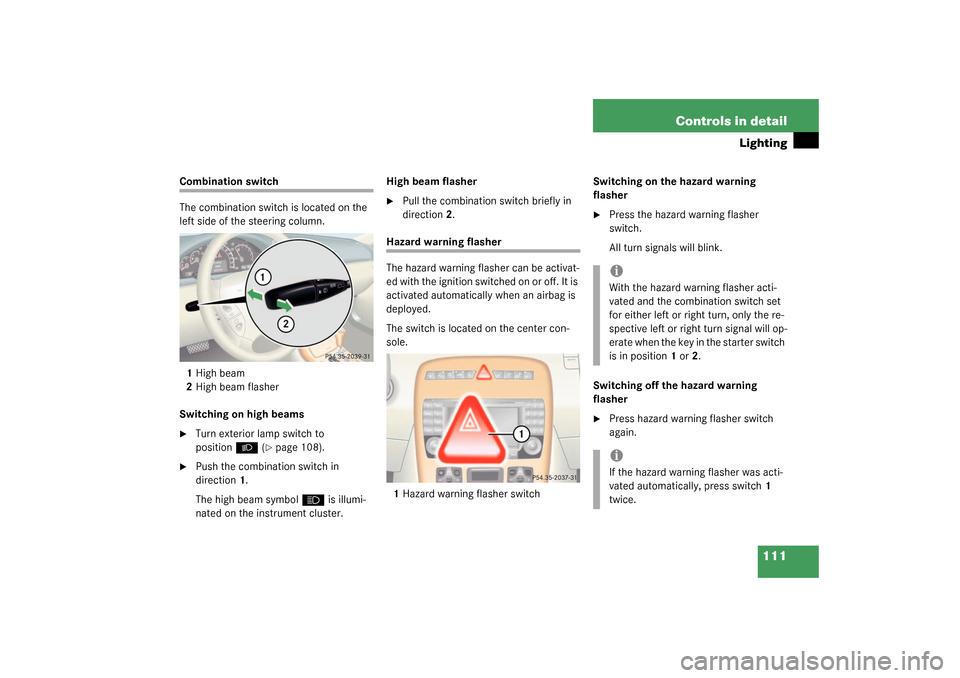
The combination switch is located on the
left side of the steering column.
1High beam
2High beam flasher
Switching on high beams�
Turn exterior lamp switch to
position
B
(�page 108).
�
Push the combination switch in
direction1.
The high beam symbol
A
is illumi-
nated on the instrument cluster.High beam flasher
�
Pull the combination switch briefly in
direction2.
Hazard warning flasher
The hazard warning flasher can be activat-
ed with the ignition switched on or off. It is
activated automatically when an airbag is
deployed.
The switch is located on the center con-
sole.
1Hazard warning flasher switchSwitching on the hazard warning
flasher
�
Press the hazard warning flasher
switch.
All turn signals will blink.
Switching off the hazard warning
flasher
�
Press hazard warning flasher switch
again.iWith the hazard warning flasher acti-
vated and the combination switch set
for either left or right turn, only the re-
spective left or right turn signal will op-
erate when the key in the starter switch
is in position 1 or 2.iIf the hazard warning flasher was acti-
vated automatically, press switch1
twice.
Page 112 of 384
112 Controls in detailLightingInterior lighting
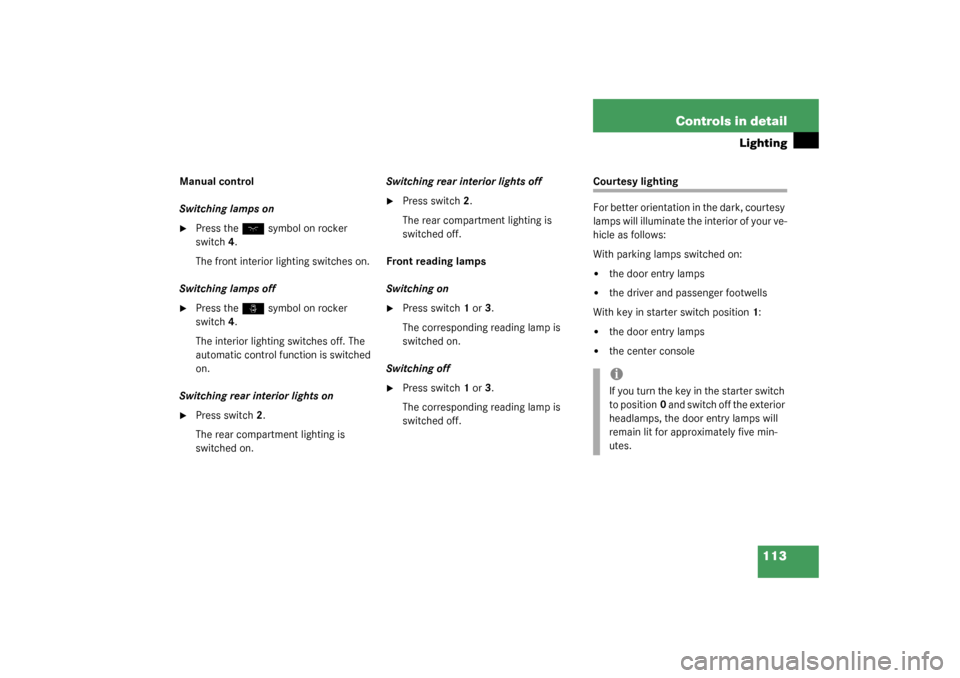
The controls are located in the overhead
control panel.
1Left front reading lamp
2Rear interior lights
3Right front reading lamp
4Rocker switch for automatic control
systemAutomatic control
Activating
�
Press the rocker switch to the center
position 4.
Interior lamps are switched on in dark-
ness, when�
the vehicle is unlocked
�
a door is opened
�
the key is removed from the starter
switch
The interior lamps are switched off after a
set time (�page 138).Deactivating
�
Press the
ñ
symbol on rocker
switch 4.
The interior lighting remains switched
off in darkness, even when you
�
unlock the vehicle
�
open a door
�
remove the key from the starter
switch
iIf the door remains open, the interior
lamps switch off automatically after ap-
proximately five minutes.
Page 113 of 384

113 Controls in detail
Lighting
Manual control
Switching lamps on�
Press the
ð
symbol on rocker
switch 4.
The front interior lighting switches on.
Switching lamps off
�
Press the
ñ
symbol on rocker
switch 4.
The interior lighting switches off. The
automatic control function is switched
on.
Switching rear interior lights on
�
Press switch2.
The rear compartment lighting is
switched on.Switching rear interior lights off
�
Press switch2.
The rear compartment lighting is
switched off.
Front reading lamps
Switching on
�
Press switch 1 or 3.
The corresponding reading lamp is
switched on.
Switching off
�
Press switch 1 or 3.
The corresponding reading lamp is
switched off.
Courtesy lighting
For better orientation in the dark, courtesy
lamps will illuminate the interior of your ve-
hicle as follows:
With parking lamps switched on:�
the door entry lamps
�
the driver and passenger footwells
With key in starter switch position1:
�
the door entry lamps
�
the center consoleiIf you turn the key in the starter switch
to position0 and switch off the exterior
headlamps, the door entry lamps will
remain lit for approximately five min-
utes.
Page 117 of 384

117 Controls in detail
Control system
Control system
The control system is activated as soon as
the key in the starter switch is turned to
position1. The control system enables you
to�
call up information about your vehicle
�
change vehicle settings
For example, you can use the control sys-
tem to find out when your vehicle is next
due for service, to set the language for
messages in the instrument cluster dis-
play, and much more.
The control system relays information to
the multifunction display.
Multifunction display
1Trip odometer
2Main odometer
iThe displays for the audio systems (ra-
dio, CD player) will appear in English,
regardless of the language selected.
Warning!
G
A driver’s attention to the road and traffic
conditions must always be his / her primary
focus when driving.
For your safety and the safety of others, se-
lecting features through the multifunction
steering wheel should only be done by the
driver when traffic and road conditions per-
mit it to be done safely.
Bear in mind that at a speed of just 30 mph
(approximately 50 km/h), your vehicle is
covering a distance of 44 feet (approximate-
ly 13.5 m) every second.
Page 123 of 384

123 Controls in detail
Control system
Operate the CD player�
Turn on the radio and select the CD
player. Refer to separate COMAND op-
erating instructions.
�
Press button
è
or
ÿ
repeatedly
until the settings for the CD currently
being played are shown in the display.1Current CD,
for CD changer (
�page 123)
2Current track
�
Press button
k
or
j
repeatedly
until the desired track is selected.
CD changer operating mode
General notes
Should excessively high temperatures oc-
cur while in CD mode,
CD TEMP HIGH
will
appear on the display and muting will take
pl ace . The uni t wil l then s witch ba ck to the
last operating mode used until the temper-
ature has decreased to a safe operating
level.
Should excessively low temperatures oc-
cur while in CD mode,
CD TEMP LOW
will ap-
pear on the display, but the CD will
continue to play.
Handle CDs carefully to prevent interfer-
ence during playback. Avoid fingerprints
and dust on CDs. Do not write on CDs or
apply any label or other material to them.
Use only original CDs. Using copied CDs
may create problems during playback.
iYou can only store new stations using
the designated feature on the radio.
Refer to separate COMAND operating
instructions.
You can also operate the radio in the
usual manner.
iCD changer: To select a CD from the
magazine, press a number on the CO-
MAND system key pad located in the
center dashboard.