Page 49 of 245

AUXILIARY POWER POINT
Power outlets are designed for
accessory plugs only. Do not
hang any type of accessory or
accessory bracket from the plug.
Improper use of the power
outlet can cause damage not
covered by your warranty.
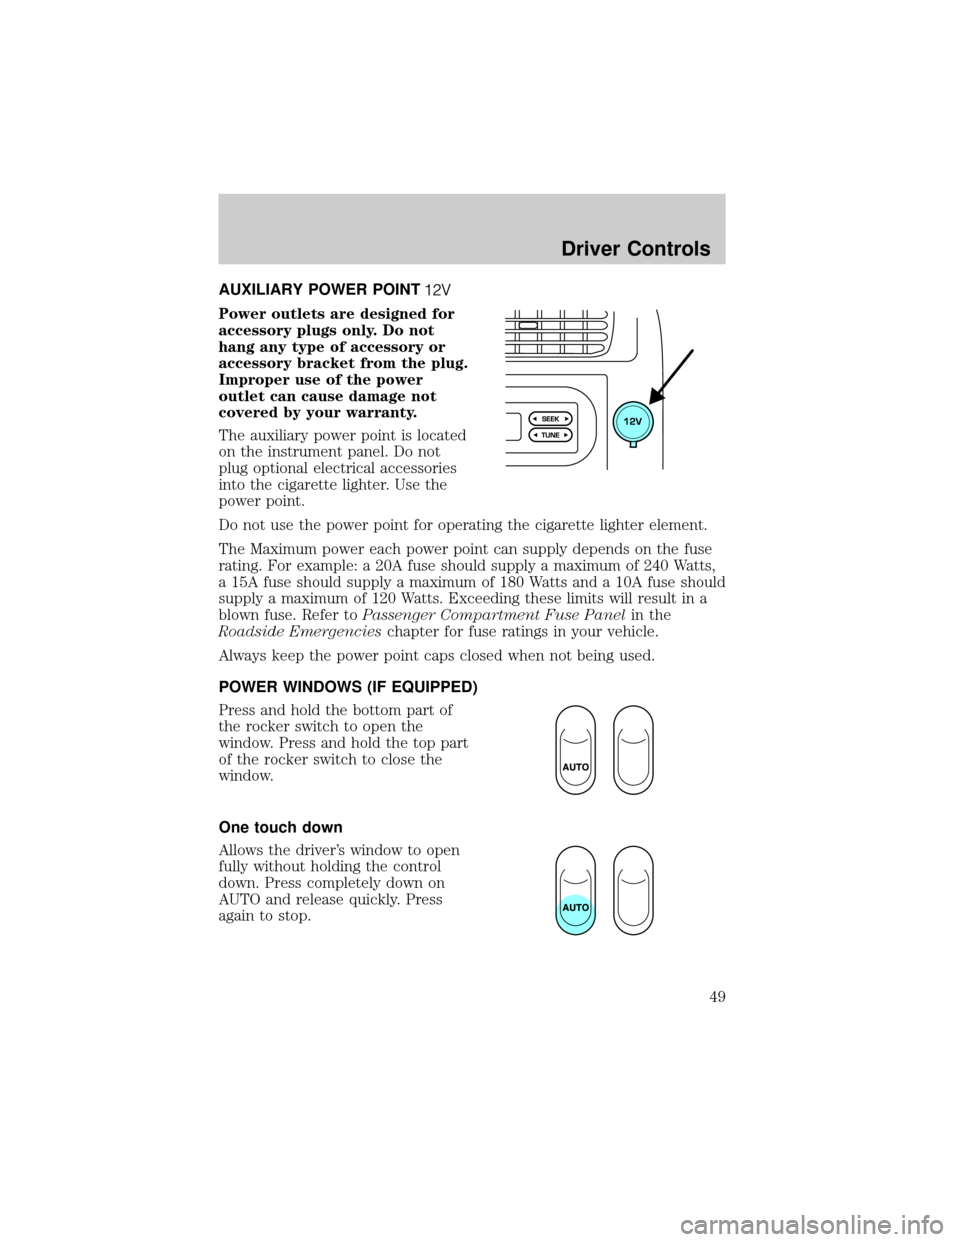
The auxiliary power point is located
on the instrument panel. Do not
plug optional electrical accessories
into the cigarette lighter. Use the
power point.
Do not use the power point for operating the cigarette lighter element.
The Maximum power each power point can supply depends on the fuse
rating. For example: a 20A fuse should supply a maximum of 240 Watts,
a 15A fuse should supply a maximum of 180 Watts and a 10A fuse should
supply a maximum of 120 Watts. Exceeding these limits will result in a
blown fuse. Refer toPassenger Compartment Fuse Panelin the
Roadside Emergencieschapter for fuse ratings in your vehicle.
Always keep the power point caps closed when not being used.
POWER WINDOWS (IF EQUIPPED)
Press and hold the bottom part of
the rocker switch to open the
window. Press and hold the top part
of the rocker switch to close the
window.
One touch down
Allows the driver's window to open
fully without holding the control
down. Press completely down on
AUTO and release quickly. Press
again to stop.
Driver Controls
49
Page 142 of 245
Standard fuse amperage rating and color
COLOR
Fuse
ratingMini
fusesStandard
fusesMaxi
fusesCartridge
maxi
fusesFuse link
cartridge
2A Grey Grey Ð Ð Ð
3A Violet Violet Ð Ð Ð
4A Pink Pink Ð Ð Ð
5A Tan Tan Ð Ð Ð
7.5A Brown Brown Ð Ð Ð
10A Red Red Ð Ð Ð
15A Blue Blue Ð Ð Ð
20A Yellow Yellow Yellow Blue Blue
25A Natural Natural Ð Ð Ð
30A Green Green Green Pink Pink
40A Ð Ð Orange Green Green
50A Ð Ð Red Red Red
60A Ð Ð Blue Ð Yellow
70A Ð Ð Tan Ð Brown
80A Ð Ð Natural Ð Black
Passenger compartment fuse panel
The fuse panel is located on the
left-hand side of the instrument
panel facing the driver's side door.
Pull the panel cover outward to
access the fuses.
Roadside Emergencies
142
Page 144 of 245

Fuse/Relay
LocationFuse Amp
RatingPassenger Compartment Fuse Panel
Description
10 7.5A Speed control servo/amplifier assembly,
Generic Electronic Module (GEM), Shift
lock actuator, Turn signals, 4x4
11 7.5A Instrument cluster, 4x4, Main light switch,
Central Security Module (CSM), Generic
Electronic Module (GEM)
12 Ð Not used
13 20A Brake pedal position switch
14 10A Anti-lock Brake System (ABS) control
module
15 Ð Not used
16 30A Windshield wiper motor, Wiper HI/LO
relay, Wiper run/park relay
17 20A Cigar lighter, Data Link Connector (DLC)
18 Ð Not used
19 25A Powertrain Control Module (PCM) power
diode, Ignition, PATS (Passive Anti-Theft
System)
20 7.5A Generic Electronic Module (GEM), Radio
21 15A Hazard flasher
22 20A Auxiliary power socket
23 Ð Not used
24 7.5A Clutch Pedal Position (CPP) switch,
Starter interrupt relay
25 Ð Not used
26 10A Battery saver relay, Auxiliary relay box,
Restraint Central Module (RCM), Generic
Electronic Module (GEM), Instrument
cluster
27 Ð Not used
28 7.5A Generic Electronic Module (GEM), Radio
29 20A Radio
Roadside Emergencies
144
Page 145 of 245
Fuse/Relay
LocationFuse Amp
RatingPassenger Compartment Fuse Panel
Description
30 Ð Not used
31 Ð Not used
32 Ð Not used
33 15A Headlamps, Daytime Running Lamps
(DRL) module, Instrument cluster
34 Ð Not used
35 15A Horn relay (if not equipped with a Central
Security Module)
36 Ð Not used
Power distribution box
The power distribution box is
located in the engine compartment.
The power distribution box contains
high-current fuses that protect your
vehicle's main electrical systems
from overloads.
WARNING: Always disconnect the battery before servicing high
current fuses.
WARNING: To reduce risk of electrical shock, always replace
the cover to the Power Distribution Box before reconnecting
the battery or refilling fluid reservoirs.
If the battery has been disconnected and reconnected, refer to the
Batterysection of theMaintenance and specificationschapter.
Roadside Emergencies
145
Page 180 of 245

If the wiper still does not wipe properly, this could be caused by
substances on the windshield or rear window such as tree sap and some
hot wax treatments used by commercial car washes. Clean the outside of
the windshield or rear window with a non-abrasive cleaner.Do notuse
abrasive cleansers on glass as they may cause scratches. The windshield
or rear window is clean if beads do not form when you rinse it with
water. The windshield, rear window and wiper blades should be cleaned
on a regular basis, and blades or rubber elements replaced when worn.
CLEANING THE INSTRUMENT PANEL
Clean the instrument panel with a damp cloth, then dry with a dry cloth.
Avoid cleaners or polish that increase the gloss of the upper portion of
the instrument panel. The dull finish in this area helps protect the driver
from undesirable windshield reflection.
Your vehicle is designed with painted controls and features which
are particularly sensitive to certain products such as insect
repellent and suntan lotion. When operating the various features
on your vehicle, be certain to wash or wipe your hands clean if
you have been in contact with any of these types of products in
order to avoid possible damage to the painted surfaces.
WARNING: Do not use chemical solvents or strong detergents
when cleaning the steering wheel or instrument panel to avoid
contamination of the air bag system.
CLEANING THE INSTRUMENT CLUSTER LENS
Clean with a damp cloth, then dry with a dry cloth.
Do not use household or glass cleaners as these may damage the lens.
INTERIOR
For fabric, carpets, cloth seats, and safety belts:
²Remove dust and loose dirt with a vacuum cleaner.
²Remove light stains and soil with Extra Strength Upholstery Cleaner,
available at your authorized Mazda dealer.
²If grease or tar is present on the material, spot-clean the area first
with Spot and Stain Remover, available at your authorized Mazda
dealer.
²Never saturate the seat covers with cleaning solution.
Cleaning
180
Page 191 of 245
Working with the engine on
²Automatic transmission:
1. Set the parking brake and shift to P (Park).
2. Block the wheels.
²Manual transmission:
1. Set the parking brake, depress the clutch and place the gearshift in
N (Neutral).
2. Block the wheels.
Note:Do not start your engine with the air cleaner removed and do not
remove it while the engine is running.
OPENING THE HOOD
1. Inside the vehicle, pull the hood
release handle located under
the bottom of the instrument
panel near the steering column.
2. Go to the front of the vehicle
and release the auxiliary latch
that is located under the front
center of the hood.
3. Lift the hood and support it
with the prop rod.
Maintenance and Specifications
191
Page 238 of 245
IDENTIFYING YOUR VEHICLE
Certification label
The National Highway Traffic Safety Administration Regulations require
that a Certification Label be affixed to a vehicle and prescribe where the
Certification Label may be located. The Certification Label is located on
the front door latch pillar on the driver's side.
Vehicle identification number (VIN)
The vehicle identification number is
attached to a metal tag and is
located on the driver side
instrument panel. (Please note that
in the graphic XXXX is
representative of your vehicle
identification number.)
Engine number
The engine number (the last eight numbers of the vehicle identification
number) is stamped on the engine block, transmission, frame and
transfer case (if equipped).
1
4
XXXXXXXXXXXXXXXXX
Maintenance and Specifications
238
Page 241 of 245

instrument cluster lens ..........180
instrument panel ....................180
interior .....................................180
Mazda car care products .......181
mirrors .....................................179
plastic parts ............................179
washing ....................................176
waxing .....................................176
wheels ......................................177
windows ..................................181
wiper blades ............................179
Clutch
fluid ..........................................222
operation while driving ..........122
recommended shift speeds ....123
Compass, electronic ..............50±51
calibration .................................52
set zone adjustment .................51
Console ........................................57
Coolant
checking and adding ..............204
refill capacities ................207, 232
specifications ..................235±236
Cruise control
(see Speed control) ....................53
Customer
Assistance ..................165±166, 169
D
Daytime running lamps
(see Lamps) ................................38
Dipstick
automatic transmission
fluid ..........................................223
engine oil .................................196
Doors
lubricant specifications ..........235Driveline universal joint and
slip yoke ....................................227
Driving under special
conditions ..................124, 126±127
mud ..........................................127
sand .........................................127
snow and ice ...........................128
through water .................127±128
E
Emergencies, roadside
jump-starting ..........................158
Emission control system ..........218
Engine ........................................236
cleaning ...................................177
coolant .....................................204
idle speed control ...................202
lubrication
specifications ..................235±236
refill capacities ........................232
service points ..................192±194
starting after a collision .........140
Engine block heater .................114
Engine oil ..................................196
checking and adding ..............196
dipstick ....................................196
filter, specifications ................200
recommendations ...................200
refill capacities ........................232
specifications ..................235±236
Exhaust fumes ..........................114
F
Flexible Fuel Vehicle (FFV) ....208
Fluid capacities .........................232
Foglamps .....................................38
Four-Wheel Drive vehicles .......124
Index
241