Page 1 of 272
Introduction 4
Instrument Cluster 10
Warning and control lights 10
Gauges 15
Entertainment Systems 17
AM/FM stereo cassette with CD 17
CD changer 21
Navigation system 24
Climate Controls 70
Dual automatic temperature control 70
Lights 74
Headlamps 74
Turn signal control 78
Bulb replacement 79
Driver Controls 83
Windshield wiper/washer control 83
Steering wheel adjustment 85
Power windows 97
Mirrors 98
Speed control 99
Message center 104
Locks and Security 113
Locks 113
Anti-theft system 123
2003 Town Car(tow)
Owners Guide (post-2002-fmt)
USA English(fus)
Table of Contents
Table of Contents
1
Page 14 of 272
Trunk ajar:Illuminates when the
trunk is not completely closed. This
light will flash and sound a tone for
one second, then the light remains
on.
Turn signal:Illuminates when the
left or right turn signal or the
hazard lights are turned on. If the
indicators stay on or flash faster, check for a burned out bulb.
High beams:Illuminates when the
high beam headlamps are turned on.
Headlamps on warning chime:Sounds when the headlamps or parking
lamps are on, the ignition is off (and the key is not in the ignition) and
the driver’s door is opened.
Key-in-ignition warning chime:Sounds when the key is left in the
ignition in the OFF/LOCK or ACC position and the driver’s door is
opened.
Turn signal chime (if equipped):Sounds when the turn signal lever
has been activated to signal a turn and not turned off after the vehicle is
driven more than 0.8 km (1/2 mile).
2003 Town Car(tow)
Owners Guide (post-2002-fmt)
USA English(fus)
Instrument Cluster
14
Page 74 of 272
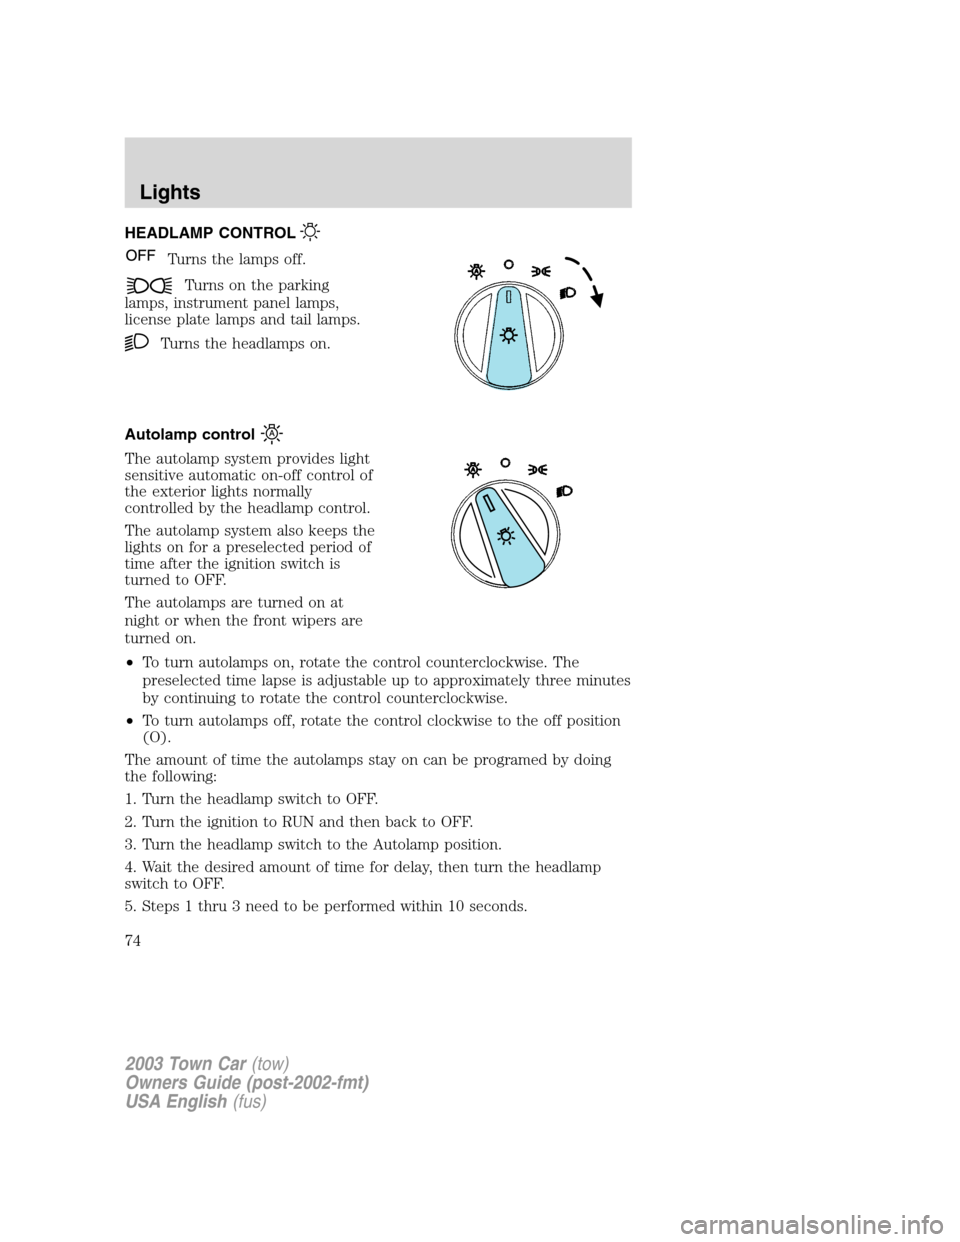
HEADLAMP CONTROL
Turns the lamps off.
Turns on the parking
lamps, instrument panel lamps,
license plate lamps and tail lamps.
Turns the headlamps on.
Autolamp control
The autolamp system provides light
sensitive automatic on-off control of
the exterior lights normally
controlled by the headlamp control.
The autolamp system also keeps the
lights on for a preselected period of
time after the ignition switch is
turned to OFF.
The autolamps are turned on at
night or when the front wipers are
turned on.
•To turn autolamps on, rotate the control counterclockwise. The
preselected time lapse is adjustable up to approximately three minutes
by continuing to rotate the control counterclockwise.
•To turn autolamps off, rotate the control clockwise to the off position
(O).
The amount of time the autolamps stay on can be programed by doing
the following:
1. Turn the headlamp switch to OFF.
2. Turn the ignition to RUN and then back to OFF.
3. Turn the headlamp switch to the Autolamp position.
4. Wait the desired amount of time for delay, then turn the headlamp
switch to OFF.
5. Steps 1 thru 3 need to be performed within 10 seconds.
2003 Town Car(tow)
Owners Guide (post-2002-fmt)
USA English(fus)
Lights
Lights
74
Page 75 of 272
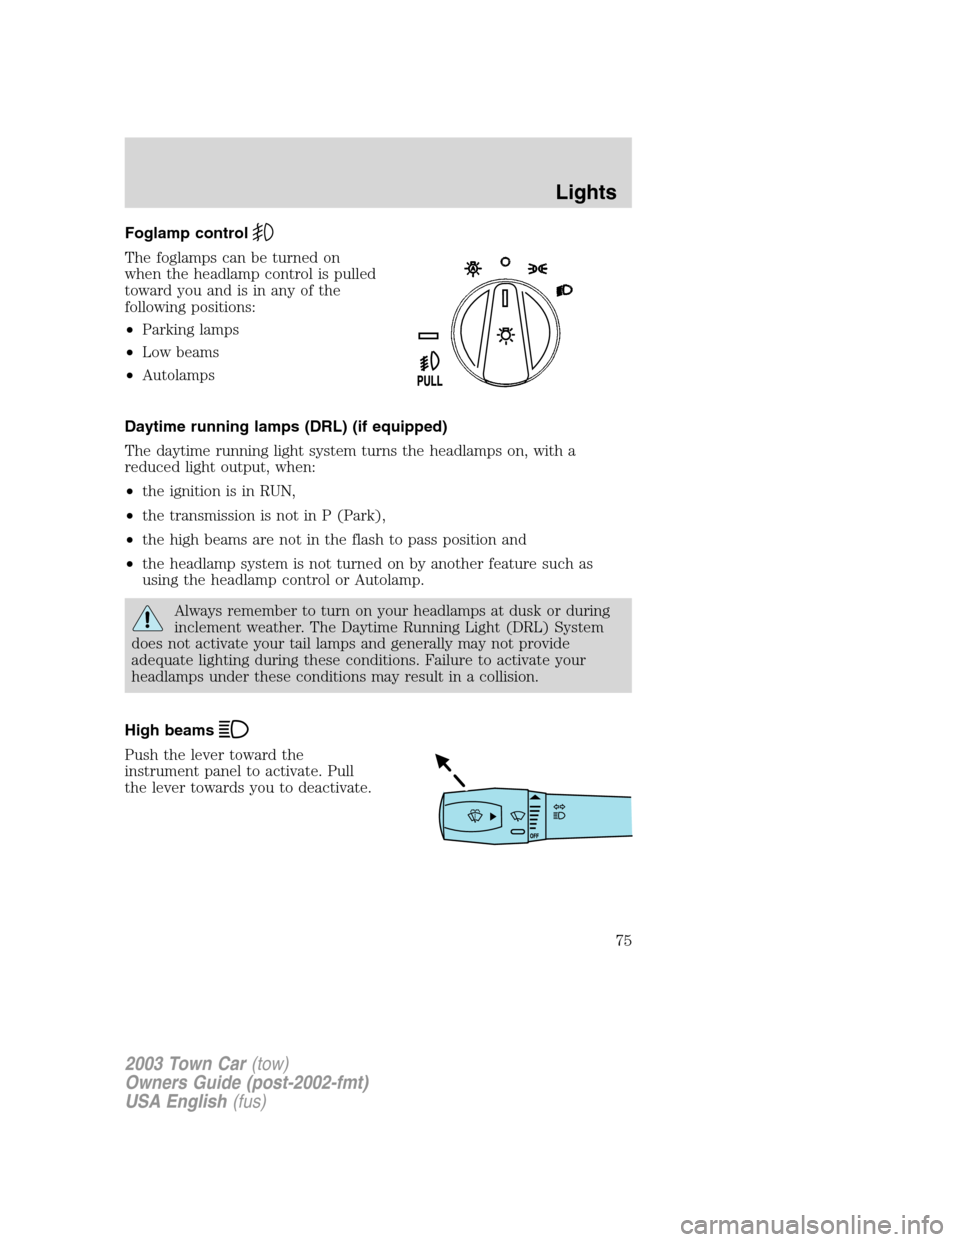
Foglamp control
The foglamps can be turned on
when the headlamp control is pulled
toward you and is in any of the
following positions:
•Parking lamps
•Low beams
•Autolamps
Daytime running lamps (DRL) (if equipped)
The daytime running light system turns the headlamps on, with a
reduced light output, when:
•the ignition is in RUN,
•the transmission is not in P (Park),
•the high beams are not in the flash to pass position and
•the headlamp system is not turned on by another feature such as
using the headlamp control or Autolamp.
Always remember to turn on your headlamps at dusk or during
inclement weather. The Daytime Running Light (DRL) System
does not activate your tail lamps and generally may not provide
adequate lighting during these conditions. Failure to activate your
headlamps under these conditions may result in a collision.
High beams
Push the lever toward the
instrument panel to activate. Pull
the lever towards you to deactivate.
2003 Town Car(tow)
Owners Guide (post-2002-fmt)
USA English(fus)
Lights
75
Page 76 of 272
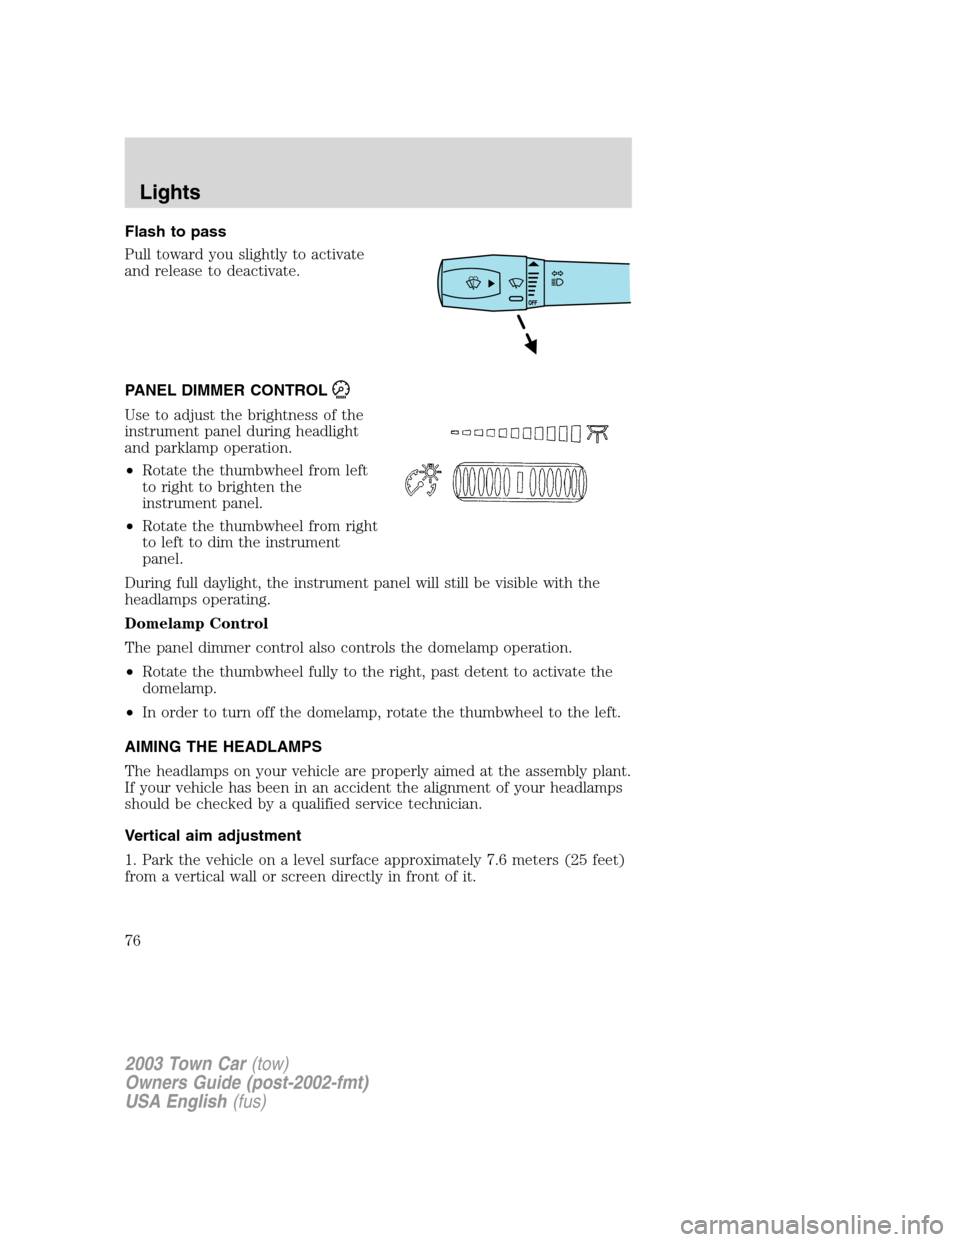
Flash to pass
Pull toward you slightly to activate
and release to deactivate.
PANEL DIMMER CONTROL
Use to adjust the brightness of the
instrument panel during headlight
and parklamp operation.
•Rotate the thumbwheel from left
to right to brighten the
instrument panel.
•Rotate the thumbwheel from right
to left to dim the instrument
panel.
During full daylight, the instrument panel will still be visible with the
headlamps operating.
Domelamp Control
The panel dimmer control also controls the domelamp operation.
•Rotate the thumbwheel fully to the right, past detent to activate the
domelamp.
•In order to turn off the domelamp, rotate the thumbwheel to the left.
AIMING THE HEADLAMPS
The headlamps on your vehicle are properly aimed at the assembly plant.
If your vehicle has been in an accident the alignment of your headlamps
should be checked by a qualified service technician.
Vertical aim adjustment
1. Park the vehicle on a level surface approximately 7.6 meters (25 feet)
from a vertical wall or screen directly in front of it.
2003 Town Car(tow)
Owners Guide (post-2002-fmt)
USA English(fus)
Lights
76
Page 77 of 272
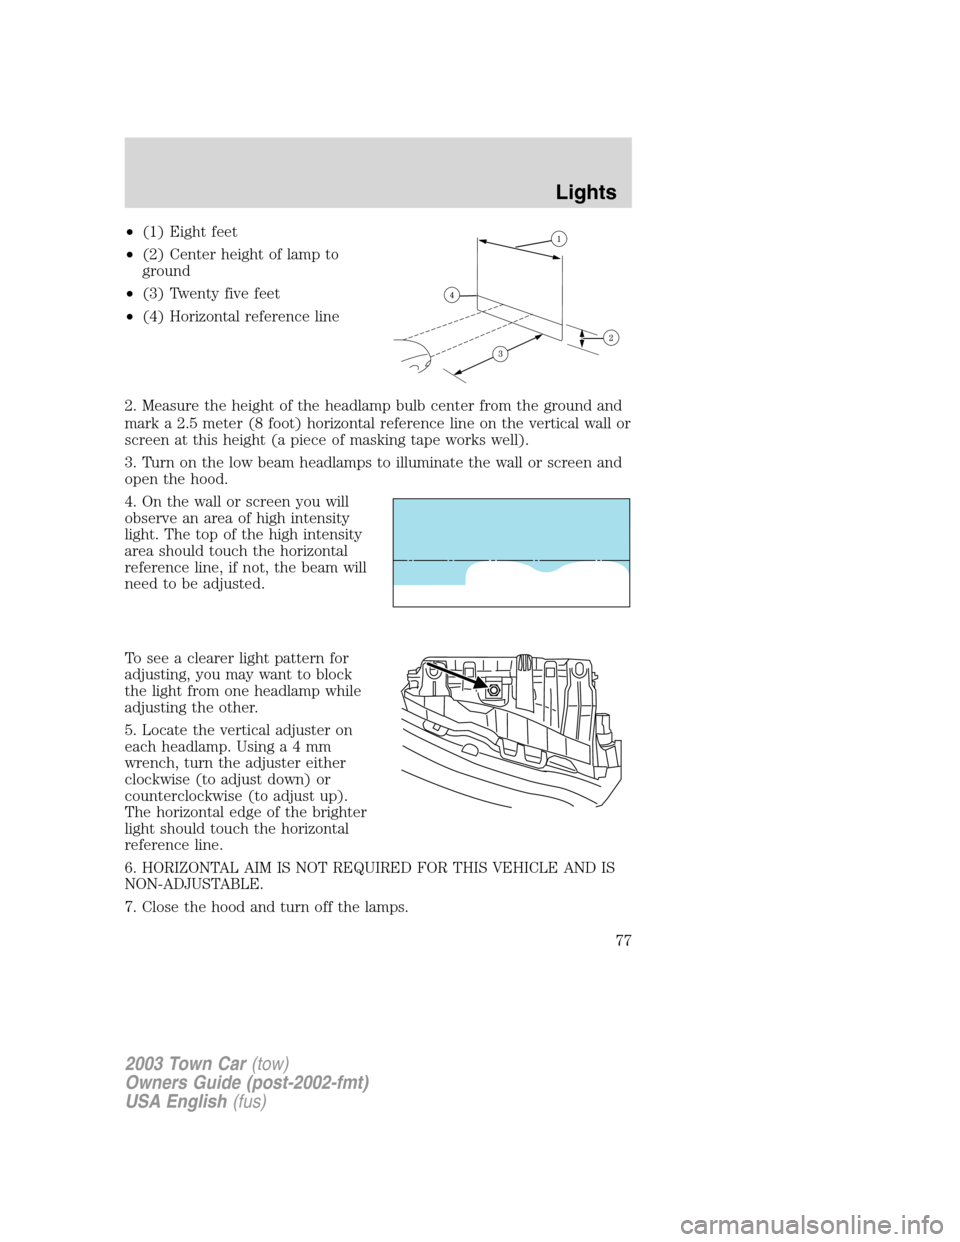
•(1) Eight feet
•(2) Center height of lamp to
ground
•(3) Twenty five feet
•(4) Horizontal reference line
2. Measure the height of the headlamp bulb center from the ground and
mark a 2.5 meter (8 foot) horizontal reference line on the vertical wall or
screen at this height (a piece of masking tape works well).
3. Turn on the low beam headlamps to illuminate the wall or screen and
open the hood.
4. On the wall or screen you will
observe an area of high intensity
light. The top of the high intensity
area should touch the horizontal
reference line, if not, the beam will
need to be adjusted.
To see a clearer light pattern for
adjusting, you may want to block
the light from one headlamp while
adjusting the other.
5. Locate the vertical adjuster on
each headlamp. Usinga4mm
wrench, turn the adjuster either
clockwise (to adjust down) or
counterclockwise (to adjust up).
The horizontal edge of the brighter
light should touch the horizontal
reference line.
6. HORIZONTAL AIM IS NOT REQUIRED FOR THIS VEHICLE AND IS
NON-ADJUSTABLE.
7. Close the hood and turn off the lamps.
2003 Town Car(tow)
Owners Guide (post-2002-fmt)
USA English(fus)
Lights
77
Page 79 of 272
BULBS
Replacing exterior bulbs
Check the operation of all the bulbs frequently.
Using the right bulbs
Replacement bulbs are specified in the chart below. Headlamp bulbs
must be marked with an authorized“D.O.T.”for North America and an
“E”for Europe to assure lamp performance, light brightness and pattern
and safe visibility. The correct bulbs will not damage the lamp assembly
or void the lamp assembly warranty and will provide quality bulb burn
time.
Function Trade Number
Headlamp (Hi beam) 9005
Headlamp (Lo beam)* H7
Park and turn lamp (front) 3457 AK
Sidemarker (front) 168
Backup lamp 3156 K
Stop, tail, turn and sidemarker lamp (rear) 3157 K
Cornering lamp 3156 K
License plate lamp 168
High-mount brakelamp - Stop** 20 (LEDS)
High-mount brakelamp - Backup Aid** 6 (LEDS)
Luggage compartment lamp 212-2
Map lamp 578
Visor vanity lamp 168
Door courtesy lamp 904
Glove compartment 194
All replacement bulbs are clear in color except where noted.
To replace all instrument panel lights - see your dealer.
* For vehicles with HID lamps, see your dealer for service.
**When replacing the center high mount stop lamp, see your dealer for
replacement bulbs.
Replacing the interior bulbs
Check the operation of all bulbs frequently.
2003 Town Car(tow)
Owners Guide (post-2002-fmt)
USA English(fus)
Lights
79
Page 80 of 272
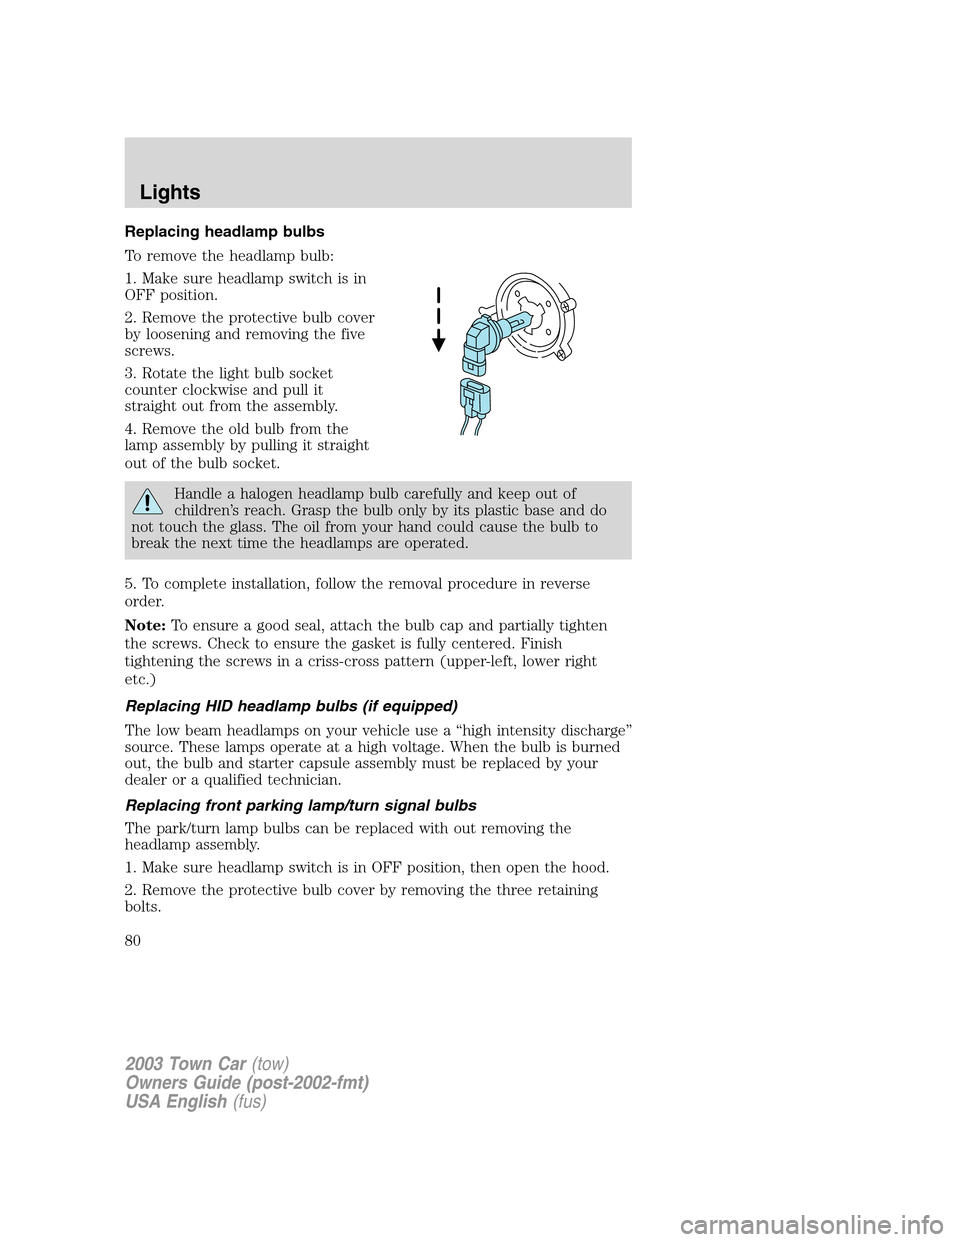
Replacing headlamp bulbs
To remove the headlamp bulb:
1. Make sure headlamp switch is in
OFF position.
2. Remove the protective bulb cover
by loosening and removing the five
screws.
3. Rotate the light bulb socket
counter clockwise and pull it
straight out from the assembly.
4. Remove the old bulb from the
lamp assembly by pulling it straight
out of the bulb socket.
Handle a halogen headlamp bulb carefully and keep out of
children’s reach. Grasp the bulb only by its plastic base and do
not touch the glass. The oil from your hand could cause the bulb to
break the next time the headlamps are operated.
5. To complete installation, follow the removal procedure in reverse
order.
Note:To ensure a good seal, attach the bulb cap and partially tighten
the screws. Check to ensure the gasket is fully centered. Finish
tightening the screws in a criss-cross pattern (upper-left, lower right
etc.)
Replacing HID headlamp bulbs (if equipped)
The low beam headlamps on your vehicle use a“high intensity discharge”
source. These lamps operate at a high voltage. When the bulb is burned
out, the bulb and starter capsule assembly must be replaced by your
dealer or a qualified technician.
Replacing front parking lamp/turn signal bulbs
The park/turn lamp bulbs can be replaced with out removing the
headlamp assembly.
1. Make sure headlamp switch is in OFF position, then open the hood.
2. Remove the protective bulb cover by removing the three retaining
bolts.
2003 Town Car(tow)
Owners Guide (post-2002-fmt)
USA English(fus)
Lights
80