2003 LINCOLN LS CD player
[x] Cancel search: CD playerPage 18 of 288

Show TYPE:Displays the station’s call letters and format.
Compression:Brings soft and loud CD passages together for a more
consistent listening level. Press MENU until compression status is
displayed. Press the SEL control to enable the compression feature when
COMP OFF is displayed. Press the SEL control again to disable the
feature when COMP ON is displayed.
Setting the clock:Press MENU until SELECT HOUR or SELECT
MINUTE is displayed. Use SEL to manually increase (
) or decrease
(
) the hours/minutes. Press MENU again to disengage clock mode.
10.Memory presets:To set a
station: Select frequency band
AM/FM; tune to a station, press and
hold a preset button until sound
returns.
11.CD:Press to select CD mode.
CD units are designed to play
commercially pressed 12 cm
(4.75 in) audio compact discs only. Due to technical
incompatibility, certain recordable and re-recordable compact
discs may not function correctly when used in Ford CD players.
Irregular shaped CDs, CDs with a scratch protection film
attached, and CDs with homemade paper (adhesive) labels should
not be inserted into the CD player. The label may peel and cause
the CD to become jammed. It is recommended that homemade
CDs be identified with permanent felt tip marker rather than
adhesive labels. Ball point pens may damage CDs. Please contact
your dealer for further information.
12.AM/FM:Press to select AM/FM
frequency band.
Autostore:Allows you to set the
strongest local radio stations without losing your original manually set
preset stations for AM/FM1/FM2 . Press and momentarily hold AM/FM.
AUTOSTORE will flash on the display. When the six strongest stations
are filled, the station stored in preset 1 will begin playing. If there are
less than six strong stations, the system will store the last one in the
remaining presets. Press again to disengage.
Entertainment Systems
18
Page 23 of 288

function correctly when used in Ford CD players. Irregular
shaped CDs, CDs with a scratch protection film attached, and CDs
with homemade paper (adhesive) labels should not be inserted
into the CD player. The label may peel and cause the CD to
become jammed. It is recommended that homemade CDs be
identified with permanent felt tip marker rather than adhesive
labels. Ball point pens may damage CDs. Please contact your
dealer for further information.
15.Power/volume:Press to turn
the system on/off. Turn to
raise/lower the volume.
Speed sensitive volume:(if
equipped) Radio volume changes
automatically and slightly with
vehicle speed to compensate for road and wind noise.
Press and hold the volume control for five seconds. Then press SEL to
increase (
) or decrease () the volume setting. The level will
appear in the display.
16.TAPE:Press to play reverse
side of the tape.
17.CD door:Insert the disc with the playing side down and printed side
up.
18.Tape door:Insert the tape facing the right.
RADIO FREQUENCIES
AM and FM frequencies are established by the Federal Communications
Commission (FCC) and the Canadian Radio and Telecommunications
Commission (CRTC). Those frequencies are:
AM - 530, 540–1700, 1710 kHz
FM- 87.7, 87.9–107.7, 107.9 MHz
RADIO RECEPTION FACTORS
There are three factors that can effect radio reception:
•Distance/strength: The further you travel from an FM station, the
weaker the signal and the weaker the reception.
•Terrain: Hills, mountains, tall buildings, power lines, electric fences,
traffic lights and thunderstorms can interfere with your reception.
Entertainment Systems
23
Page 24 of 288

•Station overload: When you pass a broadcast tower, a stronger signal
may overtake a weaker one and play while the weak station frequency
is displayed.
CD/CD PLAYER CARE
Do:
•Handle discs by their edges only. Never touch the playing surface.
•Inspect discs before playing. Clean only with an approved CD cleaner
and wipe from the center out.
Don’t:
•Expose discs to direct sunlight or heat sources for extended periods
of time.
•Insert more than one disc into each slot of the CD changer magazine.
•Clean using a circular motion.
CD units are designed to play commercially pressed 12 cm (4.75 in)
audio compact discs only. Due to technical incompatibility, certain
recordable and re-recordable compact discs may not function
correctly when used in Ford CD players. Irregular shaped CDs,
CDs with a scratch protection film attached, and CDs with
homemade paper (adhesive) labels should not be inserted into
the CD player. The label may peel and cause the CD to become
jammed. It is recommended that homemade CDs be identified
with permanent felt tip marker rather than adhesive labels. Ball
point pens may damage CDs. Please contact your dealer for
further information.
AUDIO SYSTEM WARRANTY AND SERVICE
Refer to theWarranty Guidefor audio system warranty information. If
service is necessary, see your dealer or qualified technician.
LINCOLN NAVIGATION SYSTEM (IF EQUIPPED)
Your vehicle may be equipped with a Lincoln Navigation System which
allows you to listen to the radio, play CDs and also navigate the vehicle
using a navigation DVD.
Entertainment Systems
24
Page 26 of 288

1.VOL-PUSH: Press to turn the system ON/OFF. Turn to adjust the
audio volume level.
2.AUDIO: Press to enter audio mode and access radio, CD, CDDJ, DVD
(if equipped) settings.
3.MAP: Press to enter map mode and view your current vehicle position
on the map. Press and hold to obtain additional position information.
4.DEST: Press to enter Destination Entry mode. This allows you to
enter a destination and route to it. With an active route, pressing DEST
allows the user to request a Detour, display entire route, select route
preferences, or change or cancel the destination.
5.MENU: Press to access system settings such as display, brightness,
clock mode, etc.
6.CD OPEN CLOSE: Press to open/close the display screen and access
the CD player.
Initial map display
After pressing AGREE to the initial
WARNING screen, you will move
into the initial map screen which
shows the current vehicle location.
Pressing the globe icon will take you
to the user settings—audible
feedback, navigation units, language
and clock.
Entertainment Systems
26
Page 28 of 288

increase when the system is ready to accept a disc. Push CD OPEN
CLOSE to close the screen. Once closed, the CD will begin to play.
3. Use the touch controls to advance tracks, scan, pause, etc. The slot
number indicators at the bottom will signify which disc is currently
playing.
To use the Navigation system:
1. Ensure that the vehicle ignition is on, and the navigation DVD is
loaded into the navigation DVD player.
2. Press DEST. The warning screen will appear. After reading, press
AGREE. The screen will show a map with your current location. Press
DEST again.
3. Select the desired type of destination entry; Address, Point of Interest;
Previous Dest; Special Memory Point; Select from map; Memory Point
and Freeway Ent/Exit. Enter the required information.
4. Press DEST at the bottom of the
map screen.
5. Choose the desired route by
pressing the NEXT button (if it
appears). There can be up to three
alternative routes.
6. Press START to begin the
navigation guidance.
Most functions are unavailable
while vehicle is in motion.
Please read the navigation
handbook for operating instructions.
Always drive safely and obey traffic laws.
WARNING
Agree
CD OPEN CLOSE MENU DESTMAP AUDIO VOL PUSH
Entertainment Systems
28
Page 36 of 288

recordable and re-recordable compact discs may not function
correctly when used in Ford CD players. Irregular shaped CDs,
CDs with a scratch protection film attached, and CDs with
homemade paper (adhesive) labels should not be inserted into
the CD player. The label may peel and cause the CD to become
jammed. It is recommended that homemade CDs be identified
with permanent felt tip marker rather than adhesive labels. Ball
point pens may damage CDs. Please contact your dealer for
further information.
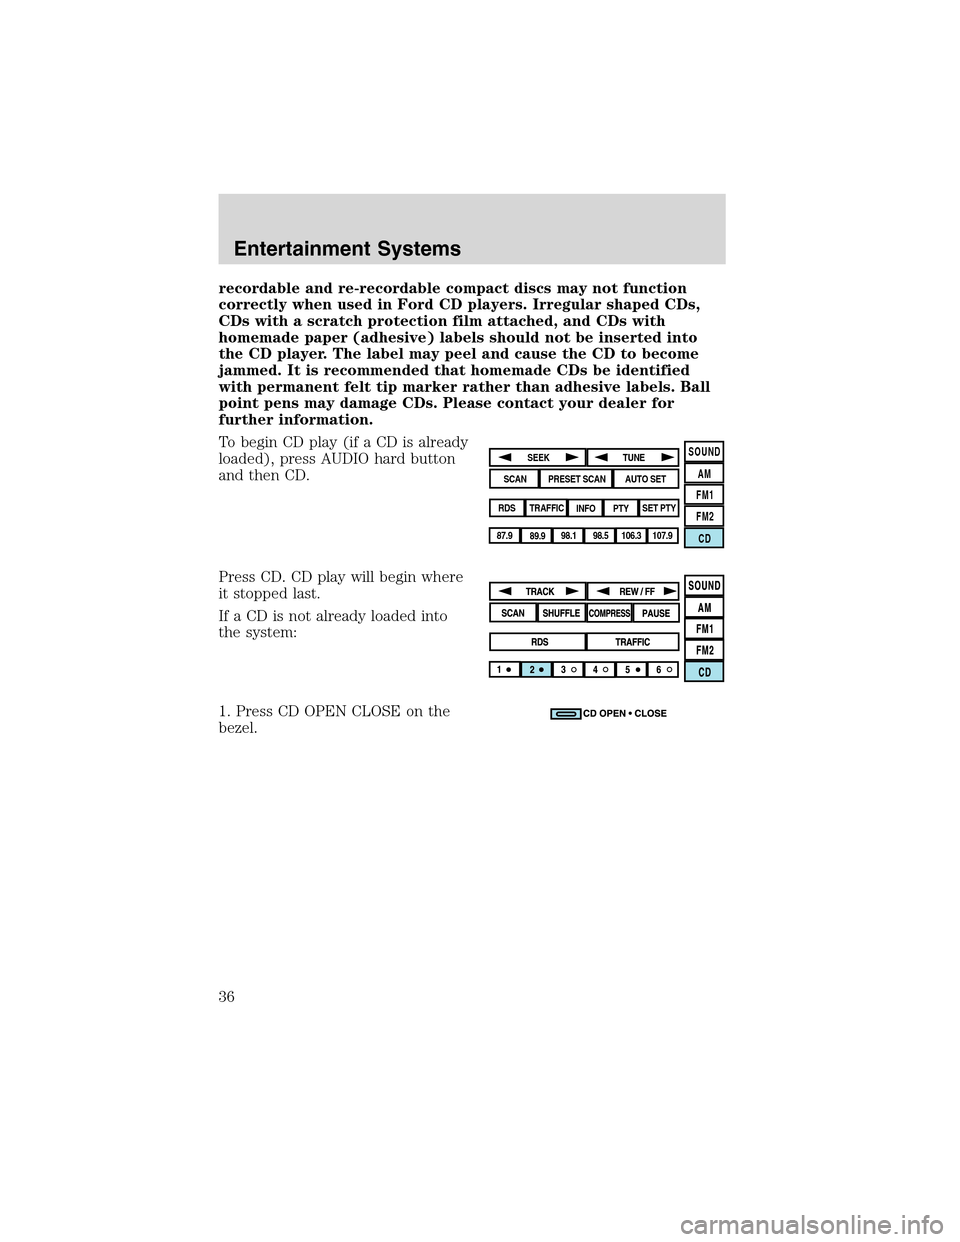
To begin CD play (if a CD is already
loaded), press AUDIO hard button
and then CD.
Press CD. CD play will begin where
it stopped last.
If a CD is not already loaded into
the system:
1. Press CD OPEN CLOSE on the
bezel.
SOUND
AM
FM1
FM2
CDSEEK
TUNE
PRESET SCANAUTO SET
SCAN
RDS
TRAFFIC
INFO PTYSET PTY
87.9
89.9 98.1
98.5 106.3 107.9
Entertainment Systems
36
Page 63 of 288

Setting the clock
Once in Menu mode, press CLOCK
to set the hours/minutes.
Voice activated commands (if equipped)
Your Lincoln Navigation System (LNS) may be equipped with a voice
activated feature which allows you to“speak”certain commands to the
system. Speaking clearly will help to ensure that the system correctly
responds to your commands.
At any time, you may say these commands:
•AM
•FM1
•FM2
•CD
•DVD (if equipped)
During normal radio operation, you may say:
•Seek up
•Seek down
During CD play with the in-dash 6 disc player:
•Track up
•Track down
•Disc up
•Disc down
While in navigation map mode, the following commands are available by
voice activation:
•Zoom in
•Zoom out
Entertainment Systems
63
Page 281 of 288

A
Accessory delay ..........................91
AdvanceTrac ..............................187
Air bag supplemental restraint
system ................157–158, 162, 165
and child safety seats ............159
description ..............158, 162, 165
disposal ....................................168
driver air bag ..........160, 163, 167
indicator light .........161, 164, 168
operation .................160, 163, 167
passenger air bag ...160, 163, 167
side air bag ......................162, 165
Air cleaner filter ...............265, 271
Air conditioning ....................69, 71
Antifreeze (see
Engine coolant) ........................248
Anti-lock brake system
(see Brakes) ......................184–185
Anti-theft system ......................133
arming the system ..................134
disarming a triggered
system .....................................134
Audio system (see Radio) ...16, 20
Automatic transmission
driving an automatic
overdrive .................................191
fluid, adding ............................264
fluid, checking ........................264
fluid, refill capacities ..............272
fluid, specification ..................275
Axle
lubricant
specifications ..................274–275
refill capacities ........................272
B
Battery .......................................246acid, treating emergencies .....246
jumping a disabled battery ....216
maintenance-free ....................246
replacement, specifications ...271
servicing ..................................246
BeltMinder .................................152
Brakes ........................................184
anti-lock ...........................184–185
anti-lock brake system
(ABS) warning light ...............184
fluid, checking and adding ....264
fluid, refill capacities ..............272
fluid, specifications .........274–275
lubricant specifications ..274–275
parking ....................................185
shift interlock ..........................190
Bulbs ............................................81
C
Capacities for refilling fluids ....272
Cargo net ...................................119
Cassette tape player ...................16
CD-single premium .....................20
Cell phone use ..........................106
Certification Label ....................277
Changing a tire .........................211
Child safety restraints ..............169
child safety belts ....................169
Child safety seats ......................172
attaching with tether straps ..176
in front seat ............................173
in rear seat ..............................173
Cleaning your vehicle
engine compartment ..............234
instrument panel ....................236
interior .............................236–237
interior trim ............................237
Index
281