Page 1 of 288
Introduction 4
Instrument Cluster 10
Warning and control lights 10
Gauges 15
Entertainment Systems 18
AM/FM stereo cassette with CD 18
AM/FM stereo with CD 27
Climate Controls 41
Electronic automatic temperature control 41
Lights 50
Headlamps 50
Turn signal control 55
Bulb replacement 56
Driver Controls 65
Windshield wiper/washer control 65
Power windows 70
Mirrors 73
Speed control 76
Message center 86
Locks and Security 103
Keys 103
Locks 103
Anti-theft system 103
Table of Contents
1
Page 10 of 288
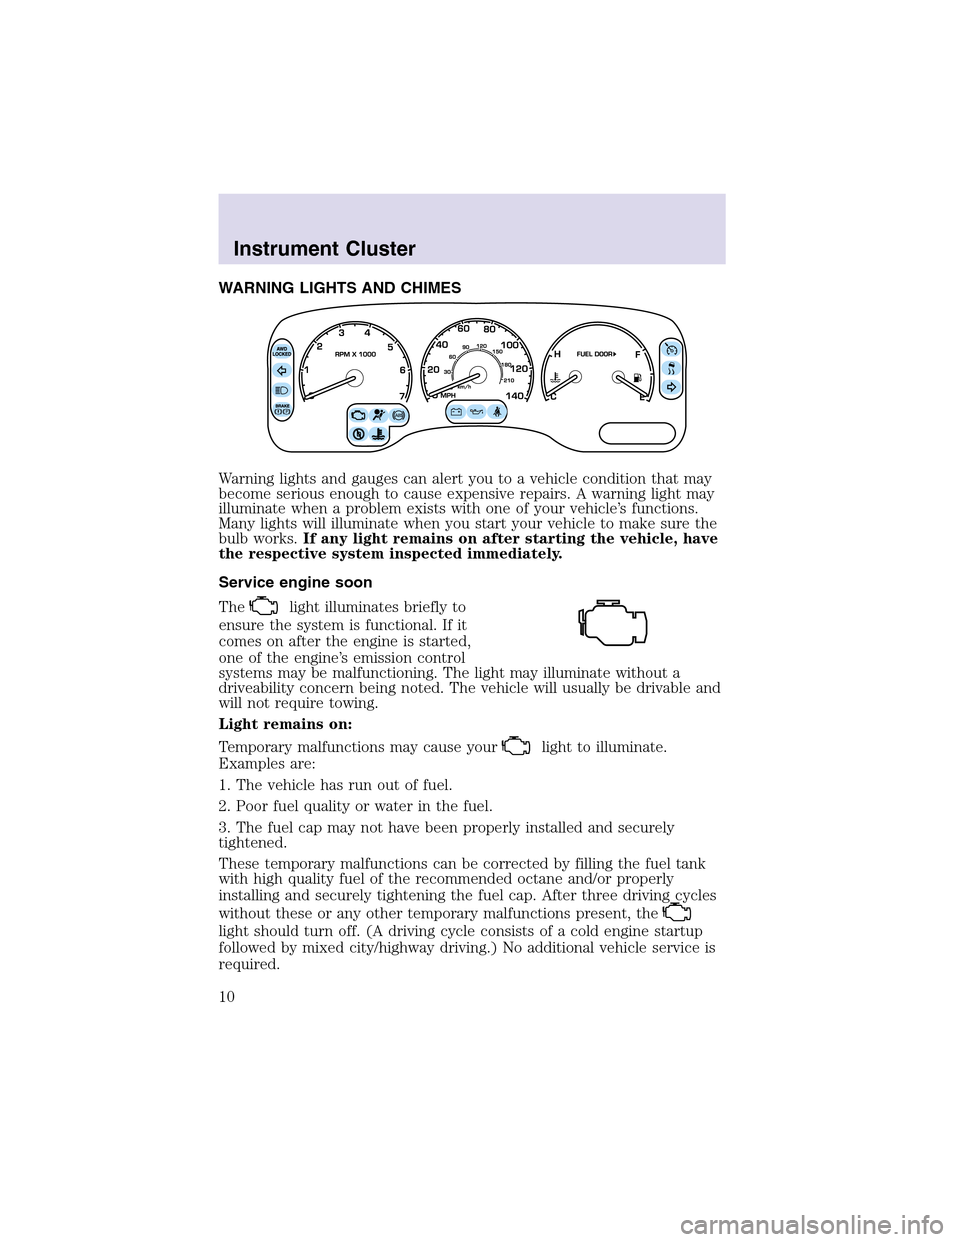
WARNING LIGHTS AND CHIMES
Warning lights and gauges can alert you to a vehicle condition that may
become serious enough to cause expensive repairs. A warning light may
illuminate when a problem exists with one of your vehicle’s functions.
Many lights will illuminate when you start your vehicle to make sure the
bulb works.If any light remains on after starting the vehicle, have
the respective system inspected immediately.
Service engine soon
The
light illuminates briefly to
ensure the system is functional. If it
comes on after the engine is started,
one of the engine’s emission control
systems may be malfunctioning. The light may illuminate without a
driveability concern being noted. The vehicle will usually be drivable and
will not require towing.
Light remains on:
Temporary malfunctions may cause your
light to illuminate.
Examples are:
1. The vehicle has run out of fuel.
2. Poor fuel quality or water in the fuel.
3. The fuel cap may not have been properly installed and securely
tightened.
These temporary malfunctions can be corrected by filling the fuel tank
with high quality fuel of the recommended octane and/or properly
installing and securely tightening the fuel cap. After three driving cycles
without these or any other temporary malfunctions present, the
light should turn off. (A driving cycle consists of a cold engine startup
followed by mixed city/highway driving.) No additional vehicle service is
required.
Instrument Cluster
10
Page 13 of 288

AdvanceTrac�(if equipped)
Flashes when the AdvanceTrac�
system is active. If the light remains
on, have the system serviced
immediately.
For more information, refer to the
Drivingchapter.
Engine oil pressure
Illuminates when the oil pressure
falls below the normal range. Check
the oil level and add oil if needed.
Refer toEngine oilin the
Maintenance and specificationschapter.
Speed control
Illuminates when the speed control
is activated.
Engine coolant temperature
Illuminates when the engine coolant
temperature is high. Stop the
vehicle as soon as safely possible,
switch off the engine and let it cool.
Never remove the coolant recovery capwhile the engine is
running or hot.
Refer toEngine coolantin theMaintenance and specifications
chapter. If light stays on or continues to turn on after the vehicle warms
up, have your vehicle serviced.
Turn signals
Illuminates when the turn signals or
the hazard lights are turned on. If
the lights stay on continuously or
flash faster, check for a burned-out bulb.
Instrument Cluster
13
Page 56 of 288
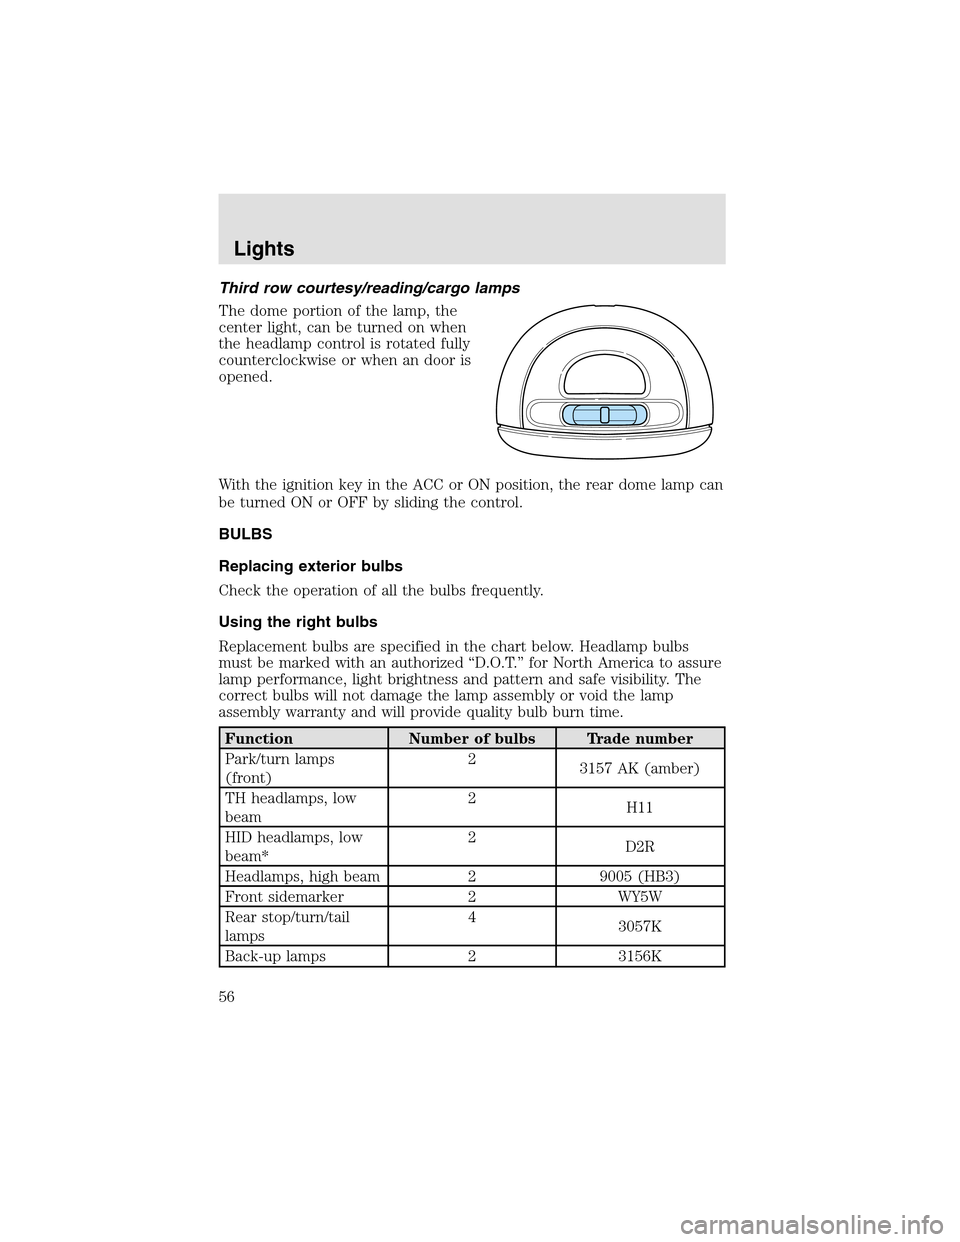
Third row courtesy/reading/cargo lamps
The dome portion of the lamp, the
center light, can be turned on when
the headlampcontrol is rotated fully
counterclockwise or when an door is
opened.
With the ignition key in the ACC or ON position, the rear dome lamp can
be turned ON or OFF by sliding the control.
BULBS
Replacing exterior bulbs
Check the operation of all the bulbs frequently.
Using the right bulbs
Replacement bulbs are specified in the chart below. Headlamp bulbs
must be marked with an authorized “D.O.T.” for North America to assure
lamp performance, light brightness and pattern and safe visibility. The
correct bulbs will not damage the lampassembly or void the lamp
assembly warranty and will provide quality bulb burn time.
Function Number of bulbs Trade number
Park/turn lamps
(front)2
3157 AK (amber)
TH headlamps, low
beam2
H11
HID headlamps, low
beam*2
D2R
Headlamps, high beam 2 9005 (HB3)
Front sidemarker 2 WY5W
Rear stop/turn/tail
lamps4
3057K
Back-uplamps 2 3156K
Lights
56
Page 57 of 288
Function Number of bulbs Trade number
Fog lamp2 9145
Liftgate lamp4 916
High-mount stoplamp 32 LEDS 2C54–13A613**
Rear license plate
lamp2
168
Mirror turn signal
lamp2
906
Approach lamp 2 912
Cargo lamp1 211-2
Interior overhead lamp1 912 (906)
Maplamps 2 168 (T10)
Front footwell light 2 194
All replacement bulbs are clear in color except where noted.
To replace all instrument panel lights see your dealer.
*For vehicles with HID lamps see your dealer.
**The entire LED display must be replaced.
Replacing the interior bulbs
Check the operation of all bulbs frequently.
Map lamps
To change the maplampbulbs:
1. Use a small screwdriver to
remove the maplamplens.
2. To remove the old bulb, twist
1⁄4
turn and pull it out.
3. Twist in a new bulb.
4. Align and press the map lamp
lens back on and test the lampoperation.
Lights
57
Page 58 of 288
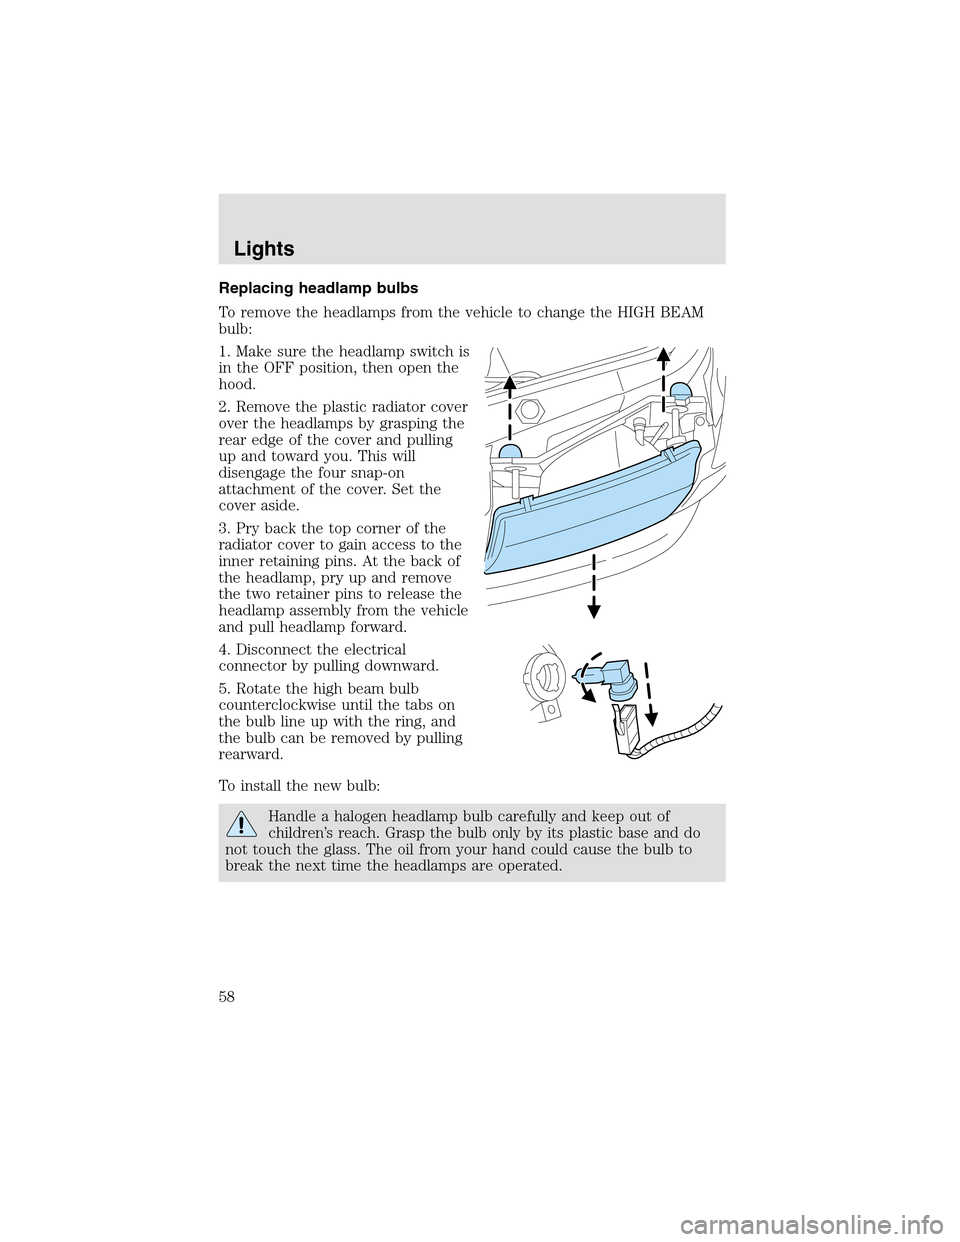
Replacing headlamp bulbs
To remove the headlamps from the vehicle to change the HIGH BEAM
bulb:
1. Make sure the headlampswitch is
in the OFF position, then open the
hood.
2. Remove the plastic radiator cover
over the headlamps by grasping the
rear edge of the cover and pulling
upand toward you. This will
disengage the four snap-on
attachment of the cover. Set the
cover aside.
3. Pry back the topcorner of the
radiator cover to gain access to the
inner retaining pins. At the back of
the headlamp, pry up and remove
the two retainer pins to release the
headlampassembly from the vehicle
and pull headlamp forward.
4. Disconnect the electrical
connector by pulling downward.
5. Rotate the high beam bulb
counterclockwise until the tabs on
the bulb line upwith the ring, and
the bulb can be removed by pulling
rearward.
To install the new bulb:
Handle a halogen headlampbulb carefully and keepout of
children’s reach. Graspthe bulb only by its plastic base and do
not touch the glass. The oil from your hand could cause the bulb to
break the next time the headlamps are operated.
Lights
58
Page 59 of 288
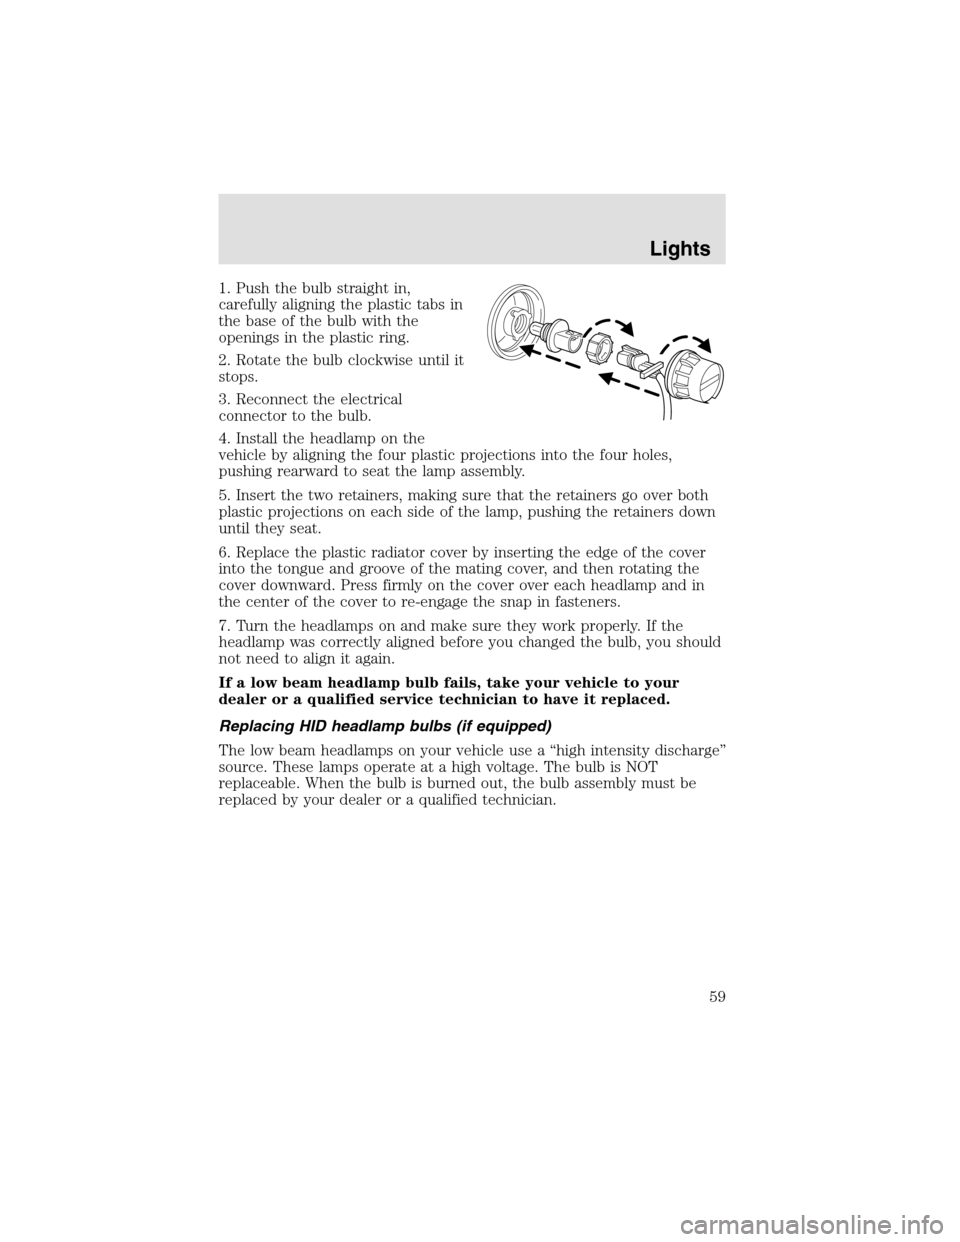
1. Push the bulb straight in,
carefully aligning the plastic tabs in
the base of the bulb with the
openings in the plastic ring.
2. Rotate the bulb clockwise until it
stops.
3. Reconnect the electrical
connector to the bulb.
4. Install the headlampon the
vehicle by aligning the four plastic projections into the four holes,
pushing rearward to seat the lamp assembly.
5. Insert the two retainers, making sure that the retainers go over both
plastic projections on each side of the lamp, pushing the retainers down
until they seat.
6. Replace the plastic radiator cover by inserting the edge of the cover
into the tongue and groove of the mating cover, and then rotating the
cover downward. Press firmly on the cover over each headlampand in
the center of the cover to re-engage the snapin fasteners.
7. Turn the headlamps on and make sure they work properly. If the
headlampwas correctly aligned before you changed the bulb, you should
not need to align it again.
If a low beam headlamp bulb fails, take your vehicle to your
dealer or a qualified service technician to have it replaced.
Replacing HID headlamp bulbs (if equipped)
The low beam headlamps on your vehicle use a “high intensity discharge”
source. These lamps operate at a high voltage. The bulb is NOT
replaceable. When the bulb is burned out, the bulb assembly must be
replaced by your dealer or a qualified technician.
Lights
59
Page 60 of 288
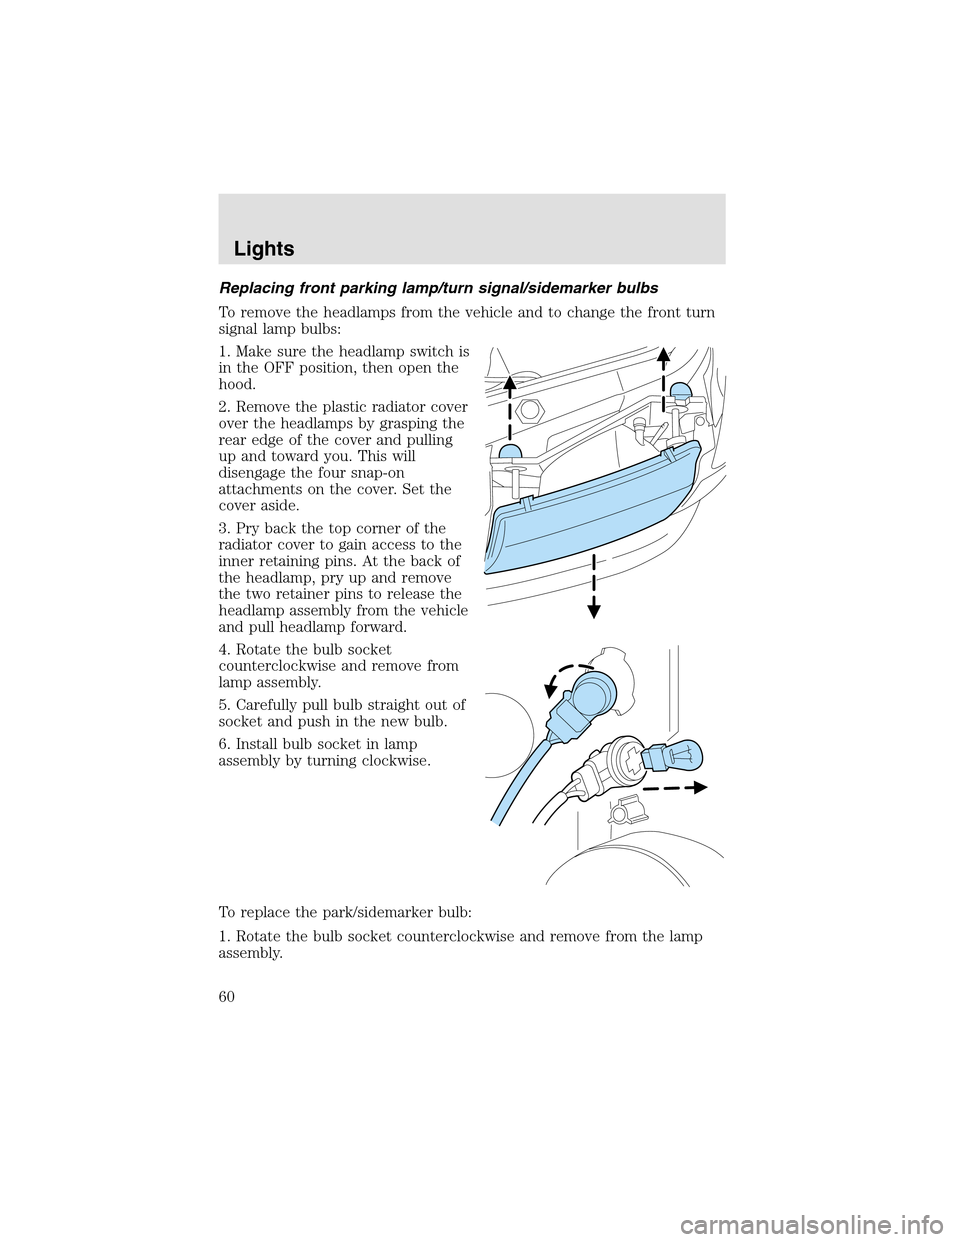
Replacing front parking lamp/turn signal/sidemarker bulbs
To remove the headlamps from the vehicle and to change the front turn
signal lampbulbs:
1. Make sure the headlampswitch is
in the OFF position, then open the
hood.
2. Remove the plastic radiator cover
over the headlamps by grasping the
rear edge of the cover and pulling
upand toward you. This will
disengage the four snap-on
attachments on the cover. Set the
cover aside.
3. Pry back the topcorner of the
radiator cover to gain access to the
inner retaining pins. At the back of
the headlamp, pry up and remove
the two retainer pins to release the
headlampassembly from the vehicle
and pull headlamp forward.
4. Rotate the bulb socket
counterclockwise and remove from
lampassembly.
5. Carefully pull bulb straight out of
socket and push in the new bulb.
6. Install bulb socket in lamp
assembly by turning clockwise.
To replace the park/sidemarker bulb:
1. Rotate the bulb socket counterclockwise and remove from the lamp
assembly.
Lights
60