Page 84 of 288

7. Press and release the “learn” or “smart” button. (The name and color
of the button may vary by manufacturer.)
Note:There are 30 seconds in which to initiate stepeight.
8. Return to the vehicle and firmly press, hold for two seconds and
release the HomeLink�button. Repeat the press/hold/release sequence
again, and, depending on the brand of the garage door opener (or other
rolling code equipped device), repeat this sequence a third time to
complete the programming.
HomeLink�should now activate your rolling code equipped device. To
program additional HomeLink�buttons begin with step2 in the
“Programming” section. For questions or comments, please contact
HomeLink atwww.homelink.comor1–800–355–3515.
Operating the HomeLink�Universal Transceiver
To operate, simply press and release
the appropriate HomeLink�button.
Activation will now occur for the
trained product (garage door, gate
operator, security system, entry
door lock, or home or office lighting
etc.). For convenience, the
hand-held transmitter of the device
may also be used at any time. In the
event that there are still
programming difficulties, contact
Homelink�atwww.homelink.comor1–800–355–3515.
Erasing HomeLink�buttons
To erase the three programmed
buttons (individual buttons cannot
be erased):
•Press and hold the two outer
HomeLink�buttons until the red
indicator light begins to
flash-after 20 seconds. Release
both buttons. Do not hold for
longer that 30 seconds.
HomeLink�is now in the train (or
learning) mode and can be programmed at any time beginning with step
2inthe“Programming”section.
Driver Controls
84
Page 85 of 288

Reprogramming a single HomeLink�button
To program a device to HomeLink�using a HomeLink�button previously
trained, follow these steps:
1. Press and hold the desired HomeLink�button.Do NOTrelease the
button.
2. The red indicator light will begin to flash after 20 seconds. Without
releasing the HomeLink�button, follow step2 in the “Programming”
section.
For questions or comments, contact HomeLink�atwww.homelink.com
or1–800–355–3515.
Gate Operator & Canadian Programming
During programming, your
hand-held transmitter may
automatically stoptransmitting —
not allowing enough time for
HomeLink�to accept the signal
from the hand-held transmitter.
After completing steps 1 and 2
outlined in the“Programming”
section, replace step 3 with the
following:
Note:If programming a garage door opener or gate operator, it is
advised to unplug the device during the “cycling” process to prevent
overheating.
•Continue to press and hold the HomeLink�button (note step3 in the
“Programming” section) while you press and release —every two
seconds(“cycle”) your hand-held transmitter until the frequency
signal has been accepted by the HomeLink�. The red indicator light
will flash slowly and then rapidly after HomeLink�accepts the radio
frequency signal.
•Proceed with step4 in the “Programming” section.
Driver Controls
85
Page 100 of 288
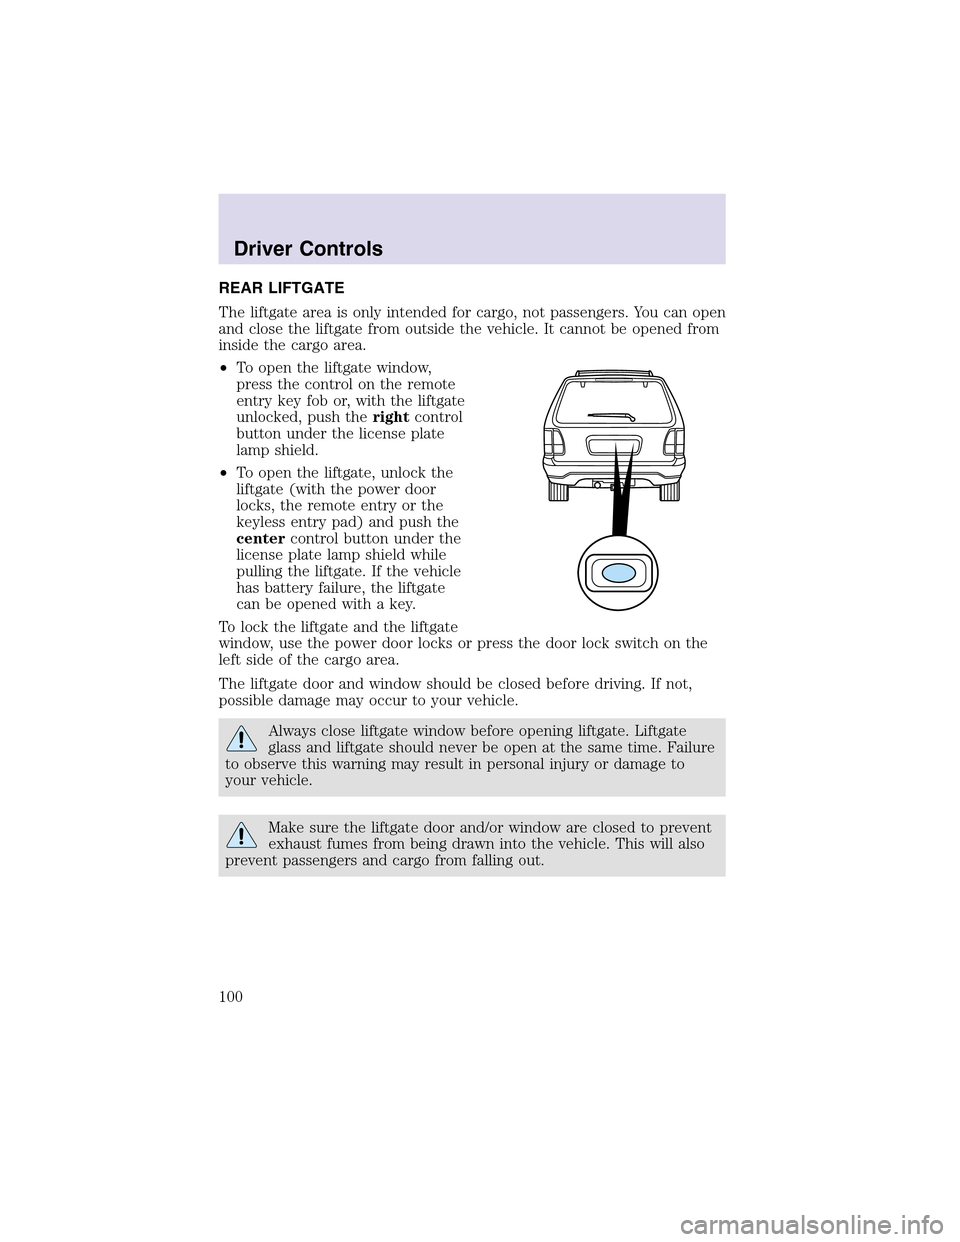
REAR LIFTGATE
The liftgate area is only intended for cargo, not passengers. You can open
and close the liftgate from outside the vehicle. It cannot be opened from
inside the cargo area.
•To open the liftgate window,
press the control on the remote
entry key fob or, with the liftgate
unlocked, push therightcontrol
button under the license plate
lampshield.
•To open the liftgate, unlock the
liftgate (with the power door
locks, the remote entry or the
keyless entry pad) and push the
centercontrol button under the
license plate lamp shield while
pulling the liftgate. If the vehicle
has battery failure, the liftgate
can be opened with a key.
To lock the liftgate and the liftgate
window, use the power door locks or press the door lock switch on the
left side of the cargo area.
The liftgate door and window should be closed before driving. If not,
possible damage may occur to your vehicle.
Always close liftgate window before opening liftgate. Liftgate
glass and liftgate should never be open at the same time. Failure
to observe this warning may result in personal injury or damage to
your vehicle.
Make sure the liftgate door and/or window are closed to prevent
exhaust fumes from being drawn into the vehicle. This will also
prevent passengers and cargo from falling out.
Driver Controls
100
Page 106 of 288
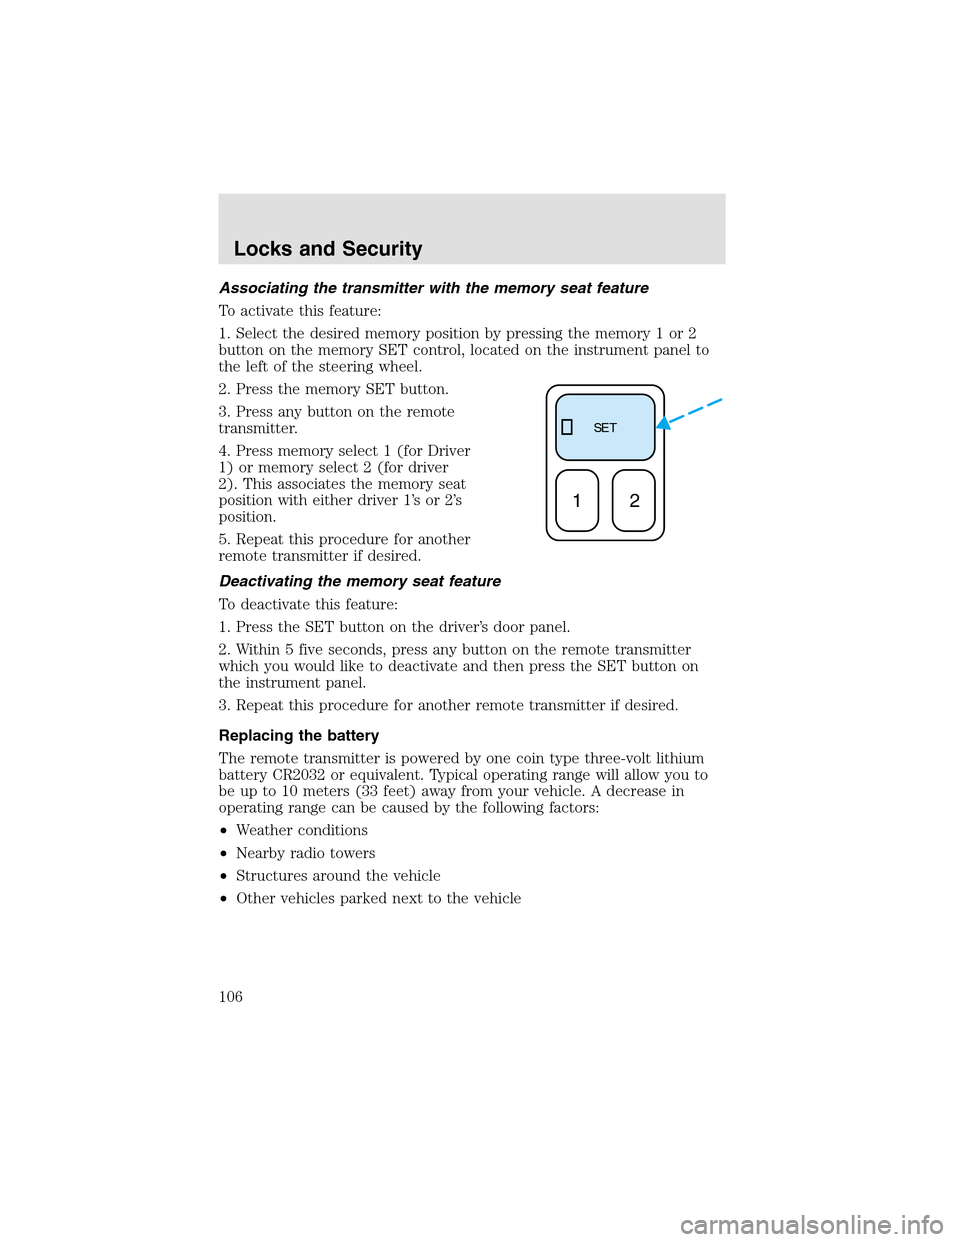
Associating the transmitter with the memory seat feature
To activate this feature:
1. Select the desired memory position by pressing the memory 1 or 2
button on the memory SET control, located on the instrument panel to
the left of the steering wheel.
2. Press the memory SET button.
3. Press any button on the remote
transmitter.
4. Press memory select 1 (for Driver
1) or memory select 2 (for driver
2). This associates the memory seat
position with either driver 1’s or 2’s
position.
5. Repeat this procedure for another
remote transmitter if desired.
Deactivating the memory seat feature
To deactivate this feature:
1. Press the SET button on the driver’s door panel.
2. Within 5 five seconds, press any button on the remote transmitter
which you would like to deactivate and then press the SET button on
the instrument panel.
3. Repeat this procedure for another remote transmitter if desired.
Replacing the battery
The remote transmitter is powered by one coin type three-volt lithium
battery CR2032 or equivalent. Typical operating range will allow you to
be upto 10 meters (33 feet) away from your vehicle. A decrease in
operating range can be caused by the following factors:
•Weather conditions
•Nearby radio towers
•Structures around the vehicle
•Other vehicles parked next to the vehicle
SE T
12
Locks and Security
106
Page 108 of 288
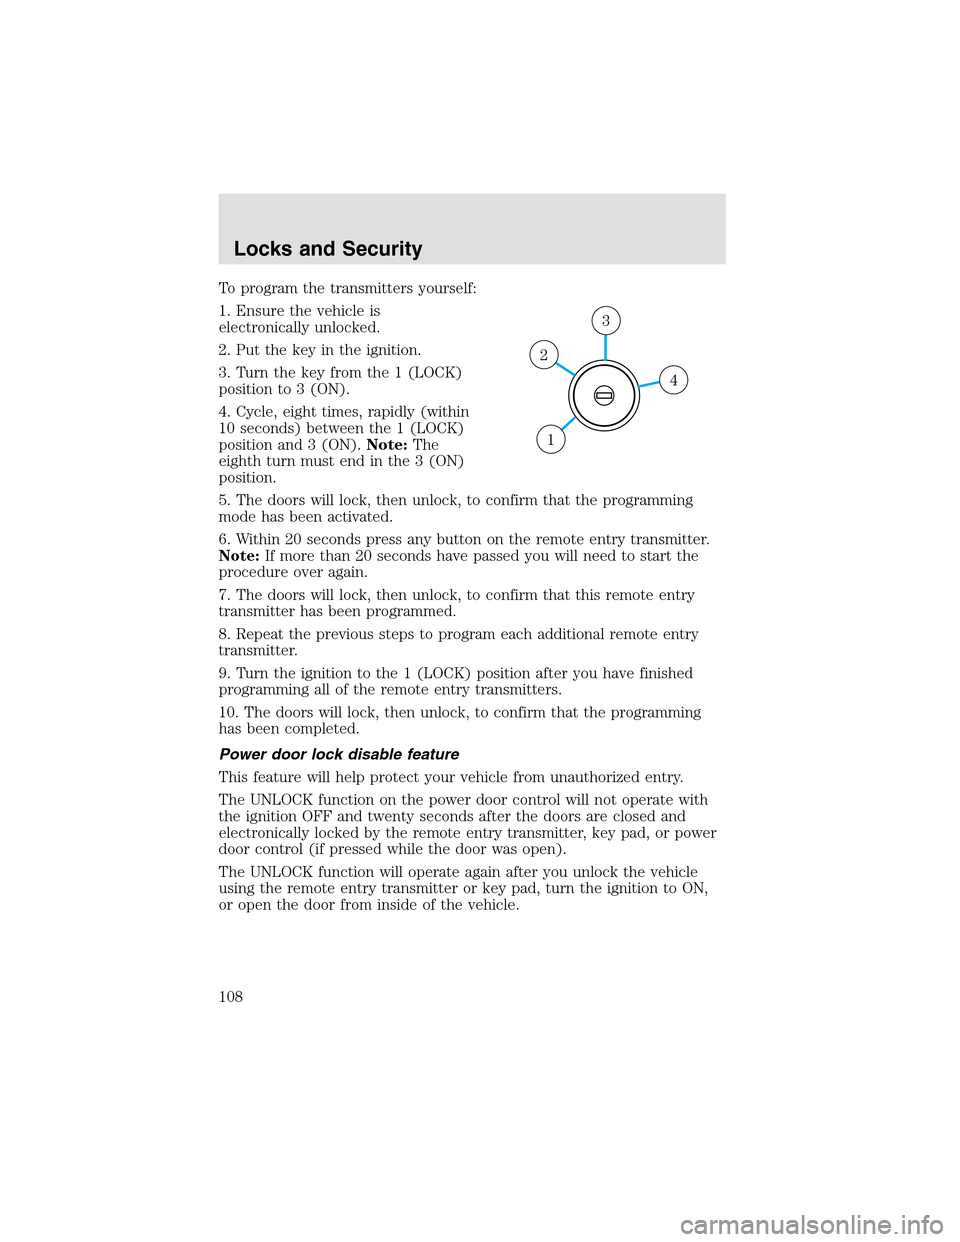
To program the transmitters yourself:
1. Ensure the vehicle is
electronically unlocked.
2. Put the key in the ignition.
3. Turn the key from the 1 (LOCK)
position to 3 (ON).
4. Cycle, eight times, rapidly (within
10 seconds) between the 1 (LOCK)
position and 3 (ON).Note:The
eighth turn must end in the 3 (ON)
position.
5. The doors will lock, then unlock, to confirm that the programming
mode has been activated.
6. Within 20 seconds press any button on the remote entry transmitter.
Note:If more than 20 seconds have passed you will need to start the
procedure over again.
7. The doors will lock, then unlock, to confirm that this remote entry
transmitter has been programmed.
8. Repeat the previous steps to program each additional remote entry
transmitter.
9. Turn the ignition to the 1 (LOCK) position after you have finished
programming all of the remote entry transmitters.
10. The doors will lock, then unlock, to confirm that the programming
has been completed.
Power door lock disable feature
This feature will helpprotect your vehicle from unauthorized entry.
The UNLOCK function on the power door control will not operate with
the ignition OFF and twenty seconds after the doors are closed and
electronically locked by the remote entry transmitter, key pad, or power
door control (if pressed while the door was open).
The UNLOCK function will operate again after you unlock the vehicle
using the remote entry transmitter or key pad, turn the ignition to ON,
or open the door from inside of the vehicle.
4
3
2
1
Locks and Security
108
Page 110 of 288
The autolock feature may also be deactivated/activated using the keyless
entry keypad. For additional information, refer toKeyless entry system
in this chapter.
Power door unlock disabled
The UNLOCK
feature on your power door locks will not work from
inside the vehicle when:
•the ignition has been turned to the OFF position, and
•20 seconds elapse after all vehicle doors are closed and locked using
the remote entry transmitter, the keypad or the power door unlock
control (while the accompanying door is open).
The UNLOCK
feature will work again after:
•a door has become ajar,
•the ignition is turned to the ON position, or
•using the UNLOCK
control on your remote entry transmitter, or
•using the keyless entry keypad to unlock the vehicle.
This feature can be activated and deactivated by an authorized dealer.
Deactivating/activating power door lock disable feature
1. Turn the ignition to the ON position, then press the UNLOCK button
three times.
2. Turn the ignition to the OFF position, then press the UNLOCK button
three times.
3. Turn the ignition to the ON position. The horn will chirp once,
indicating that the programming mode has been entered. Within five
seconds, press the LOCK button two times. Two horn chirps should be
heard, indicating that the system has been disabled. Conversely, two
horn chirps followed by a honk will indicate that the system is enabled.
4. Pressing the power door LOCK button two times again will turn the
feature ON if it was previously OFF, or OFF if it was previously ON.
Every two consecutive presses of the LOCK button after successfully
entering the configuration mode will change the enable/disable condition
of the feature.
5. Turn the ignition to the OFF position to exit programming.
Locks and Security
110
Page 121 of 288
SEATING
Adjustable head restraints
Your vehicle’s seats may be equipped with head restraints which are
vertically adjustable. The purpose of these head restraints is to help limit
head motion in the event of a rear collision. To properly adjust your head
restraints, lift the head restraint so that it is located directly behind your
head or as close to that position as possible. Refer to the following
illustrations to raise and lower the head restraints.
The head restraints can be moved
upand down.
If the head restraint is fully lowered,
push the release button to raise it.
Push release button located on the
side of the metal bar to lower head
restraint.
Seating and Safety Restraints
121
Page 125 of 288
Deactivating/activating the easy entry/exit feature
The easy entry/exit feature may also be turned on and off using the
following key sequence. This procedure must be performed within 20
seconds.
1. Remove the key from the ignition (if currently inserted).
2. Insert the ignition key into the ignition switch.
3. Turn the ignition key to the run position.
4. Place the ignition key to the off position.
5. Turn the ignition key to the run position.
6. Place the ignition key to the off position.
7. Turn the ignition key to the run position.
8. Place the ignition key to the off position.
9. Momentarily activate the horizontal seat switch in either the forward
or rearward direction.
10. Remove the ignition key from the ignition switch.
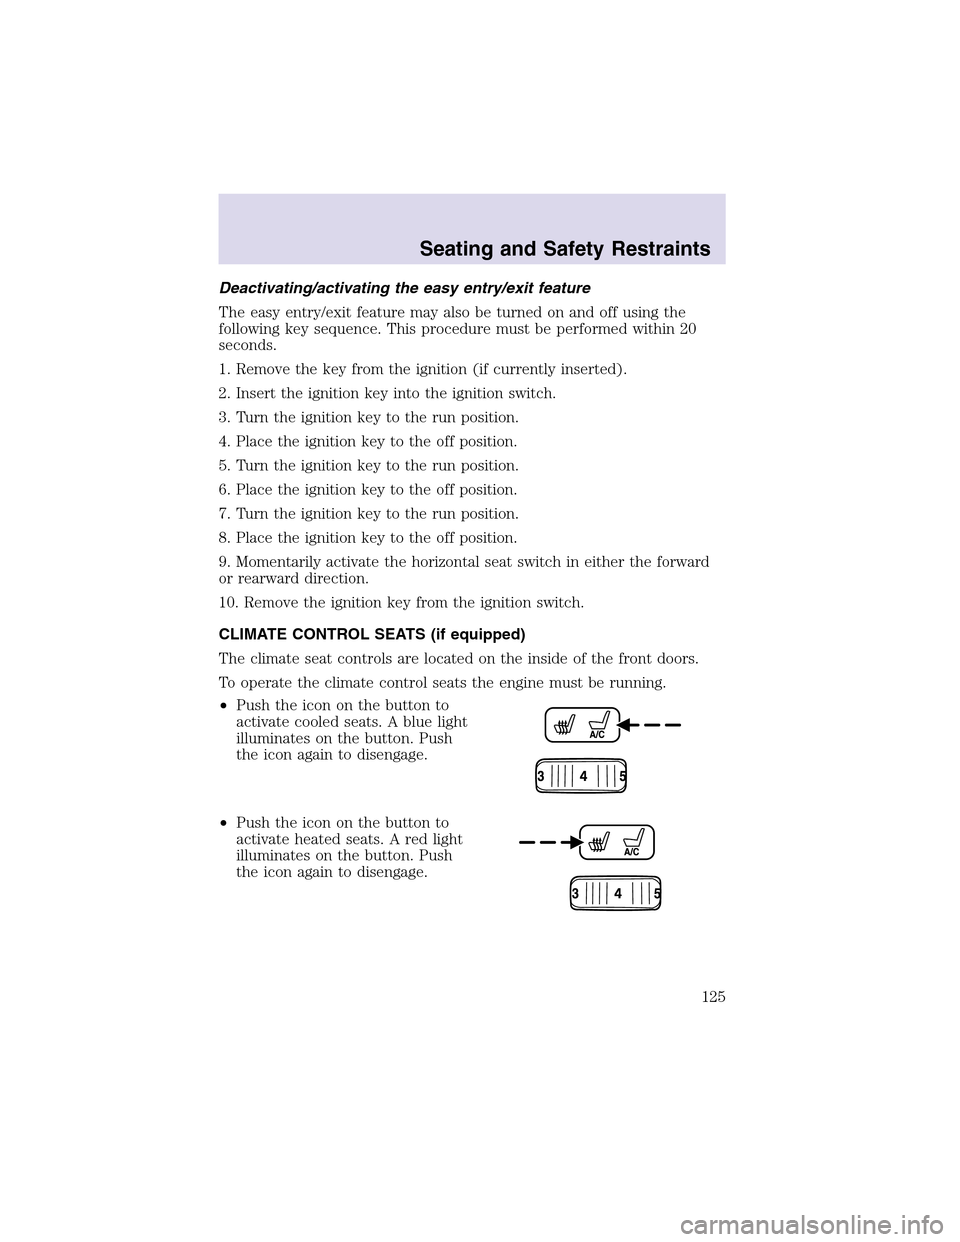
CLIMATE CONTROL SEATS (if equipped)
The climate seat controls are located on the inside of the front doors.
To operate the climate control seats the engine must be running.
•Push the icon on the button to
activate cooled seats. A blue light
illuminates on the button. Push
the icon again to disengage.
•Push the icon on the button to
activate heated seats. A red light
illuminates on the button. Push
the icon again to disengage.
Seating and Safety Restraints
125