Page 1814 of 2199

REAR OUTPUT SHAFT/YOKE/DRIVE CHAIN
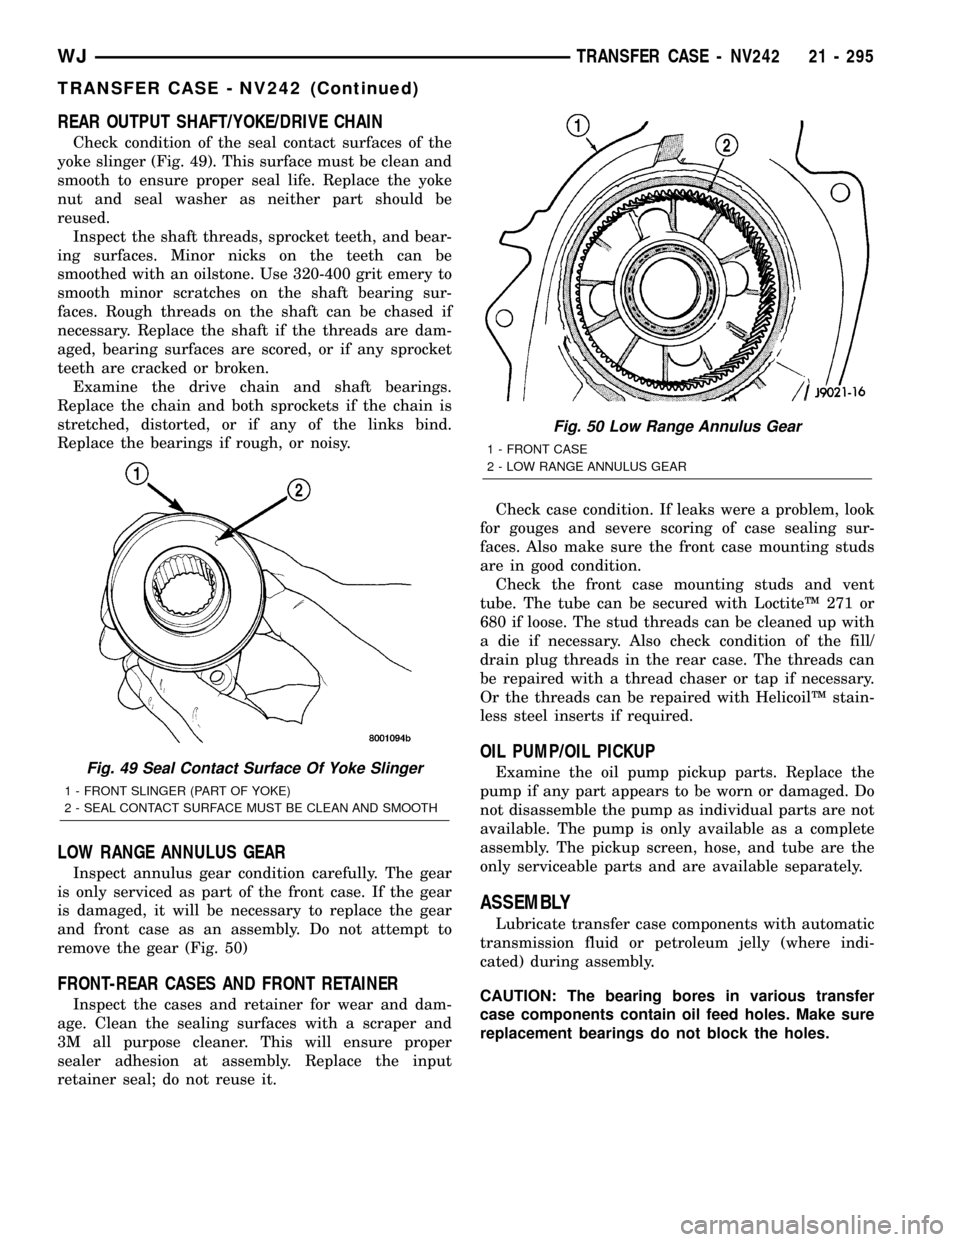
Check condition of the seal contact surfaces of the
yoke slinger (Fig. 49). This surface must be clean and
smooth to ensure proper seal life. Replace the yoke
nut and seal washer as neither part should be
reused.
Inspect the shaft threads, sprocket teeth, and bear-
ing surfaces. Minor nicks on the teeth can be
smoothed with an oilstone. Use 320-400 grit emery to
smooth minor scratches on the shaft bearing sur-
faces. Rough threads on the shaft can be chased if
necessary. Replace the shaft if the threads are dam-
aged, bearing surfaces are scored, or if any sprocket
teeth are cracked or broken.
Examine the drive chain and shaft bearings.
Replace the chain and both sprockets if the chain is
stretched, distorted, or if any of the links bind.
Replace the bearings if rough, or noisy.
LOW RANGE ANNULUS GEAR
Inspect annulus gear condition carefully. The gear
is only serviced as part of the front case. If the gear
is damaged, it will be necessary to replace the gear
and front case as an assembly. Do not attempt to
remove the gear (Fig. 50)
FRONT-REAR CASES AND FRONT RETAINER
Inspect the cases and retainer for wear and dam-
age. Clean the sealing surfaces with a scraper and
3M all purpose cleaner. This will ensure proper
sealer adhesion at assembly. Replace the input
retainer seal; do not reuse it.Check case condition. If leaks were a problem, look
for gouges and severe scoring of case sealing sur-
faces. Also make sure the front case mounting studs
are in good condition.
Check the front case mounting studs and vent
tube. The tube can be secured with LoctiteŸ 271 or
680 if loose. The stud threads can be cleaned up with
a die if necessary. Also check condition of the fill/
drain plug threads in the rear case. The threads can
be repaired with a thread chaser or tap if necessary.
Or the threads can be repaired with HelicoilŸ stain-
less steel inserts if required.
OIL PUMP/OIL PICKUP
Examine the oil pump pickup parts. Replace the
pump if any part appears to be worn or damaged. Do
not disassemble the pump as individual parts are not
available. The pump is only available as a complete
assembly. The pickup screen, hose, and tube are the
only serviceable parts and are available separately.
ASSEMBLY
Lubricate transfer case components with automatic
transmission fluid or petroleum jelly (where indi-
cated) during assembly.
CAUTION: The bearing bores in various transfer
case components contain oil feed holes. Make sure
replacement bearings do not block the holes.
Fig. 49 Seal Contact Surface Of Yoke Slinger
1 - FRONT SLINGER (PART OF YOKE)
2 - SEAL CONTACT SURFACE MUST BE CLEAN AND SMOOTH
Fig. 50 Low Range Annulus Gear
1 - FRONT CASE
2 - LOW RANGE ANNULUS GEAR
WJTRANSFER CASE - NV242 21 - 295
TRANSFER CASE - NV242 (Continued)
Page 1815 of 2199
BEARING AND SEAL
(1) Remove snap-ring that retains front output
shaft front bearing in case (Fig. 51). Then remove
bearing. Use hammer handle, or hammer and brass
punch to tap bearing out of case.
(2) Install new front output shaft front bearing
with Tool Handle C-4171 and Installer 8033-A with
the tapered cone upward (Fig. 52).(3) Install front bearing snap-ring (Fig. 51).
(4) Remove front output shaft seal using an appro-
priate pry tool (Fig. 53) or slide-hammer mounted
screw.
(5) Install new front output shaft oil seal with
Installer 6952-A (Fig. 54).
Fig. 51 Front Output Shaft Front Bearing Snap-Ring
Removal
1 - FRONT BEARING SNAP-RING
Fig. 52 Front Output Shaft Front Bearing Installation
1 - SPECIAL TOOL C-4171
2 - SPECIAL TOOL 8033-A
Fig. 53 Remove Front Output Shaft Seal
1 - OUTPUT SHAFT SEAL
2 - PRYBAR
Fig. 54 Install Front Output Shaft Seal
1 - INSTALLER 6952-A
2 - TRANSFER CASE
21 - 296 TRANSFER CASE - NV242WJ
TRANSFER CASE - NV242 (Continued)
Page 1816 of 2199
(6) Remove input gear bearing with Tool Handle
C-4171 and Remover C-4210 (Fig. 55).
(7) Install snap-ring on new input gear bearing.
(8) Install new input gear bearing with Tool Han-
dle C-4171 and Remover C-4210. Install bearing far
enough to seat snap-ring against case (Fig. 56).
(9) Remove the input gear pilot bearing by insert-
ing a suitably sized drift into the splined end of the
input gear and driving the bearing out with the drift
and a hammer (Fig. 57).(10) Install new pilot bearing with Installer 8128
and Handle C-4171 (Fig. 58).
Fig. 55 Input Gear Bearing Removal
1 - SPECIAL TOOL C-4171
2 - SPECIAL TOOL C-4210
Fig. 56 Seating Input Gear Bearing
1 - SNAP-RING
2 - INPUT SHAFT BEARING
Fig. 57 Remove Input Gear Pilot Bearing
1 - DRIFT
2 - INPUT GEAR
Fig. 58 Install Input Gear Pilot Bearing
1 - HANDLE C-4171
2 - INSTALLER 8128
3 - INPUT GEAR
WJTRANSFER CASE - NV242 21 - 297
TRANSFER CASE - NV242 (Continued)
Page 1817 of 2199
(11) Install new seal in front bearing retainer with
Installer 7884 (Fig. 59).
(12) Remove output shaft rear bearing with the
screw and jaws from Remover L-4454 and Cup 8148
(Fig. 60).(13) Install new bearing with Tool Handle C-4171
and Installer 5066 (Fig. 61). Lubricate bearing after
installation.
(14) Install new seal in oil pump feed housing with
Special Tool 7888 (Fig. 62).
Fig. 59 Front Bearing Retainer Seal Installation
1 - FRONT BEARING RETAINER
2 - SPECIAL TOOL 7884
Fig. 60 Remove Front Output Shaft Rear Bearing
1 - REAR CASE
2 - SPECIAL TOOL L-4454-1 AND L-4454-3
3 - SPECIAL TOOL 8148
Fig. 61 Install Front Output Shaft Rear Bearing
1 - HANDLE C-4171
2 - OUTPUT SHAFT INNER BEARING
3 - INSTALLER 5066
Fig. 62 Oil Pump Seal Installation
1 - HOUSING SEAL
2 - SPECIAL TOOL 7888
3 - OIL PUMP FEED HOUSING
21 - 298 TRANSFER CASE - NV242WJ
TRANSFER CASE - NV242 (Continued)
Page 1818 of 2199

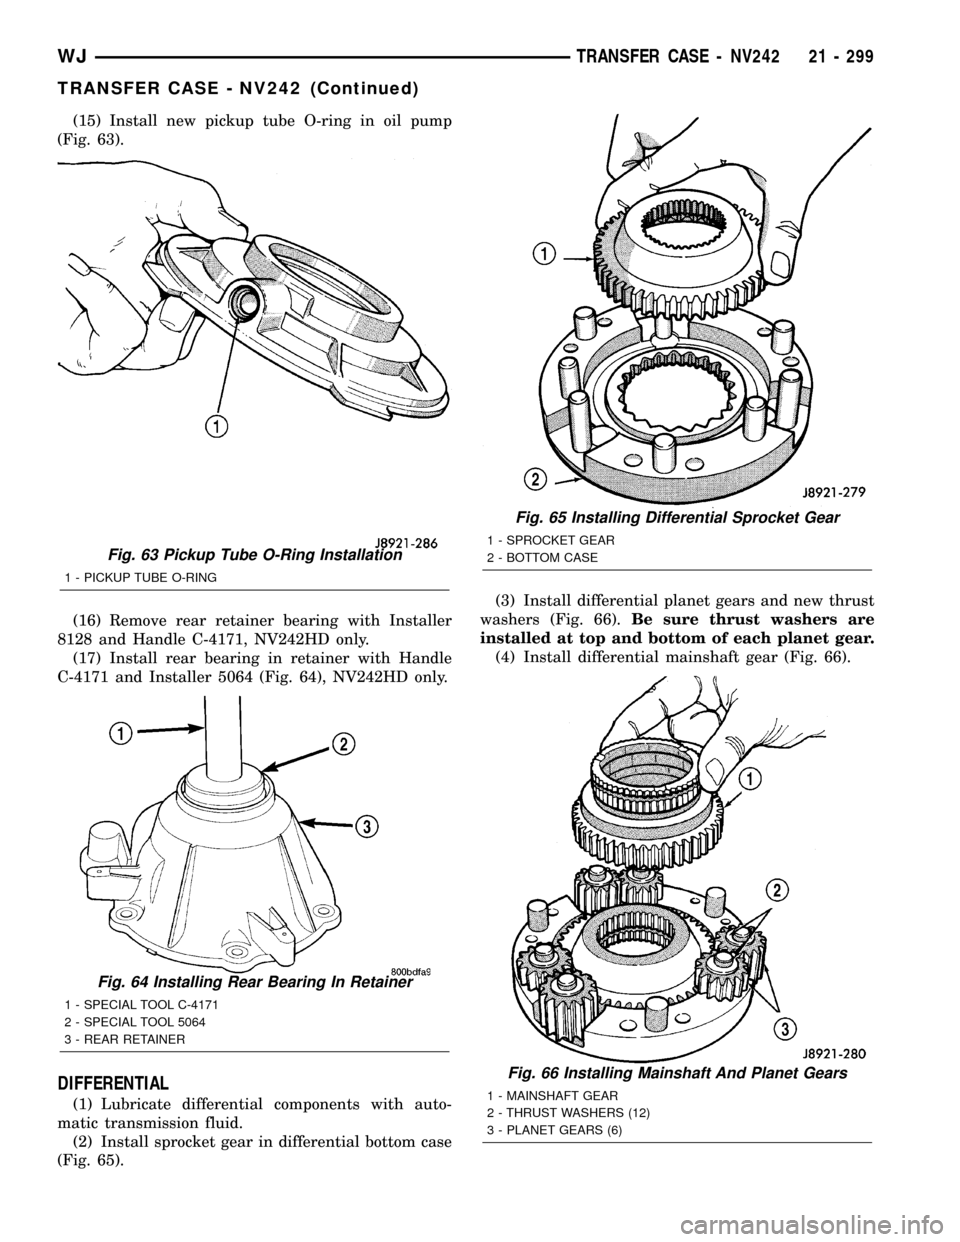
(15) Install new pickup tube O-ring in oil pump
(Fig. 63).
(16) Remove rear retainer bearing with Installer
8128 and Handle C-4171, NV242HD only.
(17) Install rear bearing in retainer with Handle
C-4171 and Installer 5064 (Fig. 64), NV242HD only.
DIFFERENTIAL
(1) Lubricate differential components with auto-
matic transmission fluid.
(2) Install sprocket gear in differential bottom case
(Fig. 65).(3) Install differential planet gears and new thrust
washers (Fig. 66).Be sure thrust washers are
installed at top and bottom of each planet gear.
(4) Install differential mainshaft gear (Fig. 66).
Fig. 63 Pickup Tube O-Ring Installation
1 - PICKUP TUBE O-RING
Fig. 64 Installing Rear Bearing In Retainer
1 - SPECIAL TOOL C-4171
2 - SPECIAL TOOL 5064
3 - REAR RETAINER
Fig. 65 Installing Differential Sprocket Gear
1 - SPROCKET GEAR
2 - BOTTOM CASE
Fig. 66 Installing Mainshaft And Planet Gears
1 - MAINSHAFT GEAR
2 - THRUST WASHERS (12)
3 - PLANET GEARS (6)
WJTRANSFER CASE - NV242 21 - 299
TRANSFER CASE - NV242 (Continued)
Page 1819 of 2199

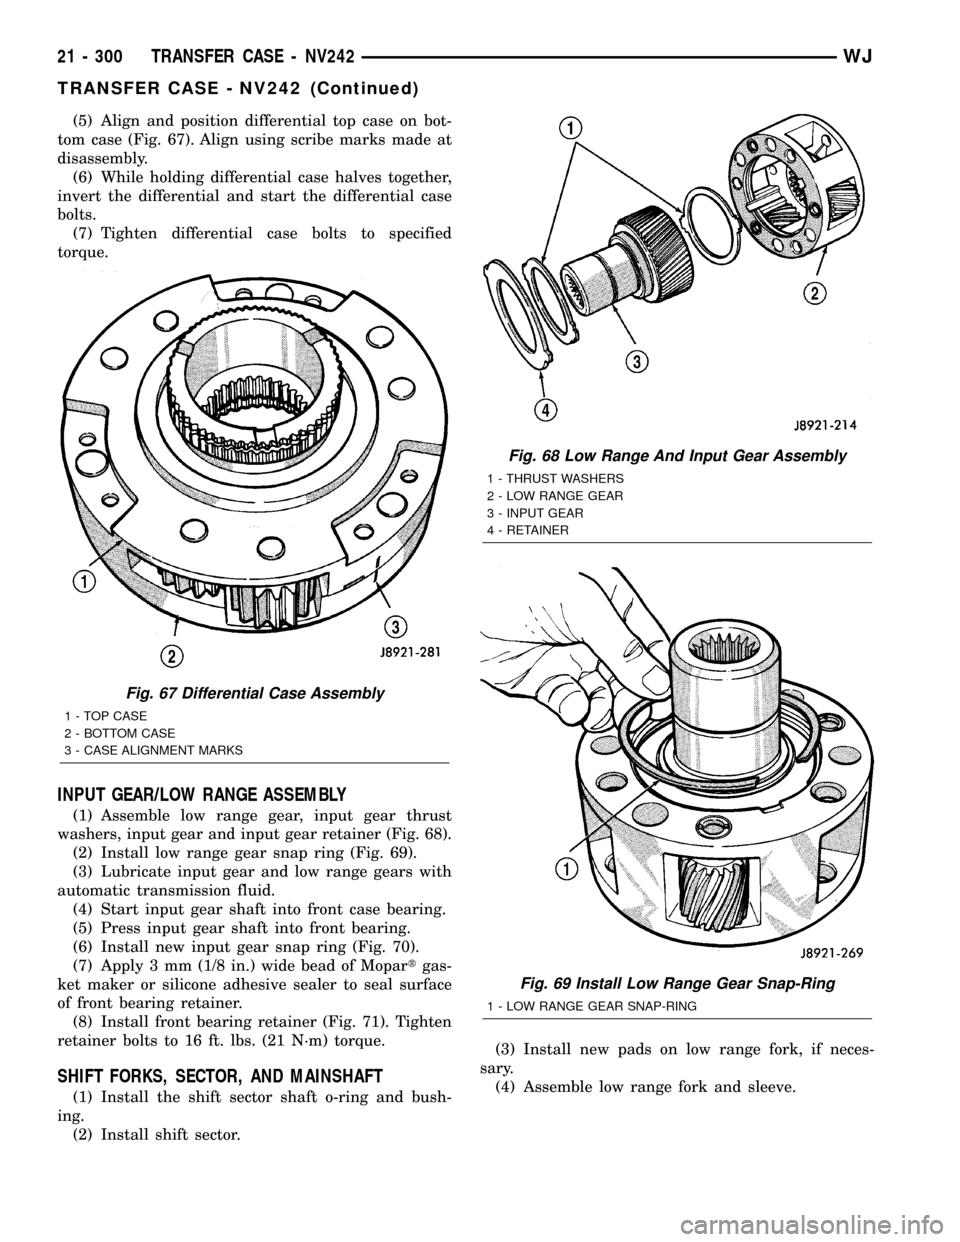
(5) Align and position differential top case on bot-
tom case (Fig. 67). Align using scribe marks made at
disassembly.
(6) While holding differential case halves together,
invert the differential and start the differential case
bolts.
(7) Tighten differential case bolts to specified
torque.
INPUT GEAR/LOW RANGE ASSEMBLY
(1) Assemble low range gear, input gear thrust
washers, input gear and input gear retainer (Fig. 68).
(2) Install low range gear snap ring (Fig. 69).
(3) Lubricate input gear and low range gears with
automatic transmission fluid.
(4) Start input gear shaft into front case bearing.
(5) Press input gear shaft into front bearing.
(6) Install new input gear snap ring (Fig. 70).
(7) Apply 3 mm (1/8 in.) wide bead of Mopartgas-
ket maker or silicone adhesive sealer to seal surface
of front bearing retainer.
(8) Install front bearing retainer (Fig. 71). Tighten
retainer bolts to 16 ft. lbs. (21 N´m) torque.
SHIFT FORKS, SECTOR, AND MAINSHAFT
(1) Install the shift sector shaft o-ring and bush-
ing.
(2) Install shift sector.(3) Install new pads on low range fork, if neces-
sary.
(4) Assemble low range fork and sleeve.
Fig. 67 Differential Case Assembly
1 - TOP CASE
2 - BOTTOM CASE
3 - CASE ALIGNMENT MARKS
Fig. 68 Low Range And Input Gear Assembly
1 - THRUST WASHERS
2 - LOW RANGE GEAR
3 - INPUT GEAR
4 - RETAINER
Fig. 69 Install Low Range Gear Snap-Ring
1 - LOW RANGE GEAR SNAP-RING
21 - 300 TRANSFER CASE - NV242WJ
TRANSFER CASE - NV242 (Continued)
Page 1820 of 2199
(5)Position low range fork and sleeve in case. Be
sure low range fork pin is engaged in shift sector slot.
(6) Install first mainshaft bearing spacer on main-
shaft (Fig. 72).
(7) Install bearing rollers on mainshaft (Fig. 72).
Coat bearing rollers with generous quantity of petro-
leum jelly to hold them in place.
(8) Install remaining bearing spacer on mainshaft
(Fig. 72). Do not displace any bearings while install-
ing spacer.(9) Install differential (Fig. 73). Do not displace
mainshaft bearings when installing differential.
Fig. 70 Input Gear Snap-Ring Installation
1 - INPUT GEAR
2 - SNAP-RING
Fig. 71 Installing Front Bearing Retainer
1 - FRONT BEARING RETAINER
Fig. 72 Installing Mainshaft Bearing Rollers and
Spacers
1 - MAINSHAFT BEARING ROLLERS
2 - BEARING SPACERS
Fig. 73 Differential Installation
1 - DIFFERENTIAL
2 - MAINSHAFT
WJTRANSFER CASE - NV242 21 - 301
TRANSFER CASE - NV242 (Continued)
Page 1821 of 2199
(10) Install differential snap-ring (Fig. 74).
(11) Install intermediate clutch shaft (Fig. 75).
(12) Install clutch shaft thrust washer (Fig. 76).
(13) Install clutch shaft snap-ring (Fig. 77).(14) Inspect mode fork assembly (Fig. 78). Replace
pads and bushing if necessary. Replace fork tube if
bushings inside tube are worn or damaged. Also
check springs and slider bracket (Fig. 78). Replace
worn, damaged components.
Fig. 74 Installing Differential Snap-Ring
1 - DIFFERENTIAL SNAP-RING
Fig. 75 Installing Intermediate Clutch Shaft
1 - INTERMEDIATE CLUTCH SHAFT
Fig. 76 Installing Clutch Shaft Thrust Washer
1 - CLUTCH SHAFT THRUST RING
Fig. 77 Installing Clutch Shaft Snap-Ring
1 - SNAP-RING
2 - INTERMEDIATE CLUTCH SHAFT
21 - 302 TRANSFER CASE - NV242WJ
TRANSFER CASE - NV242 (Continued)