2003 Hyundai Sonata set clock
[x] Cancel search: set clockPage 57 of 205

FEATURES OF YOUR HYUNDAI 1- 45
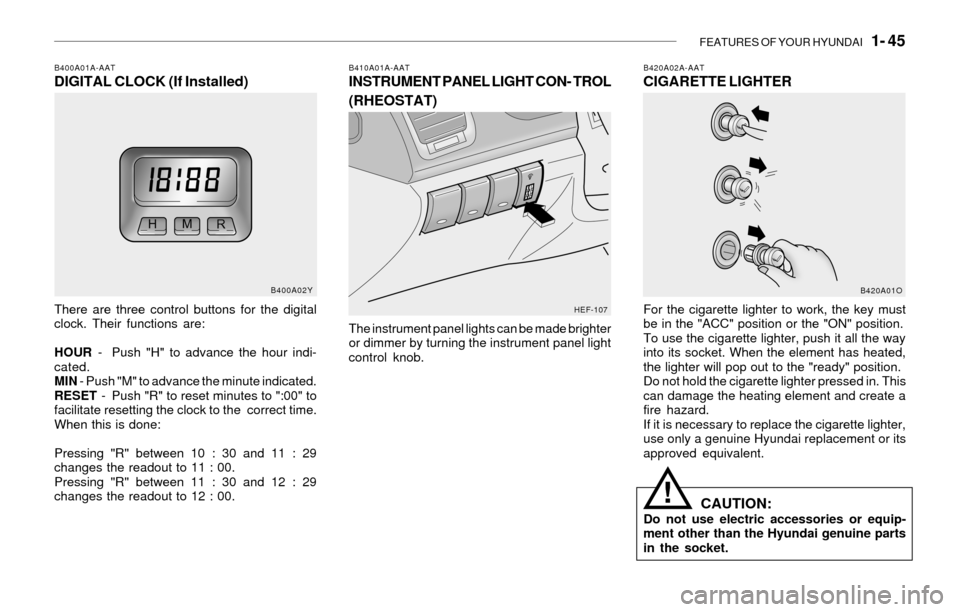
B420A02A-AATCIGARETTE LIGHTER
For the cigarette lighter to work, the key must
be in the "ACC" position or the "ON" position.
To use the cigarette lighter, push it all the way
into its socket. When the element has heated,
the lighter will pop out to the "ready" position.
Do not hold the cigarette lighter pressed in. This
can damage the heating element and create a
fire hazard.
If it is necessary to replace the cigarette lighter,
use only a genuine Hyundai replacement or its
approved equivalent.
CAUTION:Do not use electric accessories or equip-
ment other than the Hyundai genuine parts
in the socket.
!
B410A01A-AATINSTRUMENT PANEL LIGHT CON- TROL
(RHEOSTAT)
The instrument panel lights can be made brighter
or dimmer by turning the instrument panel light
control knob.
B400A01A-AATDIGITAL CLOCK (If Installed)
There are three control buttons for the digital
clock. Their functions are:
HOUR - Push "H" to advance the hour indi-
cated.
MIN - Push "M" to advance the minute indicated.
RESET - Push "R" to reset minutes to ":00" to
facilitate resetting the clock to the correct time.
When this is done:
Pressing "R" between 10 : 30 and 11 : 29
changes the readout to 11 : 00.
Pressing "R" between 11 : 30 and 12 : 29
changes the readout to 12 : 00.
B400A02Y
HEF-107B420A01O
Page 93 of 205

FEATURES OF YOUR HYUNDAI 1- 81
H240B03O-GAT1. POWER ON-OFF Control Knob
The radio unit may be operated when the ignition
key is in the "ACC" or "ON" position. Press the
knob to switch the power on. The LCD shows
the radio frequency in the radio mode or the tape
direction indicator in the tape mode. To switch
the power off, press the knob again.
VOLUME Control
Rotate the knob clockwise to increase the
volume and turn the knob counterclockwise to
reduce the volume.
2. BASS Control Knob
Press to pop the knob out and turn to the left or
right for the desired bass tone.
BAL (Balance Control) Knob
Pull the bass control knob further out. Turn the
control knob clockwise to emphasize right
speaker sound. (Left speaker sound will be
attenuated)
When the control knob is turned counterclock-
wise, left speaker sound will be emphasized.
(Right speaker sound will be attenuated)
3. TREB (Treble Control) Knob
Press to pop the knob out and turn to the left or
right for the desired treble tone.
FAD (Fader Control) Knob
Pull the treble control knob further out.
Turn the control knob counterclockwise to
emphasize front speaker sound. (Rear speaker
sound will be attenuated)
When the control knob is turned clockwise, rear
speaker sound will be emphasized.
(Front speaker sound will be attenuated)
4. TUNE (Manual) Select Button
Press the side or side to increase or to decrease
the frequency. Press either button and hold
down to continuously scroll. Release button
once the desired station is reached.
SEEK Operation
(Automatic Channel Selection)
Press the TUNE select button 1 sec or
more.Releasing will automatically tune to the
next available station with a beep sound.
When the ( ) side is pressed longer than 1
second, releasing will automatically tune to the
next higher frequency and when the ( ) side
is pressed longer than 1 second, releasing will
automatically tune to the next lower frequency.
5. BAND Selector
Pressing the button changes the AM, FM1
and FM2 bands. The mode selected is dis-
played on LCD.
6. PRESET STATION SELECT Button
Six (6) stations for AM, FM and FM2 respec-
tively can be preset in the electronic memory
circuit on this unit.
HOW TO PRESET STATIONS
Six AM and twelve FM stations may be pro-
grammed into the memory of the radio. Then, by
simply pressing the band select button and/or
one of the six station select buttons, you may
recall any of these stations instantly. To pro-
gram the stations, follow these steps:
o Press band selector to set the band for AM,
FM, or FM2.
o Select the desired station to be stored by
seek or manual tuning.
o Determine the preset station select button
you wish to use to access that station.
FM/AM
Page 98 of 205

1- 86 FEATURES OF YOUR HYUNDAI
H260B03E-AAT1. POWER ON-OFF Control Knob
The radio unit may be operated when the ignition
key is in the "ACC" or "ON" position. Press the
knob to switch the power on. The LCD shows
the radio frequency in the radio mode or the CD
track indicator in either the CD mode or CD
AUTO CHANGER mode. To switch the power
off, press the knob again.
VOLUME Control
Rotate the knob clockwise to increase the
volume and turn the knob counterclockwise to
reduce the volume.
BALANCE Control
Pull and turn the control knob clockwise to
emphasize right speaker sound (Left speaker
sound will be attenuated). When the control
knob is turned counterclockwise, left speaker
sound will be emphasized. (Right speaker sound
will be attenuated)
2. FAD (Fader Control) Knob
Turn the control knob counterclockwise to em-
phasize front speaker sound. (Rear speaker
sound will be attenuated) When the control knob
is turned clockwise, rear speaker sound will be
emphasized. (Front speaker sound will be at-
tenuated)
3. BASS Control Knob
Press to pop the knob out and turn to the left or
right for the desired bass tone.
TREB (Treble Control) Knob
Pull the bass control knob further out. Turn to the
left or right for the desired treble tone.
4. SCAN Button
When the scan button is pressed, the frequency
will increase and the receivable stations will be
tuned in one after another, receiving each sta-
tion for 5 seconds. To stop scanning, press the
scan button again.
5. TUNE (Manual) Select Button
Press the ( ) side or ( ) side to increase or to
decrease the frequency. Press either button
and hold down to continuously scroll. Release
button once the desired station is reached.
SEEK Operation
(Automatic Channel Selection)
Press the TUNE select button for 1 sec or more.
Releasing it will automatically tune to the next
available station with a beep sound.
When the ( ) side is pressed longer than 1
second, releasing will automatically tune to the
next higher frequency and when the ( ) side is
pressed longer than 1 second, releasing will
automatically tune to the next lower frequency.
6. BAND Selector
Pressing the button changes the AM, FM1
and FM2 bands. The mode selected is dis-
played on LCD.
7. PRESET STATION SELECT Button
Six (6) stations for AM, FM or FM2 respectively
can be preset in the electronic memory circuit
on this unit.
HOW TO PRESET STATIONS
Six AM and twelve FM stations may be pro-
grammed into the memory of the radio. Then, by
simply pressing the band select button and/or
one of the six station select buttons, you may
recall any of these stations instantly. To pro-
gram the stations, follow these steps:
FM/AM
Page 103 of 205

FEATURES OF YOUR HYUNDAI 1- 91
H290B03E-GAT1. POWER ON-OFF Control Knob
The radio unit may be operated when the ignition
key is in the "ACC" or "ON" position. Press the
button to switch the power on. The display
shows the radio frequency in the radio mode,
the tape direction indicator in the tape mode or
CD track in either the CD mode or CD AUTO
CHANGER mode. To switch the power off,
press the button again.
VOLUME Control
Rotate the knob clockwise to increase the
volume and turn the knob counterclockwise to
reduce the volume.
2. BASS/BALANCE Control Knob
BASS Control Knob
Press to pop the knob out. To increase the bass,
rotate the knob clockwise, while to decrease the
bass, rotate the knob counterclockwise.
BALANCE Control knob
Pull the Bass control knob out further. Rotate the
knob clockwise to emphasize right speaker
sound. (Left speaker sound will be attenuated)
When the control knob is turned counterclock-
wise, left speaker sound will be emphasized
(Right speaker sound will be attenuated).
3. TREBLE/FAD Knob
TREBLE Control Knob
Press to pop the knob out and turn to the left or
right for the desired treble tone.
FAD (Fader Control) Knob
Pull the Bass control knob out further. Turn the
control knob counterclockwise to emphasize
front speaker sound. (Rear speaker sound will
be attenuated) When the control knob is turned
clockwise, rear speaker sound will be empha-
sized. (Front speaker sound will be attenuated)
4. TUNE (Manual) Select Button
Press the ( ) side or ( ) side to increase or to
decrease the frequency. Press either button
and hold down to continuously scroll, Release
button once the desired station is reached.
SEEK Operation (Automatic Channel
Selection)
Press the TUNE select button for 0.5 sec or
more. Releasing it will automatically tune to the
next available station with a beep sound.
When the ( ) side is pressed longer than 0.5
second, releasing will automatically tune to the
next higher frequency and when the ( ) side is
pressed longer than 0.5 second, releasing will
automatically tune to the next lower frequency.
5. PRESET STATION Select Buttons
Six (6) stations for AM, FM and FM2 respec-
tively can be preset in the electronic memory
circuit.
HOW TO PRESET STATIONS
Six AM and twelve FM stations may be pro-
grammed into the memory of the radio. Then, by
simply pressing the band select button and/or
one of the six station select buttons, you may
recall any of these stations instantly. To pro-
gram the stations, follow these steps:
o Press band selector to set the band for AM,
FM or FM2.
o Select the desired station to be stored by
seek or manual tuning.
o Determine the preset station select button
you wish to use to access that station.
o Press the station select button for more than
two seconds. A select button indicator will
show in the display indicating which select
button you have depressed. The frequency
display will flash after it has been stored into
the memory with a beep sound. You should
then release the button, and proceed to
program the next desired station. A total of
18 stations can be programmed by selecting
one AM and two FM station per button.
o When completed, any preset station may be
recalled by selecting AM, FM or FM2 band
and the appropriate station button.
Page 112 of 205

1- 100 FEATURES OF YOUR HYUNDAI
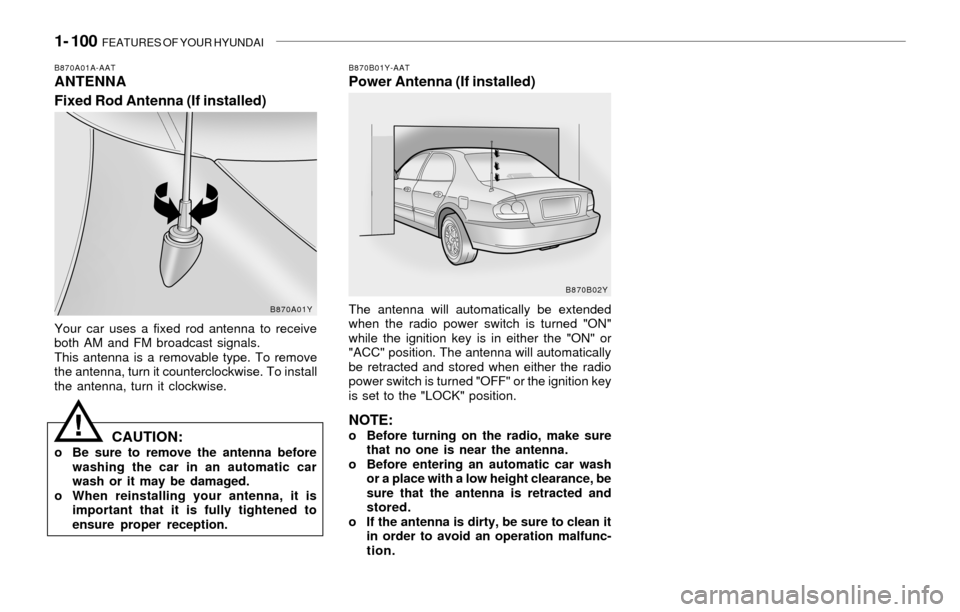
B870A01A-AATANTENNA
Fixed Rod Antenna (If installed)B870B01Y-AATPower Antenna (If installed)
Your car uses a fixed rod antenna to receive
both AM and FM broadcast signals.
This antenna is a removable type. To remove
the antenna, turn it counterclockwise. To install
the antenna, turn it clockwise.The antenna will automatically be extended
when the radio power switch is turned "ON"
while the ignition key is in either the "ON" or
"ACC" position. The antenna will automatically
be retracted and stored when either the radio
power switch is turned "OFF" or the ignition key
is set to the "LOCK" position.
NOTE:o Before turning on the radio, make sure
that no one is near the antenna.
o Before entering an automatic car wash
or a place with a low height clearance, be
sure that the antenna is retracted and
stored.
o If the antenna is dirty, be sure to clean it
in order to avoid an operation malfunc-
tion.CAUTION:o Be sure to remove the antenna before
washing the car in an automatic car
wash or it may be damaged.
o When reinstalling your antenna, it is
important that it is fully tightened to
ensure proper reception.
!
B870A01YB870B02Y
Page 161 of 205

6- 6 DO-IT-YOURSELF MAINTENANCE
!WARNING:Be very careful when draining the engine oil
as it may be hot enough to burn you!
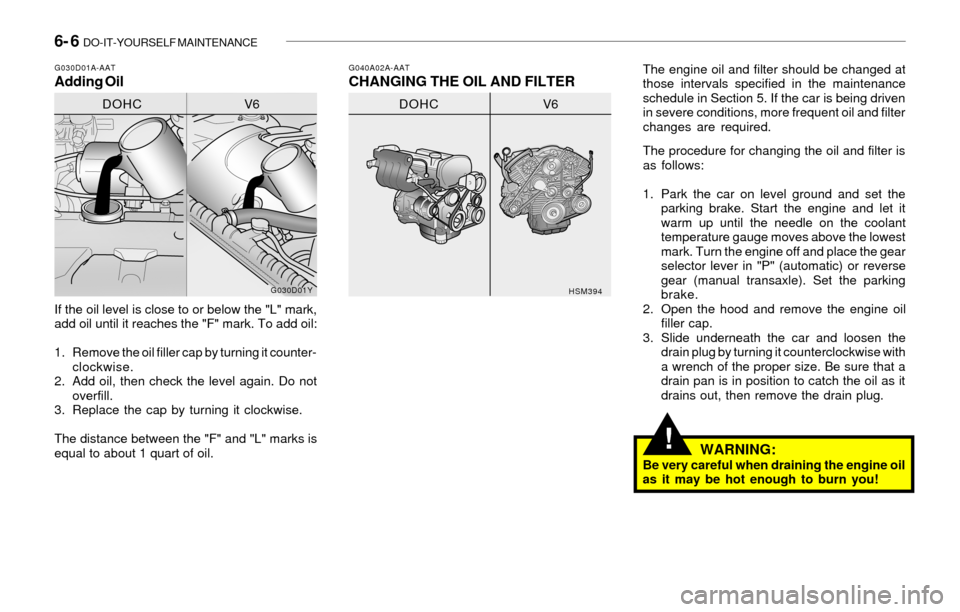
G040A02A-AATCHANGING THE OIL AND FILTERG030D01A-AATAdding Oil
If the oil level is close to or below the "L" mark,
add oil until it reaches the "F" mark. To add oil:
1. Remove the oil filler cap by turning it counter-
clockwise.
2. Add oil, then check the level again. Do not
overfill.
3. Replace the cap by turning it clockwise.
The distance between the "F" and "L" marks is
equal to about 1 quart of oil.The engine oil and filter should be changed at
those intervals specified in the maintenance
schedule in Section 5. If the car is being driven
in severe conditions, more frequent oil and filter
changes are required.
The procedure for changing the oil and filter is
as follows:
1. Park the car on level ground and set the
parking brake. Start the engine and let it
warm up until the needle on the coolant
temperature gauge moves above the lowest
mark. Turn the engine off and place the gear
selector lever in "P" (automatic) or reverse
gear (manual transaxle). Set the parking
brake.
2. Open the hood and remove the engine oil
filler cap.
3. Slide underneath the car and loosen the
drain plug by turning it counterclockwise with
a wrench of the proper size. Be sure that a
drain pan is in position to catch the oil as it
drains out, then remove the drain plug.
G030D01Y
HSM394
DOHC V6DOHC V6
Page 201 of 205

10- 2 INDEX
A
Air bag ...............................................................................................1-28
Air Cleaner Filter ...............................................................................6-11
Air Conditioning
Care..............................................................................................6-15
Operation............................................................................ 1-70, 6-16
Switch...........................................................................................1-70
Antenna ..........................................................................................1-100
Ashtray..............................................................................................1-46
Audio (H240, H260, H290) ........................................... 1-80, 1-85, 1-90
B
Battery..................................................................................... 2-14, 6-19
Brake
Anti-lock system ..........................................................................2-10
Checking the brakes ....................................................................6-14
Fluid ..............................................................................................6-14
Pedal clearance ...........................................................................6-17
Pedal free-play .............................................................................6-17
Practices......................................................................................2-12
Breaking-In your New Hyundai .......................................................... 1-3
Bulb Replacement .............................................................................6-21
C
Care of Cassette Tapes ...................................................................1-98
Cassette Tape Player Operation (H240, H290) .................... 1-83, 1-93
Catalytic Converter ............................................................................. 7-3
Child Restraint System .....................................................................1-22
Child-Protector Rear Door Lock ......................................................... 1-6
Cigarette Lighter ................................................................................1-45
Clock.................................................................................................1-45Clutch
Checking fluid ...............................................................................6-15
Pedal free-play .............................................................................6-17
Combination Light
Headlight flasher ..........................................................................1-42
Headlight switch ...........................................................................1-41
High-beam switch ........................................................................1-42
Lane change signal ......................................................................1-41
Turn signal operation ...................................................................1-41
Compact Disk Player Operation (H260, H290) ..................... 1-88, 1-95
Consumer Information ........................................................................ 8-5
Cooling Fans .....................................................................................6-20
Corrosion protection
Cleaning the interior ....................................................................... 4-4
Protecting your Hyundai from corrosion ....................................... 4-2
Washing and waxing ...................................................................... 4-3
Cruise Control ...................................................................................1-62
D
Defrosting/Defogging........................................................................1-71
Door
Door locks ...................................................................................... 1-4
Front door edge warning light ......................................................1-60
Locking, unlocking front door with a key ...................................... 1-4
Drink Holder ......................................................................................1-47
Drive Belts .........................................................................................6-18
Driving
Economical driving .......................................................................2-13
Smooth cornering .........................................................................2-13
Winter driving ...............................................................................2-13