2003 Hyundai Sonata warning
[x] Cancel search: warningPage 162 of 205

DO-IT-YOURSELF MAINTENANCE 6- 7
!
!
4. When the oil has stopped draining, replace
the drain plug using a new washer and
retighten by turning it clockwise.
Tightening torque is: 3.5 ~ 4.5 kgf.m
5. Remove the oil filter by turning it counter-
clockwise with a oil filter wrench of the proper
size. A certain amount of oil will come out
when you remove the filter. So be sure to
have your drain pan in place underneath it.
6. Install a new oil filter in accordance with the
instructions on the carton or on the filter itself.
Do not over-tighten.
Tightening torque is: 1.2 ~ 1.6 kgf.m
Be sure that the mounting surface on the
engine is clean and that the old gasket is
removed completely. Lubricate the new
gasket on the filter with clean engine oil
before installation.
7. Refill the crankcase with the recommended
engine oil. Refer to the specification in chap-
ter 9 for engine oil capacity.
8. Start the engine and check to be sure no oil
is leaking from the drain plug or oil filter.
9. Shut off the engine and recheck the oil level.G050A01A-AATCHECKING AND CHANGING THE EN-
GINE COOLANT
WARNING:
Do not remove the radiator cap when the
engine is hot. When the engine is hot, the
engine coolant is under pressure and may
erupt through the opening if the cap is
removed. You could be seriously burned if
you do not observe this precaution. Do not
remove the radiator cap until the radiator is
cool to the touch.
NOTE:Always dispose of used engine oil in an
environmentally acceptable manner. It is
suggested that it be placed in a sealed
container and taken to a service station for
reclamation. Do not pour the oil on the
ground or put it into the household trash.
WARNING:Used motor oil may cause irritation or can-
cer of the skin if left in contact with the skin
for prolonged periods of time. Wash your
hands thoroughly with soap and warm
water as soon as possible after handling
used oil.
Page 164 of 205

DO-IT-YOURSELF MAINTENANCE 6- 9
!
4. Turn the radiator cap counterclockwise with-
out pressing down on it, until it stops. This
relieves any pressure remaining in the cool-
ing system. And remove the radiator cap by
pushing down and turning counterclock-
wise.
Now fill the radiator with clean demineralized
or distilled water. Continue to add clean
demineralized or distilled water in small quan-
tities until the fluid level stays up in the
radiator neck.
5. Start the engine, top off the radiator with
water and then add coolant to the reservoir
until the level is between "L" and "F".
6. Replace the radiator and reservoir caps and
check to be sure the drain cocks are fully
closed and not leaking.G060A02Y-AATSPARK PLUGS
Your engine was originally equipped with plati-
num-tipped spark plugs.
Platinum-tipped spark plugs will last longer than
conventional type spark plugs and can be
identified by blue lines on the ceramic shell.
NOTE:Do not clean or regap platinum-tipped spark
plugs.
WARNING:The cooling fan is controlled by engine
coolant temperature and may sometimes
operate even when the engine is not run-
ning. Use extreme caution when working
near the blades of the coolant fan so that
you are not injured by a rotating fan blade.
As the engine coolant temperature de-
creases, the fan will automatically shut off.
This is a normal condition.
HSM392G060B04Y-AAT
Replacing the Spark PlugsThe spark plugs should be changed at the
intervals specified in the vehicle maintenance
schedule in Section 5 or whenever engine
performance indicates they should be changed.
Symptoms that suggest poor spark plug perfor-
mance include engine misfiring under load, loss
of fuel economy, poor acceleration, etc. When
spark plugs are replaced, always use spark
plugs recommended by Hyundai. The use of
other spark plugs can result in loss of perfor-
mance, radio interference or engine damage.
NOTE:When replacing the spark plugs, always use
the genuine parts recommended.
Recommended Spark Plugs:
Type
RN10PYP4 (CHAMPION)
PGR5C-11 (NGK)
RC10PYB4 (CHAMPION)
PFR5N-11 (NGK)Remark
For 2.4L only
For 2.7L only
DOHC V6
0.1~1.1 mm 0.1~1.1 mm
Page 165 of 205

6- 10 DO-IT-YOURSELF MAINTENANCE
!
G060C04Y-AATChanging the Spark Plugs
You will find it easier to change spark plugs if the
engine is cold. Always change one spark plug
at a time. This helps avoid getting the wires
mixed up.
1. Remove the center (2.4 L) cover on the
engine rocker cover.
NOTE:It is recommended that the spark plugs (For
2.7L Engines) should be changed by an
authorized Hyundai dealer.
2. Using a clean cloth, remove any dirt that has
accumulated around the base of the spark
plug so it cannot fall into the cylinder when the
spark plug is removed.3. To remove the spark plug cable, pull straight
up on the insulated connector, not the cable.
Pulling on the cable may damage the carbon
core conductor.
WARNING:It is recommended that the engine be cool
or cold when changing the spark plugs. If
the engine is hot, you could burn yourself
on the insulated connector, the spark plug
or the engine itself.
4. When preparing to remove the old spark
plug, guide the socket down over the spark
plug, being careful not to damage the ce-
ramic insulator.
5. To remove the old spark plug, turn the
wrench handle in a counterclockwise direc-
tion.6. To install the new spark plug, guide the
socket down over the spark plug, being
careful not to damage the ceramic insulator.
NOTE:Spark plugs should be tightened to speci-
fication. Over-tightening can damage the
threads in the aluminum cylinder head.
Also, leaving them too loose can cause the
spark plug to get very hot and possibly
result in damage to the engine.
7. Replace the cable by pushing the insulated
connector directly down onto the electrode.
Check to be sure it has snapped into place
and can’t fall off.
G060C01O
G060C02OG060C03O
Page 167 of 205

6- 12 DO-IT-YOURSELF MAINTENANCE
!
G110B03A-AAT
Recommended Fluid
Your Hyundai automatic transaxle is specially
designed to operate with HYUNDAI GENUINE
ATF or DIAMOND ATF SP-III or SK ATF SP-III.
Damage caused by a nonspecified fluid is not
covered by your new vehicle limited warranty.
G110A01A-AAT
CHECKING THE TRANSAXLE FLUID
(AUTOMATIC)
Transaxle fluid in the automatic transaxle should
be checked at those intervals specified in the
vehicle maintenance schedule in Section 5.
G100B02A-AATTo Check the Manual Transaxle Fluid
Level
G100A03Y-AATCHECKING THE TRANSAXLE OIL
(MANUAL)
Transaxle lubricant in the manual transaxle
should be checked at those intervals specified
in the vehicle maintenance schedule in Section
5.
Recommended Oil
Use only HYUNDAI GENUINE PARTS MTF
75W/90 (API GL-4) or equivalent in the manual
transaxle.
Manual Transaxle Oil Capacity
The oil capacity of the manual transaxle is 2.2
U.S. quarts (2.1 liters).Park the car on level ground with the engine off.
1. Using a wrench of the correct size, loosen
the oil filler plug by turning it counterclock-
wise and remove it with your fingers.2. Use your finger or suitable tool to feel inside
the hole. The oil level should be at its bottom
edge. If it is not, check for leaks before
adding oil. To refill the transaxle or bring the
oil level up,add oil slowly until it reaches the
proper level. Do not overfill.
3. Replace the plug and washer, screw it in with
your fingers and then tighten securely with
the wrench.
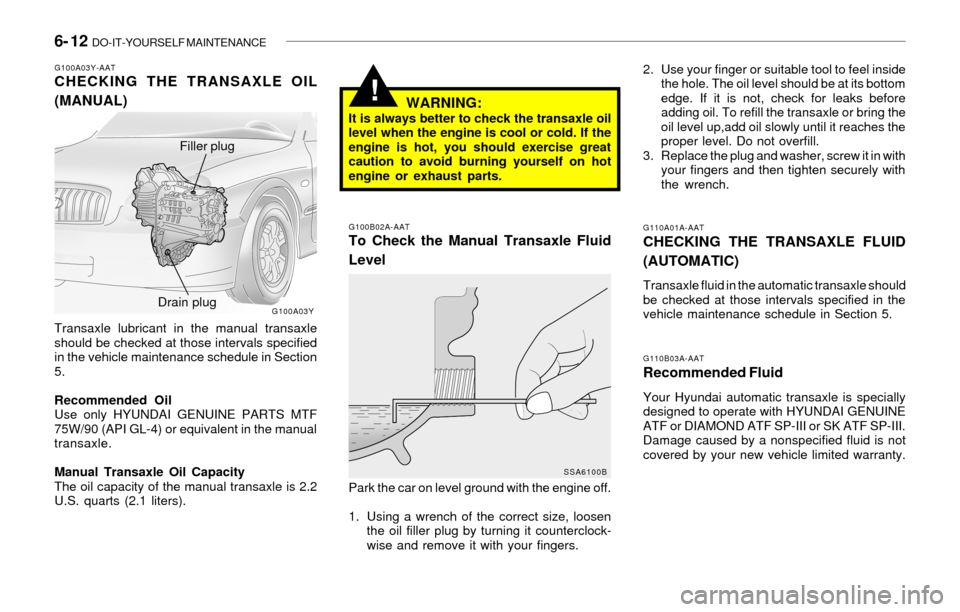
WARNING:It is always better to check the transaxle oil
level when the engine is cool or cold. If the
engine is hot, you should exercise great
caution to avoid burning yourself on hot
engine or exhaust parts.
G100A03Y
SSA6100B
Filler plug
Drain plug
Page 168 of 205

DO-IT-YOURSELF MAINTENANCE 6- 13
!
G110C01Y-AATTransaxle Fluid CapacityThe fluid capacity of the automatic transaxle is
8.2 U.S. quarts.
WARNING:The transaxle fluid level should be checked
when the engine is at normal operating
temperature. This means that the engine,
radiator, exhaust system etc., are very hot
so you should exercise great care not to
burn yourself during this procedure.
G110D02L-AATTo Check the Transaxle Fluid Level
Park the car on level ground with the parking
brake engaged. When the transaxle fluid level
is checked, the transaxle fluid should be at
normal operating temperature and the engine
idling.While the engine is idling, apply the brakes and
move the gear selector lever from "P" to each
of its other positions — "R", "N", "D" — and then
return to "N" or "P". With the engine still idling:
1. Open the hood, being careful to keep hands,
long hair and clothing clear of any moving
parts.
2. Remove the transaxle dipstick, wipe it clean,
reinsert the dipstick as far as it will go, then
remove it again. Now check the fluid level on
the dipstick. It should be in the "HOT" range
on the dipstick.
3. If the transaxle fluid level is low, use a funnel
to add transaxle fluid through the dipstick
tube until the level reaches the "HOT" range.
Do not overfill.
C090A01YG110D02Y-1
DOHC V6
Page 169 of 205

6- 14 DO-IT-YOURSELF MAINTENANCE
!
!
G120E02A-AATAdding Brake Fluid
G120D01A-AATTo Check the Fluid Level
The fluid level in the brake fluid reservoir should
be checked periodically. The level should be
between the "MIN" and "MAX" marks on the side
of the reservoir. If the level is at or below the
"MIN" mark, carefully add fluid to bring it up to
"MAX". Do not overfill.
G120C02A-AATRecommended Brake Fluid
Use only hydraulic brake fluid conforming to
DOT 3 or DOT 4 specifications in your braking
system. Follow the instructions printed on the
container.
G120B01A-AATChecking the Brake Fluid Level
G120A01A-AATCHECKING THE BRAKES
WARNING:
The cooling fan is controlled by engine
coolant temperature and may sometimes
operate even when the engine is not run-
ning. Use extreme caution when working
near the blades of the cooling fan, so that
you are not injured by a rotating fan blade.
As the engine coolant temperature de-
creases, the fan will automatically shut off.
This is a normal condition.
CAUTION:Because brakes are essential to the safe
operation of the car, it is suggested that
they be checked and inspected by your
Hyundai dealer. The brakes should be
checked and inspected for wear at those
intervals specified in the vehicle mainte-
nance schedule in Section 5.
!
WARNING:Use caution when handling brake fluid. It
can damage your vision if it gets into your
eyes. It will also damage your vehicle's
paint if spilled on it and not removed imme-
diately.
!
HKSOM120
HEF-234
Fluid level should be within "HOT" range
Page 170 of 205

DO-IT-YOURSELF MAINTENANCE 6- 15
!
G130A01A-AATCHECKING THE CLUTCH FLUID
To Check the Clutch FluidG130B02A-AATTo Replace the Fluid
Recommended brake fluid conforming to DOT
3 or DOT 4 specification should be used. The
reservoir cap must be fully tightened to avoid
contamination from foreign matter or moisture.
NOTE:Do not allow any other liquids to contami-
nate the brake fluid. Seal damage will result.
WARNING:Handle brake fluid carefully. It can damage
your vision if it gets into your eyes. Use only
DOT 3 or DOT 4 specification fluid from a
sealed container. Do not allow the fluid can
or reservoir to remain open any longer than
required. This will prevent entry of dirt and
moisture which can damage the brake sys-
tem and cause improper operation.
To add brake fluid, first wipe away any dirt then
unscrew the fluid reservoir cap. Slowly pour the
recommended fluid into the reservoir. Do not
overfill. Carefully replace the cap on the reser-
voir and tighten.
!
The clutch fluid level in the master cylinder
should be checked when performing other un-
der hood services. The system should be
checked for leakage at the same time. Check
to make certain that the clutch fluid level is
always between the "MAX" and "MIN" level
markings on the fluid reservoir. Fill as required.
Fluid loss indicates a leak in the clutch system
which should be inspected and repaired imme-
diately. Consult your Hyundai dealer.
WARNING:Use caution when handling brake fluid. It
can damage your vision if you get it in your
eyes. It will also damage your vehicle's
paint if spilled on it and not removed imme-
diately.
G140A01A-AATAIR CONDITIONING CARE
Keeping the Condenser Clean
The air conditioning condenser (and engine
radiator) should be checked periodically for
accumulation of dirt, dead insects, leaves, etc.
These can interfere with maximum cooling ef-
ficiency. When removing such accumulations,
brush or hose them away carefully to avoid
bending the cooling fans.
G130A01Y
!
Page 174 of 205

DO-IT-YOURSELF MAINTENANCE 6- 19
!
If any of your car’s lights or other electrical
accessories stop working, a blown fuse could
be the reason. If the fuse has burned out, you
will see that the metal strip inside the fuse has
burned through. If you suspect a blown fuse,
follow this procedure:
1. Turn off the ignition and all other switches.
2. Open the instrument panel junction box and
examine each fuse. Remove each fuse by
pulling it toward you (a small "fuse puller" tool
is contained in the fuse box to simplify this
operation).
3. Be sure to check all other fuses even if you
find one that appears to have burned out.
4. Replace the blown fuse by pressing a new
fuse of the same rating into place. The fuse
should be a snug fit. If it is not, have the fuse
clip repaired or replaced by a Hyundai dealer.
HXGS416Fuse Puller
G210A01A-AATCHECKING THE BATTERY
WARNING:
Batteries can be dangerous! When working
with batteries, carefully observe the follow-
ing precautions to avoid serious injuries.
The fluid in the battery contains a strong solution
of sulfuric acid, which is poisonous and highly
corrosive. Be careful not to spill it on yourself or
the car. If you do spill battery fluid on yourself,
immediately do the following:
o If battery fluid is on your skin, flush the
affected areas with water for at least 15
minutes and then seek medical assistance.
o If battery fluid is in your eyes, rinse out your
eyes with water and get medical assistance
as soon as possible. While you are being
driven to get medical assistance, continue to
rinse your eyes by using a sponge or soft
cloth saturated with water.
o If you swallow battery fluid, drink a large
quantity of water or milk followed by milk of
magnesia, eat a raw egg or drink vegetable
oil. Get medical assistance as soon as
possible. If you do not have a spare fuse, you may be
able to borrow a fuse of the same or lower
rating from an accessory you can tempo-
rarily get along without (the radio or cigarette
lighter, for example). Always remember to
replace the borrowed fuse.
CAUTION:A burned-out fuse indicates that there is a
problem in the electrical circuit. If you re-
place a fuse and it blows as soon as the
accessory is turned on, the problem is
serious and should be referred to a Hyundai
dealer for diagnosis and repair. Never re-
place a fuse with anything except a fuse
with the same or a lower amperage rating.
A higher capacity fuse could cause damage
and create a fire hazard.
NOTE:See page 6-29 for the junction box descrip-
tions.
!
G200B03Y
GoodBurned out