2003 Hyundai Sonata check oil
[x] Cancel search: check oilPage 154 of 205

5- 8 VEHICLE MAINTENANCE REQUIREMENTS
F070M01Y-AATo Steering Gear Box, Linkage & Boots/
Lower Arm Ball Joint, Upper Arm Ball
Joint
With the vehicle stopped and engine off, check
for excessive free-play in the steering wheel.
Check the linkage for bends or damage. Check
the dust boots and ball joints for deterioration,
cracks, or damage. Replace any damaged
parts.
F070G02A-AATo Brake Fluid
Check brake fluid level in the brake fluid reser-
voir. The level should be between "MIN" and
"MAX" marks on the side of the reservoir. Use
only hydraulic brake fluid conforming to DOT 3
or DOT 4.
F070D01A-AATo Manual transaxle oil
Inspect the manual transaxle oil according to
the maintenance schedule.
NOTE:If the oil level is low, check for possible leaks
before adding oil. Do not overfill.
F070F01A-AATo Brake Hoses and Lines
Visually check for proper installation, chafing,
cracks, deterioration and any leakage. Replace
any deteriorated or damaged parts immedi-
ately.
F070E04A-AATo Automatic Transaxle Fluid and Filter
The fluid level should be in the "HOT" range of
the dipstick, after the engine and transaxle are
at normal operating temperature. Check the
automatic transaxle fluid level with the engine
running and the transaxle in neutral, with the
parking brake properly applied. Use Genuine
Hyundai ATF or DIAMOND ATF SP-III or SK
ATF SP-III when adding or changing fluid.
F070K01A-AATo Exhaust Pipe and Muffler
Visually inspect the exhaust pipes, muffler and
hangers for cracks, deterioration, or damage.
Start the engine and listen carefully for any
exhaust gas leakage. Tighten connections or
replace parts as necessary.
F070J01A-AAT
o Brake Pads, Calipers and Rotors
Check the pads for excessive wear, discs for
run out and wear, and calipers for fluid leakage.
F070H01A-AAT
o Rear Brake Drums and Linings/
Parking Brake
Check the rear brake drums and linings for
scoring, burning, leaking fluid, broken parts,
and excessive wear. Inspect the parking brake
system including the parking brake lever and
cables. For detailed service procedures, refer
to the Shop Manual.
F070L01A-AAT
o Suspension Mounting Bolts
Check the suspension connections for loose-
ness or damage. Retighten to the specified
torque.
Page 155 of 205

VEHICLE MAINTENANCE REQUIREMENTS 5- 9
F070Q01A-AAT
o Air Conditioning Refrigerant
Check the air conditioning lines and connec-
tions for leakage and damage. Check air con-
ditioning performance according to the relevant
shop manual if necessary.
F070P01A-AAT
o Driveshafts and Boots
Check the drive shafts, boots and clamps for
cracks, deterioration, or damage. Replace any
damaged parts and, if necessary, repack the
grease.
F070N01A-AATo Power Steering Pump, Belt and Hoses
Check the power steering pump and hoses for
leakage and damage. Replace any damaged or
leaking parts immediately. Inspect the power
steering belt for evidence of cuts, cracks, ex-
cessive wear, oiliness and proper tension.
Replace or adjust it if necessary.
Page 156 of 205

6. Do-It-Yourself Maintenance
Engine compartment ........................................................................ 6-2
General checks ................................................................................ 6-4
Checking the engine oil .................................................................... 6-5
Changing the oil and filter ................................................................. 6-6
Checking and changing the engine coolant ...................................... 6-7
Spark plugs ...................................................................................... 6-9
Changing the air cleaner filter ......................................................... 6-11
Checking the transaxle oil (Manual) ............................................... 6-12
Checking the transaxle fluid (Automatic) ....................................... 6-13
Checking the brakes ...................................................................... 6-14
Air conditioning care ....................................................................... 6-15
Checking drive belts ...................................................................... 6-18
Checking and replacing fuses ........................................................ 6-18
Replacement of bulbs .................................................................... 6-21
Junction Box description ................................................................ 6-29
6
Page 159 of 205

6- 4 DO-IT-YOURSELF MAINTENANCE
G020C01A-AATVehicle Interior
The following should be checked each time
when the vehicle is driven:
o Lights operation
o Windshield wiper operation
o Horn operation
o Defroster, heating system operation (and air
conditioning, if installed)
o Steering operation and condition
o Mirror condition and operation
o Turn signal operation
o Accelerator pedal operation
o Brake operation, including parking brake
o Manual transaxle operation, including clutch
operation
o Automatic transaxle operation, including
"Park" mechanism operation
o Seat control condition and operation
o Seat belt condition and operation
o Sunvisor operation
If you notice anything that does not operate
correctly or appears to be functioning incor-
rectly, inspect it carefully and seek assistance
from your Hyundai dealer if service is needed.
G020B01A-AATVehicle Exterior
The following should be checked monthly:
o Overall appearance and condition
o Air filter condition
o Wheel condition and wheel nut torque
o Exhaust system condition
o Light condition and operation
o Windshield glass condition
o Wiper blade condition
o Paint condition and body corrosion
o Fluid leaks
o Door and hood lock condition
o Tire pressure and condition (including spare
tire)
G020A01A-AATGENERAL CHECKS
Engine Compartment
The following should be checked regularly:
o Engine oil level and condition
o Transaxle fluid level and condition
o Brake fluid level
o Clutch fluid level
o Engine coolant level
o Windshield washer fluid level
o Accessory drive belt condition
o Engine Coolant hose condition
o Fluid leaks (on or below components)
o Power steering fluid level
o Battery condition
Page 160 of 205

DO-IT-YOURSELF MAINTENANCE 6- 5
G030A01A-AATCHECKING THE ENGINE OIL
Engine oil is essential to the performance and
service of the engine. It is suggested that you
check the oil level at least once a week in normal
use and more often if you are on a trip or driving
in severe conditions.
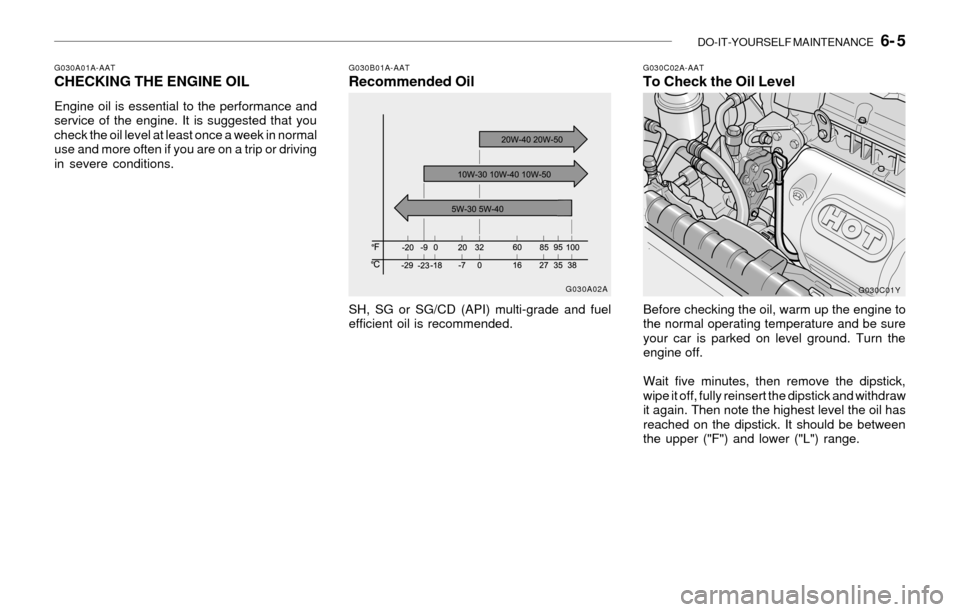
G030C02A-AATTo Check the Oil LevelG030B01A-AATRecommended Oil
SH, SG or SG/CD (API) multi-grade and fuel
efficient oil is recommended.Before checking the oil, warm up the engine to
the normal operating temperature and be sure
your car is parked on level ground. Turn the
engine off.
Wait five minutes, then remove the dipstick,
wipe it off, fully reinsert the dipstick and withdraw
it again. Then note the highest level the oil has
reached on the dipstick. It should be between
the upper ("F") and lower ("L") range.
G030A02A
G030C01Y
Page 161 of 205

6- 6 DO-IT-YOURSELF MAINTENANCE
!WARNING:Be very careful when draining the engine oil
as it may be hot enough to burn you!
G040A02A-AATCHANGING THE OIL AND FILTERG030D01A-AATAdding Oil
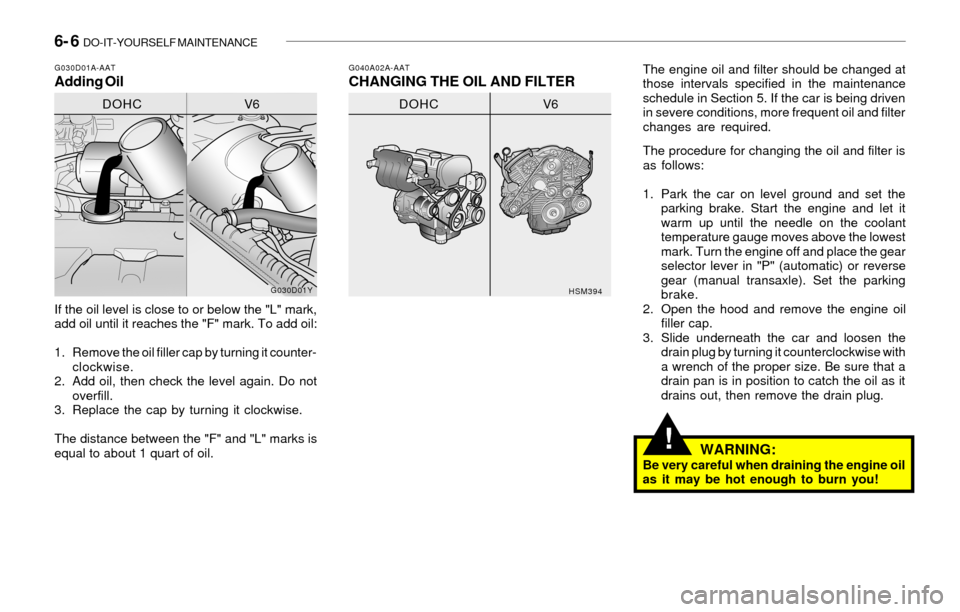
If the oil level is close to or below the "L" mark,
add oil until it reaches the "F" mark. To add oil:
1. Remove the oil filler cap by turning it counter-
clockwise.
2. Add oil, then check the level again. Do not
overfill.
3. Replace the cap by turning it clockwise.
The distance between the "F" and "L" marks is
equal to about 1 quart of oil.The engine oil and filter should be changed at
those intervals specified in the maintenance
schedule in Section 5. If the car is being driven
in severe conditions, more frequent oil and filter
changes are required.
The procedure for changing the oil and filter is
as follows:
1. Park the car on level ground and set the
parking brake. Start the engine and let it
warm up until the needle on the coolant
temperature gauge moves above the lowest
mark. Turn the engine off and place the gear
selector lever in "P" (automatic) or reverse
gear (manual transaxle). Set the parking
brake.
2. Open the hood and remove the engine oil
filler cap.
3. Slide underneath the car and loosen the
drain plug by turning it counterclockwise with
a wrench of the proper size. Be sure that a
drain pan is in position to catch the oil as it
drains out, then remove the drain plug.
G030D01Y
HSM394
DOHC V6DOHC V6
Page 162 of 205

DO-IT-YOURSELF MAINTENANCE 6- 7
!
!
4. When the oil has stopped draining, replace
the drain plug using a new washer and
retighten by turning it clockwise.
Tightening torque is: 3.5 ~ 4.5 kgf.m
5. Remove the oil filter by turning it counter-
clockwise with a oil filter wrench of the proper
size. A certain amount of oil will come out
when you remove the filter. So be sure to
have your drain pan in place underneath it.
6. Install a new oil filter in accordance with the
instructions on the carton or on the filter itself.
Do not over-tighten.
Tightening torque is: 1.2 ~ 1.6 kgf.m
Be sure that the mounting surface on the
engine is clean and that the old gasket is
removed completely. Lubricate the new
gasket on the filter with clean engine oil
before installation.
7. Refill the crankcase with the recommended
engine oil. Refer to the specification in chap-
ter 9 for engine oil capacity.
8. Start the engine and check to be sure no oil
is leaking from the drain plug or oil filter.
9. Shut off the engine and recheck the oil level.G050A01A-AATCHECKING AND CHANGING THE EN-
GINE COOLANT
WARNING:
Do not remove the radiator cap when the
engine is hot. When the engine is hot, the
engine coolant is under pressure and may
erupt through the opening if the cap is
removed. You could be seriously burned if
you do not observe this precaution. Do not
remove the radiator cap until the radiator is
cool to the touch.
NOTE:Always dispose of used engine oil in an
environmentally acceptable manner. It is
suggested that it be placed in a sealed
container and taken to a service station for
reclamation. Do not pour the oil on the
ground or put it into the household trash.
WARNING:Used motor oil may cause irritation or can-
cer of the skin if left in contact with the skin
for prolonged periods of time. Wash your
hands thoroughly with soap and warm
water as soon as possible after handling
used oil.
Page 166 of 205

DO-IT-YOURSELF MAINTENANCE 6- 11
!
!
G070A03Y-AATCHANGING THE AIR CLEANER FILTER
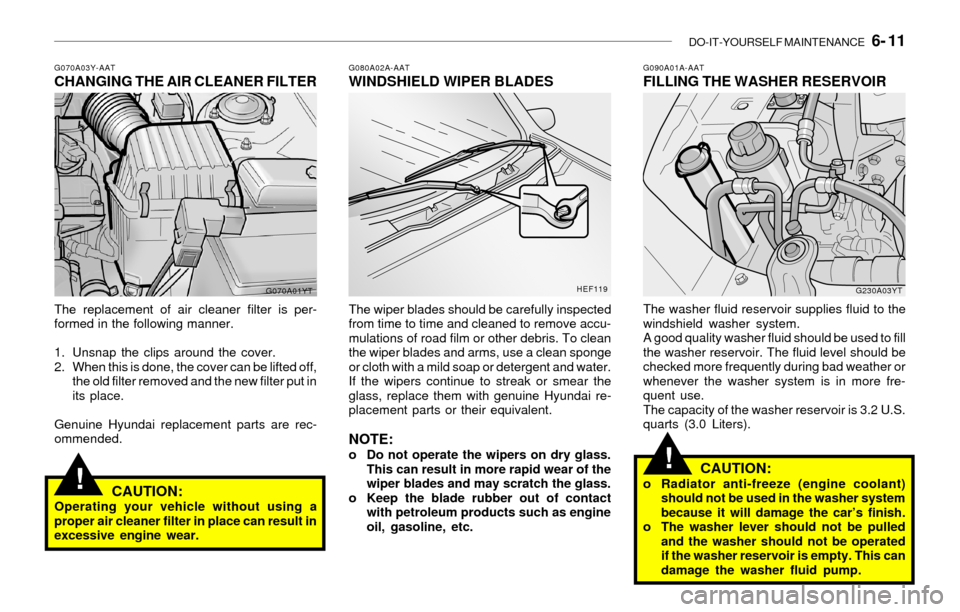
The replacement of air cleaner filter is per-
formed in the following manner.
1. Unsnap the clips around the cover.
2. When this is done, the cover can be lifted off,
the old filter removed and the new filter put in
its place.
Genuine Hyundai replacement parts are rec-
ommended.
G080A02A-AATWINDSHIELD WIPER BLADES
The wiper blades should be carefully inspected
from time to time and cleaned to remove accu-
mulations of road film or other debris. To clean
the wiper blades and arms, use a clean sponge
or cloth with a mild soap or detergent and water.
If the wipers continue to streak or smear the
glass, replace them with genuine Hyundai re-
placement parts or their equivalent.
NOTE:o Do not operate the wipers on dry glass.
This can result in more rapid wear of the
wiper blades and may scratch the glass.
o Keep the blade rubber out of contact
with petroleum products such as engine
oil, gasoline, etc.
G090A01A-AATFILLING THE WASHER RESERVOIR
The washer fluid reservoir supplies fluid to the
windshield washer system.
A good quality washer fluid should be used to fill
the washer reservoir. The fluid level should be
checked more frequently during bad weather or
whenever the washer system is in more fre-
quent use.
The capacity of the washer reservoir is 3.2 U.S.
quarts (3.0 Liters).
CAUTION:Operating your vehicle without using a
proper air cleaner filter in place can result in
excessive engine wear.
CAUTION:o Radiator anti-freeze (engine coolant)
should not be used in the washer system
because it will damage the car’s finish.
o The washer lever should not be pulled
and the washer should not be operated
if the washer reservoir is empty. This can
damage the washer fluid pump.
G070A01YTHEF119
G230A03YT