2003 Hyundai Sonata ESP
[x] Cancel search: ESPPage 3 of 205

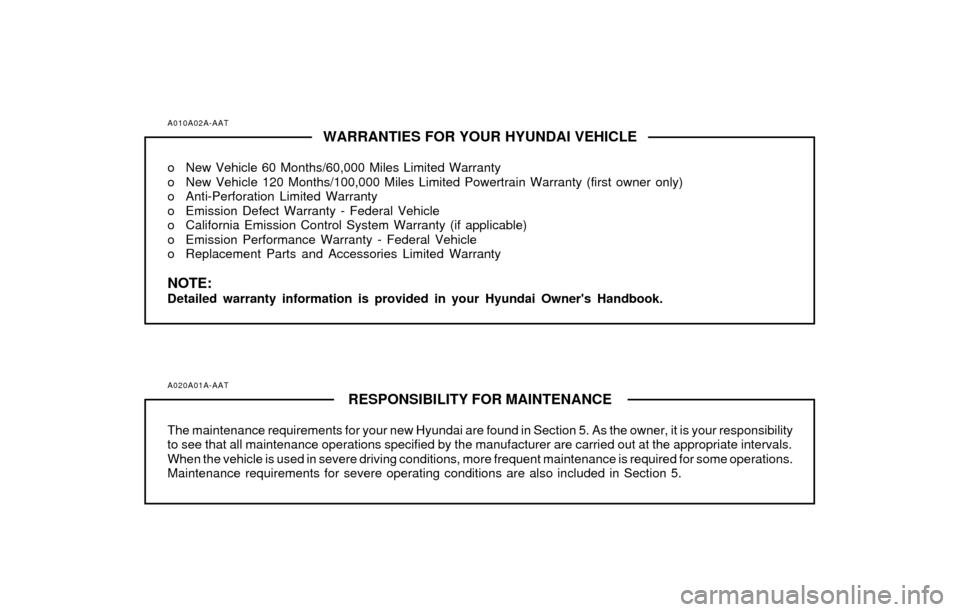
A010A02A-AATWARRANTIES FOR YOUR HYUNDAI VEHICLE
o New Vehicle 60 Months/60,000 Miles Limited Warranty
o New Vehicle 120 Months/100,000 Miles Limited Powertrain Warranty (first owner only)
o Anti-Perforation Limited Warranty
o Emission Defect Warranty - Federal Vehicle
o California Emission Control System Warranty (if applicable)
o Emission Performance Warranty - Federal Vehicle
o Replacement Parts and Accessories Limited Warranty
NOTE:Detailed warranty information is provided in your Hyundai Owner's Handbook.
A020A01A-AAT
RESPONSIBILITY FOR MAINTENANCE
The maintenance requirements for your new Hyundai are found in Section 5. As the owner, it is your responsibility
to see that all maintenance operations specified by the manufacturer are carried out at the appropriate intervals.
When the vehicle is used in severe driving conditions, more frequent maintenance is required for some operations.
Maintenance requirements for severe operating conditions are also included in Section 5.
Page 16 of 205

1- 4 FEATURES OF YOUR HYUNDAI
!
B030C01Y-AATILLUMINATED IGNITION SWITCH
(If installed)B040A01A-AATDOOR LOCKSB040B01A-AATLocking and unlocking front doors with a
key
Whenever a door is opened, the ignition switch
will be illuminated for your convenience, pro-
vided the ignition switch is not in the "ON"
position.
The light will go off approximately 10 seconds
after closing the door or when the ignition switch
is turned on.
B030C01L
o The door can be locked or unlocked with a
key.
o Lock the door by turning the key toward the
front of the vehicle and unlock it by turning the
key toward the rear.
B040B01Y
LOCK
UNLOCK
WARNING:o Unlocked doors can be dangerous. Be-
fore you drive away (especially if there
are children in the car), be sure that all the
doors are securely closed and locked so
that the doors cannot be opened from
the inside. This helps assure that doors
will not be opened accidentally. Also,
when combined with the proper use of
seat belts, locking the doors helps keep
occupants from being ejected from the
car in case of an accident.
o Before opening the door, always look for
and avoid oncoming traffic.
Page 63 of 205

FEATURES OF YOUR HYUNDAI 1- 51
!
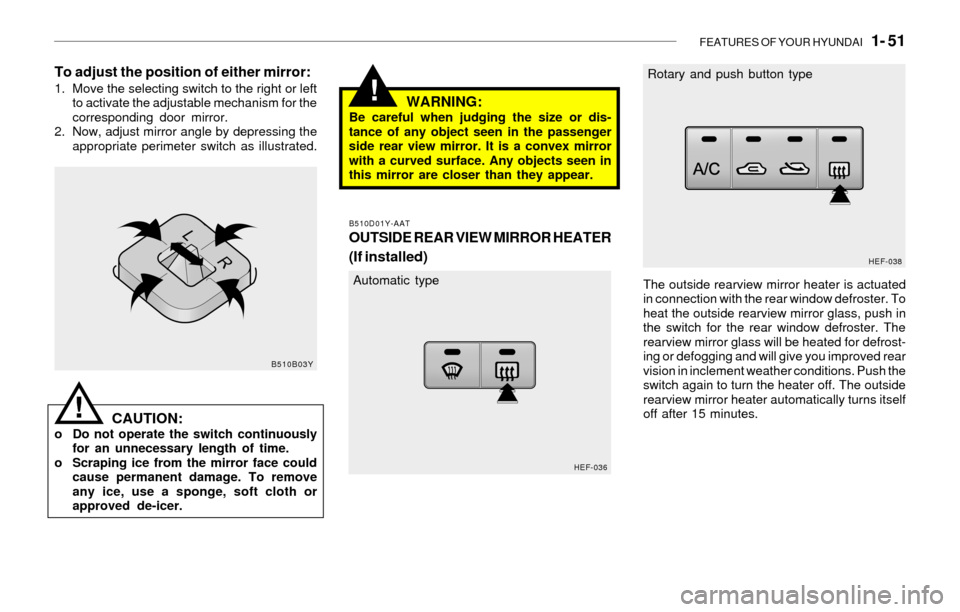
To adjust the position of either mirror:1. Move the selecting switch to the right or left
to activate the adjustable mechanism for the
corresponding door mirror.
2. Now, adjust mirror angle by depressing the
appropriate perimeter switch as illustrated.
CAUTION:o Do not operate the switch continuously
for an unnecessary length of time.
o Scraping ice from the mirror face could
cause permanent damage. To remove
any ice, use a sponge, soft cloth or
approved de-icer.
WARNING:Be careful when judging the size or dis-
tance of any object seen in the passenger
side rear view mirror. It is a convex mirror
with a curved surface. Any objects seen in
this mirror are closer than they appear.
!
B510D01Y-AAT
OUTSIDE REAR VIEW MIRROR HEATER
(If installed)
The outside rearview mirror heater is actuated
in connection with the rear window defroster. To
heat the outside rearview mirror glass, push in
the switch for the rear window defroster. The
rearview mirror glass will be heated for defrost-
ing or defogging and will give you improved rear
vision in inclement weather conditions. Push the
switch again to turn the heater off. The outside
rearview mirror heater automatically turns itself
off after 15 minutes.
B510B03Y
HEF-036HEF-038
Automatic typeRotary and push button type
Page 93 of 205

FEATURES OF YOUR HYUNDAI 1- 81
H240B03O-GAT1. POWER ON-OFF Control Knob
The radio unit may be operated when the ignition
key is in the "ACC" or "ON" position. Press the
knob to switch the power on. The LCD shows
the radio frequency in the radio mode or the tape
direction indicator in the tape mode. To switch
the power off, press the knob again.
VOLUME Control
Rotate the knob clockwise to increase the
volume and turn the knob counterclockwise to
reduce the volume.
2. BASS Control Knob
Press to pop the knob out and turn to the left or
right for the desired bass tone.
BAL (Balance Control) Knob
Pull the bass control knob further out. Turn the
control knob clockwise to emphasize right
speaker sound. (Left speaker sound will be
attenuated)
When the control knob is turned counterclock-
wise, left speaker sound will be emphasized.
(Right speaker sound will be attenuated)
3. TREB (Treble Control) Knob
Press to pop the knob out and turn to the left or
right for the desired treble tone.
FAD (Fader Control) Knob
Pull the treble control knob further out.
Turn the control knob counterclockwise to
emphasize front speaker sound. (Rear speaker
sound will be attenuated)
When the control knob is turned clockwise, rear
speaker sound will be emphasized.
(Front speaker sound will be attenuated)
4. TUNE (Manual) Select Button
Press the side or side to increase or to decrease
the frequency. Press either button and hold
down to continuously scroll. Release button
once the desired station is reached.
SEEK Operation
(Automatic Channel Selection)
Press the TUNE select button 1 sec or
more.Releasing will automatically tune to the
next available station with a beep sound.
When the ( ) side is pressed longer than 1
second, releasing will automatically tune to the
next higher frequency and when the ( ) side
is pressed longer than 1 second, releasing will
automatically tune to the next lower frequency.
5. BAND Selector
Pressing the button changes the AM, FM1
and FM2 bands. The mode selected is dis-
played on LCD.
6. PRESET STATION SELECT Button
Six (6) stations for AM, FM and FM2 respec-
tively can be preset in the electronic memory
circuit on this unit.
HOW TO PRESET STATIONS
Six AM and twelve FM stations may be pro-
grammed into the memory of the radio. Then, by
simply pressing the band select button and/or
one of the six station select buttons, you may
recall any of these stations instantly. To pro-
gram the stations, follow these steps:
o Press band selector to set the band for AM,
FM, or FM2.
o Select the desired station to be stored by
seek or manual tuning.
o Determine the preset station select button
you wish to use to access that station.
FM/AM
Page 98 of 205

1- 86 FEATURES OF YOUR HYUNDAI
H260B03E-AAT1. POWER ON-OFF Control Knob
The radio unit may be operated when the ignition
key is in the "ACC" or "ON" position. Press the
knob to switch the power on. The LCD shows
the radio frequency in the radio mode or the CD
track indicator in either the CD mode or CD
AUTO CHANGER mode. To switch the power
off, press the knob again.
VOLUME Control
Rotate the knob clockwise to increase the
volume and turn the knob counterclockwise to
reduce the volume.
BALANCE Control
Pull and turn the control knob clockwise to
emphasize right speaker sound (Left speaker
sound will be attenuated). When the control
knob is turned counterclockwise, left speaker
sound will be emphasized. (Right speaker sound
will be attenuated)
2. FAD (Fader Control) Knob
Turn the control knob counterclockwise to em-
phasize front speaker sound. (Rear speaker
sound will be attenuated) When the control knob
is turned clockwise, rear speaker sound will be
emphasized. (Front speaker sound will be at-
tenuated)
3. BASS Control Knob
Press to pop the knob out and turn to the left or
right for the desired bass tone.
TREB (Treble Control) Knob
Pull the bass control knob further out. Turn to the
left or right for the desired treble tone.
4. SCAN Button
When the scan button is pressed, the frequency
will increase and the receivable stations will be
tuned in one after another, receiving each sta-
tion for 5 seconds. To stop scanning, press the
scan button again.
5. TUNE (Manual) Select Button
Press the ( ) side or ( ) side to increase or to
decrease the frequency. Press either button
and hold down to continuously scroll. Release
button once the desired station is reached.
SEEK Operation
(Automatic Channel Selection)
Press the TUNE select button for 1 sec or more.
Releasing it will automatically tune to the next
available station with a beep sound.
When the ( ) side is pressed longer than 1
second, releasing will automatically tune to the
next higher frequency and when the ( ) side is
pressed longer than 1 second, releasing will
automatically tune to the next lower frequency.
6. BAND Selector
Pressing the button changes the AM, FM1
and FM2 bands. The mode selected is dis-
played on LCD.
7. PRESET STATION SELECT Button
Six (6) stations for AM, FM or FM2 respectively
can be preset in the electronic memory circuit
on this unit.
HOW TO PRESET STATIONS
Six AM and twelve FM stations may be pro-
grammed into the memory of the radio. Then, by
simply pressing the band select button and/or
one of the six station select buttons, you may
recall any of these stations instantly. To pro-
gram the stations, follow these steps:
FM/AM
Page 103 of 205

FEATURES OF YOUR HYUNDAI 1- 91
H290B03E-GAT1. POWER ON-OFF Control Knob
The radio unit may be operated when the ignition
key is in the "ACC" or "ON" position. Press the
button to switch the power on. The display
shows the radio frequency in the radio mode,
the tape direction indicator in the tape mode or
CD track in either the CD mode or CD AUTO
CHANGER mode. To switch the power off,
press the button again.
VOLUME Control
Rotate the knob clockwise to increase the
volume and turn the knob counterclockwise to
reduce the volume.
2. BASS/BALANCE Control Knob
BASS Control Knob
Press to pop the knob out. To increase the bass,
rotate the knob clockwise, while to decrease the
bass, rotate the knob counterclockwise.
BALANCE Control knob
Pull the Bass control knob out further. Rotate the
knob clockwise to emphasize right speaker
sound. (Left speaker sound will be attenuated)
When the control knob is turned counterclock-
wise, left speaker sound will be emphasized
(Right speaker sound will be attenuated).
3. TREBLE/FAD Knob
TREBLE Control Knob
Press to pop the knob out and turn to the left or
right for the desired treble tone.
FAD (Fader Control) Knob
Pull the Bass control knob out further. Turn the
control knob counterclockwise to emphasize
front speaker sound. (Rear speaker sound will
be attenuated) When the control knob is turned
clockwise, rear speaker sound will be empha-
sized. (Front speaker sound will be attenuated)
4. TUNE (Manual) Select Button
Press the ( ) side or ( ) side to increase or to
decrease the frequency. Press either button
and hold down to continuously scroll, Release
button once the desired station is reached.
SEEK Operation (Automatic Channel
Selection)
Press the TUNE select button for 0.5 sec or
more. Releasing it will automatically tune to the
next available station with a beep sound.
When the ( ) side is pressed longer than 0.5
second, releasing will automatically tune to the
next higher frequency and when the ( ) side is
pressed longer than 0.5 second, releasing will
automatically tune to the next lower frequency.
5. PRESET STATION Select Buttons
Six (6) stations for AM, FM and FM2 respec-
tively can be preset in the electronic memory
circuit.
HOW TO PRESET STATIONS
Six AM and twelve FM stations may be pro-
grammed into the memory of the radio. Then, by
simply pressing the band select button and/or
one of the six station select buttons, you may
recall any of these stations instantly. To pro-
gram the stations, follow these steps:
o Press band selector to set the band for AM,
FM or FM2.
o Select the desired station to be stored by
seek or manual tuning.
o Determine the preset station select button
you wish to use to access that station.
o Press the station select button for more than
two seconds. A select button indicator will
show in the display indicating which select
button you have depressed. The frequency
display will flash after it has been stored into
the memory with a beep sound. You should
then release the button, and proceed to
program the next desired station. A total of
18 stations can be programmed by selecting
one AM and two FM station per button.
o When completed, any preset station may be
recalled by selecting AM, FM or FM2 band
and the appropriate station button.
Page 118 of 205

2- 6 DRIVING YOUR HYUNDAI
!
shift into reverse, depress the clutch, move
the shift lever to neutral, wait three seconds,
then shift to the reverse position.
o Exercise extreme caution when driving on a
slippery surface. Be especially careful when
braking, accelerating or shifting gears. On a
slippery surface, an abrupt change in ve-
hicle speed can cause the drive wheels to
lose traction and the vehicle to go out of
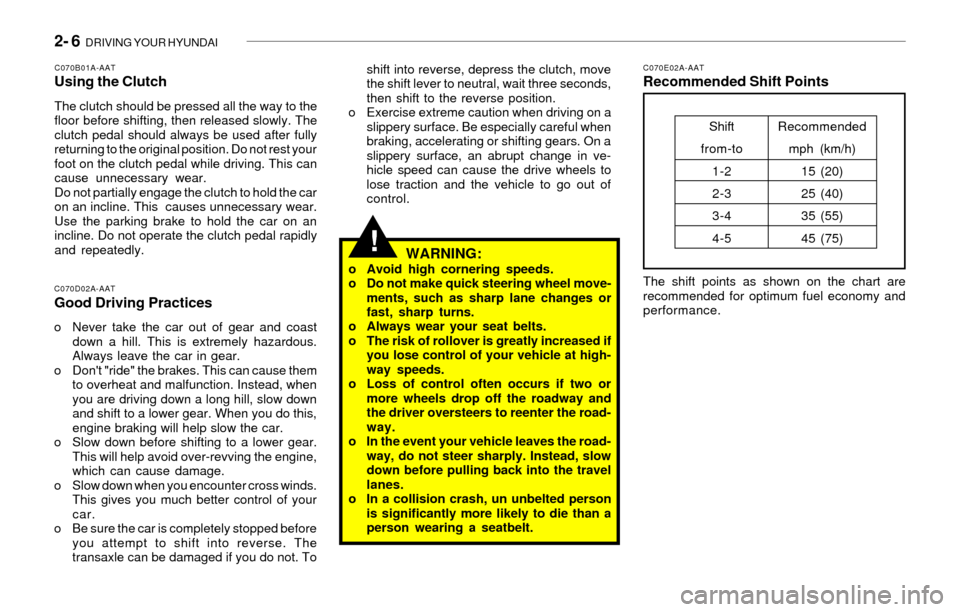
control.C070E02A-AATRecommended Shift Points
The shift points as shown on the chart are
recommended for optimum fuel economy and
performance.
Shift
from-to
1-2
2-3
3-4
4-5Recommended
mph (km/h)
15 (20)
25 (40)
35 (55)
45 (75)
C070B01A-AATUsing the Clutch
The clutch should be pressed all the way to the
floor before shifting, then released slowly. The
clutch pedal should always be used after fully
returning to the original position. Do not rest your
foot on the clutch pedal while driving. This can
cause unnecessary wear.
Do not partially engage the clutch to hold the car
on an incline. This causes unnecessary wear.
Use the parking brake to hold the car on an
incline. Do not operate the clutch pedal rapidly
and repeatedly.
C070D02A-AATGood Driving Practices
o Never take the car out of gear and coast
down a hill. This is extremely hazardous.
Always leave the car in gear.
o Don't "ride" the brakes. This can cause them
to overheat and malfunction. Instead, when
you are driving down a long hill, slow down
and shift to a lower gear. When you do this,
engine braking will help slow the car.
o Slow down before shifting to a lower gear.
This will help avoid over-revving the engine,
which can cause damage.
o Slow down when you encounter cross winds.
This gives you much better control of your
car.
o Be sure the car is completely stopped before
you attempt to shift into reverse. The
transaxle can be damaged if you do not. To
WARNING:o Avoid high cornering speeds.
o Do not make quick steering wheel move-
ments, such as sharp lane changes or
fast, sharp turns.
o Always wear your seat belts.
o The risk of rollover is greatly increased if
you lose control of your vehicle at high-
way speeds.
o Loss of control often occurs if two or
more wheels drop off the roadway and
the driver oversteers to reenter the road-
way.
o In the event your vehicle leaves the road-
way, do not steer sharply. Instead, slow
down before pulling back into the travel
lanes.
o In a collision crash, un unbelted person
is significantly more likely to die than a
person wearing a seatbelt.
Page 122 of 205

2- 10 DRIVING YOUR HYUNDAI
!
!
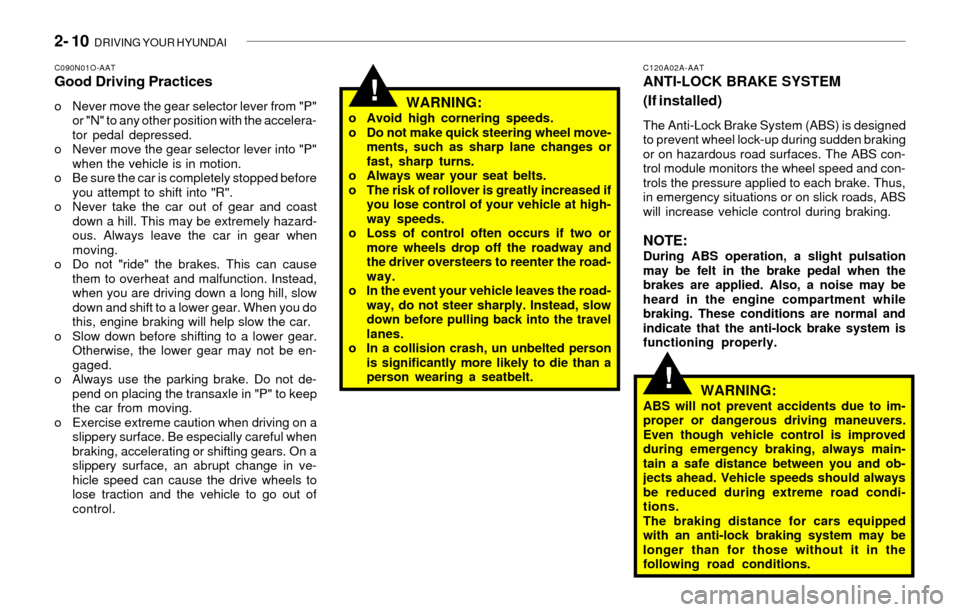
C120A02A-AATANTI-LOCK BRAKE SYSTEM
(If installed)
The Anti-Lock Brake System (ABS) is designed
to prevent wheel lock-up during sudden braking
or on hazardous road surfaces. The ABS con-
trol module monitors the wheel speed and con-
trols the pressure applied to each brake. Thus,
in emergency situations or on slick roads, ABS
will increase vehicle control during braking.
NOTE:During ABS operation, a slight pulsation
may be felt in the brake pedal when the
brakes are applied. Also, a noise may be
heard in the engine compartment while
braking. These conditions are normal and
indicate that the anti-lock brake system is
functioning properly.
C090N01O-AATGood Driving Practices
o Never move the gear selector lever from "P"
or "N" to any other position with the accelera-
tor pedal depressed.
o Never move the gear selector lever into "P"
when the vehicle is in motion.
o Be sure the car is completely stopped before
you attempt to shift into "R".
o Never take the car out of gear and coast
down a hill. This may be extremely hazard-
ous. Always leave the car in gear when
moving.
o Do not "ride" the brakes. This can cause
them to overheat and malfunction. Instead,
when you are driving down a long hill, slow
down and shift to a lower gear. When you do
this, engine braking will help slow the car.
o Slow down before shifting to a lower gear.
Otherwise, the lower gear may not be en-
gaged.
o Always use the parking brake. Do not de-
pend on placing the transaxle in "P" to keep
the car from moving.
o Exercise extreme caution when driving on a
slippery surface. Be especially careful when
braking, accelerating or shifting gears. On a
slippery surface, an abrupt change in ve-
hicle speed can cause the drive wheels to
lose traction and the vehicle to go out of
control.
WARNING:ABS will not prevent accidents due to im-
proper or dangerous driving maneuvers.
Even though vehicle control is improved
during emergency braking, always main-
tain a safe distance between you and ob-
jects ahead. Vehicle speeds should always
be reduced during extreme road condi-
tions.
The braking distance for cars equipped
with an anti-lock braking system may be
longer than for those without it in the
following road conditions.
WARNING:o Avoid high cornering speeds.
o Do not make quick steering wheel move-
ments, such as sharp lane changes or
fast, sharp turns.
o Always wear your seat belts.
o The risk of rollover is greatly increased if
you lose control of your vehicle at high-
way speeds.
o Loss of control often occurs if two or
more wheels drop off the roadway and
the driver oversteers to reenter the road-
way.
o In the event your vehicle leaves the road-
way, do not steer sharply. Instead, slow
down before pulling back into the travel
lanes.
o In a collision crash, un unbelted person
is significantly more likely to die than a
person wearing a seatbelt.