2003 Hyundai Santa Fe lock
[x] Cancel search: lockPage 75 of 221
FEATURES OF YOUR HYUNDAI 1- 63
!
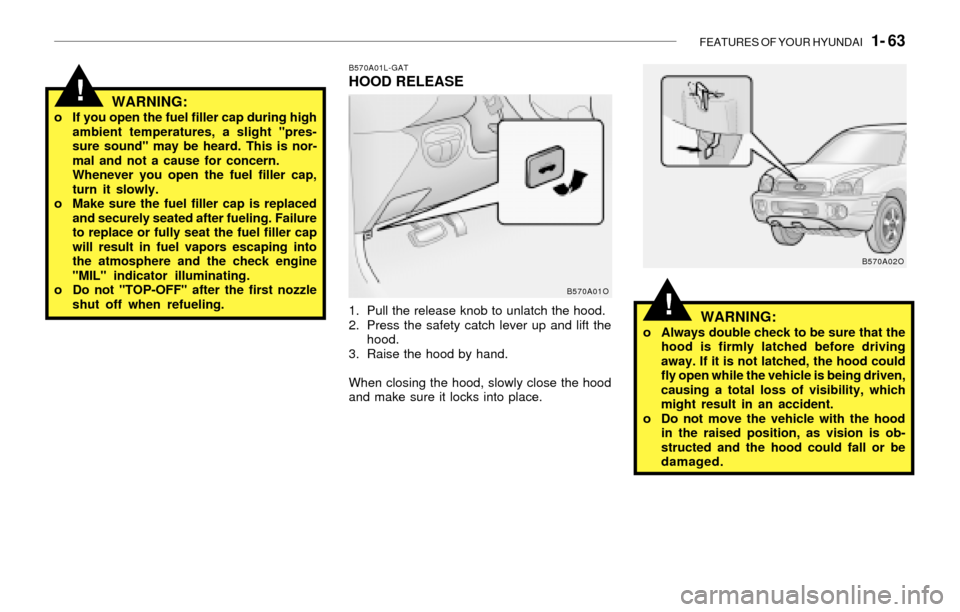
B570A01L-GATHOOD RELEASE
1. Pull the release knob to unlatch the hood.
2. Press the safety catch lever up and lift the
hood.
3. Raise the hood by hand.
When closing the hood, slowly close the hood
and make sure it locks into place.
WARNING:o If you open the fuel filler cap during high
ambient temperatures, a slight "pres-
sure sound" may be heard. This is nor-
mal and not a cause for concern.
Whenever you open the fuel filler cap,
turn it slowly.
o Make sure the fuel filler cap is replaced
and securely seated after fueling. Failure
to replace or fully seat the fuel filler cap
will result in fuel vapors escaping into
the atmosphere and the check engine
"MIL" indicator illuminating.
o Do not "TOP-OFF" after the first nozzle
shut off when refueling.
B570A01O
!WARNING:o Always double check to be sure that the
hood is firmly latched before driving
away. If it is not latched, the hood could
fly open while the vehicle is being driven,
causing a total loss of visibility, which
might result in an accident.
o Do not move the vehicle with the hood
in the raised position, as vision is ob-
structed and the hood could fall or be
damaged.
B570A02O
Page 76 of 221
1- 64 FEATURES OF YOUR HYUNDAI
!
B580A01A-AATSUN VISOR
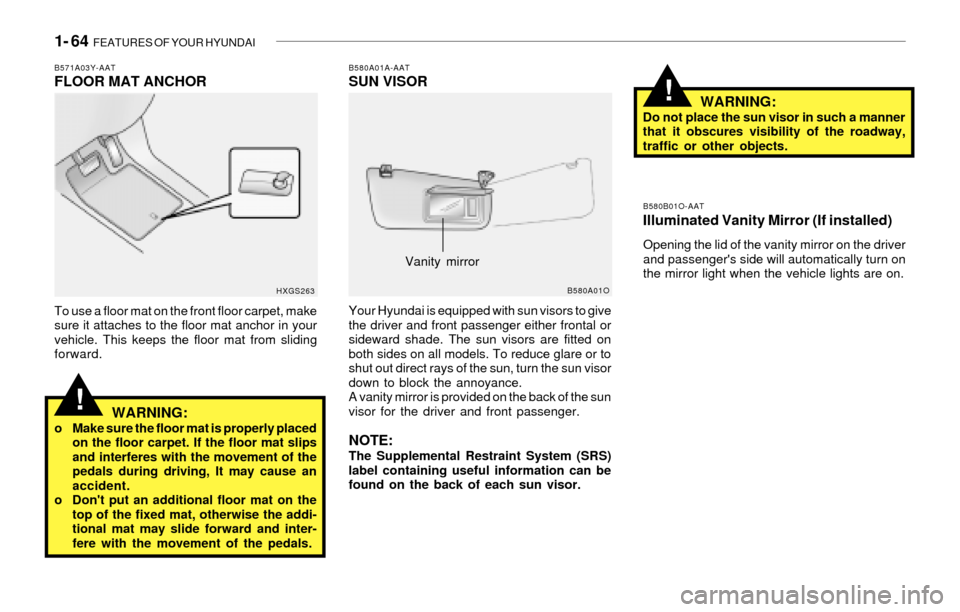
Your Hyundai is equipped with sun visors to give
the driver and front passenger either frontal or
sideward shade. The sun visors are fitted on
both sides on all models. To reduce glare or to
shut out direct rays of the sun, turn the sun visor
down to block the annoyance.
A vanity mirror is provided on the back of the sun
visor for the driver and front passenger.
NOTE:The Supplemental Restraint System (SRS)
label containing useful information can be
found on the back of each sun visor.
B580A01O
WARNING:Do not place the sun visor in such a manner
that it obscures visibility of the roadway,
traffic or other objects.
B580B01O-AATIlluminated Vanity Mirror (If installed)
Opening the lid of the vanity mirror on the driver
and passenger's side will automatically turn on
the mirror light when the vehicle lights are on.
Vanity mirror
!
B571A03Y-AATFLOOR MAT ANCHOR
To use a floor mat on the front floor carpet, make
sure it attaches to the floor mat anchor in your
vehicle. This keeps the floor mat from sliding
forward.
WARNING:o Make sure the floor mat is properly placed
on the floor carpet. If the floor mat slips
and interferes with the movement of the
pedals during driving, It may cause an
accident.
o Don't put an additional floor mat on the
top of the fixed mat, otherwise the addi-
tional mat may slide forward and inter-
fere with the movement of the pedals.
HXGS263
Page 77 of 221
FEATURES OF YOUR HYUNDAI 1- 65
!
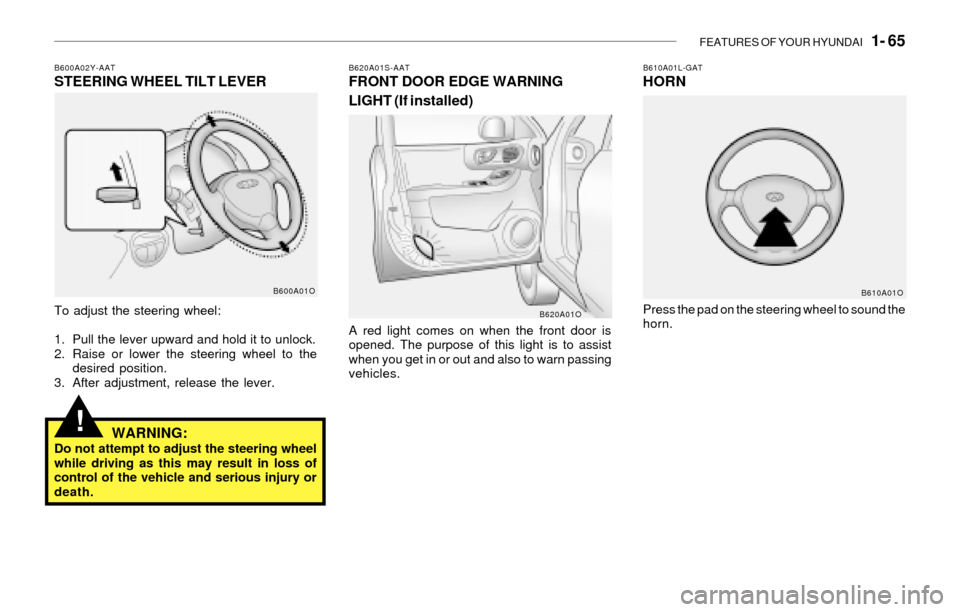
To adjust the steering wheel:
1. Pull the lever upward and hold it to unlock.
2. Raise or lower the steering wheel to the
desired position.
3. After adjustment, release the lever.
WARNING:Do not attempt to adjust the steering wheel
while driving as this may result in loss of
control of the vehicle and serious injury or
death.
B600A02Y-AATSTEERING WHEEL TILT LEVER
B600A01O
B620A01S-AATFRONT DOOR EDGE WARNING
LIGHT (If installed)
A red light comes on when the front door is
opened. The purpose of this light is to assist
when you get in or out and also to warn passing
vehicles.
B610A01L-GATHORN
Press the pad on the steering wheel to sound the
horn.B620A01OB610A01O
Page 88 of 221
1- 76 FEATURES OF YOUR HYUNDAI
B730A01FC-GATOperation Tips
o To keep dust or unpleasant fumes from
entering the car through the ventilation sys-
tem, temporarily set the air intake control
switch to the position. Be sure to return
the control switch to the position when
the irritation has passed to keep fresh air in
the vehicle. This will help keep the driver alert
and comfortable.
o Air for the heating/cooling system is drawn
in through the grilles just ahead of the wind-
shield. Care should be taken that these are
not blocked by leaves, snow, ice or other
obstructions.
o To prevent interior fog on the windshield, set
the air intake control switch to the fresh air
( ) position and fan speed to the desired
position.
o Adjust the fan control to the desired speed.
For greater cooling, turn the fan control to
one of the higher speeds or temporarily
select the recirculate ( ) position on the
air intake control switch.
B740C02O-AATDe-Humidified Heating
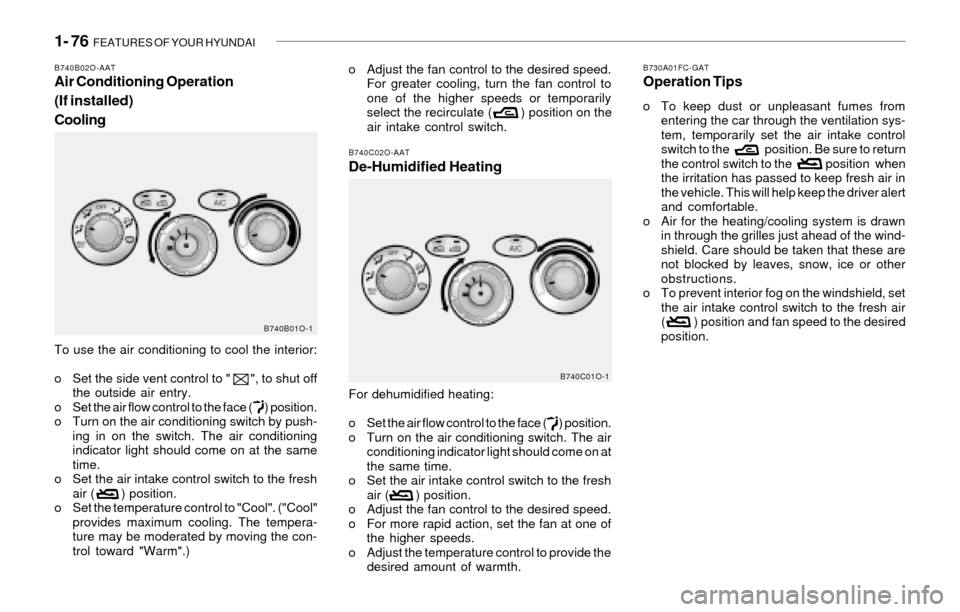
For dehumidified heating:
o Set the air flow control to the face ( ) position.
o Turn on the air conditioning switch. The air
conditioning indicator light should come on at
the same time.
o Set the air intake control switch to the fresh
air ( ) position.
o Adjust the fan control to the desired speed.
o For more rapid action, set the fan at one of
the higher speeds.
o Adjust the temperature control to provide the
desired amount of warmth.
B740C01O-1
To use the air conditioning to cool the interior:
o Set the side vent control to " ", to shut off
the outside air entry.
o Set the air flow control to the face ( ) position.
o Turn on the air conditioning switch by push-
ing in on the switch. The air conditioning
indicator light should come on at the same
time.
o Set the air intake control switch to the fresh
air ( ) position.
o Set the temperature control to "Cool". ("Cool"
provides maximum cooling. The tempera-
ture may be moderated by moving the con-
trol toward "Warm".)
B740B02O-AATAir Conditioning Operation
(If installed)
Cooling
B740B01O-1
Page 97 of 221
FEATURES OF YOUR HYUNDAI 1- 85
!
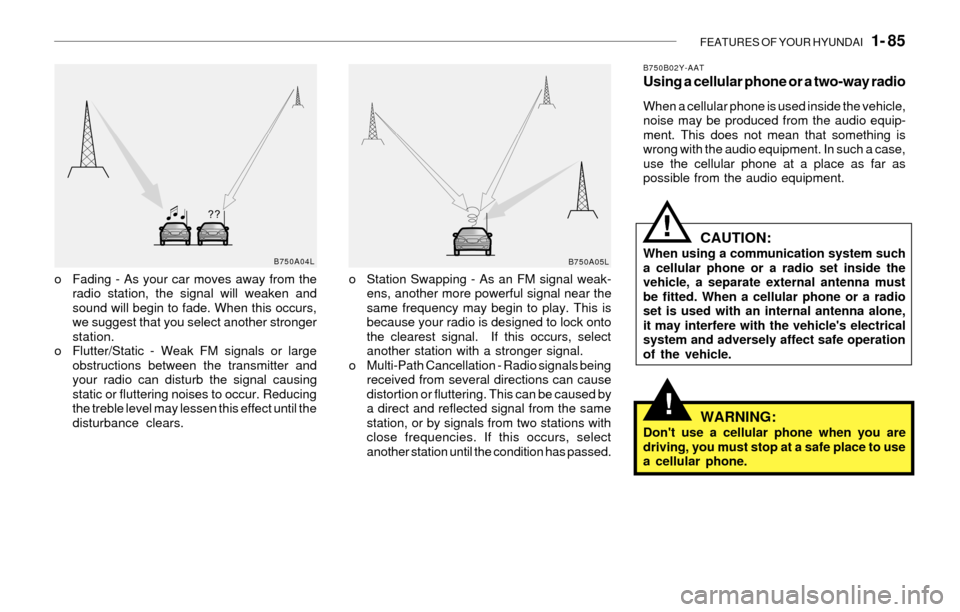
o Fading - As your car moves away from the
radio station, the signal will weaken and
sound will begin to fade. When this occurs,
we suggest that you select another stronger
station.
o Flutter/Static - Weak FM signals or large
obstructions between the transmitter and
your radio can disturb the signal causing
static or fluttering noises to occur. Reducing
the treble level may lessen this effect until the
disturbance clears.o Station Swapping - As an FM signal weak-
ens, another more powerful signal near the
same frequency may begin to play. This is
because your radio is designed to lock onto
the clearest signal. If this occurs, select
another station with a stronger signal.
o Multi-Path Cancellation - Radio signals being
received from several directions can cause
distortion or fluttering. This can be caused by
a direct and reflected signal from the same
station, or by signals from two stations with
close frequencies. If this occurs, select
another station until the condition has passed.
B750B02Y-AATUsing a cellular phone or a two-way radio
When a cellular phone is used inside the vehicle,
noise may be produced from the audio equip-
ment. This does not mean that something is
wrong with the audio equipment. In such a case,
use the cellular phone at a place as far as
possible from the audio equipment.
CAUTION:When using a communication system such
a cellular phone or a radio set inside the
vehicle, a separate external antenna must
be fitted. When a cellular phone or a radio
set is used with an internal antenna alone,
it may interfere with the vehicle's electrical
system and adversely affect safe operation
of the vehicle.
WARNING:Don't use a cellular phone when you are
driving, you must stop at a safe place to use
a cellular phone.
B750A04L
B750A05L
!
Page 99 of 221
FEATURES OF YOUR HYUNDAI 1- 87
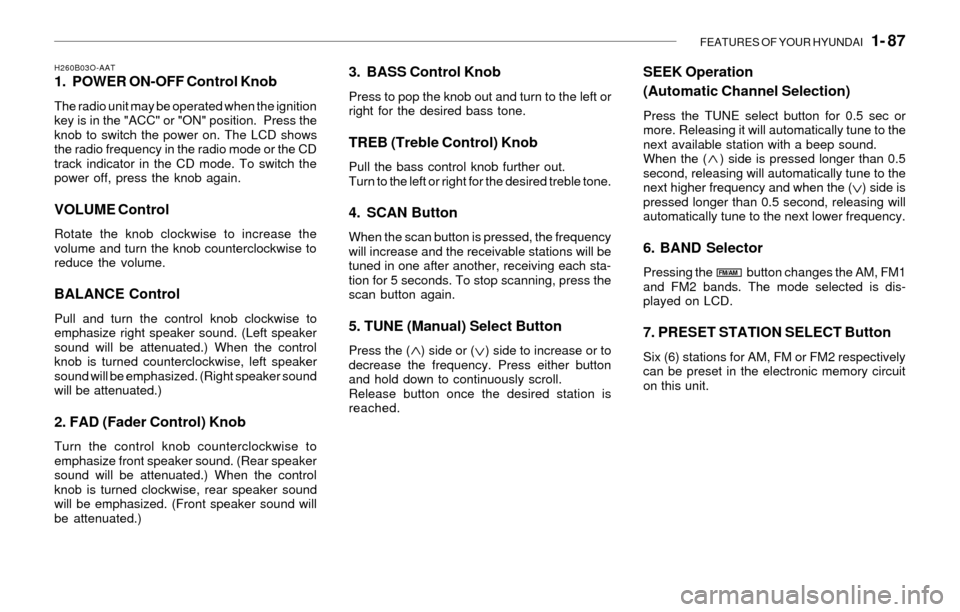
H260B03O-AAT1. POWER ON-OFF Control Knob
The radio unit may be operated when the ignition
key is in the "ACC" or "ON" position. Press the
knob to switch the power on. The LCD shows
the radio frequency in the radio mode or the CD
track indicator in the CD mode. To switch the
power off, press the knob again.
VOLUME Control
Rotate the knob clockwise to increase the
volume and turn the knob counterclockwise to
reduce the volume.
BALANCE Control
Pull and turn the control knob clockwise to
emphasize right speaker sound. (Left speaker
sound will be attenuated.) When the control
knob is turned counterclockwise, left speaker
sound will be emphasized. (Right speaker sound
will be attenuated.)
2. FAD (Fader Control) Knob
Turn the control knob counterclockwise to
emphasize front speaker sound. (Rear speaker
sound will be attenuated.) When the control
knob is turned clockwise, rear speaker sound
will be emphasized. (Front speaker sound will
be attenuated.)
3. BASS Control Knob
Press to pop the knob out and turn to the left or
right for the desired bass tone.
TREB (Treble Control) Knob
Pull the bass control knob further out.
Turn to the left or right for the desired treble tone.
4. SCAN Button
When the scan button is pressed, the frequency
will increase and the receivable stations will be
tuned in one after another, receiving each sta-
tion for 5 seconds. To stop scanning, press the
scan button again.
5. TUNE (Manual) Select Button
Press the ( ) side or ( ) side to increase or to
decrease the frequency. Press either button
and hold down to continuously scroll.
Release button once the desired station is
reached.
SEEK Operation
(Automatic Channel Selection)
Press the TUNE select button for 0.5 sec or
more. Releasing it will automatically tune to the
next available station with a beep sound.
When the ( ) side is pressed longer than 0.5
second, releasing will automatically tune to the
next higher frequency and when the ( ) side is
pressed longer than 0.5 second, releasing will
automatically tune to the next lower frequency.
6. BAND Selector
Pressing the button changes the AM, FM1
and FM2 bands. The mode selected is dis-
played on LCD.
7. PRESET STATION SELECT Button
Six (6) stations for AM, FM or FM2 respectively
can be preset in the electronic memory circuit
on this unit.
FM/AM
Page 105 of 221
FEATURES OF YOUR HYUNDAI 1- 93
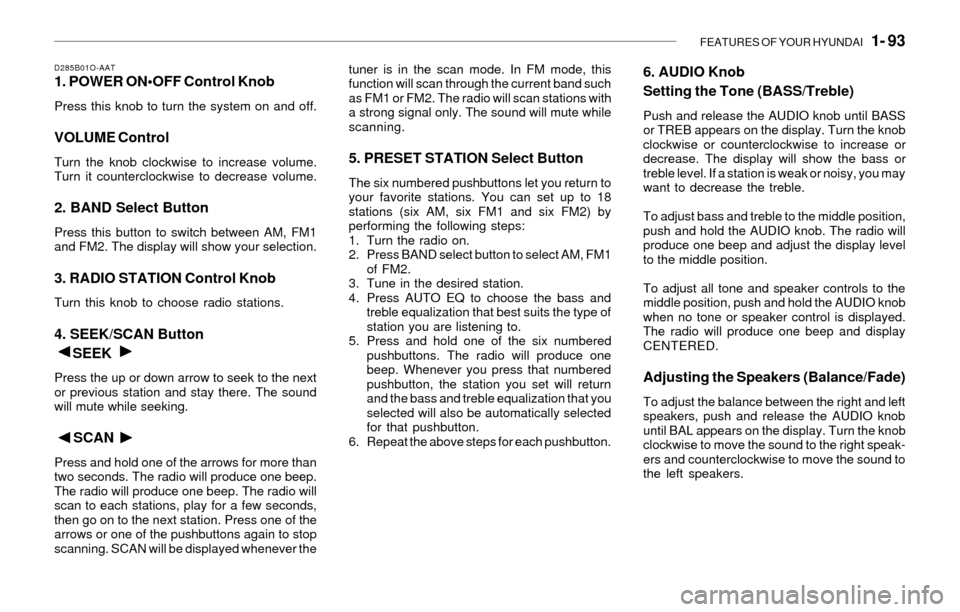
D285B01O-AAT1. POWER ON•OFF Control Knob
Press this knob to turn the system on and off.
VOLUME Control
Turn the knob clockwise to increase volume.
Turn it counterclockwise to decrease volume.
2. BAND Select Button
Press this button to switch between AM, FM1
and FM2. The display will show your selection.
3. RADIO STATION Control Knob
Turn this knob to choose radio stations.
4. SEEK/SCAN Button
SEEK
Press the up or down arrow to seek to the next
or previous station and stay there. The sound
will mute while seeking.
SCAN
Press and hold one of the arrows for more than
two seconds. The radio will produce one beep.
The radio will produce one beep. The radio will
scan to each stations, play for a few seconds,
then go on to the next station. Press one of the
arrows or one of the pushbuttons again to stop
scanning. SCAN will be displayed whenever thetuner is in the scan mode. In FM mode, this
function will scan through the current band such
as FM1 or FM2. The radio will scan stations with
a strong signal only. The sound will mute while
scanning.
5. PRESET STATION Select Button
The six numbered pushbuttons let you return to
your favorite stations. You can set up to 18
stations (six AM, six FM1 and six FM2) by
performing the following steps:
1. Turn the radio on.
2. Press BAND select button to select AM, FM1
of FM2.
3. Tune in the desired station.
4. Press AUTO EQ to choose the bass and
treble equalization that best suits the type of
station you are listening to.
5. Press and hold one of the six numbered
pushbuttons. The radio will produce one
beep. Whenever you press that numbered
pushbutton, the station you set will return
and the bass and treble equalization that you
selected will also be automatically selected
for that pushbutton.
6. Repeat the above steps for each pushbutton.
6. AUDIO Knob
Setting the Tone (BASS/Treble)
Push and release the AUDIO knob until BASS
or TREB appears on the display. Turn the knob
clockwise or counterclockwise to increase or
decrease. The display will show the bass or
treble level. If a station is weak or noisy, you may
want to decrease the treble.
To adjust bass and treble to the middle position,
push and hold the AUDIO knob. The radio will
produce one beep and adjust the display level
to the middle position.
To adjust all tone and speaker controls to the
middle position, push and hold the AUDIO knob
when no tone or speaker control is displayed.
The radio will produce one beep and display
CENTERED.
Adjusting the Speakers (Balance/Fade)
To adjust the balance between the right and left
speakers, push and release the AUDIO knob
until BAL appears on the display. Turn the knob
clockwise to move the sound to the right speak-
ers and counterclockwise to move the sound to
the left speakers.
Page 106 of 221
1- 94 FEATURES OF YOUR HYUNDAI
To adjust the fade between the front and rear
speakers push and release the AUDIO knob
until FADE appears on the display. Turn the
knob clockwise to move the sound to the front
speakers and counterclockwise to move the
sound to the rear speakers.
The middle position balances the sound be-
tween the speakers. To adjust the balance and
fade to the middle position, push the AUDIO
knob then push it again and hold it until you hear
one beep. The balance and fade will be adjusted
to the middle position and the display will show
the speaker balance.
To adjust all tone and speaker controls to the
middle position, push and hold the AUDIO knob
when no tone or speaker control is display ALL
with the level display in the middle position.
7. AUTO EQUALIZER
This feature allows you to choose bass and
treble equalization settings designed for coun-
try jazz, news, pop, rock and classical stations.
Each time you press the AUTO TONE button,
this feature will change to one of the preset
equalization settings previously listed.
To return the bass and treble to the custom
mode, push and release the AUDIO knob until
custom is displayed.
8. Tips About Your Audio System
Hearing damage form loud noise is almost
undetectable until it is too late. Your hearing can
adapt to higher volumes of sound. Sound that
seems normal can be loud and harmful to your
hearing. Take precautions by adjusting the
volume control on your radio to a safe sound
level before your hearing adapts to it.
To help avoid hearing loss or damage do the
following:
1. Adjust the volume knob to the lowest setting.
2. Increase volume slowly until you hear com-
fortably and clearly.