2003 Hyundai Grandeur oil temperature
[x] Cancel search: oil temperaturePage 54 of 235
1- 40 FEATURES OF YOUR HYUNDAI
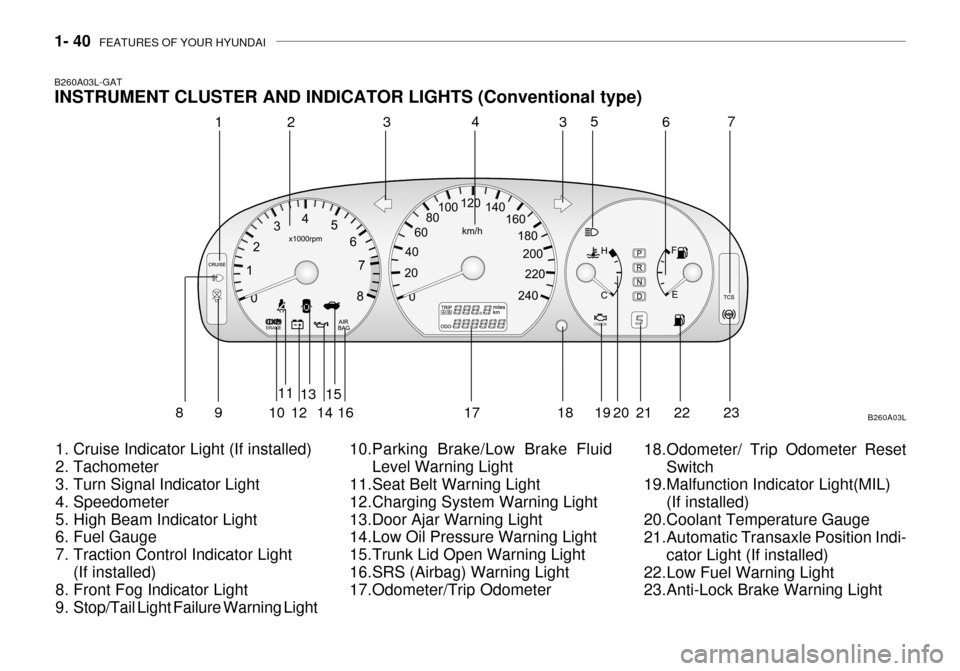
B260A03L-GAT INSTRUMENT CLUSTER AND INDICATOR LIGHTS (Conventional type)
1. Cruise Indicator Light (If installed)
2. Tachometer
3. Turn Signal Indicator Light
4. Speedometer
5. High Beam Indicator Light
6. Fuel Gauge
7. Traction Control Indicator Light (If installed)
8. Front Fog Indicator Light
9. Stop/Tail Light Failure Warning Light 10.Parking Brake/Low Brake Fluid
Level Warning Light
11.Seat Belt Warning Light
12.Charging System Warning Light
13.Door Ajar Warning Light
14.Low Oil Pressure Warning Light
15.Trunk Lid Open Warning Light
16.SRS (Airbag) Warning Light
17.Odometer/Trip Odometer 18.Odometer/ Trip Odometer Reset
Switch
19.Malfunction Indicator Light(MIL)
(If installed)
20.Coolant Temperature Gauge
21.Automatic Transaxle Position Indi-
cator Light (If installed)
22.Low Fuel Warning Light
23.Anti-Lock Brake Warning Light B260A03L
1
2
3435
67
89 1 011
1213
1415
16 17 18 19 20 21 22
23
Page 55 of 235
FEATURES OF YOUR HYUNDAI 1- 41
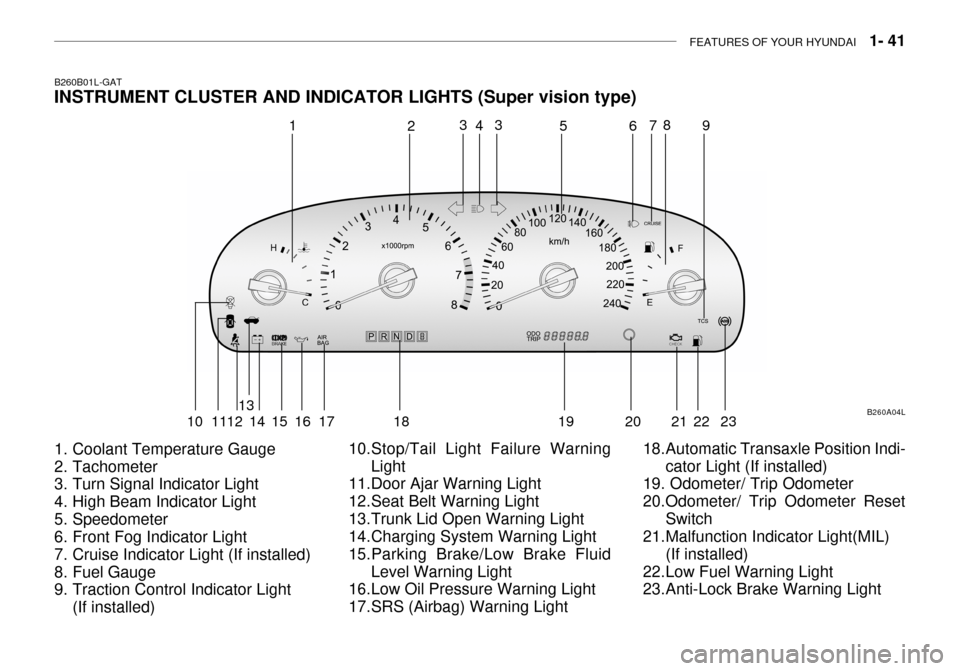
B260B01L-GAT INSTRUMENT CLUSTER AND INDICATOR LIGHTS (Super vision type)
1. Coolant Temperature Gauge
2. Tachometer
3. Turn Signal Indicator Light
4. High Beam Indicator Light
5. Speedometer
6. Front Fog Indicator Light
7. Cruise Indicator Light (If installed)
8. Fuel Gauge
9. Traction Control Indicator Light
(If installed) 10.Stop/Tail Light Failure Warning
Light
11.Door Ajar Warning Light
12.Seat Belt Warning Light
13.Trunk Lid Open Warning Light
14.Charging System Warning Light
15.Parking Brake/Low Brake Fluid
Level Warning Light
16.Low Oil Pressure Warning Light
17.SRS (Airbag) Warning Light 18.Automatic Transaxle Position Indi-
cator Light (If installed)
19. Odometer/ Trip Odometer
20.Odometer/ Trip Odometer Reset
Switch
21.Malfunction Indicator Light(MIL)
(If installed)
22.Low Fuel Warning Light
23.Anti-Lock Brake Warning Light B260A04L
1
2
4
3 3
56 78
9
10 1112 13
14 15 16 17 18 19 20 21 22 23
Page 130 of 235
1- 116 FEATURES OF YOUR HYUNDAI
Head
Cotton applicator
B860B02L
B860A02L
o Be sure that the cassette label is not
loose or peeling off or tape ejection may be difficult.
o Never touch or soil the actual audio
tape surfaces.
o Keep all magnetized objects, such as electric motors, speakers or trans-formers away from your cassettetapes and tape player unit.
o Store cassettes in a cool, dry place
with the open side facing down toprevent dust from setting in the cas- sette body.
o We strongly recommend against the
use of tapes longer than C-60 (60 minutes total). Tapes such as C-120 or C-180 are very thin and do not perform as well in the automo- tive environment. o Avoid repeated fast reverse usage to
replay one given tune or tape sec-tion. This can cause poor tape wind-ing to occur, and eventually cause excessive internal drag and poor audio quality in the cassette. If thisoccurs, it can sometimes be cor- rected by fast winding the tape from end to end several times. If this doesnot correct the problem, do not con- tinue to use the tape in your vehicle.
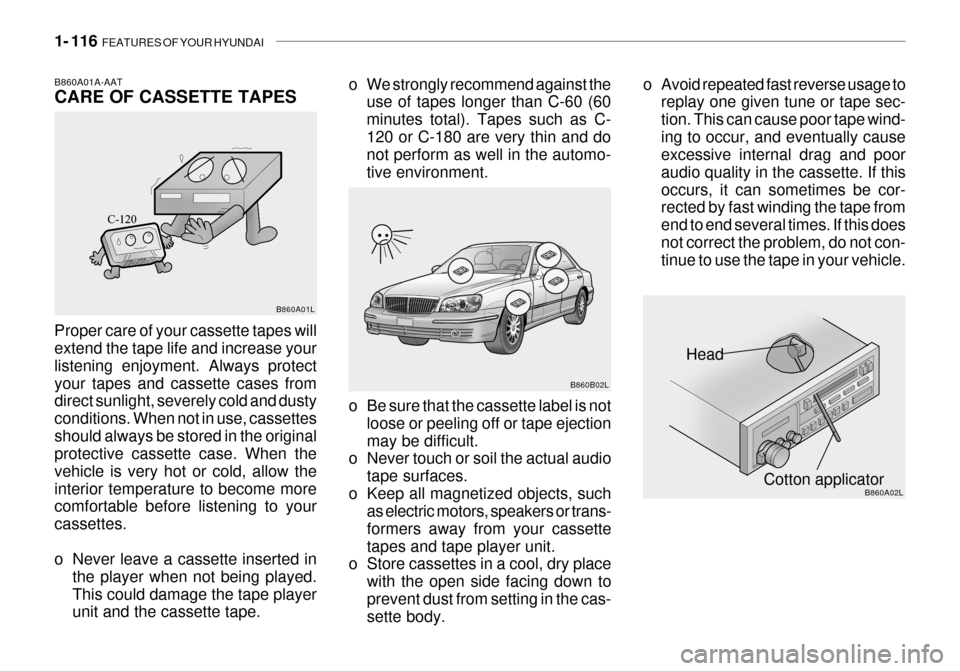
B860A01A-AAT CARE OF CASSETTE TAPES Proper care of your cassette tapes will extend the tape life and increase your listening enjoyment. Always protectyour tapes and cassette cases from direct sunlight, severely cold and dusty conditions. When not in use, cassettesshould always be stored in the original protective cassette case. When the vehicle is very hot or cold, allow theinterior temperature to become more comfortable before listening to your cassettes.
o Never leave a cassette inserted in
the player when not being played. This could damage the tape player unit and the cassette tape. B860A01L
Page 131 of 235
FEATURES OF YOUR HYUNDAI 1- 117
o The playback head, capstan and
pinch rollers will develop a coating of tape residue that can result in dete-rioration of sound quality, such as a wavering sound. They should be cleaned monthly using a commer-cially available head cleaning tape or special solution available from audio specialty shops. Follow the supplier'sdirections carefully and never oil any part of the tape player unit.
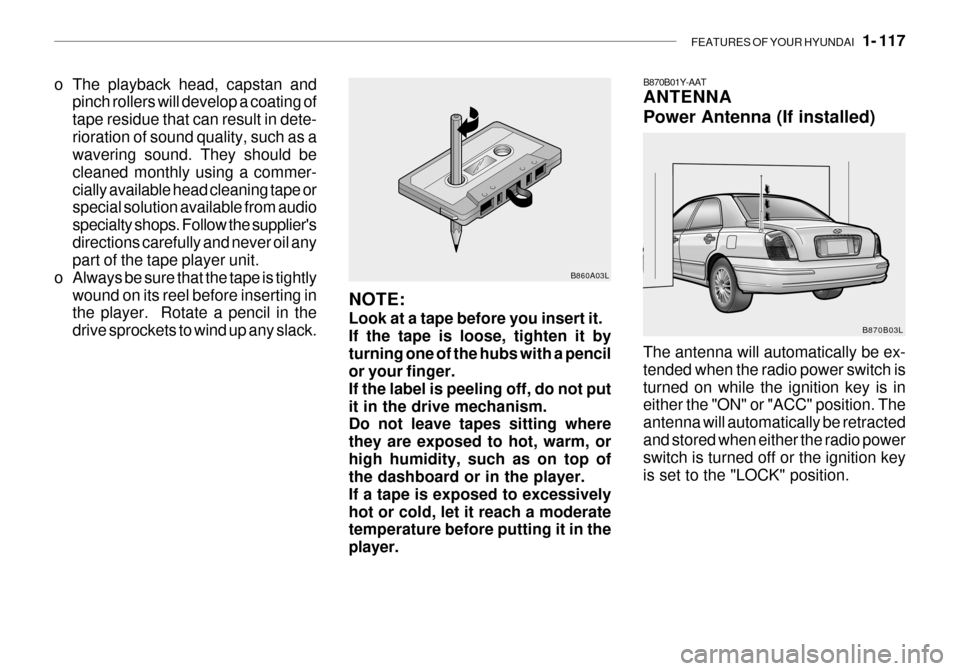
o Always be sure that the tape is tightly wound on its reel before inserting inthe player. Rotate a pencil in the drive sprockets to wind up any slack. B860A03L
NOTE: Look at a tape before you insert it. If the tape is loose, tighten it byturning one of the hubs with a pencil or your finger. If the label is peeling off, do not putit in the drive mechanism. Do not leave tapes sitting where they are exposed to hot, warm, orhigh humidity, such as on top of the dashboard or in the player. If a tape is exposed to excessivelyhot or cold, let it reach a moderate temperature before putting it in the player.B870B01Y-AAT ANTENNA Power Antenna (If installed) The antenna will automatically be ex- tended when the radio power switch isturned on while the ignition key is in either the "ON" or "ACC" position. The antenna will automatically be retractedand stored when either the radio power switch is turned off or the ignition key is set to the "LOCK" position. B870B03L
Page 180 of 235

5- 8 VEHICLE MAINTENANCE REQUIREMENTS
F060H01A-AAT
o Air Cleaner Filter A Genuine Hyundai air cleaner filter is
recommended when the filter is re- placed. F060J01A-AAT
o Spark Plugs Make sure to install new spark plugs of the correct heat range. F070C02A-AAT
o Coolant The coolant should be changed at the intervals specified in the mainte- nance schedule. F070D01A-AAT
o Manual Transaxle Oil
Inspect the manual transaxle oil ac-cording to the maintenance schedule.
NOTE: If the oil level is low, check forpossible leaks before adding oil. Do not overfill. F070E03A-AAT
o Automatic Transaxle Fluid and
Filter
The fluid level should be in the "HOT" range of the dipstick, after the engine and transaxle are at normal operatingtemperature. Check the automatic transaxle fluid level with the engine running and the transaxle in neutral,with the parking brake properly ap- plied. Use DIAMOND ATF SP-III or SK ATF SP-III when adding or chang-ing fluid. F070F01A-AAT
o Brake Hoses and Lines
Visually check for proper installation,chafing, cracks, deterioration and any leakage. Replace any deteriorated or damaged parts immediately. F070G02A-AAT
o Brake Fluid
Check brake fluid level in the brake fluid reservoir. The level should be between "MIN" and "MAX" marks on the side of the reservoir. Use onlyhydraulic brake fluid conforming to DOT 3 or DOT 4.
F070H01A-AAT
o Rear Brake Drums/Linings,
Parking Brake
Check the rear brake drums and lin-
ings for scoring, burning, leaking fluid,broken parts, and excessive wear. Inspect the parking brake system in-cluding the parking brake lever and cables. For detailed service proce- dures, refer to the Shop Manual.
F070B01A-GAT
o Cooling System Check the cooling system part, such as radiator, coolant reservoir, hosesand connections for leakage and dam- age. Replace any damaged parts.
Page 188 of 235
DO-IT-YOURSELF MAINTENANCE 6- 7
G040A02A-AAT
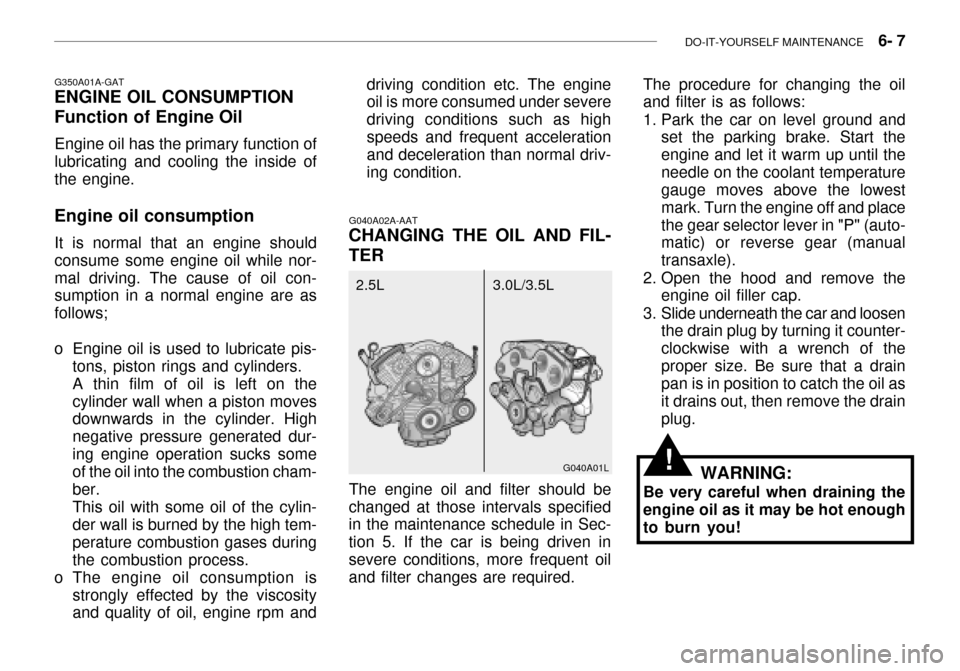
CHANGING THE OIL AND FIL- TER The procedure for changing the oil and filter is as follows:
1. Park the car on level ground and
set the parking brake. Start the engine and let it warm up until theneedle on the coolant temperature gauge moves above the lowest mark. Turn the engine off and placethe gear selector lever in "P" (auto- matic) or reverse gear (manual transaxle).
2. Open the hood and remove the engine oil filler cap.
3. Slide underneath the car and loosen the drain plug by turning it counter-clockwise with a wrench of theproper size. Be sure that a drain pan is in position to catch the oil as it drains out, then remove the drainplug.
WARNING:
Be very careful when draining theengine oil as it may be hot enoughto burn you!
The engine oil and filter should be
changed at those intervals specified in the maintenance schedule in Sec- tion 5. If the car is being driven insevere conditions, more frequent oil and filter changes are required. G040A01L
3.0L/3.5L
2.5L
G350A01A-GAT
ENGINE OIL CONSUMPTION Function of Engine Oil
Engine oil has the primary function of lubricating and cooling the inside ofthe engine.
Engine oil consumption It is normal that an engine shouldconsume some engine oil while nor-
mal driving. The cause of oil con- sumption in a normal engine are as follows;
o Engine oil is used to lubricate pis- tons, piston rings and cylinders.A thin film of oil is left on thecylinder wall when a piston moves downwards in the cylinder. High negative pressure generated dur-ing engine operation sucks some of the oil into the combustion cham- ber. This oil with some oil of the cylin- der wall is burned by the high tem- perature combustion gases duringthe combustion process.
o The engine oil consumption is
strongly effected by the viscosity and quality of oil, engine rpm and driving condition etc. The engine
oil is more consumed under severe driving conditions such as highspeeds and frequent acceleration and deceleration than normal driv- ing condition.
!
Page 195 of 235
6- 14 DO-IT-YOURSELF MAINTENANCE
G110B03A-AAT
Recommended Fluid
Your Hyundai automatic transaxle is specially designed to operate with DIAMOND ATF SP-III or SK ATF SP-III. Damage caused by a nonspecified fluid is not covered by your new ve- hicle limited warranty.
G110C02L-GAT
Transaxle Fluid Capacity
The fluid capacity of the automatic transaxle is 7.8 liters (2.5 V6)/8.5 liters (3.0/3.5 V6).
HXG065
G110D02L-AAT
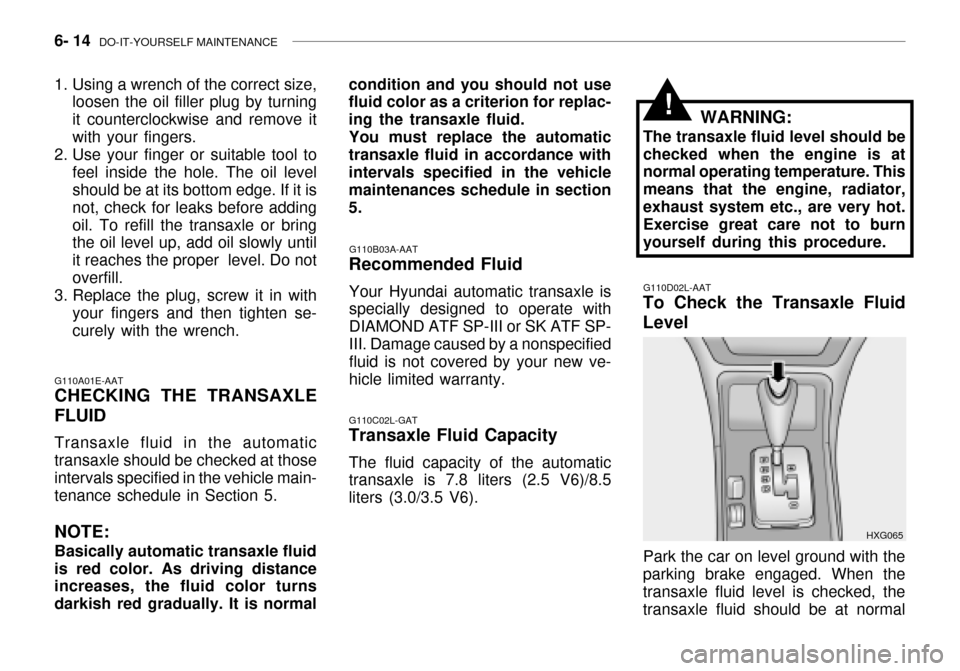
To Check the Transaxle Fluid Level
Park the car on level ground with the
parking brake engaged. When the transaxle fluid level is checked, the transaxle fluid should be at normal
G110A01E-AAT CHECKING THE TRANSAXLE FLUID Transaxle fluid in the automatic transaxle should be checked at those intervals specified in the vehicle main- tenance schedule in Section 5. NOTE: Basically automatic transaxle fluid is red color. As driving distance increases, the fluid color turns darkish red gradually. It is normal
1. Using a wrench of the correct size,
loosen the oil filler plug by turningit counterclockwise and remove itwith your fingers.
2. Use your finger or suitable tool to
feel inside the hole. The oil level should be at its bottom edge. If it is not, check for leaks before addingoil. To refill the transaxle or bring the oil level up, add oil slowly until it reaches the proper level. Do notoverfill.
3. Replace the plug, screw it in with
your fingers and then tighten se-curely with the wrench. condition and you should not use fluid color as a criterion for replac- ing the transaxle fluid.
You must replace the automatic
transaxle fluid in accordance withintervals specified in the vehicle maintenances schedule in section 5. WARNING:
The transaxle fluid level should bechecked when the engine is at normal operating temperature. This means that the engine, radiator,exhaust system etc., are very hot. Exercise great care not to burn yourself during this procedure.
!
Page 204 of 235

DO-IT-YOURSELF MAINTENANCE 6- 23
G210A01A-AAT
CHECKING THE BATTERY
WARNING:
Batteries can be dangerous! When working with batteries, care-
fully observe the following pre- cautions to avoid serious injuries.
The fluid in the battery contains a
strong solution of sulfuric acid, whichis poisonous and highly corrosive. Be careful not to spill it on yourself or thecar. If you do spill battery fluid on yourself, immediately do the follow- ing:
o If battery fluid is on your skin, flush the affected areas with water for at least 15 minutes and then seek medical assistance.
o If battery fluid is in your eyes, rinse out your eyes with water and getmedical assistance as soon as possible. While you are being driven to get medical assistance, continueto rinse your eyes by using a sponge or soft cloth saturated with water. o If you swallow battery fluid, drink a
large quantity of water or milk fol-lowed by milk of magnesia, eat araw egg or drink vegetable oil. Get medical assistance as soon as pos- sible.
While batteries are being charged(either by a battery charger or by the vehicle's generator), they produce explosive gases. Always observethese warnings to prevent injuries from occurring:
o Charge batteries only in a well ven- tilated area.
o Do not permit flames, sparks or smoking in the area.
o Keep children away from the area. G210B01A-AAT Checking the Battery Keep the battery clean. Any evidence of corrosion around the battery posts or terminals should be removed using a solution of household baking sodaand warm water. After the battery terminals are dry, cover them with a light coating of grease.
!
G220A01A-AAT
CHECKING ELECTRIC COOL- ING FANS
WARNING:
The cooling fan is controlled by
engine coolant temperature and may sometimes operate even whenthe engine is not running. Use extreme caution when working near the blades of the cooling fan,so that you are not injured by a rotating fan blade. As the coolant temperature decreases the fan willautomatically shut off. This is a normal condition.
G220B01A-AAT
Checking Engine Cooling Fan
The engine cooling fan should come
on automatically if the engine coolanttemperature is high.
G220C01A-AAT
Checking Condenser Cooling Fan
The condenser cooling fan should
come on automatically whenever the air conditioning is in operation.
!