2003 Hyundai Elantra gear oil
[x] Cancel search: gear oilPage 112 of 172

DRIVING YOUR HYUNDAI DRIVING YOUR HYUNDAIDRIVING YOUR HYUNDAI DRIVING YOUR HYUNDAI
DRIVING YOUR HYUNDAI
2- 11 accordance with the maintenance schedule in
Section 5. Before winter, have your coolant test-
ed to assure that its freezing point is sufficient for
the temperatures anticipated during the winter.
C160D01A-AAT
Check Battery and Cables Check Battery and CablesCheck Battery and Cables Check Battery and Cables
Check Battery and CablesWinter puts additional burdens on the battery
system. Visually inspect the battery and cables
as described in Section 6. The level of charge in
your battery can be checked by your Hyundai
dealer or a service station.
C160E01A-AATChange to "Winter Weight" Oil if Change to "Winter Weight" Oil ifChange to "Winter Weight" Oil if Change to "Winter Weight" Oil if
Change to "Winter Weight" Oil if
Necessary NecessaryNecessary Necessary
Necessary
In some climates it is recommended that a lower
viscosity "winter weight" oil be used during cold
weather. See Section 9 for recommendations. If
you aren't sure what weight oil you should use,
consult your Hyundai dealer.
C160F01A-AATCheck Spark Plugs and Ignition Check Spark Plugs and IgnitionCheck Spark Plugs and Ignition Check Spark Plugs and Ignition
Check Spark Plugs and Ignition
System SystemSystem System
System
Inspect your spark plugs as described in Section
6 and replace them if necessary. Also check all
ignition wiring and components to be sure they
are not cracked, worn or damaged in any way.
C160G01A-AAT
To Keep Locks from Freezing To Keep Locks from FreezingTo Keep Locks from Freezing To Keep Locks from Freezing
To Keep Locks from FreezingTo keep the locks from freezing, squirt an ap-
proved de-icer fluid or glycerine into the key
opening. If a lock is covered with ice, squirt it with
an approved de-icing fluid to remove the ice. If
the lock is frozen internally, you may be able to
thaw it out by using a heated key. Handle the
heated key with care to avoid burning the fingers.
C160H01A-AATUse Approved Anti-Freeze in Window Use Approved Anti-Freeze in WindowUse Approved Anti-Freeze in Window Use Approved Anti-Freeze in Window
Use Approved Anti-Freeze in Window
Washer System Washer SystemWasher System Washer System
Washer System
To keep the water in the window washer system
from freezing, add an approved anti-freeze solu-
tion in accordance with instructions on the con-
tainer. Window washer anti-freeze is available
from Hyundai dealers and most auto parts out-
lets. Do not use engine coolant or other types of
anti-freeze as these may damage the finish.
C160I01A-AAT
Don't Let Your Parking Brake Freeze Don't Let Your Parking Brake FreezeDon't Let Your Parking Brake Freeze Don't Let Your Parking Brake Freeze
Don't Let Your Parking Brake FreezeUnder some conditions your parking brake can
freeze in the engaged position. This is most likely
to happen when there is an accumulation of snow
or ice around or near the rear brakes or if the
brakes are wet. If there is a risk the parking brake
may freeze, apply it only temporarily while you
put the gear selector lever in "P" (automatic) or in
first or reverse gear (manual transaxle) and
block the rear wheels so the car cannot roll. Then
release the parking brake.
C160K01A-AAT
Carry Emergency Equipment Carry Emergency EquipmentCarry Emergency Equipment Carry Emergency Equipment
Carry Emergency EquipmentDepending on the severity of the weather where
you drive your car, you should carry appropriate
emergency equipment. Some of the items you
may want to carry include tire chains, tow straps
or chains, flashlight, emergency flares, sand, a
shovel, jumper cables, a window scraper, gloves,
ground cloth, coveralls, a blanket, etc.
C160J01A-AAT
Don't Let Ice and Snow Accumulate Don't Let Ice and Snow AccumulateDon't Let Ice and Snow Accumulate Don't Let Ice and Snow Accumulate
Don't Let Ice and Snow Accumulate
Underneath UnderneathUnderneath Underneath
Underneath
Under some conditions, snow and ice can build
up under the fenders and interfere with the steer-
ing. When driving in severe winter conditions
where this may happen, you should periodically
check underneath the car to be sure the move-
ment of the front wheels and the steering compo-
nents is not obstructed.
C170A01A-AAT
HIGHER SPEED MOTORING HIGHER SPEED MOTORINGHIGHER SPEED MOTORING HIGHER SPEED MOTORING
HIGHER SPEED MOTORING
Pre-Trip Inspections Pre-Trip InspectionsPre-Trip Inspections Pre-Trip Inspections
Pre-Trip Inspections
1. Tires:
Adjust the tire inflation pressures to specifica-
tion. Low tire inflation pressures will result in
overheating and possible failure of the tires.
Avoid using worn or damaged tires which may
result in reduced traction or tire failure.
Page 116 of 172
WHAT TO DO IN AN EMERGENCY WHAT TO DO IN AN EMERGENCYWHAT TO DO IN AN EMERGENCY WHAT TO DO IN AN EMERGENCY
WHAT TO DO IN AN EMERGENCY
3-1
3 . WHAT TO DO IN AN
EMERGENCY
D010A01A-AAT
IF THE ENGINE WILL NOT START IF THE ENGINE WILL NOT STARTIF THE ENGINE WILL NOT START IF THE ENGINE WILL NOT START
IF THE ENGINE WILL NOT START
WARNING: WARNING:WARNING: WARNING:
WARNING:
If the engine will not start, do not push or pull If the engine will not start, do not push or pullIf the engine will not start, do not push or pull If the engine will not start, do not push or pull
If the engine will not start, do not push or pull
the car to start it. This could result in a the car to start it. This could result in athe car to start it. This could result in a the car to start it. This could result in a
the car to start it. This could result in a
collision or cause other damage. In addition, collision or cause other damage. In addition,collision or cause other damage. In addition, collision or cause other damage. In addition,
collision or cause other damage. In addition,
push or pull starting may cause the catalytic push or pull starting may cause the catalyticpush or pull starting may cause the catalytic push or pull starting may cause the catalytic
push or pull starting may cause the catalytic
converter to be overloaded and create a fire converter to be overloaded and create a fireconverter to be overloaded and create a fire converter to be overloaded and create a fire
converter to be overloaded and create a fire
hazard. hazard.hazard. hazard.
hazard.
D010B02A-AATIf Engine Doesn't Turn Over or Turns If Engine Doesn't Turn Over or TurnsIf Engine Doesn't Turn Over or Turns If Engine Doesn't Turn Over or Turns
If Engine Doesn't Turn Over or Turns
Over Slowly Over SlowlyOver Slowly Over Slowly
Over Slowly
1. If your car has an automatic transaxle, be
sure the gear selector lever is in "N" or "P" and
the emergency brake is set.
2. Check the battery connections to be sure
they are clean and tight.
3. Turn on the interior light. If the light dims or
goes out when you operate the starter, the
battery is discharged.
4. Check the starter connections to be sure they
are securely tightened.
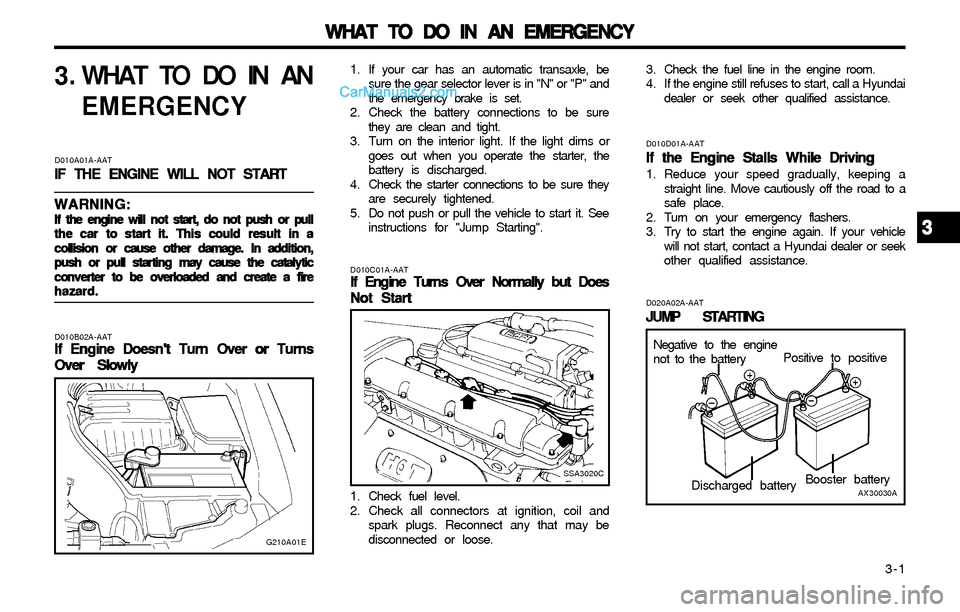
5. Do not push or pull the vehicle to start it. See
instructions for "Jump Starting".
SSA3020C D010C01A-AAT
If Engine Turns Over Normally but Does If Engine Turns Over Normally but DoesIf Engine Turns Over Normally but Does If Engine Turns Over Normally but Does
If Engine Turns Over Normally but Does
Not Start Not StartNot Start Not Start
Not Start
1. Check fuel level.
2. Check all connectors at ignition, coil and
spark plugs. Reconnect any that may be
disconnected or loose.
D010D01A-AAT
If the Engine Stalls While Driving If the Engine Stalls While DrivingIf the Engine Stalls While Driving If the Engine Stalls While Driving
If the Engine Stalls While Driving1. Reduce your speed gradually, keeping a
straight line. Move cautiously off the road to a
safe place.
2. Turn on your emergency flashers.
3. Try to start the engine again. If your vehicle
will not start, contact a Hyundai dealer or seek
other qualified assistance.
D020A02A-AAT
JUMP STARTING JUMP STARTINGJUMP STARTING JUMP STARTING
JUMP STARTING
G210A01E
Negative to the engine
not to the batteryPositive to positive
Booster battery
AX30030ADischarged battery
3 33 3
3
3. Check the fuel line in the engine room.
4. If the engine still refuses to start, call a Hyundai
dealer or seek other qualified assistance.
Page 132 of 172

VEHICLE MAINTENANCE REQUIREMENTS VEHICLE MAINTENANCE REQUIREMENTSVEHICLE MAINTENANCE REQUIREMENTS VEHICLE MAINTENANCE REQUIREMENTS
VEHICLE MAINTENANCE REQUIREMENTS
5- 4 Note :
*1 - FOR CALIFORNIA, THIS MAINTENANCE IS RECOMMENDED, BUT NOT REQUIRED
*2 - AFTER 105,000 MILES OR 84 MONTHS, INSPECT EVERY 15,000 MILES OR 12 MONTHS
*3 - FOR EVERY 12 MONTHS OR 12,000 MILES (20,000 KM), WHICHEVER OCCURS FIRST:R
See Note *3
F030C03E-AATR : Replace I : Inspect and, after inspection, clean, adjust, repair or replace if necessary
GENERAL ITEMS
DRIVE BELT (WATER PUMP, ALTERNATOR AND A/CON)
COOLANT
TIMING BELT
MANUAL TRANSAXLE OIL
AUTOMATIC TRANSAXLE FLUID
BRAKE FLUID
BRAKE HOSES AND LINES
REAR BRAKE DRUMS/LININGS, PARKING BRAKE
BRAKE PADS, CALIPERS AND ROTORS
EXHAUST PIPE AND MUFFLER
CYLINDER HEAD COVER GASKET (2.0L SULEV Only)
OIL PAN LIQUID GASKET (2.0L SULEV Only)
IN-MANI GASKET (2.0L SULEV Only)
SUSPENSION MOUNTING BOLTS
STEERING GEAR BOX, LINKAGE & BOOTS/LOWER ARM
BALL JOINT
POWER STEERING PUMP, BELT AND HOSES
DRIVESHAFTS AND BOOTS
AIR CONDITIONING REFRIGERANT
AIR FILTER (IN FRONT OF BLOWER UNIT) 1
2
3
4
5
6
7
8
9
10
11
12
13
14
15
16
17
18
19 No.DESCRIPTIONMILES X 1000
KILOMETERS X 1000
MONTHS7.5
12
615
24
12
I
I
I
I
I
I
I
I22.5
36
1830
48
24
I
R
I
I
I
I
I
I
I
I
I
I
I
I
I37.5
60
3045
72
36
I
I
I
I
I
I
I
I52.5
84
4260
96
48
I
R
R*
1
I
I
I
I
I
I
I
I
I
I
I
I67.5
108
5475
120
60
I
I
I
I
I
I
I
I82.5
132
6690
144
72
I
R
I
I
I
I
I
I
I
I
I
I
I
I
I97.5
156
78105
168
84
R
I
I
I
R
I
I
I
I112.5
180
90120
192
96
I
R
R*
1
I
I
I
I
I
I
I
I
I
I
I
I127.5
204
102135
216
108
I
I
I
I
I
I
I
I142.5
228
114150
240
120
I
R
I
I
I
I
I
I
I
I
I
I
I
I
I
See Note *2
See Note *2
Page 133 of 172

VEHICLE MAINTENANCE REQUIREMENTS VEHICLE MAINTENANCE REQUIREMENTSVEHICLE MAINTENANCE REQUIREMENTS VEHICLE MAINTENANCE REQUIREMENTS
VEHICLE MAINTENANCE REQUIREMENTS
5-5
MAINTENANCE UNDER SEVERE USAGE CONDITIONS MAINTENANCE UNDER SEVERE USAGE CONDITIONSMAINTENANCE UNDER SEVERE USAGE CONDITIONS MAINTENANCE UNDER SEVERE USAGE CONDITIONS
MAINTENANCE UNDER SEVERE USAGE CONDITIONSThe following items must be serviced more frequently on cars normally used under severe driving conditions. Refer to the chart below for the
appropriate maintenance intervals.
R : Replace I : Inspect and, after inspection, clean, adjust, repair or replace if necessary
F040A02E-AAT
MAINTENANCE ITEM
F - More than 50% driving in heavy city traffic during hot
weather above 90°F (32°C)
G - Driving in mountainous areas
H - Towing a trailer
I - Driving as a patrol car, taxi, or other commercial use
or vehicle towing
J - Driving over 100 MPH SEVERE DRIVING CONDITIONS SEVERE DRIVING CONDITIONSSEVERE DRIVING CONDITIONS SEVERE DRIVING CONDITIONS
SEVERE DRIVING CONDITIONS
A - Repeated short distance driving
B - Extensive idling
C - Driving in dusty, rough roads
D - Driving in areas using salt or other corrosive materials or in very cold weather
E - Driving in sandy areasMAINTENANCE INTERVALS
ENGINE OIL AND FILTER
AIR CLEANER FILTER
SPARK PLUGS
BRAKE PADS, CALIPERS AND ROTORS
REAR BRAKE DRUMS/LININGS/PADS,
PARKING BRAKE
STEERING GEAR RACK, LINKAGE & BOOTS/
LOWER ARM BALL JOINT
DRIVESHAFTS AND BOOTS
MANUAL TRANSAXLE OIL
AUTOMATIC TRANSAXLE FLUID
AIR FILTER (IN FRONT OF BLOWER UNIT)R
R
R
I
I
I
I
R
R
REVERY 3,000 MILES (4,800 KM) OR 3 MONTHS
MORE FREQUENTLY
MORE FREQUENTLY
MORE FREQUENTLY
MORE FREQUENTLY
MORE FREQUENTLY
EVERY 7,500 MILES (12,000 KM) OR 6 MONTHS
EVERY 60,000 MILES (96,000 KM)
EVERY 30,000 MILES (48,000 KM)
MORE FREQUENTLY MAINTENANCE
OPERATION
A, B, C, F, H
C, E
B, H
C, D, G, H
C, D, G, H
C, D, E, F, G
C, E, F
A, C, D, E, F, G, H, I, J
A, C, E, F, G, H, I
C, EDRIVING
CONDITION
Page 135 of 172

VEHICLE MAINTENANCE REQUIREMENTS VEHICLE MAINTENANCE REQUIREMENTSVEHICLE MAINTENANCE REQUIREMENTS VEHICLE MAINTENANCE REQUIREMENTS
VEHICLE MAINTENANCE REQUIREMENTS
5-7
F070E05A-AAT
o Automatic Transaxle Fluid o Automatic Transaxle Fluido Automatic Transaxle Fluid o Automatic Transaxle Fluid
o Automatic Transaxle FluidThe fluid level should be in the "HOT" range
of the dipstick, after the engine and transaxle
are at normal operating temperature. Check
the automatic transaxle fluid level with the
engine running and the transaxle in neutral,
with the parking brake properly applied. Use
HYUNDAI GENUINE ATF, DIAMOND ATF
SP-III or SK ATF SP-III when adding or
changing fluid.
F070F01A-AAT
o oo o
o
Brake Hoses and Lines Brake Hoses and LinesBrake Hoses and Lines Brake Hoses and Lines
Brake Hoses and LinesVisually check for proper installation, chafing,
cracks, deterioration and any leakage. Re-
place any deteriorated or damaged parts
immediately.
F070G02A-AAT
o Brake Fluid o Brake Fluido Brake Fluid o Brake Fluid
o Brake FluidCheck brake fluid level in the brake fluid
reservoir. The level should be between "MIN"
and "MAX" marks on the side of the reservoir.
Use only hydraulic brake fluid conforming to
DOT 3 or DOT 4.
F070D01A-AAT
o Manual transaxle oil o Manual transaxle oilo Manual transaxle oil o Manual transaxle oil
o Manual transaxle oilInspect the manual transaxle oil according to
the maintenance schedule.
NOTE: NOTE:NOTE: NOTE:
NOTE:If the oil level is low, check for possible If the oil level is low, check for possibleIf the oil level is low, check for possible If the oil level is low, check for possible
If the oil level is low, check for possible
leaks before adding oil. Do not overfill. leaks before adding oil. Do not overfill.leaks before adding oil. Do not overfill. leaks before adding oil. Do not overfill.
leaks before adding oil. Do not overfill.
F070H01A-AATo oo o
o
Rear Brake Drums/Linings, Rear Brake Drums/Linings,Rear Brake Drums/Linings, Rear Brake Drums/Linings,
Rear Brake Drums/Linings,
Parking Brake Parking BrakeParking Brake Parking Brake
Parking Brake
Check the rear brake drums and linings for
scoring, burning, leaking fluid, broken parts,
and excessive wear. Inspect the parking
brake system including the parking brake
lever and cables. For detailed service proce-
dures, refer to the Shop Manual.
F070J01A-AAT
o Brake Pads, Calipers and Rotors o Brake Pads, Calipers and Rotorso Brake Pads, Calipers and Rotors o Brake Pads, Calipers and Rotors
o Brake Pads, Calipers and RotorsCheck the pads for excessive wear, discs for
run out and wear, and calipers for fluid leak-
age.
F070K01A-AAT
o Exhaust Pipe and Muffler o Exhaust Pipe and Mufflero Exhaust Pipe and Muffler o Exhaust Pipe and Muffler
o Exhaust Pipe and MufflerVisually inspect the exhaust pipes, muffler
and hangers for cracks, deterioration, or dam-
age. Start the engine and listen carefully for
any exhaust gas leakage. Tighten connec-
tions or replace parts as necessary.
F070L01A-AAT
o Suspension Mounting Bolts o Suspension Mounting Boltso Suspension Mounting Bolts o Suspension Mounting Bolts
o Suspension Mounting BoltsCheck the suspension connections for loose-
ness or damage. Retighten to the specified
torque.
F070N01A-AATo oo o
o
Power Steering Pump, Belt and Hoses Power Steering Pump, Belt and HosesPower Steering Pump, Belt and Hoses Power Steering Pump, Belt and Hoses
Power Steering Pump, Belt and HosesCheck the power steering pump and hoses
for leakage and damage. Replace any dam-
aged or leaking parts immediately. Inspect the
power steering belt for evidence of cuts,
cracks, excessive wear, oiliness and proper
tension. Replace or adjust it if necessary.
F070P01A-AAT
o Driveshafts and Boots o Driveshafts and Bootso Driveshafts and Boots o Driveshafts and Boots
o Driveshafts and BootsCheck the drive shafts, boots and clamps for
cracks, deterioration, or damage. Replace
any damaged parts and, if necessary, repack
the grease.
F070Q01A-AAT
o oo o
o
Air Conditioning Refrigerant Air Conditioning RefrigerantAir Conditioning Refrigerant Air Conditioning Refrigerant
Air Conditioning RefrigerantCheck the air conditioning lines and connec-
tions for leakage and damage. Check air
conditioning performance according to the
relevant shop manual if necessary.
F070M01A-AATo oo o
o
Steering Gear Box, Linkage & Boots/ Steering Gear Box, Linkage & Boots/Steering Gear Box, Linkage & Boots/ Steering Gear Box, Linkage & Boots/
Steering Gear Box, Linkage & Boots/
Lower arm Ball Joint Lower arm Ball JointLower arm Ball Joint Lower arm Ball Joint
Lower arm Ball Joint
With the vehicle stopped and engine off, check
for excessive free-play in the steering wheel.
Check the linkage for bends or damage.
Check the dust boots and ball joints for dete-
rioration, cracks, or damage. Replace any
damaged parts.
Page 140 of 172

DO-IT-YOURSELF MAINTENANCE DO-IT-YOURSELF MAINTENANCEDO-IT-YOURSELF MAINTENANCE DO-IT-YOURSELF MAINTENANCE
DO-IT-YOURSELF MAINTENANCE
6-4
G030B02A
G030C01A-AAT
To Check the Oil Level To Check the Oil LevelTo Check the Oil Level To Check the Oil Level
To Check the Oil Level
G030D01A-AAT
Adding Oil Adding OilAdding Oil Adding Oil
Adding Oil
Wait a minute, then remove the dipstick, wipe it
off, fully reinsert the dipstick and withdraw it
again. Then note the highest level the oil has
reached on the dipstick. It should be between
the upper ("FULL") and lower ("LOW") range.
If the oil level is close to or below the "LOW"
mark, add oil until it reaches the "FULL" mark.
To add oil:
1. Remove the oil filler cap by turning it counter-
clockwise.
2. Add oil, then check the level again. Do not
overfill.
3. Replace the cap by turning it clockwise.
The distance between the "FULL" and "LOW"
marks is equal to about 1 quart of oil.
G030C01E-1
SH(API) or GF-I (ILSAC) and ABOVE multi-
grade and fuel efficient oil is recommended.
G040A01E-AAT
CHANGING THE OIL AND FILTER CHANGING THE OIL AND FILTERCHANGING THE OIL AND FILTER CHANGING THE OIL AND FILTER
CHANGING THE OIL AND FILTER
The engine oil and filter should be changed at
those intervals specified in the maintenance
schedule in Section 5. If the car is being driven
in severe conditions, more frequent oil and filter
changes are required.
The procedure for changing the oil and filter is
as follows:
1. Park the car on level ground and set the
parking brake. Start the engine and let it
warm up until the needle on the coolant
temperature gauge moves above the lowest
mark. Turn the engine off and place the gear
selector lever in "P" (automatic) or reverse
gear (manual transaxle). Set the parking
brake.
2. Open the hood and remove the engine oil
filler cap.
SSA6040A
Oil filler cap
Drain plug
Oil filter 2.0L SULEV
Before checking the oil, warm up the engine to
the normal operating temperature and be sure
your car is parked on level ground. Turn the
engine off.
G030D01S