Page 148 of 186
6- 12 DO-IT-YOURSELF MAINTENANCE
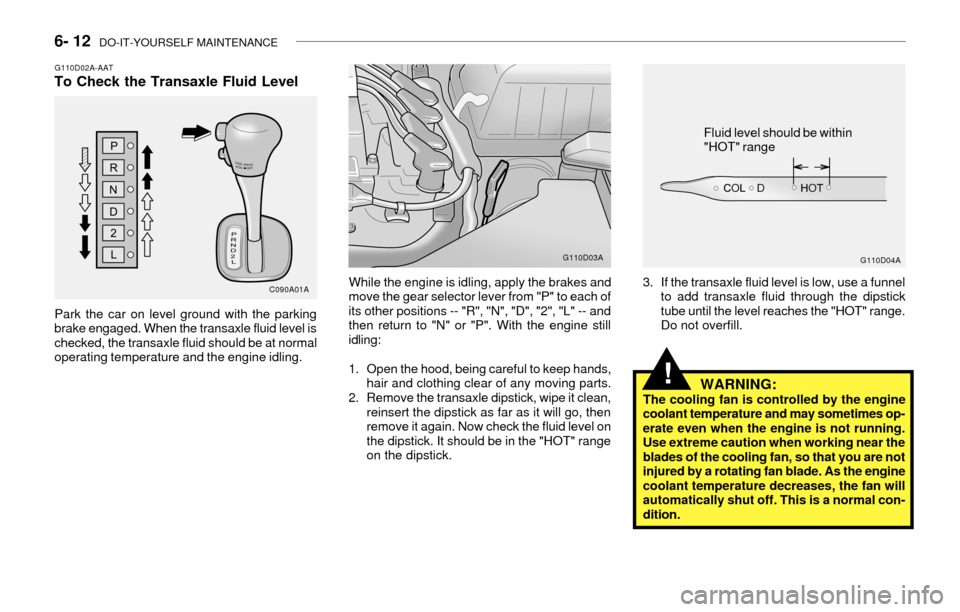
While the engine is idling, apply the brakes and
move the gear selector lever from "P" to each of
its other positions -- "R", "N", "D", "2", "L" -- and
then return to "N" or "P". With the engine still
idling:
1. Open the hood, being careful to keep hands,
hair and clothing clear of any moving parts.
2. Remove the transaxle dipstick, wipe it clean,
reinsert the dipstick as far as it will go, then
remove it again. Now check the fluid level on
the dipstick. It should be in the "HOT" range
on the dipstick.3. If the transaxle fluid level is low, use a funnel
to add transaxle fluid through the dipstick
tube until the level reaches the "HOT" range.
Do not overfill.
G110D03A
G110D04A
Fluid level should be within
"HOT" range
WARNING:The cooling fan is controlled by the engine
coolant temperature and may sometimes op-
erate even when the engine is not running.
Use extreme caution when working near the
blades of the cooling fan, so that you are not
injured by a rotating fan blade. As the engine
coolant temperature decreases, the fan will
automatically shut off. This is a normal con-
dition.
!
G110D02A-AATTo Check the Transaxle Fluid Level
Park the car on level ground with the parking
brake engaged. When the transaxle fluid level is
checked, the transaxle fluid should be at normal
operating temperature and the engine idling.
C090A01A
Page 157 of 186

DO-IT-YOURSELF MAINTENANCE 6- 21
G240A01A-AATPOWER STEERING HOSES
It is suggested that you check the power steer-
ing hose connections for fluid leakage at those
intervals specified in the vehicle maintenance
schedule in Section 5.
The power steering hoses should be replaced if
there is severe surface cracking, pulling, scuff-
ing or worn spots. Deterioration of the hose
could cause premature failure.
Recommended Fluid
Use PSF-3 type fluid
NOTE:Do not start the engine when the power
steering oil reservoir is empty.
G250A01A-AAT
FOR MORE INFORMATION ABOUT
YOUR HYUNDAI
If you desire additional information about main-
taining and servicing your Hyundai, you may
purchase a factory Shop Manual at your Hyundai
dealer's parts department. This is the same
manual used by dealership technicians and while
it is highly technical it can be useful in obtaining
a better understanding of your car and how it
works.
G290A04A-AATHEADLIGHT AIMING ADJUSTMENT
Before performing aiming adjustment, make sure
of the following.
1. Keep all tires inflated to the correct pressure.
2. Place the vehicle on level ground and press
the front bumper & rear bumper down sever-
al times. Place vehicle at a distance of 118
in. (3m) from the test wall.
3. See that the vehicle is unloaded (except for
full levels of coolant, engine oil and fuel, and
spare tire, jack, and tools). Have the driver or
equivalent weight placed in driver's seat.
4. Clean the headlight lenses and turn on the
headlights (Low beam).5. Open the hood.
6. Draw the vertical line (through the center of
each headlight) and the horizontal line
(through the center of each headlight) on the
aiming screen.
And then, draw the parallel line at 0.8 in.(21
mm) place under the horizontal line.
7. Adjust each cut-off line of the low beam to
the parallel line with a phillips screwdriver
- VERTICAL AIMING
G290A01A-1
Vertical
Aiming
WARNING:Horizontal aiming should be adjusted by an
authorized Hyundai dealer.
!
Page 159 of 186
DO-IT-YOURSELF MAINTENANCE 6- 23
HLC5033 G270A03A-AAT
Headlight Bulb
1. Allow the bulb to cool. Wear eye protection.
2. Open the engine hood.
3. Always grasp the bulb by its plastic base,
avoid touching the glass.
4. Using a socket wrench of the correct size,
remove the headlight assembly mounting
bolts.
6. Remove the dust cover.
HLC5011
HLC5009
5. Disconnect the power cord from the bulb
base in the back of the headlight.7. Push the bulb spring to remove the headlight
bulb.
HLC5010HLC5034-1
