Page 235 of 392

Youshoulddothefollowingchecks
and adjustments every day bef ore
you drive your vehicle.Make sure all windows, mirrors,
and outside lights are clean and
unobstructed. Remove f rost, snow,
or ice. Check the adjustment of the seat
(see page ).
Check the adjustment of the
inside and outside mirrors (see
page ).
Check the adjustment of the
steering wheel (see page ).
Fasten your seat belt. Check that
your passengers have f astened
their seat belts (see page ).Turn the ignition switch ON (II).
Check the indicator lights in the
instrument panel.
Start the engine (see page ).
Check the gauges and indicator
lights in the instrument panel (see
page ).
Check that any items you may be
carrying with you inside are stored
properly or f astened down
securely. Visually check the tires. If a tire
looks low, use a gauge to check its
pressure. Check that the hood and tailgate
arefullyclosed. Makesurethedoorsandtailgate
are securely closed and locked.
3. 2.
1.
4. 5.
6.
7.
8.
9. 11.
12. 10.
15
78
61
102
232
89
Preparing to Drive
Driving231
Page 236 of 392

Apply the parking brake.
In cold weather, turn of f all
electrical accessories to reduce
the drain on the battery.
Make sure the shif t lever is in
Park. Press on the brake pedal.
Without touching the accelerator
pedal, turn the ignition key to the
START (III) position. If the engine
does not start right away, do not
hold the key in START (III) f or
more than 15 seconds at a time.
Pause f or at least 10 seconds
bef ore trying again.
If the engine does not start within
15 seconds, or starts but stalls
right away, repeat step 4 with the
accelerator pedal pressed half-way
down. If the engine starts, release
pressure on the accelerator pedal
so the engine does not race.If the engine still does not start,
press the accelerator pedal all the
way down and hold it there while
starting in order to clear f looding.
As bef ore, keep the ignition key in
the START (III) position f or no
more than 15 seconds. Return to
step 5 if the engine does not start.
If it starts, lif t your f oot of f the
accelerator pedal so the engine
does not race.
An engine is harder to start in cold
weather. The thinner air f ound at
high altitude above 8,000 f eet (2,400
meters) adds to the problem.
Use the f ollowing procedure: Turn of f all electrical accessories
to reduce the drain on the battery. Push the accelerator pedal half-
way to the f loor and hold it there
while starting the engine. Do not
hold the ignition key in START
(III) f or more than 15 seconds.
When the engine starts, release
the accelerator pedal gradually as
the engine speeds up and smooths
out.
If the engine fails to start in step 2,
push the accelerator pedal to the
f loor and hold it there while you
try to start the engine for no more
than 15 seconds. If the engine
does not start, return to step 2.
1. 2.
3.
5. 6.
1.
2.
3.
4.
Starting in Cold Weather at High
A ltitude (A bove 8,000 f eet/
2,400 meters)
Starting the Engine
Driving232
Page 238 of 392

�µ
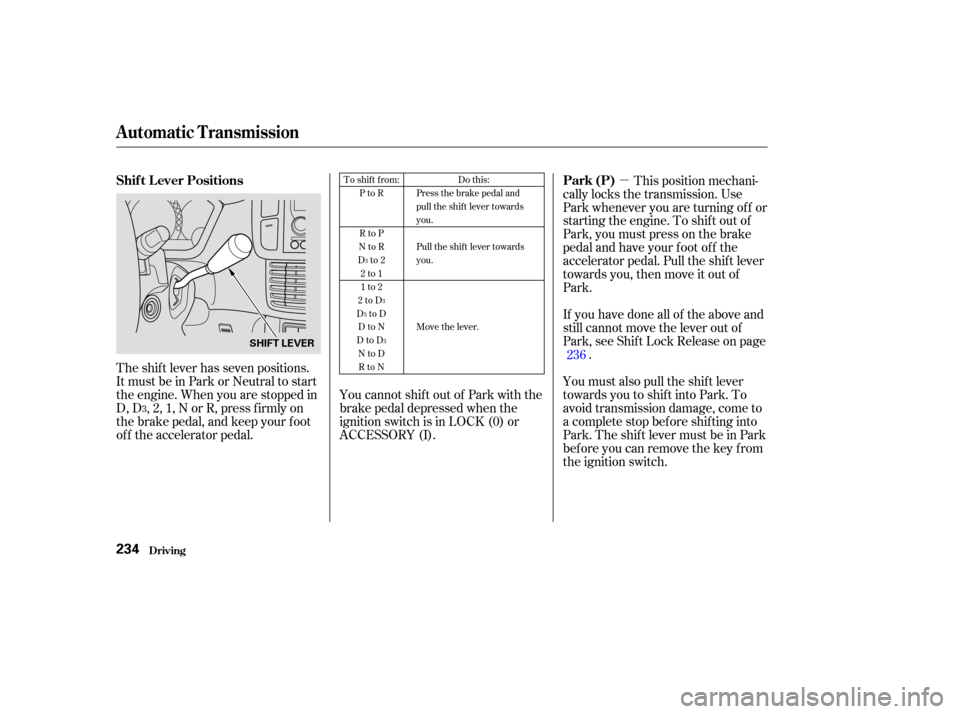
The shift lever has seven positions.
It must be in Park or Neutral to start
the engine. When you are stopped in
D, D , 2, 1, N or R, press f irmly on
the brake pedal, and keep your f oot
of f the accelerator pedal. This position mechani-
cally locks the transmission. Use
Park whenever you are turning of f or
starting the engine. To shif t out of
Park, you must press on the brake
pedal and have your f oot of f the
accelerator pedal. Pull the shif t lever
towards you, then move it out of
Park.
If you have done all of the above and
still cannot move the lever out of
Park, see Shif t Lock Release on page .
You must also pull the shif t lever
towards you to shift into Park. To
avoid transmission damage, come to
a complete stop bef ore shif ting into
Park. The shif t lever must be in Park
bef ore you can remove the key f rom
the ignition switch.
YoucannotshiftoutofParkwiththe
brake pedal depressed when the
ignition switch is in LOCK (0) or
ACCESSORY (I). 236
3 To shift from:
PtoR
RtoP
NtoR
Dto2 2to1
1to2
2toD
DtoD DtoN
DtoD NtoDRtoN Do this:
Press the brake pedal and
pull the shift lever towards
you.
Pull the shift lever towards
you.
Move the lever.
3
3
3
3
Shif t L ever Positions Park (P)
Automatic Transmission
Driving234
SHIFT LEVER
Page 239 of 392

�µ
�µ �µ �µ
Use Neutral if you
need to restart a stalled engine, or if
it is necessary to stop brief ly with
the engine idling. Shif t to Park posi-
tion if you need to leave the vehicle
f or any reason. Press on the brake pe-
dal when you are moving the shif t
lever from Neutral to another gear.
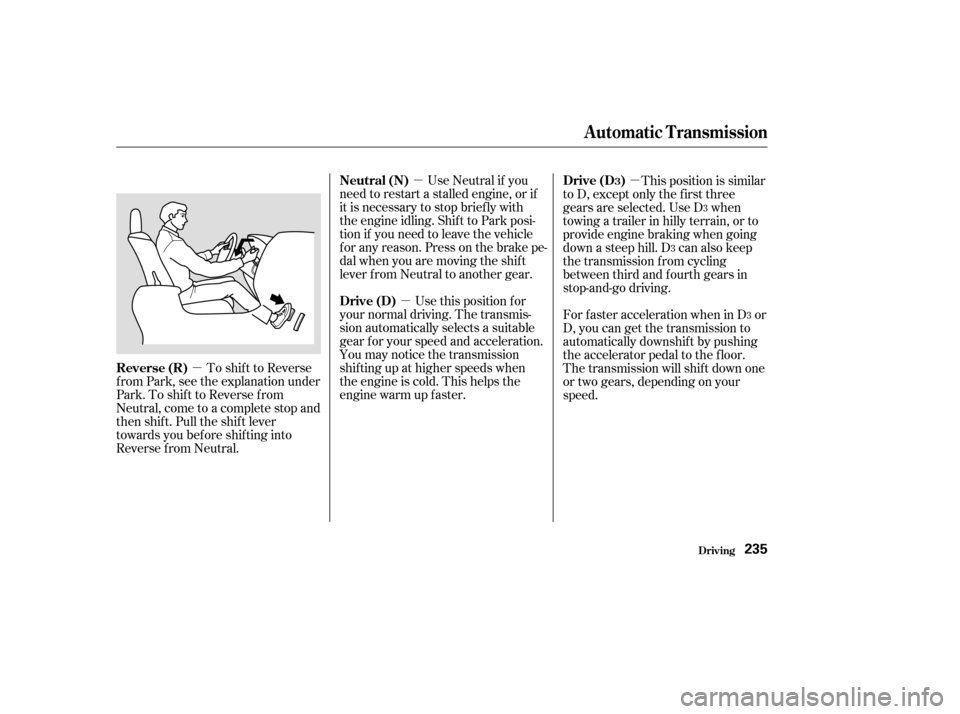
To shif t to Reverse
f rom Park, see the explanation under
Park. To shif t to Reverse f rom
Neutral, come to a complete stop and
then shift. Pull the shift lever
towards you before shifting into
Reverse f rom Neutral. Use this position f or
your normal driving. The transmis-
sion automatically selects a suitable
gear f or your speed and acceleration.
You may notice the transmission
shif ting up at higher speeds when
the engine is cold. This helps the
engine warm up f aster. This position is similar
to D, except only the first three
gears are selected. Use D when
towing a trailer in hilly terrain, or to
provide engine braking when going
down a steep hill. D can also keep
the transmission f rom cycling
between third and f ourth gears in
stop-and-go driving.
ForfasteraccelerationwheninD or
D, you can get the transmission to
automatically downshif t by pushing
the accelerator pedal to the floor.
The transmission will shif t down one
or two gears, depending on your
speed.
3
3
3
Automatic Transmission
Driving
Neutral (N)
Reverse (R) Drive (D)Drive (D )3
235
Page 240 of 392

�µ�µ
If you exceed the maximum speed
f or the gear you are in, the engine
speed will enter into the tachometer’s
red zone. If this occurs, you may f eel
the engine cut in and out. This is
caused by a limiter in the engine’s
computer controls. The engine will
run normally when you reduce the
RPM below the red zone.
When driving down hill with a trailer,
use the Second position. To shif t f rom Second
to First, pull the shift lever
towards you, then shift to the
lower gear. With the lever in this
position, the transmission locks in
First gear. By upshif ting and
downshif ting through 1, 2, D and
D, you can operate this
transmission much like a manual
transmission without a clutch
pedal. This allows you to move the shif t
lever out of Park if the normal
method of pushing on the brake
pedal and pulling the shif t lever does
not work.
Set the Parking brake.
Make sure the key is in the
ignition switch LOCK (0) position.
To shif t to Second,
pull the shif t lever towards you, then
shif t to the lower gear. This position
locks the transmission in second
gear. It does not downshif t to f irst
gear when you come to a stop.
Second gives you more power when
climbing, and increased engine
braking when going down steep hills.
Usesecondgearwhenstartingout
on a slippery surf ace or in deep snow.
It will help reduce wheelspin. 1.
2.
3
Engine Speed Limiter
Shift Lock Release
First (1) Second (2)
Automatic Transmission
Driving236
Page 241 of 392
If you need to use the Shif t Lock
Release, it means your vehicle is
developing a problem. Have the
vehicle checked by your Honda
dealer.
Put a cloth on the edge of the Shif t
Lock Release slot cover.
Use a small flat-tipped screw
driver or small metal plate (neither
are included in the tool kit) to
remove the cover. Caref ully pry on
the edge of the cover. Insert a screwdriver in the Shif t
Lock Release slot.
Push down on the screwdriver
while you pull the shif t lever
towards you and move it out of
Park to Neutral.Remove the screwdriver f rom the
shif t lock release slot, then install
the cover.
Depress the brake pedal and
restart the engine.
3. 4.
5.6.
Driving
Automatic Transmission
237
Page 242 of 392
The Variable Torque Management
4WD System (VTM-4) automatically
transf ers varying amounts of engine
torque to the rear wheels under low
traction conditions.If more traction is needed when your
Pilot is stuck or is likely to become
stuck, you can use the VTM-4 Lock
button to increase torque to the rear
wheels. As soon as this feature is no
longer needed, press the VTM-4
Lock button again to disengage the
VTM-4 Lock. VTM-4 Lock
Variable Torque Management 4WD System
Driving238
Do not use the VTM-4 Lock button on
dry, paved roads. Driving on dry,
paved roads with VTM-4 Lock ON may
damage the rear dif f erential when
making a turn. Strange noises and
vibration can also result.
Page 243 of 392

To engage the VTM-4 Lock:To disengage the VTM-4 Lock, do
one of the f ollowing:
The VTM-4 Lock will temporarily
disengage when the vehicle speed
exceeds 18 mph (30 km/h). It will
automatically engage again as the
speed slows below 18 mph (30
km/h). The light in the VTM-4 Lock
button will remain on the whole time.
The vehicle must be stopped with
the engine running.
Move the shift lever to first (1),
second (2) or reverse (R) gear.
Press the VTM-4 Lock button.
The light in the button will come
on.
To get unstuck, apply light pressure
to the accelerator pedal. Do not spin
the f ront tires f or more than a f ew
seconds. Because of the amount of
torque applied to the rear tires, they
should not spin. This is normal. If
you are not able to get the vehicle to
move, apply the brakes to stop the
wheels, then reverse direction. Press the VTM-4 Lock button.
Move the shift lever to D, or D .
Turn the ignition to OFF (0).
When you restart your Pilot, the
VTM-4 Lock f eature will be of f .
1.
2.
3.
3
Variable Torque Management 4WD System
Driving239
Do not continuously spin the f ront tires
of your PILOT. Continuously spinning
the f ront tires can cause transmission
or rear dif f erential damage.