Page 220 of 415
CONT INUED
Your Honda is equipped with a Rear
Entertainment System that includes
a DVD player f or the enjoyment of
the rear passengers. With this
system, the rear passengers can
enjoy a dif f erent entertainment
source (radio, cassette player, CD
player or DVD player) than the f ront
seat occupants.
The ignition switch must be in
ACCESSORY (I) or ON (II) to
operate the Rear Entertainment
System.
Turn on the rear system by pressing
the REAR PWR button. The rear
entertainment system can then be
operated f rom the f ront control panel,
the rear control panel on the ceiling,
or with the remote control. The right
display then shows the inf ormation
f or the rear system.
Optional on EX-L model
Comf ort and Convenience Feat ures
Rear Entertainment System
217
REAR PWR
BUTTON
Page 221 of 415
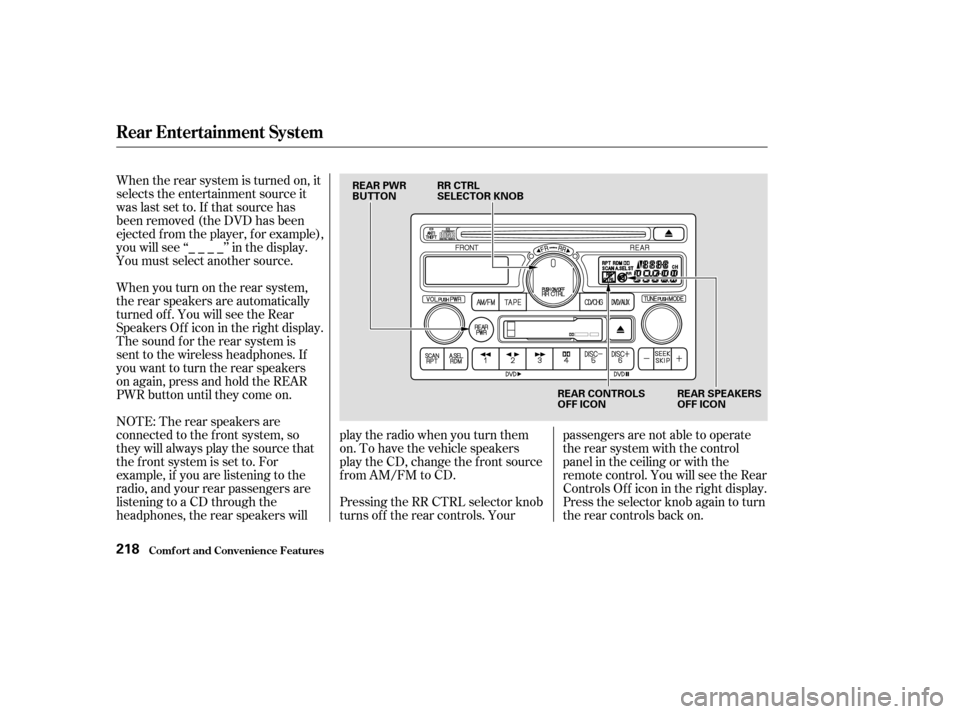
When the rear system is turned on, it
selects the entertainment source it
waslastsetto.Ifthatsourcehas
been removed (the DVD has been
ejected f rom the player, f or example),
youwillsee‘‘____’’inthedisplay.
You must select another source.
When you turn on the rear system,
the rear speakers are automatically
turned off. You will see the Rear
SpeakersOff iconintherightdisplay.
The sound f or the rear system is
sent to the wireless headphones. If
youwanttoturntherearspeakers
on again, press and hold the REAR
PWR button until they come on.
NOTE: The rear speakers are
connected to the f ront system, so
they will always play the source that
the f ront system is set to. For
example, if you are listening to the
radio, and your rear passengers are
listening to a CD through the
headphones, the rear speakers willplay the radio when you turn them
on. To have the vehicle speakers
play the CD, change the f ront source
f rom AM/FM to CD.
Pressing the RR CTRL selector knob
turns off the rear controls. Yourpassengers are not able to operate
the rear system with the control
panel in the ceiling or with the
remote control. You will see the Rear
ControlsOff iconintherightdisplay.
Press the selector knob again to turn
the rear controls back on.
Comf ort and Convenience Feat ures
Rear Entertainment System
218
REAR PWR
BUTTON
RR CTRL
SELECTOR KNOB
REAR CONTROLS
OFF ICONREAR SPEAKERS
OFF ICON
Page 225 of 415
�Û�Ý
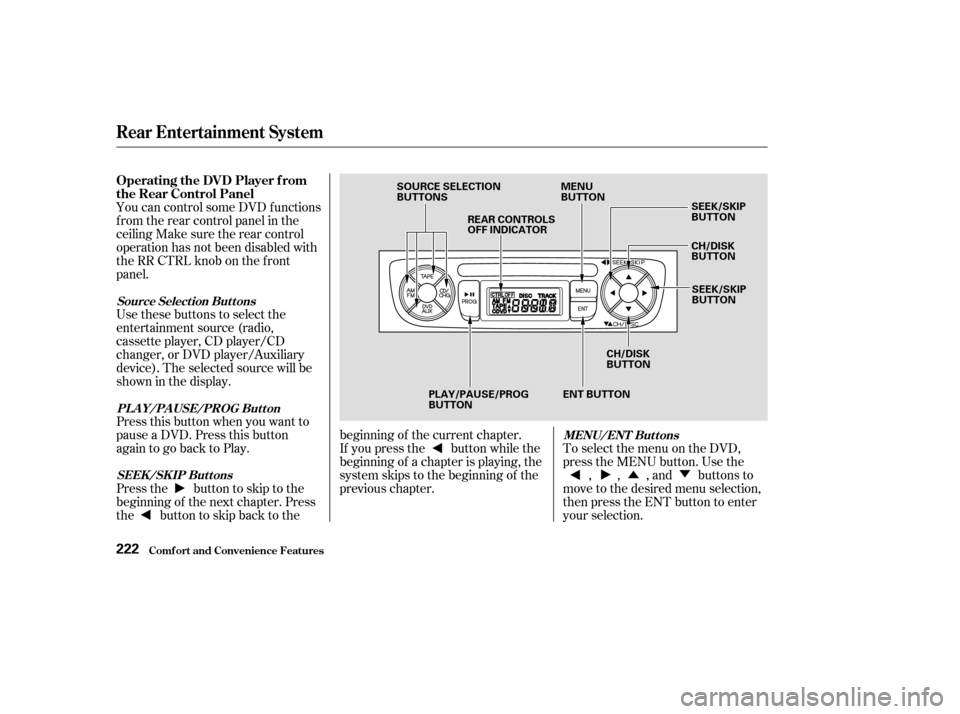
You can control some DVD f unctions
f rom the rear control panel in the
ceiling Make sure the rear control
operation has not been disabled with
theRRCTRLknobonthefront
panel.
Use these buttons to select the
entertainment source (radio,
cassette player, CD player/CD
changer, or DVD player/Auxiliary
device). The selected source will be
showninthedisplay.
Press this button when you want to
pause a DVD. Press this button
again to go back to Play.
To select the menu on the DVD,
press the MENU button. Use the , , , and buttons to
move to the desired menu selection,
then press the ENT button to enter
your selection.
Pressthe buttontoskiptothe
beginning of the next chapter. Press
the buttontoskipbacktothe beginning of the current chapter.
If you press the button while the
beginning of a chapter is playing, the
system skips to the beginning of the
previous chapter.
Comf ort and Convenience Feat ures
Rear Entertainment System
Operating the DVD Player f rom
the Rear Control Panel
Source Select ion But t ons
PL A Y/PA USE/PROG But t on MENU/ENT But t ons
SEEK /SK IP But t ons
222
SOURCE SELECTION
BUTTONS REAR CONTROLS
OFF INDICATOR MENU
BUTTON
SEEK/SKIP
BUTTON
CH/DISK
BUTTON
SEEK/SKIP
BUTTON
CH/DISK
BUTTON
ENT BUTTON
PLAY/PAUSE/PROG
BUTTON
Page 226 of 415
CONT INUED
You can control all of the DVD
functions with the remote control.
Make sure the rear control operation
has not been disabled with the RR
CTRL knob on the f ront panel.
When using the remote control,
point it at the rear control panel in
the ceiling.
Press this button to start playing a
DVD. Use these buttons to select the
entertainment source (radio,
cassette player, CD player/CD
changer, or DVD player/Auxiliary
device). The selected source will be
showninthedisplay.
Comf ort and Convenience Feat ures
Rear Entertainment System
Operating the DVD Player with
the Remote Control
Source Select ion But t onsPL A Y/PROG Button
223
SOURCE SELECTION
BUTTONS SEEK/SKIP BUTTONS
DISP BUTTON RETURN (T/C) BUTTON
REW/FWD BUTTONS
STOP BUTTON PAUSE BUTTON
PLAY/PROG BUTTON
MENU BUTTON
SUBTITLE BUTTON
AUDIO BUTTON
ANGLE BUTTON
TITLE BUTTON
Page 232 of 415
�Û
�Ý
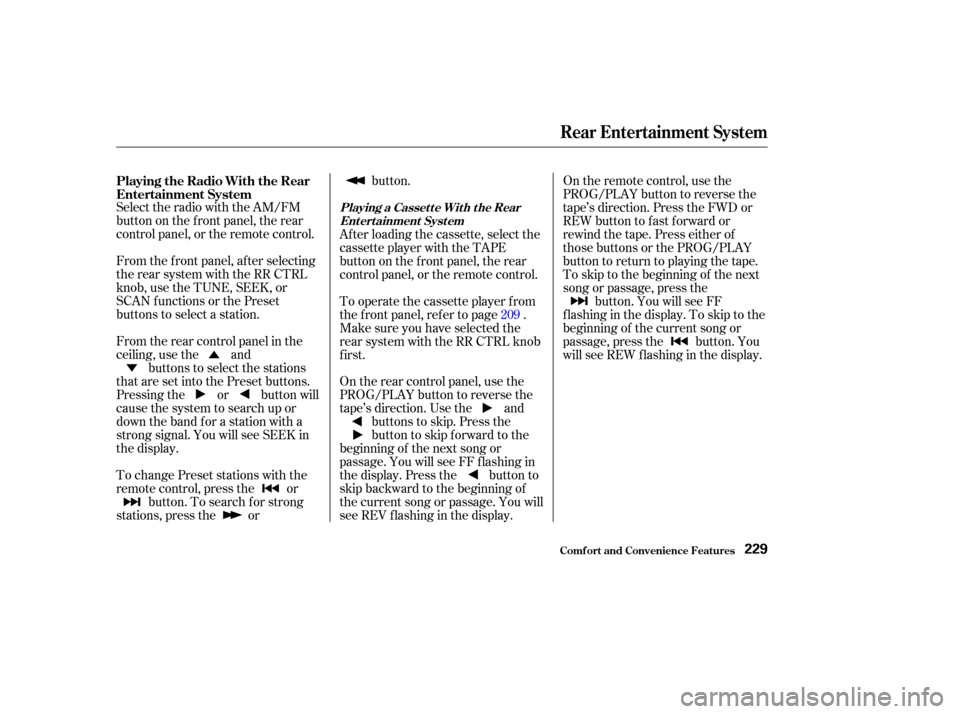
Select the radio with the AM/FM
buttononthefrontpanel,therear
control panel, or the remote control.
From the front panel, after selecting
the rear system with the RR CTRL
knob, use the TUNE, SEEK, or
SCAN f unctions or the Preset
buttons to select a station.
From the rear control panel in the
ceiling, use the and buttons to select the stations
that are set into the Preset buttons.
Pressing the or button will
cause the system to search up or
down the band for a station with a
strong signal. You will see SEEK in
the display.
To change Preset stations with the
remote control, press the or button. To search for strong
stations, press the or button.
After loading the cassette, select the
cassette player with the TAPE
buttononthefrontpanel,therear
control panel, or the remote control.
On the rear control panel, use the
PROG/PLAY button to reverse the
tape’s direction. Use the and buttons to skip. Press the
button to skip forward to the
beginning of the next song or
passage. You will see FF f lashing in
the display. Press the button to
skip backward to the beginning of
the current song or passage. You will
seeREVflashinginthedisplay. To operate the cassette player from
the f ront panel, ref er to page .
Make sure you have selected the
rear system with the RR CTRL knob
first. On the remote control, use the
PROG/PLAY button to reverse the
tape’s direction. Press the FWD or
REW button to f ast f orward or
rewind the tape. Press either of
those buttons or the PROG/PLAY
button to return to playing the tape.
To skip to the beginning of the next
song or passage, press the
button. You will see FF
flashinginthedisplay.Toskiptothe
beginning of the current song or
passage, press the button. You
will see REW f lashing in the display.
209
Playing the Radio With the Rear
Entertainment SystemPlaying a Cassette With the Rear
Entertainment System
Rear Entertainment System
Comf ort and Convenience Feat ures229
Page 237 of 415
The security system helps to protect
your vehicle and valuables f rom thef t.
The horn sounds and a combination
of headlights, parking lights, side
marker lights and taillights f lashes if
someone attempts to break into your
vehicleorremovetheradio.This
alarm continues f or two minutes,
then the alarm stops. To reset an
alarming system before the two
minutes have elapsed, unlock either
f ront door with the key or the
remote transmitter.
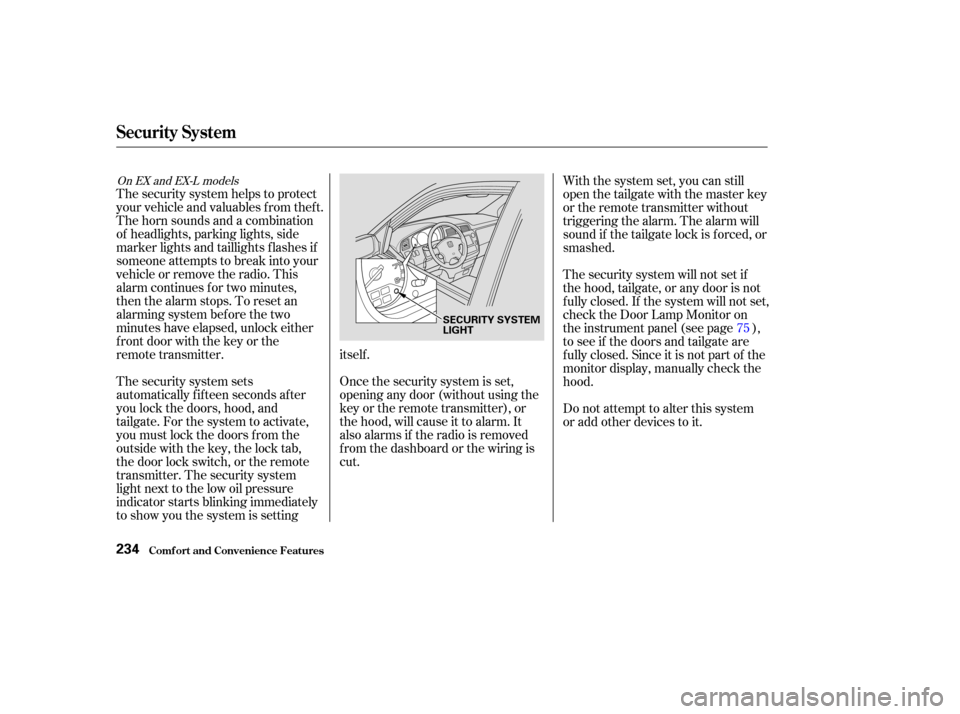
The security system sets
automatically fifteen seconds after
you lock the doors, hood, and
tailgate. For the system to activate,
you must lock the doors f rom the
outside with the key, the lock tab,
the door lock switch, or the remote
transmitter. The security system
light next to the low oil pressure
indicator starts blinking immediately
to show you the system is settingitself .
Once the security system is set,
opening any door (without using the
key or the remote transmitter), or
the hood, will cause it to alarm. It
also alarms if the radio is removed
f rom the dashboard or the wiring is
cut.With the system set, you can still
open the tailgate with the master key
or the remote transmitter without
triggering the alarm. The alarm will
sound if the tailgate lock is f orced, or
smashed.
The security system will not set if
the hood, tailgate, or any door is not
f ully closed. If the system will not set,
check the Door Lamp Monitor on
the instrument panel (see page ),
to see if the doors and tailgate are
f ully closed. Since it is not part of the
monitor display, manually check the
hood.
Do not attempt to alter this system
or add other devices to it.
75
On EX and EX-L models
Security System
Comf ort and Convenience Feat ures234
SECURITY SYSTEM
LIGHT
Page 254 of 415
However, if electronic accessories
are improperly installed, or exceed
your vehicle’s electrical system
capacity, they can interf ere with theoperation of your vehicle, or even
cause the airbags to deploy.
Make sure the accessory does not
obscure any lights, or interf ere
with proper vehicle operation or
perf ormance.
Be sure electronic accessories do
not overload electrical circuits
(see page ).
Have the installer contact your
Honda dealer f or assistance bef ore
installing any electronic accessory.
If possible, have your dealer inspect
the f inal installation.
Modif ying your vehicle, or installing
some non-Honda accessories, can
make your vehicle unsaf e. Bef ore
you make any modif ications or add
anyaccessories,besuretoreadthe
f ollowing inf ormation.
Bef ore installing any accessory:
When properly installed, cellular
phones, alarms, two-way radios, and
low-powered audio systems should
not interf ere with your vehicle’s
computer-controlled systems, such
as the SRS and anti-lock brake
system.
Your dealer has Honda accessories
that allow you to personalize your
vehicle. These accessories have
been designed and approved f or your
vehicle, and are covered by warranty.
Non-Honda accessories are usually
designed f or universal applications.
Although aftermarket accessories
may f it on your vehicle, they may not
meet f actory specif ications, and
could adversely af f ect your vehicle’s
handling and stability. (See
‘‘Modif ications’’ on page f or
additional information.)
374
252
A ccessories
A ccessories and Modif ications
Bef ore Driving251
Improper accessories or
modifications can affect your
vehicle’s handling, stability, and
performance, and cause a
crash in which you can be hurt
or killed.
Follow all instructions in this
owner’s manual regarding
accessories and modifications.
Page 373 of 415
This indicator should come on when
the ignition switch is ON (II), and go
out af ter the engine starts. If it
comes on brightly when the engine
is running, it indicates that the
charging system has stopped
charging the battery.By eliminating as much of the
electrical load as possible, you can
drive several miles (kilometers)
before the battery is too discharged
to keep the engine running. Drive to
a service station or garage where
you can get technical assistance.
Immediately turn of f all electrical
accessories:radio,heater,A/C,
climate control, rear def ogger, cruise
control, etc. Try not to use other
electrically-operated controls such as
the power windows. Keep the engine
running and take extra care not to
stall it. Starting the engine will
discharge the battery rapidly.
Charging System Indicator
T aking Care of t he Unexpect ed370
CHARGING SYSTEM INDICATOR