Page 298 of 415
�µ�µ �µ
�µ
�µ
�µ �µ
Youshouldcheckthefollowing
items at the specif ied intervals. If
you are unsure of how to perf orm
any check, turn to the page given.
Engine oil level Check every
time you fill the fuel tank. See
page .
Engine coolant level Check the
radiator reserve tank every time
you f ill the f uel tank. See page .Tires Check the tire pressure
monthly. Examine the tread f or
wear and foreign objects. See page
.
Windshield washer f luid Check
the level in the reservoir monthly.
If weather conditions cause you to
use the washers f requently, check
the reservoir each time you stop
f or f uel. See page .
Automatic transmission Check
the f luid level monthly. See page .
Brakes Check the f luid level
monthly. See page . Lights Check the operation of
the headlights, parking lights,
taillights, high-mount brake light,
turn signals, brake lights, and
license plate light monthly. See
page .
248
249
306
307 309 323
330
Owner Maintenance Checks
Maint enance295
Page 299 of 415
Fluid Locations
Maint enance296
ENGINE OIL DIPSTICK
(Orange loop)
WASHER FLUID
(Blue cap)
POWER STEERING
FLUID (Red cap)RADIATOR CAP ENGINE OIL FILL CAPAUTOMATIC
TRANSMISSION
FLUID DIPSTICK
(Yellow loop)
BRAKE FLUID
(Gray cap)
ENGINE COOLANT
RESERVOIR
Page 300 of 415
To add oil, unscrew and remove the
engine oil f ill cap on top of the valve
cover. Pour in the oil, and install the
engine oil f ill cap. Tighten it securely.
Wait a f ew minutes and recheck the
oil level. Do not f ill above the upper
mark; you could damage the engine.Oil is a major contributor to your
engine’s perf ormance and longevity.
Always use a premium-grade 5W-20
detergent oil displaying the API
Certif ication Seal. This seal indicates
the oil is energy conserving, and that
it meets the American Petroleum
Institute’s latest requirements.
Honda Motor Oil is the pref erred
5W-20 lubricant f or your vehicle. It is
highly recommended that you use
genuine Honda Motor Oil in your
vehicle f or optimum engine
protection.
Pour the oil slowly and caref ully so
you do not spill. Clean up any spills
immediately. Spilled oil could
damage components in the engine
compartment.
CONT INUED
A dding Oil
Recommended Oil
Engine Oil
Maint enance297
ENGINE OIL FILL CAP
Page 301 of 415
You may use a synthetic motor oil if
it meets the same requirements
given f or a conventional motor oil: it
displays the API Certif ication Seal,
and it is the proper weight as shown
on the chart. When using synthetic
oil, you must f ollow the oil and f ilter
change intervals given in the
maintenance schedule.
The oil’s viscosity or weight is
provided on the container’s label.
Select the oil f or your vehicle
according to this chart.
5W-20 oil is f ormulated f or year-
round protection of your Honda, to
improve cold weather starting, and
to help your engine use less f uel.
Make sure the API Certif ication Seal
says ‘‘For Gasoline Engines.’’
Synthetic Oil
Engine Oil
Maint enance298
Ambient Temperature
API CERTIFICATION SEAL
Page 302 of 415

Always change the oil and f ilter
accordingtothetimeanddistance
(miles/kilometers) recommenda-
tions in the maintenance schedule.
The oil and f ilter collect contami-
nants that can damage your engine if
they are not removed regularly.
Changing the oil and f ilter requires
special tools and access f rom
underneath the vehicle. The vehicle
should be raised on a service station-
type hydraulic lif t f or this service.
Unless you have the knowledge and
proper equipment, you should have
this maintenance done by a skilled
mechanic.Run the engine until it reaches
normal operating temperature,
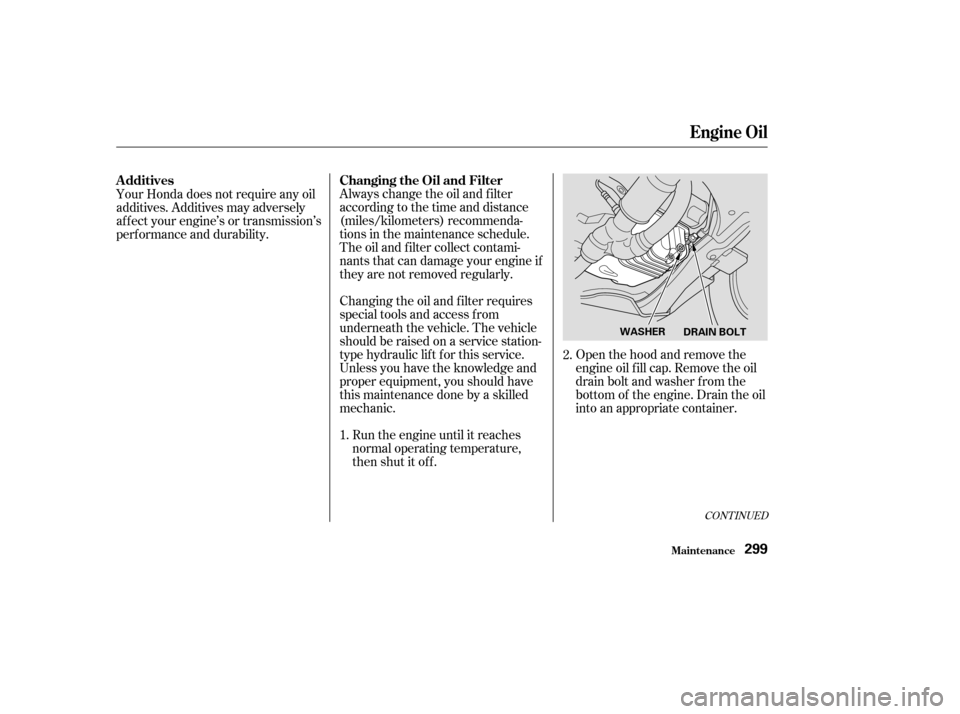
then shut it off. Open the hood and remove the
engine oil f ill cap. Remove the oil
drain bolt and washer f rom the
bottom of the engine. Drain the oil
into an appropriate container.
Your Honda does not require any oil
additives. Additives may adversely
af f ect your engine’s or transmission’s
perf ormance and durability.
1.2.
CONT INUED
Additives
Changing the Oil and Filter
Engine Oil
Maint enance299
WASHER
DRAIN BOLT
Page 303 of 415

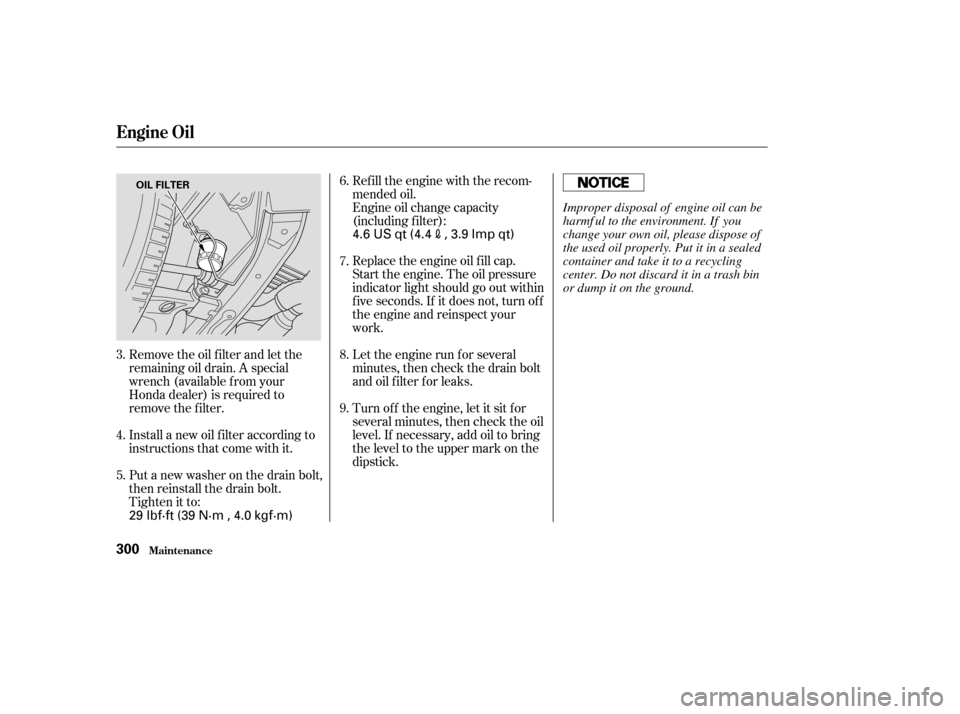
Remove the oil f ilter and let the
remaining oil drain. A special
wrench (available from your
Honda dealer) is required to
remove the f ilter.
Install a new oil f ilter according to
instructions that come with it.
Put a new washer on the drain bolt,
then reinstall the drain bolt.
Tighten it to:Refill the engine with the recom-
mended oil.
Engine oil change capacity
(including f ilter):
Replace the engine oil f ill cap.
Start the engine. The oil pressure
indicator light should go out within
f ive seconds. If it does not, turn of f
the engine and reinspect your
work.
Let the engine run f or several
minutes, then check the drain bolt
and oil f ilter f or leaks.
Turn of f the engine, let it sit f or
several minutes, then check the oil
level. If necessary, add oil to bring
the level to the upper mark on the
dipstick.
9. 8. 7. 6.
4.
5. 3.
Engine Oil
Maint enance300
OIL FILTER
29 lbf·ft (39 N·m , 4.0 kgf·m) 4.6 US qt (4.4
, 3.9 Imp qt)
Improper disposal of engine oil can be
harmf ul to the environment. If you
change your own oil, please dispose of
the used oil properly. Put it in a sealed
container and take it to a recycling
center. Do not discard it in a trash bin
or dump it on the ground.
Page 317 of 415
Loosen the two holding clips by
turning the heads one-quarter turn
counterclockwise with a f lat-tipped
screwdriver. Remove the cover on
the f ront cylinder bank by pulling
it straight up.
Clean off any dirt and oil that have
collected around the ignition coils.Disconnect the wire connector
f rom the ignition coil by pushing
on the lock tab and pulling on the
connector. Pull on the plastic
connector, not the wires.
Use a wrench to remove the
hexagonsocketheadcapbolt
holding the ignition coil. Remove
the ignition coil by pulling it
straight out.
Remove the spark plug with
a f ive-eighths inch (16 mm) spark
plug socket.
5.
6.
4.
2.
3.
Maint enance
Spark Plugs
314
HEXAGON SOCKET HEAD CAP BOLT
HOLDING CLIP
Page 319 of 415
�´
�µ
Install the ignition coil. Reinstall
the hexagon socket head cap bolt.
Push the wire connector onto the
ignition coil. Make sure it locks in
place.
Repeat this procedure f or the
other f ive spark plugs.
Reinstall the cover on the front
cylinder bank while putting its
mounting clip in the hole on the
passenger’s side. Secure the cover
by turning the heads of the two
holding clips one-quarter turn
clockwise with a f lat-tipped
screwdriver.Spark Plug Gap:
Reinstall the engine cover and
tighten the f our bolts securely. NGK:
DENSO:
9.
11.
10.
12.
13.
Spark Plugs
Maint enance
Specif ications:
316
PZFR5F-11
PKJ16CR-L11
0.04 in (1.1 mm)
0
0.1 mm