Page 82 of 415

This shows how much f uel you have.
It is most accurate when the vehicle
is on level ground. It may show
slightly more or less than the actual
amount when you are driving on
curvy or hilly roads.
This shows the temperature of the
engine’s coolant. During normal
operation, the pointer should rise
from the bottom white mark to about
the middle of the gauge. In severe
driving conditions, such as very hot
weather or a long period of uphill
driving, the pointer may rise to near
the upper white mark. If it reaches
the red (Hot) mark, pull safely to the
side of the road. Turn to page f or
instructions and precautions on
checking the engine’s cooling
system.
This meter shows the number of
miles (U.S.) or kilometers (Canada)
driven since you last reset it.
There are two trip meters: Trip A
and Trip B. Switch between these
displays by pressing the Select/
Reset button repeatedly. Each trip
meter works independently, so you
can keep track of two dif f erent
distances.
To reset a trip meter, display it, and
then press and hold the Select/Reset
button until the number resets to
‘‘0.0’’.
The needle returns to the bottom
after you turn off the ignition. The
gauge shows the f uel level reading
immediately af ter you turn the
ignition switch back ON (II).
366
Gauges
Inst rument s and Cont rols
Trip Meter
Temperature GaugeFuel Gauge
79
Avoid driving with an extremely low
f uel level. Running out of f uel could
cause the engine to misf ire, damaging
the catalytic converter.
Page 83 of 415

Ref er to the Maintenance Schedules
f or Normal and Severe Driving
Conditions on pages and .
For the f irst 6,000 miles (9,600 km)
af ter the Maintenance Required
Indicator is reset, it will come on f or
two seconds when you turn the
ignition switch to ON (II).Between 6,000 miles (9,600 km) and
7,500 miles (12,000 km) this
indicator will light f or two seconds
when you first turn the ignition
switch to ON (II), and then flash for
ten seconds.
If you exceed 7,500 miles (12,000
km) without having the scheduled
maintenance perf ormed, this
indicator will remain on as a constant
reminder.Your dealer will reset this indicator
af ter completing the scheduled
maintenance. If this maintenance is
done by someone other than your
Honda dealer, reset the indicator as
f ollows.
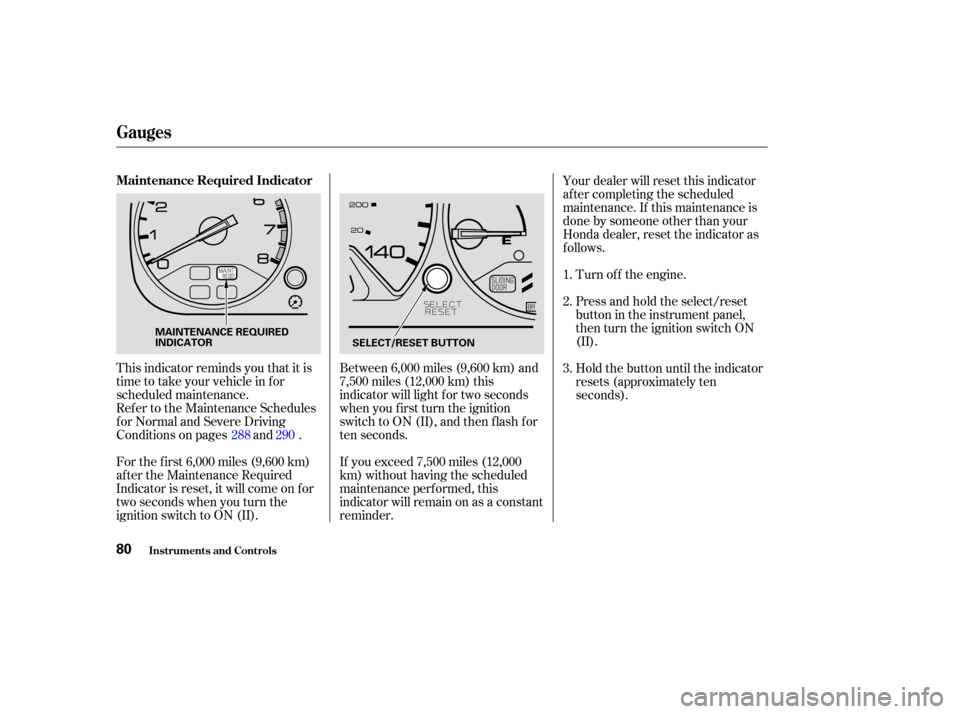
Turn of f the engine.
This indicator reminds you that it is
time to take your vehicle in for
scheduled maintenance. Press and hold the select/reset
buttonintheinstrumentpanel,
then turn the ignition switch ON
(II).
Hold the button until the indicator
resets (approximately ten
seconds).
1.
2.
3.
288 290
Gauges
Maintenance Required Indicator
Inst rument s and Cont rols80
MAINTENANCE REQUIRED
INDICATOR SELECT/RESET BUTTON
Page 92 of 415

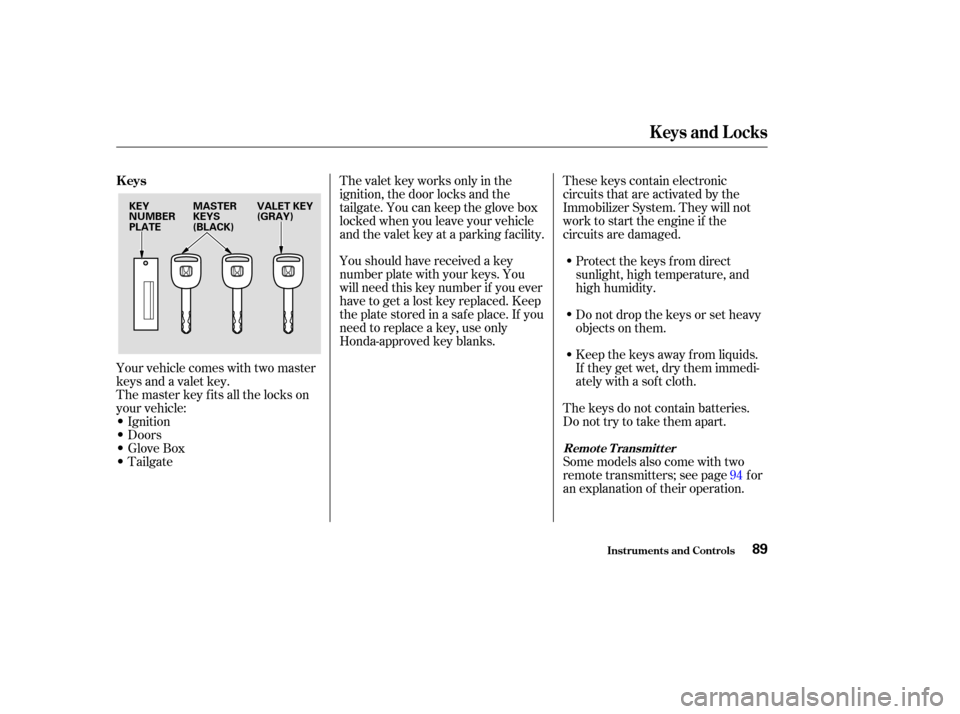
Your vehicle comes with two master
keys and a valet key.
The master key fits all the locks on
your vehicle:
Ignition
Doors
GloveBox
TailgateYoushouldhavereceivedakey
number plate with your keys. You
will need this key number if you ever
have to get a lost key replaced. Keep
the plate stored in a saf e place. If you
need to replace a key, use only
Honda-approved key blanks.
These keys contain electronic
circuits that are activated by the
Immobilizer System. They will not
work to start the engine if the
circuits are damaged.
Protect the keys f rom direct
sunlight, high temperature, and
high humidity.
Donotdropthekeysorsetheavy
objects on them.
Keep the keys away f rom liquids.
If they get wet, dry them immedi-
ately with a soft cloth.
The keys do not contain batteries.
Do not try to take them apart.
The valet key works only in the
ignition, the door locks and the
tailgate. You can keep the glove box
locked when you leave your vehicle
and the valet key at a parking f acility.
Some models also come with two
remote transmitters; see page for
an explanation of their operation.94
Keys
Remote Transmitter
Keys and Locks
Inst rument s and Cont rols89
KEY
NUMBER
PLATE
MASTER
KEYS
(BLACK)VALET KEY
(GRAY)
Page 93 of 415

The Immobilizer System protects
your vehicle f rom thef t. A properly-
coded master or valet key must be
used in the ignition switch f or the
engine to start. If an improperly-
coded key (or other device) is used,
the engine’s f uel system is disabled.
When you turn the ignition switch to
ON (II), the Immobilizer System
indicator should come on f or a f ew
seconds, then go out. If the indicator
starts to blink, it means the system
does not recognize the coding of the
key. Turn the ignition switch to
LOCK (0), remove the key, reinsert
it, and turn the switch to ON (II)
again.The system may not recognize your
key’s coding if another immobilizer
key or other metal object is near the
ignition switch when you insert the
key. To make sure the system
recognizes the key code:
Do not keep other immobilizer
keys on the same key ring.
Use a plastic or leather key f ob,
not metal.
Keep other keys away f rom your
vehicle’s key and the ignition
switch while trying to start the
engine. If the system repeatedly does not
recognize the coding of your key,
contact your Honda dealer.
The Immobilizer System indicator
will also blink several times when
you turn the ignition switch f rom ON
(II) to ACCESSORY (I) or LOCK (0).
Do not attempt to alter this system
or add other devices to it. Electrical
problems could result that may make
your vehicle undriveable.
If you have lost your key and you
cannot start the engine, contact your
Honda dealer.
Immobilizer System
Keys and Locks
Inst rument s and Cont rols90
Page 95 of 415

�µ
�µ �µ
Use this position
only to start the engine. The switch
returns to ON (II) when you let go of
the key.
This is the normal key
position when driving. All f eatures
and accessories on the vehicle are
usable. Several of the lights on the
instrument panel come on as a test
when you turn the ignition switch
f rom ACCESSORY to ON. The engine will not start if the
Immobilizer System does not
recognize the key’s coding (see page
).
You will hear a reminder beeper if
you leave the key in the ignition
switch in the LOCK (0) or
ACCESSORY (I) position and open
thedriver’sdoor.Removethekeyto
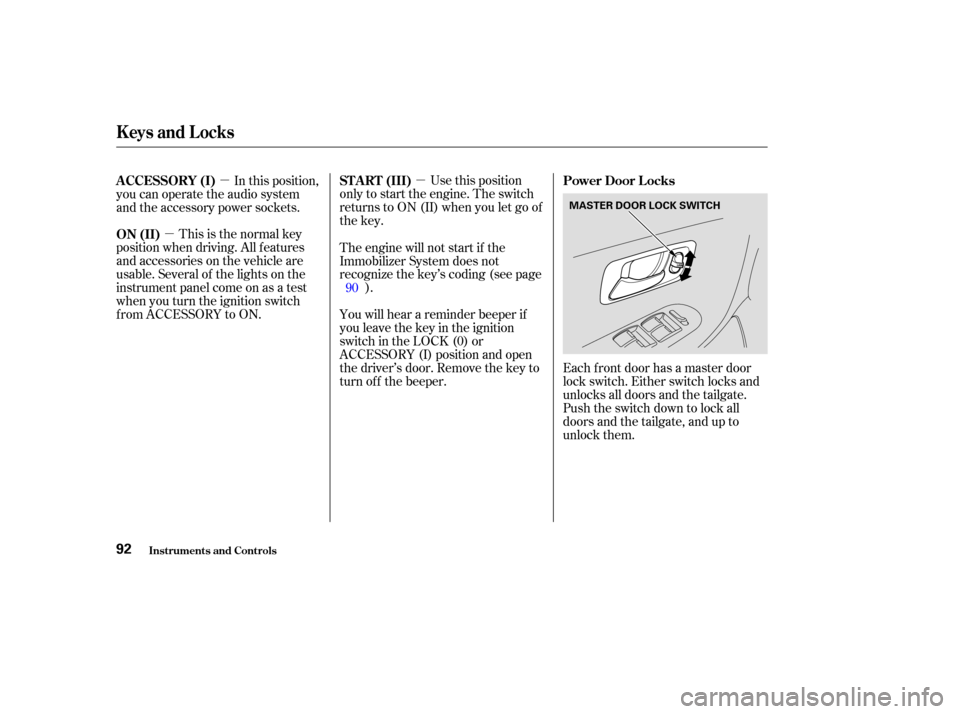
turn of f the beeper. Each f ront door has a master door
lock switch. Either switch locks and
unlocks all doors and the tailgate.
Push the switch down to lock all
doors and the tailgate, and up to
unlock them.
In this position,
you can operate the audio system
and the accessory power sockets.
90
ST A RT (III)
Power Door L ocks
ON (II) A CCESSORY (I)
Keys and Locks
Inst rument s and Cont rols92
MASTER DOOR LOCK SWITCH
Page 126 of 415

The HI or LO indicator lights and
remains lit until you turn it of f by
pushing the opposite side of the
switch lightly. The indicator will turn
off.
In HI, the heater turns of f when the
seat gets warm, and turns back on
after the seat’s temperature drops. It
continues to cycle as long as you
leave it set on HI. The HI indicator
remains lit as a reminder that you
have the heater on.
In LO, the heater runs continuously.
It does not cycle with temperature
changes.Do not use the seat heaters, even
on the LO setting, if the engine is
lef t idling f or an extended period.
They can weaken the battery,
causing hard starting. Use the HI setting only to heat the
seats quickly. Select the LO
setting when the seats f eel warm.
The HI setting draws large
amounts of current f rom the
battery.
Follow these precautions whenever
you use the seat heaters:
Because of the sensors f or the side
airbag system, there is no heater in
the passenger’s seat-back.
Both f ront seats are equipped with
seat heaters. The ignition switch
must be ON (II) to use them.The
seat heater switch is located on each
f ront door. Push the f ront of the
switch, HI, to rapidly heat up the seat.
After the seat reaches a comfortable
temperature, select LO by pushing
the back of the switch. This will keep
the seat warm.
On EX-L model
Seat Heaters
Inst rument s and Cont rols123
Page 129 of 415

If your vehicle’s battery is
disconnected or goes dead, or the
driver’s window f use is removed, the
AUTO f unction will be disabled. The
power window system needs to be
reset af ter reconnecting the battery
or installing the f use. You should do
the f ollowing.Start the engine. Push down on
the driver’s window switch until
the window is f ully open.
Pull back on the driver’s window
switch to close the window
completely, then hold the switch
f or a second or two more.
If the power windows do not operate
properly af ter resetting, have your
vehicle checked by a Honda dealer.
Auto reverse stops sensing when the
window is almost closed. You should
always check that all passengers and
objects are away from the window
bef ore closing it. If the driver’s window runs into any
obstacle while it is closing
automatically, it will reverse
direction, and then stop. To close the
window, remove the obstacle, then
use the window switch again.
The power window system has a key-
of f delay f unction. The windows will
stilloperateforuptotenminutes
after you turn off the ignition.
Opening either f ront door cancels
the delay function. You must turn
the ignition switch ON (II) again
bef ore you can operate the windows.
1.
2.
Power Windows
Inst rument s and Cont rols
Auto Reverse
126
Page 132 of 415
Canadian Models
The outside mirrors are heated to re-
move fog and frost. With the ignition
switchON(II),turnontheheaters
by pressing the button. The light in
the button comes on as a reminder.
Press the button again to turn the
heaters off.To apply the parking brake, push the
parking brake pedal down with your
f oot. To release the parking brake,
push on the pedal again. The parking
brake light on the instrument panel
should go out when the parking
brake is f ully released with the
engine running. (see page .)
72
Parking Brake
Mirrors, Parking Brake
Inst rument s and Cont rols129
HEATED MIRROR BUTTON
PARKING BRAKE PEDAL
Driving the vehicle with the parking
brake applied can damage the rear
brakes and axles.