Page 115 of 374

�µ
The master control panel also con-
tains these extra features:
To open the driver’s
window f ully, push the window
switch f irmly down, then release it.
The window automatically goes
down all the way. To stop the
window f rom going all the way down,
pull back on the window switch
brief ly.
To close the driver’s window f ully,
pull back the window switch f irmly,
then release it. The window
automatically goes all the way up. To
stop the window f rom going all the
way up, push down on the window
switch brief ly. To open or close the driver’s window
partially, push down or pull back on
the window switch lightly and hold it.
The window will stop when you
release the switch.
The light in the AUTO switch comes
on when you turn the ignition switch
to ON (II).
The MAIN switch controls power to
the passengers’ windows. When you
push in the MAIN switch, the
passengers’ windows cannot be
raised or lowered. The MAIN switch
does not af f ect the driver’s window.
To cancel this f eature, push on the
switch again. Keep the MAIN switch
pushed in when you have children in
the vehicle so they do not injure
themselves by operating the
windows unintentionally.
Power Windows
Inst rument s and Cont rols
AUTO
111
Page 117 of 374

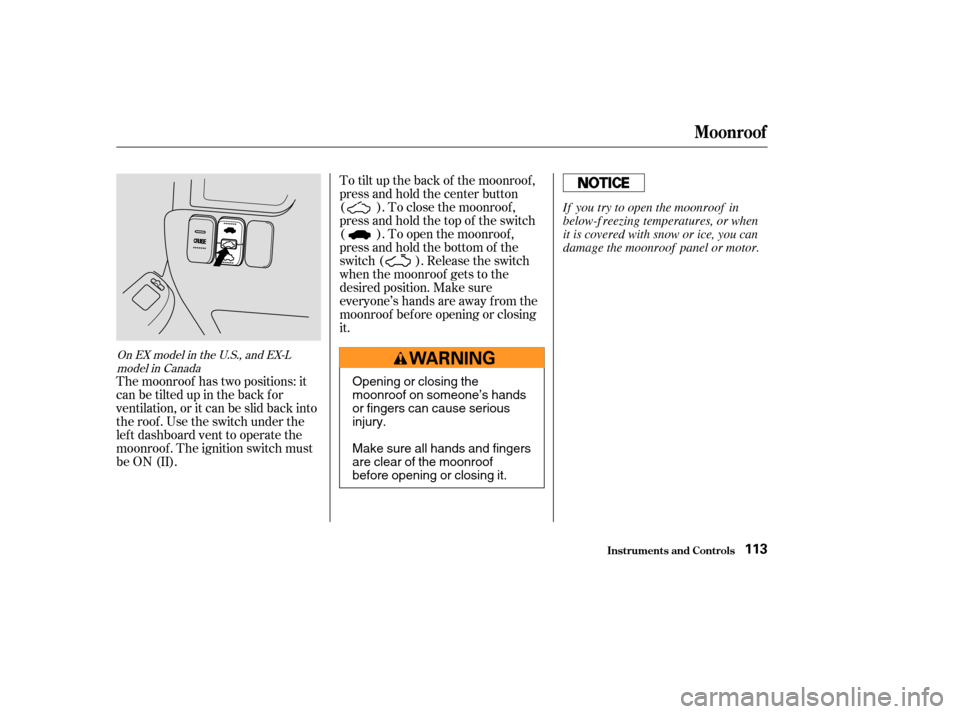
To tilt up the back of the moonroof ,
press and hold the center button
( ). To close the moonroof ,
press and hold the top of the switch
( ). To open the moonroof ,
press and hold the bottom of the
switch ( ). Release the switch
when the moonroof gets to the
desired position. Make sure
everyone’s hands are away f rom the
moonroof bef ore opening or closing
it.
The moonroof has two positions: it
can be tilted up in the back f or
ventilation, or it can be slid back into
the roof . Use the switch under the
lef t dashboard vent to operate the
moonroof . The ignition switch must
be ON (II).
On EX model in the U.S., and EX-L model in Canada
Inst rument s and Cont rols
Moonroof
113
Opening or closing the
moonroof on someone’s hands
or fingers can cause serious
injury.
Make sure all hands and fingers
are clear of the moonroof
before opening or closing it. If you try to open the moonroof in
below-f reezing temperatures, or when
it is covered with snow or ice, you can
damage the moonroof panel or motor.
Page 118 of 374
Push the appropriate edge of the
adjustment switch to move the
mirrorright,left,up,ordown.
When you f inish, move the
selector switch to the center (off)
position. This turns of f the
adjustment switch so you can’t
move a mirror out of position by
accidentally bumping the switch.
Keeptheinsideandoutsidemirrors
clean and adjusted f or best visibility.
Be sure to adjust the mirrors bef ore
you start driving.
The inside mirror has day and night
positions. The night position reduces
glare f rom headlights behind you.
Flip the tab on the bottom edge of
the mirror to select the day or night
position.
Adjust the outside mirrors with the
adjustment switch on the driver’s
door armrest:
Turn the ignition switch ON (II).
Move the selector switch to L
(driver’s side) or R (passenger’s
side). 3.
4.
1.
2.
Inst rument s and Cont rols
Mirrors
Adjusting the Power Mirrors
114
TAB SELECTOR SWITCH
ADJUSTMENT SWITCH
Page 119 of 374
To use the center table, pull up the
outside edge of the table until it
latches. To store it, pull the lever and
lower the table.
The outside mirrors are heated to re-
move fog and frost. With the ignition
switchON(II),turnontheheaters
by pressing the button. The light in
the button comes on as a reminder.
Press the button again to turn the
heaters off. Sitting on or getting under the table,
or putting heavy objects on the table,
may damage or deform it.
Do not put any items on the table
while driving. They may f all down or
f ly around when you go around
corners or brake hard.On EX and EX-L models in Canada
Inst rument s and Cont rols
Mirrors, Center Table
Center Table
115
Page 126 of 374
These sockets are intended to supply
power f or 12 volt DC accessories
that are rated 120 watts or less (10
amps). To power an accessory, the
ignition switch must be in
ACCESSORY (I) or ON (II).
When both sockets are being used,
the combined power rating of both
accessories should be 120 watts or
less (10 amps).
They will not power an automotive
type cigarette lighter element.
Your vehicle has two accessory
power sockets. One is located on the
dashboard, and the other is on the
lef t side of the cargo area. To use an accessory power socket,
pull up on the cover.
Inst rument s and Cont rols
A ccessory Power Socket s
122
Front
Rear
Pull up Pull up
Page 128 of 374

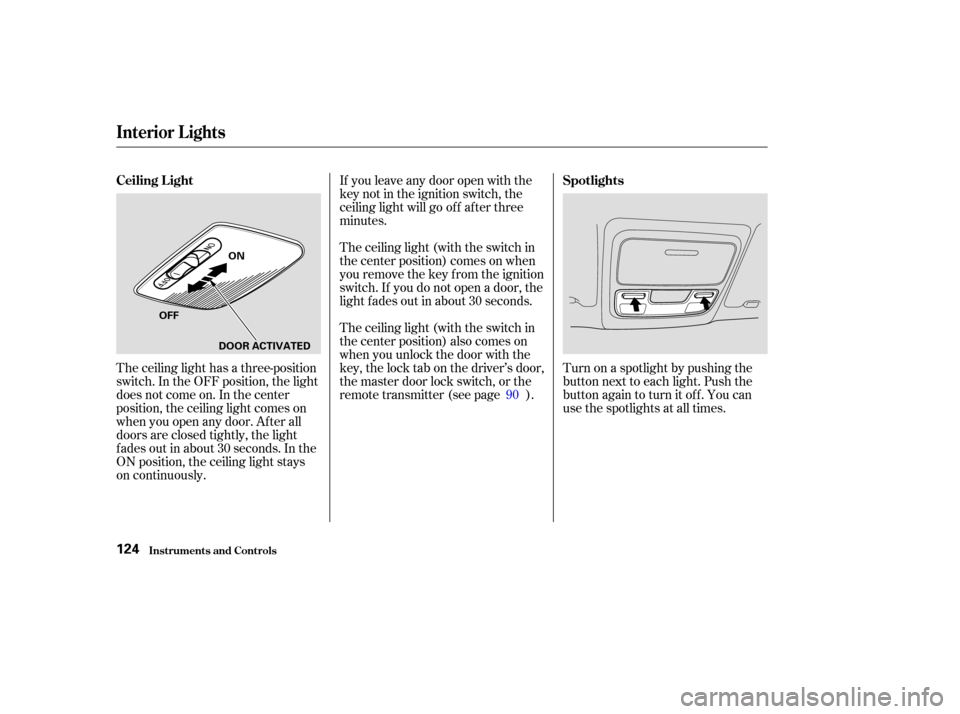
If you leave any door open with the
keynotintheignitionswitch,the
ceiling light will go of f af ter three
minutes.
The ceiling light (with the switch in
the center position) comes on when
you remove the key f rom the ignition
switch. If you do not open a door, the
light f ades out in about 30 seconds.
The ceiling light (with the switch in
the center position) also comes on
when you unlock the door with the
key, the lock tab on the driver’s door,
the master door lock switch, or the
remote transmitter (see page ).Turn on a spotlight by pushing the
button next to each light. Push the
button again to turn it off. You can
use the spotlights at all times.
The ceiling light has a three-position
switch. In the OFF position, the light
does not come on. In the center
position, the ceiling light comes on
when you open any door. Af ter all
doors are closed tightly, the light
f ades out in about 30 seconds. In the
ON position, the ceiling light stays
on continuously. 90
Inst rument s and Cont rols
Interior Lights
Ceiling L ight
Spotlights
124
ON
OFF DOOR ACTIVATED
Page 129 of 374
The cargo area light has a three-
position switch. In the OFF position,
the light does not come on. In the
center position, the light comes on
when you open the tailgate or the
hatch glass. In the ON position, the
light stays on continuously.The ignition switch light comes on
when you unlock the driver’s door,
and f ades out about 30 seconds af ter
you close the door.
Interior Lights
Inst rument s and Cont rols
Cargo A rea L ight
Ignition Switch L ight
125
ON
OFF IGNITION SWITCH LIGHT
TAILGATE/HATCH GLASS ACTIVATED
Page 143 of 374
CONT INUED
The ignition switch must be in
ACCESSORY (I) or ON (II) to
operate the audio system. Turn the
system on by pressing the PWR/
VOL knob, or the AM or FM button.
Adjust the volume by turning the
knob.
The band and f requency that the
radio was last tuned to is displayed.
To change bands, press the AM or
FM button. On the FM band, ST will
be displayed if the station is broad-
castinginstereo.Stereo
reproduction on AM is not available. Operating the Radio
Audio System
Comf ort and Convenience Feat ures139
PWR/VOL KNOBPRESET BUTTONS
AM BUTTON SEEK BUTTONSTUNE KNOB
SCAN BUTTON FM BUTTON