Page 60 of 317

This section gives inf ormation about
the controls and displays that
contribute to the daily operation of
your Honda. All the essential
controls are within easy reach............................
Control Locations .58 ...............................
Indicator Lights .59
.............................................
Gauges .67
...............................
Speedometer .69
.................................
Tachometer .69
...............
Odometer/Trip Meter . 69
.................
Current Fuel Mileage . 70
................................
Trip Mileage .70
Turning Of f the Mileage .....................................
Display .71
..................................
Fuel Gauge .71
...................
Temperature Gauge . 71
..................
Battery Level Gauge . 72
................
Charge/Assist Gauge . 73
Controls Near the Steering .......................................
Wheel .74
...................................
Headlights .75
............
Daytime Running Lights . 76
....
Instrument Panel Brightness . 77
................................
Turn Signals .78
.....................
Windshield Wipers .78
..................
Windshield Washers . 80
..........................
Hazard Warning .80
.............
Rear Window Def ogger . 81
......
Steering Wheel Adjustment . 82
...............................
Keys and Locks .83
..............................................
Keys .83 ....................
Immobilizer System . 84
............................
Ignition Switch .86
......................
Power Door Locks .87
...................
Remote Transmitter . 89
..............
Childproof Door Locks . 92
...........................................
Trunk .92
........
Emergency Trunk Opener . 93
............................
Seat Adjustments .94
.............
Front Seat Adjustments . 94
................
Driver’s Seat Armrest . 95
..........................
Head Restraints .96
..............................
Power Windows .97
.............................................
Mirrors .99
....
Adjusting the Power Mirrors . 99
...............................
Parking Brake .100
......................................
Glove Box .101
...........................
Beverage Holder .102
.................
Console Compartment . 102
........................................
Coin Box .103
...............................
Center Pocket .103
.............
Accessory Power Socket . 103
...............................
Interior Lights .104
..............................
Ceiling Light .104
...................................
Spotlights .104
................
Ignition Switch Light . 105
Instruments and Controls
Inst rument s and Cont rols57
Page 65 of 317

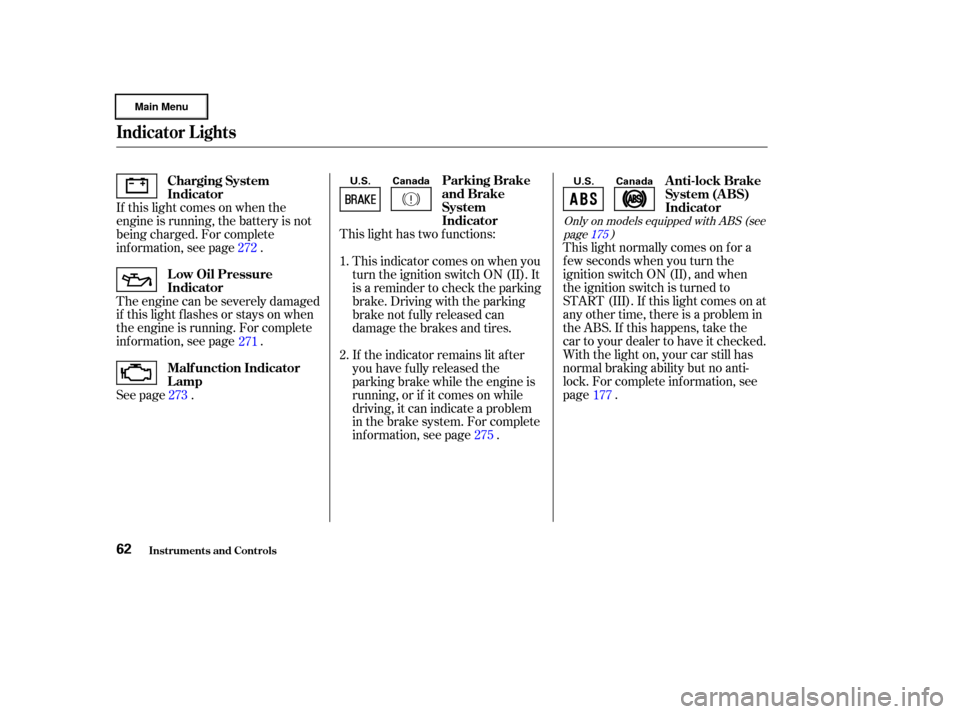
This light has two f unctions:This light normally comes on f or a
f ew seconds when you turn the
ignition switch ON (II), and when
the ignition switch is turned to
START (III). If this light comes on at
any other time, there is a problem in
theABS.If thishappens,takethe
cartoyourdealertohaveitchecked.
With the light on, your car still has
normal braking ability but no anti-
lock. For complete inf ormation, see
page .
If this light comes on when the
engine is running, the battery is not
being charged. For complete
inf ormation, see page .
The engine can be severely damaged
if this light f lashes or stays on when
the engine is running. For complete
inf ormation, see page .
This indicator comes on when you
turn the ignition switch ON (II). It
is a reminder to check the parking
brake. Driving with the parking
brake not f ully released can
damage the brakes and tires.
If the indicator remains lit after
you have f ully released the
parking brake while the engine is
running, or if it comes on while
driving, it can indicate a problem
in the brake system. For complete
inf ormation, see page .
See page . 1.
2.
272
271 275177
273
Only on models equipped with ABS (see
page ) 175
Parking Brake
and Brake
System
Indicator Anti-lock Brake
System (A BS)
Indicator
Charging System
Indicator
L ow Oil Pressure
Indicator
Malf unction Indicator
Lamp
Indicator L ights
Inst rument s and Cont rols62
U.S. Canada
U.S. Canada
Page 70 of 317
CONT INUEDU.S. model is shown.
Gauges
Inst rument s and Cont rols67
Automatic Transmission (CVT)TACHOMETERSPEEDOMETER
ODOMETER/TRIP METER
FUEL GAUGE
IMA CHARGE/ASSIST GAUGE BATTERY LEVEL INDICATOR
FUEL MILEAGE DISPLAY CURRENT FUEL MILEAGE DISPLAYSELECT/RESET
BUTTON
TEMPERATURE GAUGE
Page 71 of 317
U.S. model is shown.
Gauges
Inst rument s and Cont rols68
Manual TransmissionTACHOMETERSPEEDOMETER
ODOMETER/TRIP METER FUEL GAUGE
IMA CHARGE/ASSIST GAUGE
BATTERY LEVEL INDICATOR
FUEL MILEAGE DISPLAY CURRENT FUEL MILEAGE DISPLAY SELECT/
RESET BUTTON
TEMPERATURE GAUGE
Page 75 of 317

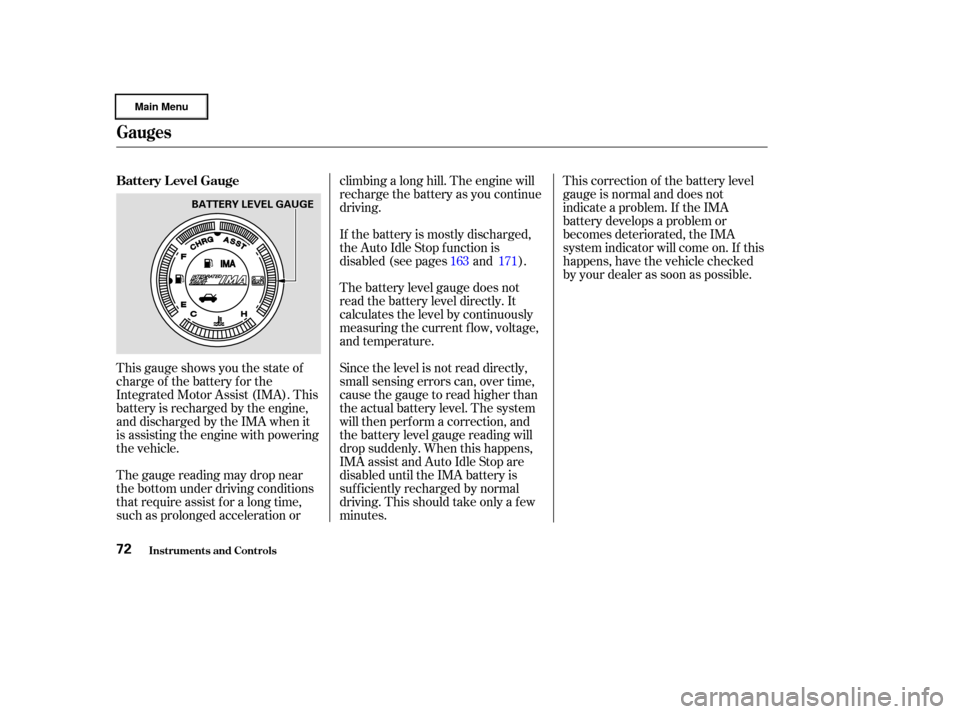
This gauge shows you the state of
charge of the battery for the
Integrated Motor Assist (IMA). This
battery is recharged by the engine,
anddischargedbytheIMAwhenit
is assisting the engine with powering
the vehicle.
The gauge reading may drop near
the bottom under driving conditions
that require assist f or a long time,
such as prolonged acceleration orclimbing a long hill. The engine will
recharge the battery as you continue
driving.
If the battery is mostly discharged,
the Auto Idle Stop f unction is
disabled (see pages and ).
The battery level gauge does not
read the battery level directly. It
calculates the level by continuously
measuring the current f low, voltage,
and temperature.
Since the level is not read directly,
small sensing errors can, over time,
cause the gauge to read higher than
the actual battery level. The system
will then perf orm a correction, and
the battery level gauge reading will
drop suddenly. When this happens,
IMA assist and Auto Idle Stop are
disabled until the IMA battery is
suf f iciently recharged by normal
driving. This should take only a f ew
minutes.This correction of the battery level
gauge is normal and does not
indicate a problem. If the IMA
battery develops a problem or
becomes deteriorated, the IMA
system indicator will come on. If this
happens, have the vehicle checked
by your dealer as soon as possible.
163 171
Battery Level Gauge
Gauges
Inst rument s and Cont rols72
BATTERY LEVEL GAUGE
Page 76 of 317
This gauge shows you the status of
the Integrated Motor Assist (IMA).
When the IMA battery is being
charged, the lef t side of the gauge
illuminates. When the IMA is
assisting the engine, the right side of
the gauge illuminates.If the IMA battery is too hot or too
cold, the IMA system shuts down to
protect the battery. This disables the
IMA assist and Auto Idle Stop, even
though the Battery Level Gauge may
show that the battery is well-charged.
Theref ore, those f unctions may not
operate when you f irst start driving
in very hot or cold weather.
The battery temperature will
normalize af ter a f ew minutes of
driving, and the IMA system will
work normally.
Inst rument s and Cont rols
Gauges
Charge/Assist Gauge
73
IMA CHARGE
GAUGE
IMA ASSIST
GAUGE
Page 93 of 317

�´
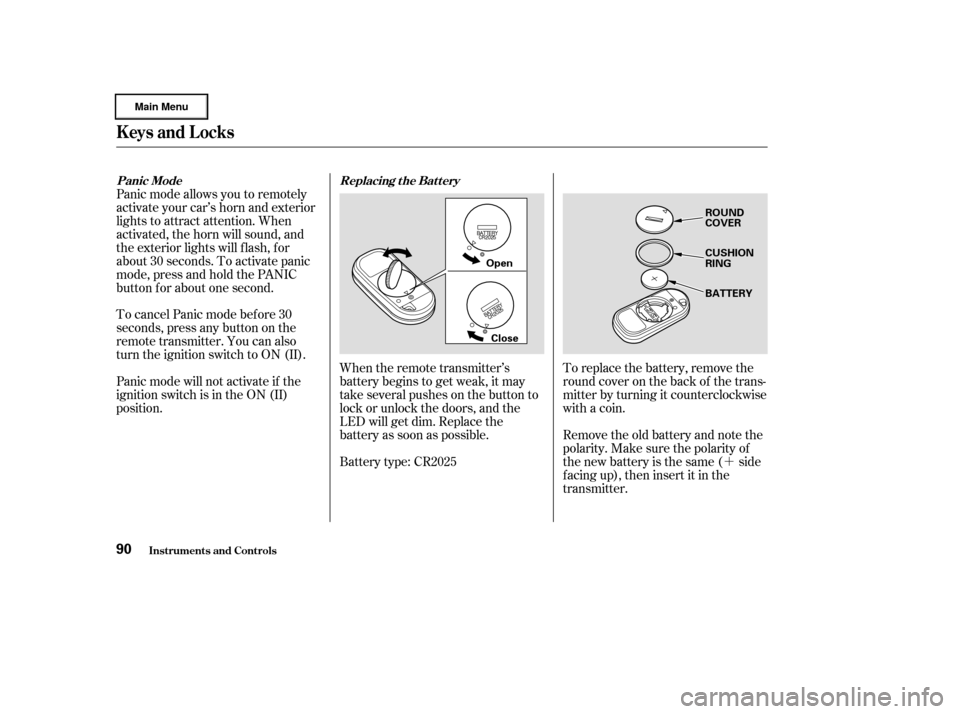
To replace the battery, remove the
round cover on the back of the trans-
mitter by turning it counterclockwise
with a coin.
Remove the old battery and note the
polarity. Make sure the polarity of
the new battery is the same ( side
f acing up), then insert it in the
transmitter.
When the remote transmitter’s
battery begins to get weak, it may
take several pushes on the button to
lock or unlock the doors, and the
LED will get dim. Replace the
battery as soon as possible.
Battery type: CR2025
To cancel Panic mode bef ore 30
seconds, press any button on the
remote transmitter. You can also
turn the ignition switch to ON (II).
Panic mode will not activate if the
ignition switch is in the ON (II)
position. Panic mode allows you to remotely
activate your car’s horn and exterior
lights to attract attention. When
activated, the horn will sound, and
the exterior lights will f lash, f or
about 30 seconds. To activate panic
mode,pressandholdthePANIC
button f or about one second.
Inst rument s and Cont rols
Keys and Locks
Replacing the Battery
Panic Mode
90
Open
Close CUSHION
RING ROUND
COVER
BATTERY
Page 121 of 317
The band and f requency that the
radio was last tuned to is displayed.
To change bands, press the AM/FM
button. On the FM band, ST will be
displayed if the station is broadcast-
ing in stereo. Stereo reproduction on
AM is not available.
The ignition switch must be in
ACCESSORY (I) or ON (II) to
operate the audio system. Turn the
system on by pushing the PWR/
VOL knob or the AM/FM button.
Adjust the volume by turning the
PWR/VOL knob.
Your Honda’s audio system provides
clear reception on both AM and FM
bands, while the preset buttons allow
you to easily select your f avorite
stations.
The anti-thef t f eature will disable the
system if it is disconnected f rom the
car’s battery. To get the system
working again, you must enter a
code number (see page ).
137
Audio System
Comf ort and Convenience Feat ures
AM/FM/CD Audio System
Operating the Radio
118
AM/FM BUTTONSTEREO INDICATOR
SCAN INDICATOR
AUTO
SELECT
BUTTONSCAN
BUTTON
PRESET BUTTONS
SEEK BAR
PWR/VOL KNOB
TUNE KNOB