Page 140 of 302
If you see an error indication in the
display while operating the CD
changer, f ind the cause in the chart
to the right. If you cannot clear the
error indication, take the car to your
Honda dealer.Indication Cause Solution
FOCUS Error
No CD in the CD magazine
Mechanical Error
High temperature.
No CD magazine in the
CD changer.Press the magazine eject button and pull out
the magazine, check for error indication. Insert
the magazine again. If the code does not
disappear or the magazine cannot be pulled out,
consult your Honda dealer.
Insert CD.
Press the magazine eject button and pull out
the magazine, check for error indication. Insert
the magazine again. If the code does not
disappear or the magazine cannot be pulled out,
consult your Honda dealer.
Will disappear when the temperature returns to
normal.
Insert CD magazine.
Audio System
Comf ort and Convenience Feat ures
CD Changer Error Indications
144
�����—�����—�����y�
�������������y���
�(���%�������y���
�����y
Page 155 of 302
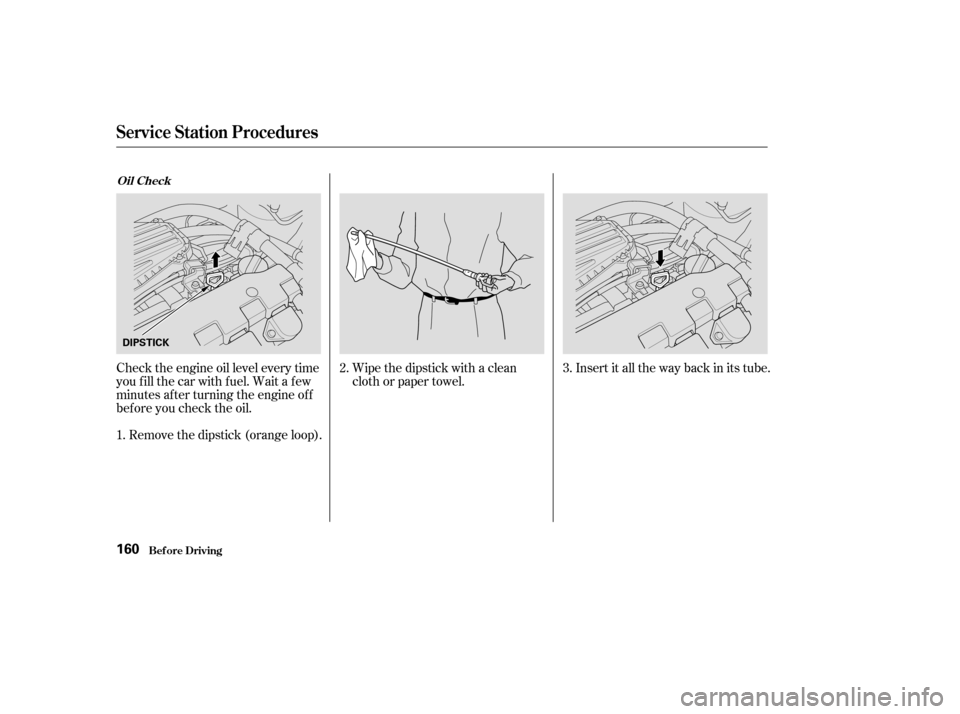
Wipe the dipstick with a clean
cloth or paper towel.Insert it all the way back in its tube.
Check the engine oil level every time
you f ill the car with f uel. Wait a f ew
minutes af ter turning the engine of f
bef ore you check the oil.
Remove the dipstick (orange loop). 2.
3.
1.
Oil Check
Service Station Procedures
Bef ore Driving160
DIPSTICK
�����—�����—�����y�
�������������y���
�(���%�������y���
�����y
Page 156 of 302
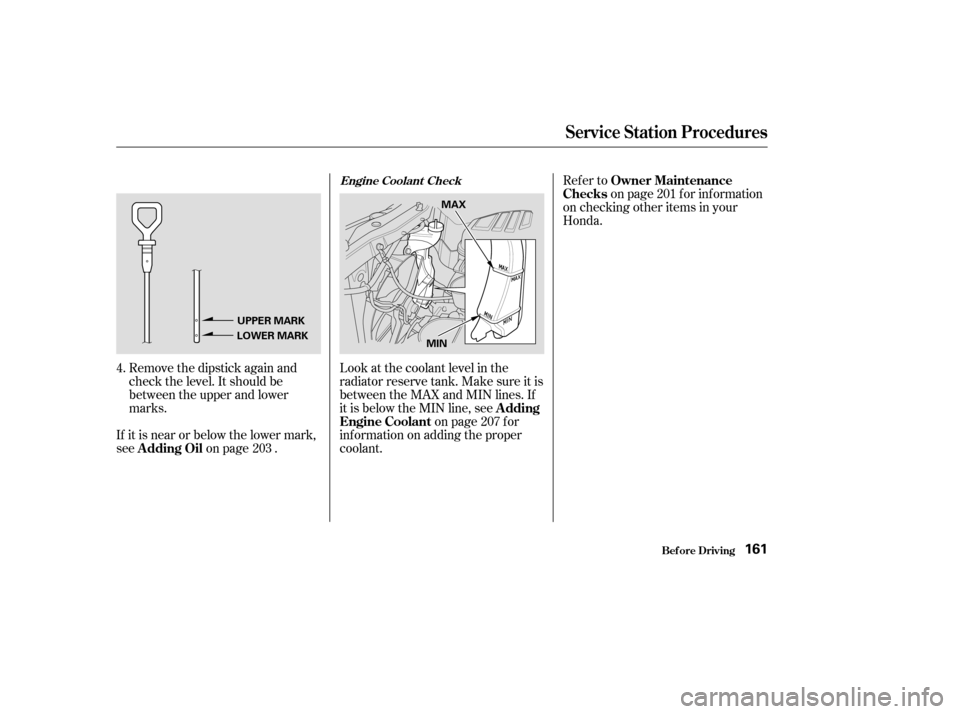
Remove the dipstick again and
check the level. It should be
between the upper and lower
marks.Look at the coolant level in the
radiator reserve tank. Make sure it is
between the MAX and MIN lines. If
it is below the MIN line, see
on page f or
inf ormation on adding the proper
coolant.
If it is near or below the lower mark,
see on page . Refer to
on page f or inf ormation
on checking other items in your
Honda.
4. 203 207201
A dding
Engine Coolant
A dding Oil Owner Maintenance
Checks
Engine Coolant Check
Service Station Procedures
Bef ore Driving161
UPPER MARK
LOWER MARK MAX
MIN
�����—�����—�����y�
�������������y���
�(���%�������y���
�����y
Page 157 of 302

A cold engine uses more f uel than a
warm engine. It is not necessary to
‘‘warm-up’’ a cold engine by letting it
idle f or a long time. You can drive
away in about a minute, no matter
how cold it is outside. The engine
will warm up f aster, and you get
better f uel economy. To cut down on
the number of ‘‘cold starts,’’ try to
combine several short trips into one.
You can improve f uel economy by
driving moderately. Rapid acceler-
ation, abrupt cornering, and hard
braking use more f uel.
Always drive in the highest gear that
allows the engine to run and acceler-
ate smoothly.
The air conditioning puts an extra
load on the engine which makes it
usemorefuel.Turnoff theA/Cto
cut down on air conditioning use.
Use the f low-through ventilation
when the outside air temperature is
moderate.
The condition of your car and your
driving habits are the two most
important things that affect the fuel
mileage you get.
Always maintain your car according
to the maintenance schedule. This
will keep it in top operating condition.
Depending on traf f ic conditions, try
to maintain a constant speed. Every
time you slow down and speed up,
your car uses extra f uel. Use the
cruise control, when appropriate, to
increase f uel economy.
An important part of that mainte-
nance is the
(see page ). For
example, an underinf lated tire
causes more ‘‘rolling resistance,’’
which uses f uel. It also wears out
f aster, so check the tire pressure at
least monthly.
In winter, the build-up of snow on
your car’s underside adds weight and
rolling resistance. Frequent cleaning
helps your f uel mileage and reduces
thechanceof corrosion. 201
Vehicle Condition
Driving Habits
Owner Maintenance
Checks
Bef ore Driving
Fuel Economy
162
�����—�����—�����y�
�������������y���
�(���%�������y���
�����y
Page 164 of 302

Make sure all windows, mirrors,
and outside lights are clean and
unobstructed. Remove f rost, snow,
or ice.
Check that the hood and trunk are
f ully closed.Make sure the doors are securely
closed and locked.
Check that any items you may be
carrying with you inside are stored
properly or f astened down
securely.
Visually check the tires. If a tire
looks low, use a gauge to check its
pressure. Check the adjustment of the seat
(see page ).
Check the adjustment of the
inside and outside mirrors (see
page ).
Check the adjustment of the
steering wheel (see page ).Turn the ignition switch ON (II).
Check the indicator lights in the
instrument panel.
Start the engine (see page ).
Check the gauges and indicator
lights in the instrument panel (see
page ).
Fasten your seat belt. Check that
your passengers have f astened
their seat belts (see page ).
Youshoulddothefollowingchecks
and adjustments every day bef ore
you drive your car. 1. 2. 3. 4.
9.
10.
8.
7.
6.
5.
11.
12. 16
90
99 79 171
61
Preparing to Drive
Driving170
�����—�����—�����y�
�������������y���
�(���%�������y���
�����y
Page 168 of 302
Your Honda’s transmission has f our
f orward speeds, and is electronically
controlled f or smoother shif ting. It
also has a ‘‘lock-up’’ torque converter
forbetterfueleconomy.Youmay
f eel what seems like another shif t
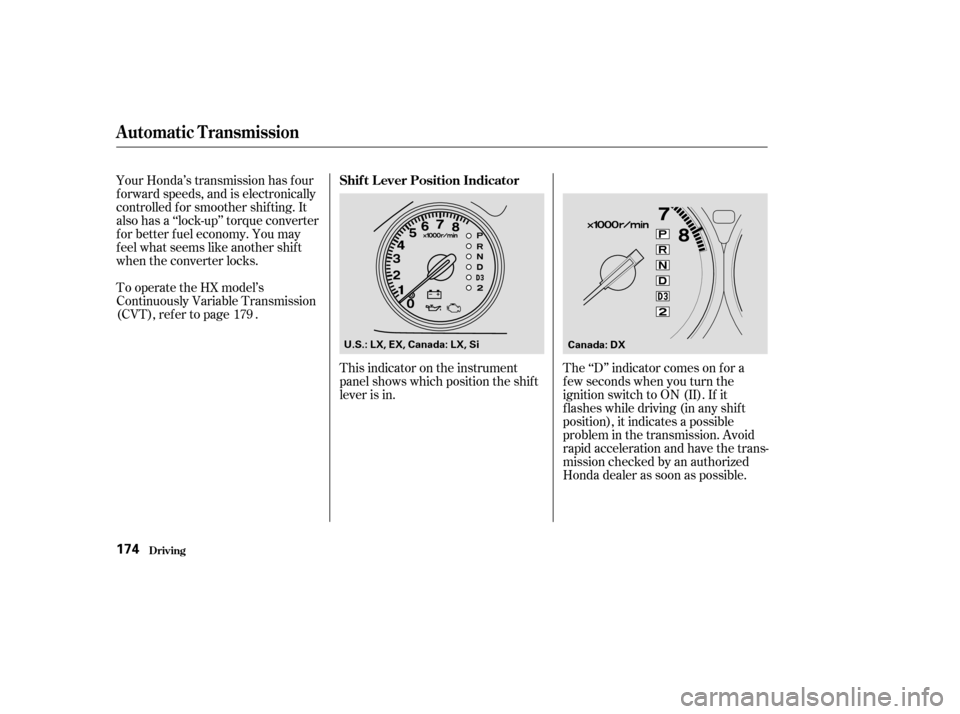
when the converter locks.This indicator on the instrument
panel shows which position the shif t
lever is in.The ‘‘D’’ indicator comes on f or a
f ew seconds when you turn the
ignition switch to ON (II). If it
f lashes while driving (in any shif t
position), it indicates a possible
problem in the transmission. Avoid
rapid acceleration and have the trans-
missioncheckedbyanauthorized
Honda dealer as soon as possible.
To operate the HX model’s
Continuously Variable Transmission
(CVT), refer to page .
179
Automatic Transmission
Driving
Shif t L ever Position Indicator
174
U.S.: LX, EX, Canada: LX, Si
Canada: DX
�����—�����—�����y�
�������������y���
�(���%�������y���
�����y
Page 172 of 302
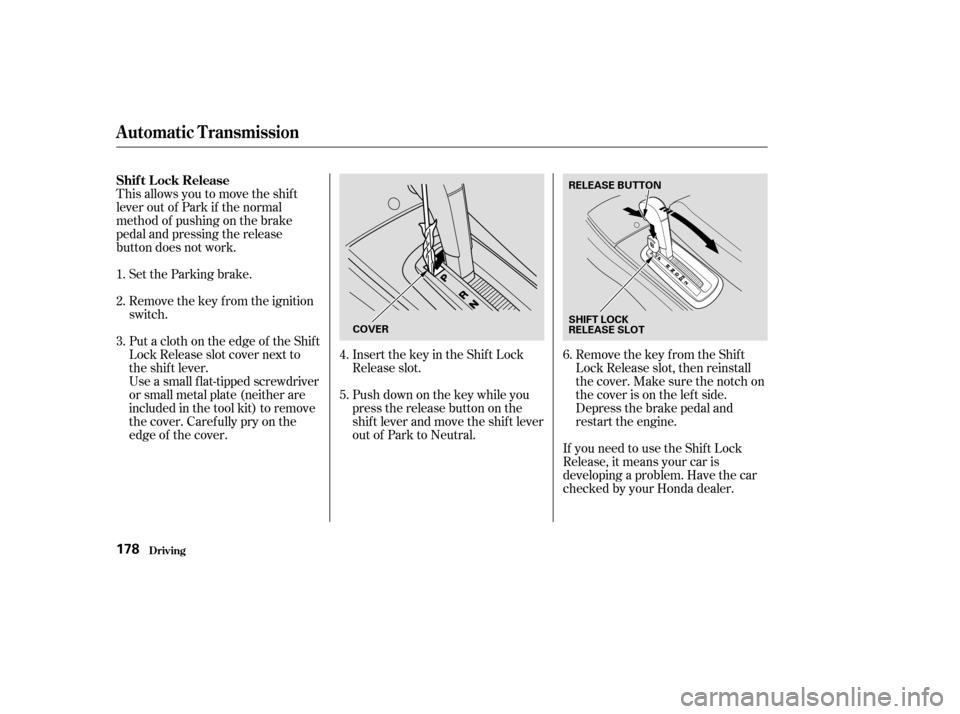
This allows you to move the shif t
lever out of Park if the normal
method of pushing on the brake
pedal and pressing the release
button does not work.Set the Parking brake.
Remove the key from the ignition
switch.
Push down on the key while you
pressthereleasebuttononthe
shif t lever and move the shif t lever
out of Park to Neutral.
Insert the key in the Shift Lock
Release slot.
Put a cloth on the edge of the Shif t
Lock Release slot cover next to
the shift lever.
Use a small flat-tipped screwdriver
or small metal plate (neither are
included in the tool kit) to remove
the cover. Caref ully pry on the
edge of the cover. Remove the key from the Shift
Lock Release slot, then reinstall
thecover.Makesurethenotchon
the cover is on the lef t side.
Depress the brake pedal and
restart the engine.
If you need to use the Shif t Lock
Release, it means your car is
developing a problem. Have the car
checked by your Honda dealer.
1. 2. 3.
4.5.6.
Automatic Transmission
Driving
Shif t L ock Release
178
COVER
SHIFT LOCK
RELEASE SLOT
RELEASE BUTTON
�����—�����—�����y�
���������
���y���
�(���%�������y���
���
�y
Page 173 of 302
Honda’s Continuously Variable
automatic transmission’s unique
design provides a smooth, constant
f low of power. It is electronically
controlled f or more precise operation
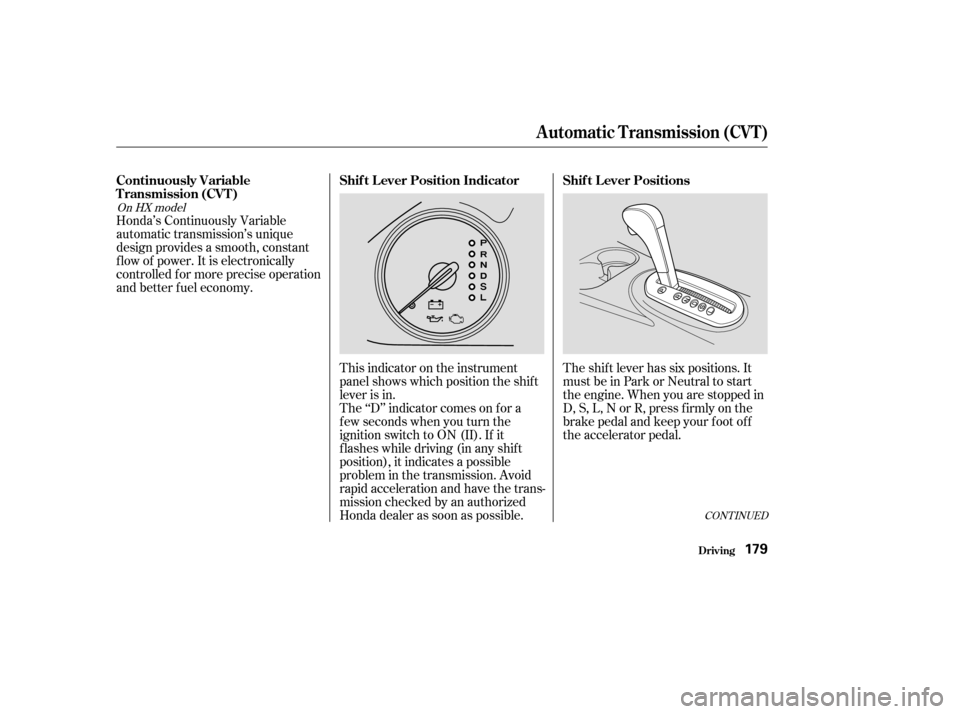
and better f uel economy.This indicator on the instrument
panel shows which position the shif t
lever is in.
The ‘‘D’’ indicator comes on f or a
f ew seconds when you turn the
ignition switch to ON (II). If it
f lashes while driving (in any shif t
position), it indicates a possible
problem in the transmission. Avoid
rapid acceleration and have the trans-
mission checked by an authorized
Honda dealer as soon as possible.The shif t lever has six positions. It
must be in Park or Neutral to start
the engine. When you are stopped in
D, S, L, N or R, press f irmly on the
brake pedal and keep your f oot of f
the accelerator pedal.
CONT INUED
On HX model
Continuously Variable
T ransmission (CVT )
Shif t L ever Position Indicator Shif t L ever Positions
Automatic Transmission (CVT)
Driving179
�����—�����—�
���y�
���������
���y���
�(���%�������y���
�����y