Page 229 of 380

�µ
CONT INUED
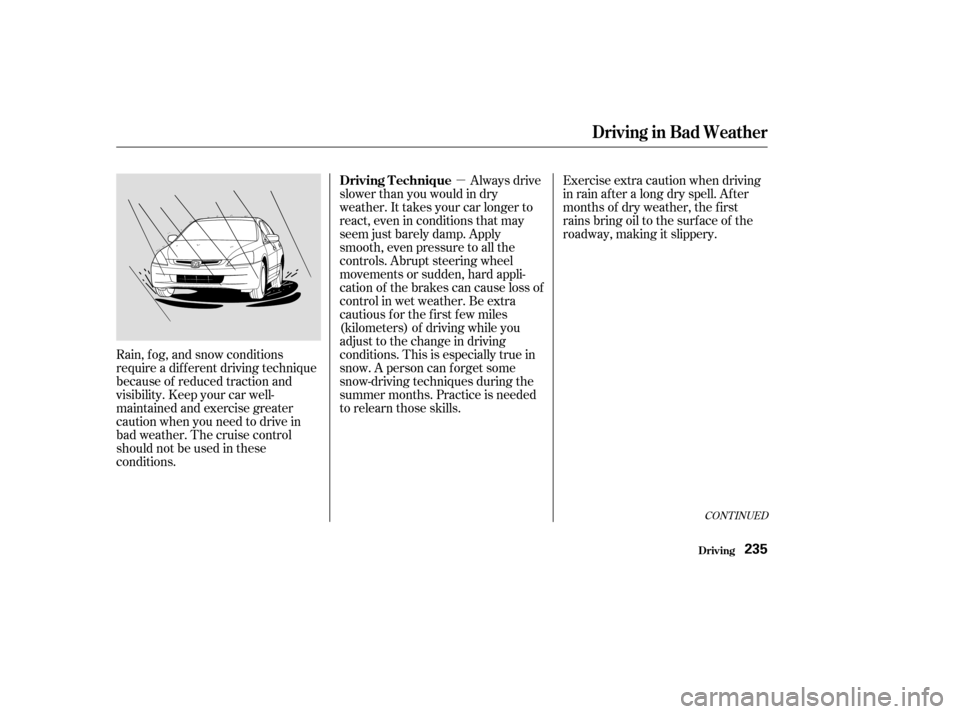
Rain, f og, and snow conditions
require a dif f erent driving technique
because of reduced traction and
visibility. Keep your car well-
maintained and exercise greater
caution when you need to drive in
bad weather. The cruise control
should not be used in these
conditions.Always drive
slower than you would in dry
weather. It takes your car longer to
react, even in conditions that may
seem just barely damp. Apply
smooth, even pressure to all the
controls. Abrupt steering wheel
movements or sudden, hard appli-
cation of the brakes can cause loss of
control in wet weather. Be extra
cautious f or the f irst f ew miles
(kilometers) of driving while you
adjust to the change in driving
conditions. This is especially true in
snow. A person can f orget some
snow-driving techniques during the
summer months. Practice is needed
to relearn those skills. Exercise extra caution when driving
in rain af ter a long dry spell. Af ter
months of dry weather, the f irst
rains bring oil to the surf ace of the
roadway, making it slippery.
Driving in Bad Weather
Driving
Driving T echnique
235
�����—�����—�����y���������������y���
�(�����������y���������y
Page 237 of 380
Always drive slowly and have
someone guide you when backing up.
Grip the of the steering
wheel; then turn the wheel to the lef t
to get the trailer to move to the lef t,
andturnthewheelrighttomovethe
trailer to the right.Follow all normal precautions when
parking, including f irmly setting the
parking brake and putting the
transmission in Park (automatic) or
in 1st or Reverse (manual). Also,
place wheel chocks at each of the
trailer’s tires.
Crosswinds and air turbulence
caused by passing trucks can disrupt
your steering and cause trailer
swaying. When being passed by a
large car, keep a constant speed and
steer straight ahead. Do not try to
make quick steering or braking
corrections.
bottom
Handling Crosswinds and Buf f et ing
Backing Up Parking
Towing a Trailer
Driving243
�����—�����—�����y�����������
���y���
�(�����������y���������y
Page 279 of 380

The air cleaner element should be
cleaned or replaced according to the
time and distance recommendations
in the maintenance schedule.
Clean the air cleaner element by
blowing compressed air through it in
the opposite direction to normal air
f low. If you do not have access to
compressed air (such as a service
station), ask your Honda dealer to do
this service.
Follow the replacement procedure
for removal and reinstallation.
Always use Honda Power Steering
Fluid. If it is not available, you may
use another power steering f luid as
an emergency replacement.
However, continued use can cause
increased wear and poor steering in
cold weather. Have the power
steering system f lushed and ref illed
with Honda PSF as soon as possible.
A low power steering f luid level can
indicate a leak in the system. Check
the f luid level f requently and have
the system inspected as soon as
possible.
A ir Cleaner Element
Cleaning (Severe Condit ions)
Power Steering, A ir Cleaner Element
Maint enance286
T urning the steering wheel to f ull lef t
or right lock and holding it there can
damage the power steering pump.
�����—�����—�����y���������������y���
�(�����������y���������y
Page 299 of 380

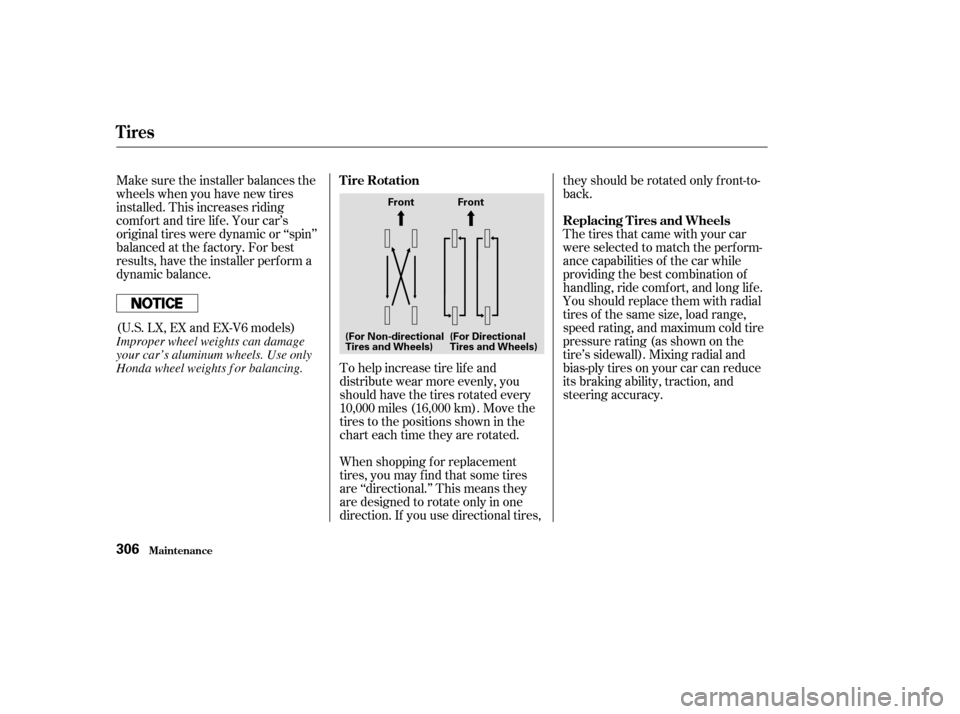
When shopping f or replacement
tires, you may find that some tires
are ‘‘directional.’’ This means they
are designed to rotate only in one
direction. If you use directional tires,they should be rotated only front-to-
back.
Make sure the installer balances the
wheels when you have new tires
installed. This increases riding
comf ort and tire lif e. Your car’s
original tires were dynamic or ‘‘spin’’
balanced at the f actory. For best
results, have the installer perf orm a
dynamic balance. The tires that came with your car
were selected to match the perform-
ance capabilities of the car while
providing the best combination of
handling, ride comf ort, and long lif e.
Youshouldreplacethemwithradial
tires of the same size, load range,
speed rating, and maximum cold tire
pressure rating (as shown on the
tire’s sidewall). Mixing radial and
bias-ply tires on your car can reduce
its braking ability, traction, and
steering accuracy.
To help increase tire lif e and
distribute wear more evenly, you
should have the tires rotated every
10,000 miles (16,000 km). Move the
tires to the positions shown in the
chart each time they are rotated.
(U.S. LX, EX and EX-V6 models) Tire Rotation
Replacing T ires and Wheels
Maint enance
Tires
306
(For Non-directional
Tires and Wheels)Front Front
(For Directional
Tires and Wheels)Improper wheel weights can damage
your car’s aluminum wheels. Use only
Honda wheel weights f or balancing.
�����—�����—�����y���������������y���
�(�����������y���������y
Page 307 of 380

Push the electrical connector back
onto the bulb. Make sure it is on
all the way.
Turn on the headlights to test the
new bulb.
Reinstall the air intake cover.
Reinstall the two fasteners and
secure them by pushing on the
heads until they lock.Use a f lat-tipped screwdriver to
remove the two holding clips f rom
the inner f ender.Pull the inner f ender cover away
f rom the f ender and bumper.
(Passenger’s side) Remove the electrical connector
fromthebulbbysqueezingthe
connector to unlock the tab, then
slide the connector of f the bulb.
Remove the bulb by turning it
approximately one-quarter turn
counterclockwise.
If you are changing the bulb on
the passenger’s side, start the
engine, turn the steering wheel all
the way to the left, and turn off the
engine. If you are changing the
bulb on the driver’s side, turn the
steering wheel to the right.
6. 7.
5.
3.4. 5.
1. 2.
L ow Beam Headlight
Lights
Maint enance314
HOLDING CLIPS
TAB BULB
6-cylinder models
�����—�����—�����y�������������
�y���
�(�����������y�����
���y
Page 308 of 380

Turn on the headlights to test the
new bulb.
Push the electrical connector back
onto the bulb. Make sure it is on
all the way.
Insert the new bulb into the hole
and turn it one-quarter turn clock-
wise to lock it in place.
Put the inner f ender cover in place.
Install the two holding clips. Lock
each one in place by pushing on
the center.
If you are changing the bulb on
the passenger’s side, start the
engine, turn the steering wheel all
the way to the left, and turn off the
engine. If you are changing the
bulb on the driver’s side, turn the
steering wheel to the right.
Use a f lat-tipped screwdriver to
remove the holding clips f rom the
inner f ender.Pull the inner f ender cover away
f rom the f ender and bumper.
Remove the socket from the
headlight assembly by turning it
one-quarter turn counterclockwise.
1.
3.
2. 4.
9.
8.
7.
6.
CONT INUED
Replacing a Front T urn Signal/
Parking L ight Bulbs
Lights
Maint enance315
HOLDING CLIPS
�����—�����—�����y���������������y���
�(�����������y�����
���y
Page 350 of 380
If you decide to tow your car with all
f our wheels on the ground, make
sure you use a properly-designed and
attached tow bar. Prepare the car for
towing as described above, and leave
the ignition switch in Accessory (I)
so the steering wheel does not lock.
Make sure the radio and any items
plugged into the accessory power
socket are turned of f so they do not
rundownthebattery.
Emergency T owing
T aking Care of t he Unexpect ed359
The steering system can be damaged if
the steering wheel is locked. Leave the
ignition switch in Accessory (I), and
make sure the steering wheel turns
f reely bef ore you begin towing.Trying to lif t or tow your car by the
bumpers will cause serious damage.
The bumpers are not designed to
support the car’s weight.
�����—�����—�����y���������������y���
�(�����������y���������y
Page 378 of 380

�Î
CONT INUED
...................
System Components . 42
...............
Use During Pregnancy . 19
........................
Seats, Adjusting the . 87
............................
Security System . 194
.........................
Select/Reset Knob . 65
...............................
Serial Number . 362
...........................
Service Intervals . 250
...........................
Service Manual . 382
.........
Service Station Procedures . 204
..........
Setting the Clock . 139, 156, 174
.....
Shif t Lever Position Indicator . 223
........................
Shif t Lock Release . 226
....................................
Side Airbags . 47
...
How Your Side Airbags Work . 47
How The SIDE Airbag Cutof f
...........
Indicator Light Works . 49
......................
Side Curtain Airbags . 48
How Your Side Curtain ..........................
Airbags Work . 48
...............................
Signaling Turns . 68
.....................................
Snow Tires . 308
...................
Solvent-type Cleaners . 326
................
Sound System . 134, 150, 169
Spare Tire
......................................
Inf lating . 334
............................
Specif ications . 366 ........
Spark Plugs, Replacing . 289, 292
....................
Specif ications Charts . 364
................................
Speed Control . 195
........................
Speed Limiter . 222, 226
...................................
Speedometer . 63
..........
SRS, Additional Inf ormation . 45
...
Additional Safety Precautions . 51
How Your Airbags
............................
Work . 45, 47, 48
How Your SRS Indicator .......................................
Works . 48
........................
SRS Components . 45
..................................
SRS Service . 51
.............................
SRS Indicator . 48, 59
....
START (Ignition Key Position) . 78
.......................
Starting the Engine . 219
In Cold Weather at High ..................................
Altitude . 220
................
With a Dead Battery . 342
........
Steam Coming f rom Engine . 345
Steering Wheel
..................................
Adjustment . 73
.............
Anti-theft Column Lock . 77
Stereo Sound .......................
System . 134, 150, 169
...........................
Storing Your Car . 323 ........................................
Sun Visor . 106
........................
Sunglasses Holder . 107
Supplemental Restraint System
......................................
Servicing . 51
.........................
SRS Indicator . 48, 59
...................
System Components . 45
..................................
Synthetic Oil . 269
.....................................
Tachometer . 63
......
Taillights, Changing Bulbs in . 317
.
Taking Care of the Unexpected . 333
Technical Descriptions
......
DOT Tire Quality Grading . 367
.....
Emissions Control Systems . 371
.....................
Oxygenated Fuels . 369
Three Way Catalytic
...............................
Converter . 373
.......................
Temperature Gauge . 64
..............
Tether Anchorage Points . 39
..
Three Way Catalytic Converter . 373
..........
Time, Setting the . 139, 156, 174
....................................
Timing Belt . 302
Index
T
VII
�����—�����—�����y���������������y���
�(�����������y���������y