Page 64 of 380
�Î
�Î
Thetwoleversonthesteering
column contain controls f or driving
f eatures you use most of ten. The lef t
lever controls the turn signals,
headlights, and high beams. The
right lever controls the windshield
washers and wipers.To use the horn, press the pad
around the ‘‘H’’ logo.
The controls under the lef t air vent
are f or the moonroof and the
Traction Control System.
The steering wheel adjustment lever
on the underside of the steering
column allows you to tilt and
telescope the steering wheel.
Inst rument s and Cont rols
Controls Near the Steering Wheel
67
INSTRUMENT PANEL
BRIGHTNESS
WINDSHIELD
WIPERS/WASHERS
HAZARD
WARNING
LIGHTS
REAR WINDOW
DEFOGGER
CRUISE
CONTROLS
TRACTION
CONTROL
SYSTEM
MOONROOF
SWITCH HEADLIGHTS/
TURN SIGNALS
(P. 69)
(P. 72)
(P. 73)
(P. 68/70)
(P. 100) (P. 232) (P. 70, 71/72)
(P. 195)
TILT/TELESCOPIC
ADJUSTMENT (P. 72, 112,
125, 131)
HORN
�����—�����—�����y�
�������������y���
�(�����������y���������y
Page 65 of 380

or LOCK (0), you will hear a
reminder chime when you open the
driver’s door.
To change f rom low beams to high
beams, push the")
If you leave the lights on with the
ignition switch in ACCESSORY (I)
or LOCK (0), you will hear a
reminder chime when you open the
driver’s door.
To change f rom low beams to high
beams, push the turn signal lever
f orward until you hear a click. The
blue high beam indicator will light
(see page ). To return to low
beams, pull the turn signal lever
back.To f lash the high beams, pull the
turn signal lever back lightly, then
release it. The high beams will come
on and go of f .
The high beams will stay on f or as
long as you hold the lever back, no
matter what position the headlight
switch is in.
The rotating switch on the lef t lever
controls the lights. Turning this
switch to the ‘‘ ’’ position turns
on the parking lights, taillights,
instrument panel lights, and rear
license plate lights. Turning the
switch to the ‘‘ ’’ position turns
on the headlights.
62
Controls Near the Steering Wheel
Inst rument s and Cont rols
Headlights
68
�����—�����—�����y���
�����������y���
�(�����������y�������
�y
Page 66 of 380

The Select/Reset knob on the
instrument panel controls the
brightness of the instrument panel
lights. Turn the knob to adjust the
brightness.
The Automatic Lighting Of f f eature
turns of f the headlights, parking
lights, taillights and license plate
light within 15 seconds of removing
the key from the ignition switch and
closing the driver’s door.
This feature activates if you leave
the headlight switch in the ‘‘ ’’
or ‘‘ ’’ position, remove the key,
open, then close the driver’s door.
If you remove the key f rom the
ignition switch with the headlight
switch on, but do not open the door
and get out, the lights will turn of f
af ter ten minutes.
The lights will turn on again when
you unlock or open the driver’s door.
If you unlock the door, but do not
open it within 15 seconds, the lights
will go off. With the driver’s door open, you will hear a lights-on
reminder chime.
With the headlight switch off, the
high beam headlights and the high
beam indicator come on with
reduced brightness when you turn
the ignition switch to ON (II) and
release the parking brake. They
remain on until you turn the ignition
of f , even if you set the parking brake.
The headlights revert to normal
operation when you turn them on
with the switch.
On all U.S. and Canadian models except
DX
Controls Near the Steering Wheel
Inst rument s and Cont rols
Automatic Lighting Of f Feature Instrument Panel Brightness
Daytime Running L ights
(Canadian Models)
69
�����—�����—�����y���
�����������y���
�(�����������y���������y
Page 69 of 380

To clean the windshield, pull back on
the wiper control lever. The washers
spray until you release the lever. The
wipers run at low speed while you’re
pulling the lever, then complete one
more sweep of the windshield af ter
you release it.Push the button between the center
vents to turn on the hazard warning
lights (f our-way f lashers). This
causes all f our outside turn signals
and both turn indicators in the
instrument panel to f lash. Use the
hazard warning lights if you need to
park in a dangerous area near heavy
traf f ic, or if your car is disabled.The rear window def ogger will clear
fog, frost, and thin ice from the
window. Push the def ogger button to
turn it on and of f . The light above
the button lights to show the
def ogger is on. It also shuts of f when
you turn off the ignition. You have to
turn it on again when you restart the
car.
Windshield Washers Hazard Warning Rear Window Def ogger
Controls Near the Steering Wheel
Inst rument s and Cont rols72
Manual A/C type shown
�����—�����—�����y�������������
�y���
�(�����������y���������y
Page 71 of 380
Push the lever up to lock the
steering wheel in that position.The master key fits all the locks on
your car:
Ignition
Doors
Trunk
Glovebox
Trunk release handle
Trunk pass-through cover
Rear seat trunk access
Your car comes with two master
keys and a valet key.
Move the steering wheel up or
down, and in or out to the desired
position, making sure the wheel
points toward your chest, not
toward your f ace. Make sure you
can see the instrument panel
gauges and the indicator lights. Make sure you have securely
locked the steering wheel in place
by trying to move it up, down, in,
and out.
3. 4. 5.
Controls Near the Steering Wheel, K eys and L ocks
Inst rument s and Cont rols
Keys
74
�����—�����—�����y�����������
���y���
�(�����������y���������y
Page 75 of 380
�µ
�µ
�µ In this position,
you can operate the audio system
and the accessory power socket.
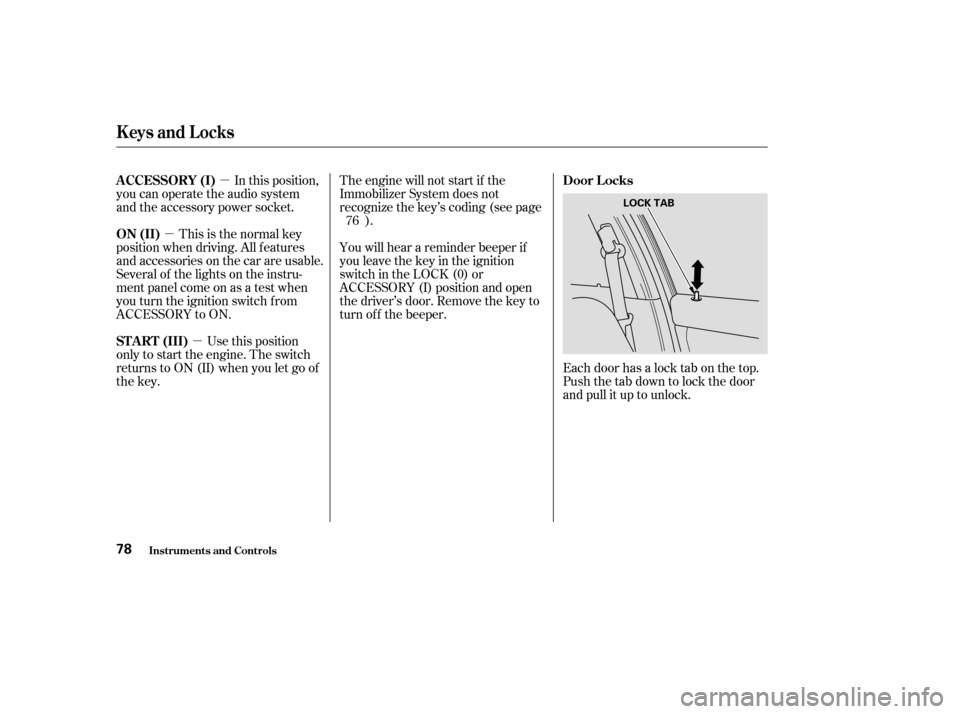
Each door has a lock tab on the top.
Push the tab down to lock the door
and pull it up to unlock.
This is the normal key
position when driving. All f eatures
and accessories on the car are usable.
Several of the lights on the instru-
ment panel come on as a test when
you turn the ignition switch f rom
ACCESSORY to ON.
Use this position
only to start the engine. The switch
returns to ON (II) when you let go of
the key. You will hear a reminder beeper if
you leave the key in the ignition
switch in the LOCK (0) or
ACCESSORY (I) position and open
thedriver’sdoor.Removethekeyto
turn of f the beeper.
The engine will not start if the
Immobilizer System does not
recognize the key’s coding (see page
).
76
A CCESSORY (I)
Door L ocks
ON (II)
ST A RT (III)
Keys and Locks
Inst rument s and Cont rols78
LOCK TAB
�����—�����—�����y��������
����
�y���
�(�����������y�������
�y
Page 77 of 380

If you f orget and leave the key in the
ignition switch, Lockout Prevention
will not allow you to lock the driver’s
door. With the driver’s door open
andthekeyintheignition,both
master door lock switches are
disabled. However, if the driver’s
door is not open, the master door
lock switches are not disabled.
Pushing the switch down on the
open passenger’s door will lock all
doors. If you try to lock an open
driver’s door by pushing in the lock
tab, the tabs on all doors pop out.
Pushinginthelocktabonthe
passenger’s door only locks that door.When you push the LOCK button a
second time within 5 seconds after
you have locked the doors, you will
hear a beep to verify that the doors
are locked and the security system
has set.
When you push the UNLOCK button
once, only the driver’s door unlocks.
The remaining doors unlock when
you push the button a second time.
The parking lights, side marker
lights, and taillights f lash twice.
You can lock and unlock your car
with the remote transmitter. When
you push the LOCK button, all doors
lock. The parking lights, side marker
lights, and taillights f lash once. You can open and close all power
windows from outside the car with
the key. With the remote transmitter,
you can open the windows. Ref er to
Power Windows on page .
99
On all models except U.S. DX
L ockout Prevent ion
Remote Transmitter
Keys and Locks
Inst rument s and Cont rols80
PANIC
BUTTON
TRUNK
RELEASE
BUTTON UNLOCK/
WINDOW-
OPEN
BUTTON
LOCK
BUTTON
�����—�����—�����y��������
��
���y���
�(�����������y���������y
Page 79 of 380
When the remote transmitter’s
battery begins to get weak, it may
take several pushes on the button to
lock or unlock the doors, and the
LED will not light. Replace the
battery as soon as possible.
Battery type: CR1616To replace the battery:
Separate the transmitter by prying
its middle seam with your
f ingernail.
Remove the screw at the base of
the transmitter with a small
Phillips-head screwdriver.
To cancel Panic mode bef ore 30
seconds, press any button on the
remote transmitter. You can also
turn the ignition switch to ON (II).
Panic mode allows you to remotely
activate your car’s horn and exterior
lights to attract attention. The horn
sounds and the exterior lights f lash
f or about 30 seconds. To activate
panic mode, press and hold the
PANIC button f or about two seconds.
1. 2.On all models except U.S. and CanadaDX Replacing the Battery
Panic Mode
Keys and Locks
Inst rument s and Cont rols82
SCREW
�����—�����—�����y��������
������y���
�(�����������y���������y