Page 274 of 429

This section also includes
Maintenance Schedules f or normal
driving and severe driving conditions,
a Maintenance Record, and instruc-
tions f or simple maintenance tasks
you may want to take care of
yourself .
If you have the skills and tools to per-
f orm more complex maintenance
tasks on your Honda, you may want
to purchase the Service Manual. See
page f or inf ormation on how to
obtain a copy, or see your Honda
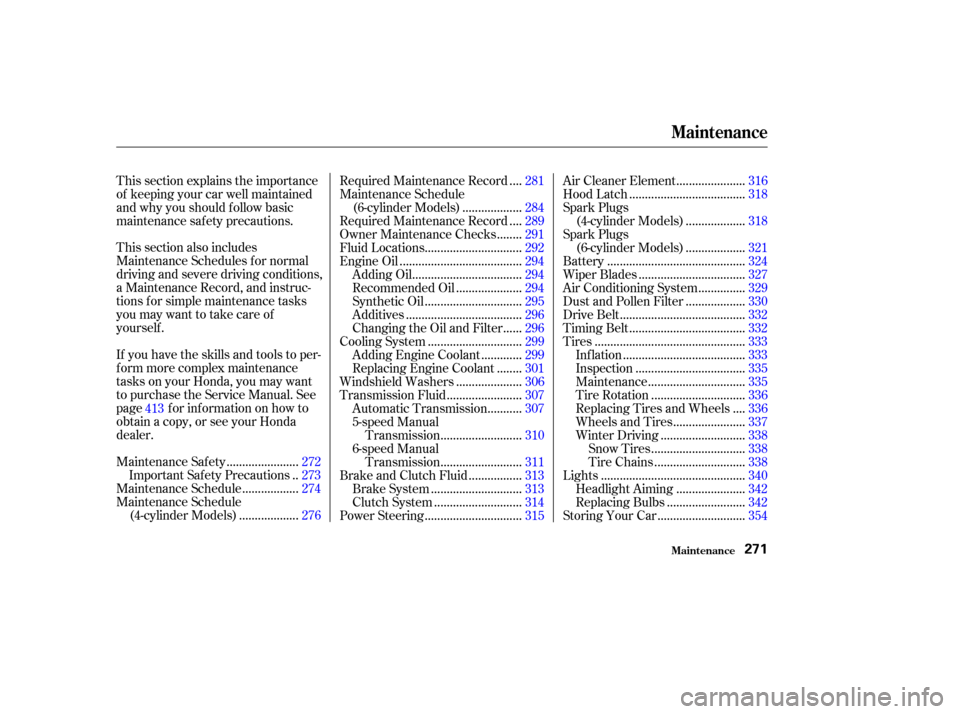
dealer. This section explains the importance
of keeping your car well maintained
andwhyyoushouldfollowbasic
maintenance saf ety precautions.......................
Maintenance Saf ety .272
.
Important Safety Precautions . 273
.................
Maintenance Schedule . 274
Maintenance Schedule ..................
(4-cylinder Models) . 276 ...
Required Maintenance Record . 281
Maintenance Schedule ..................
(6-cylinder Models) . 284
...
Required Maintenance Record . 289
.......
Owner Maintenance Checks . 291
..............................
Fluid Locations .292
......................................
Engine Oil .294
..................................
Adding Oil .294
....................
Recommended Oil .294
..............................
Synthetic Oil .295
....................................
Additives .296
.....
Changing the Oil and Filter . 296
.............................
Cooling System .299
............
Adding Engine Coolant . 299
.......
Replacing Engine Coolant . 301
....................
Windshield Washers .306
.......................
Transmission Fluid .307
..........
Automatic Transmission . 307
5-speed Manual .........................
Transmission .310
6-speed Manual .........................
Transmission .311
................
Brake and Clutch Fluid . 313
............................
Brake System .313
...........................
Clutch System .314
..............................
Power Steering .315 .....................
Air Cleaner Element .316
....................................
Hood Latch .318
Spark Plugs ..................
(4-cylinder Models) . 318
Spark Plugs ..................
(6-cylinder Models) . 321
...........................................
Battery .324
.................................
Wiper Blades .327
..............
Air Conditioning System . 329
..................
Dust and Pollen Filter . 330
.......................................
Drive Belt .332
....................................
Timing Belt .332
...............................................
Tires .333
......................................
Inf lation .333
..................................
Inspection .335
..............................
Maintenance .335
.............................
Tire Rotation .336
...
Replacing Tires and Wheels . 336
......................
Wheels and Tires .337
..........................
Winter Driving .338
.............................
Snow Tires .338
............................
Tire Chains .338
.............................................
Lights .340
.....................
Headlight Aiming .342
........................
Replacing Bulbs .342
...........................
Storing Your Car .354
413
Maintenance
Maint enance271
Page 295 of 429
4-cylinder Models
Fluid Locations
Maint enance292
BRAKE FLUID
(Gray cap)
ENGINE OIL DIPSTICK
(Orange handle)
WASHER FLUID
(Blue cap)
POWER STEERING
FLUID (Red cap)
RADIATOR CAPAUTOMATIC
TRANSMISSION
FLUID DIPSTICK
(Yellow loop) ENGINE OIL
FILL CAP CLUTCH FLUID
(5-speed Manual
Transmission only)
(Light gray cap)
ENGINE
COOLANT
RESERVOIR
Page 296 of 429
6-cylinder Models
Fluid Locations
Maint enance293
ENGINE OIL FILL CAPRADIATOR CAP
ENGINE OIL DIPSTICK
(Orange loop)
WASHER FLUID
(Blue cap)
POWER STEERING
FLUID (Red cap) BRAKE FLUID
(Gray cap)
AUTOMATIC
TRANSMISSION
FLUID DIPSTICK
(Yellow loop)
ENGINE
COOLANT
RESERVOIR CLUTCH FLUID
(Gray cap)
(6-speed Manual
Transmission only)
Page 310 of 429

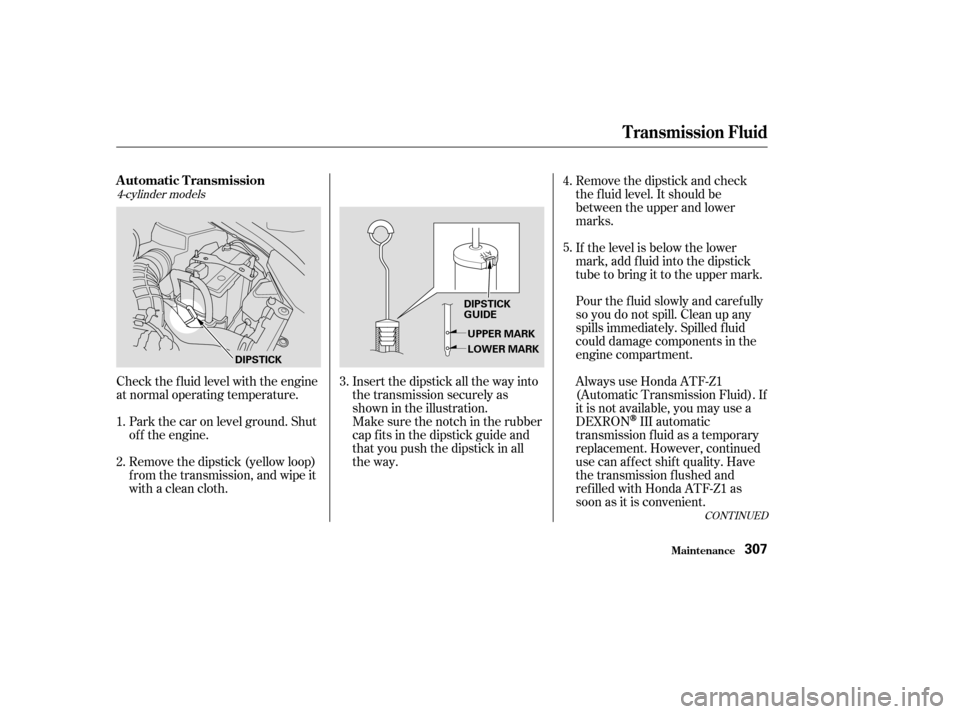
Remove the dipstick (yellow loop)
f rom the transmission, and wipe it
with a clean cloth.
Check the f luid level with the engine
at normal operating temperature.
Insert the dipstick all the way into
the transmission securely as
shown in the illustration.
Park the car on level ground. Shut
of f the engine. Make sure the notch in the rubber
cap f its in the dipstick guide and
that you push the dipstick in all
the way.Remove the dipstick and check
the f luid level. It should be
between the upper and lower
marks.
If the level is below the lower
mark, add f luid into the dipstick
tube to bring it to the upper mark.
Pour the f luid slowly and caref ully
so you do not spill. Clean up any
spills immediately. Spilled f luid
could damage components in the
engine compartment.
Always use Honda ATF-Z1
(Automatic Transmission Fluid). If
it is not available, you may use a
DEXRON
III automatic
transmission f luid as a temporary
replacement. However, continued
use can affect shift quality. Have
the transmission f lushed and
ref illed with Honda ATF-Z1 as
soon as it is convenient.
1.
2. 3.5. 4.
4-cylinder models
CONT INUED
Automatic Transmission
T ransmission Fluid
Maint enance307
DIPSTICK
UPPER MARK
LOWER MARK
DIPSTICK
GUIDE
Page 311 of 429

To thoroughly f lush the transmission,
the technician should drain and ref ill
it with Honda ATF-Z1, then drive the
vehicle a short distance. Do this
three times. Then drain and ref ill the
transmission a f inal time.Insert the dipstick all the way back
into the transmission securely as
shown in the illustration.
The transmission should be drained
and ref illed with new f luid according
to the time and distance recommen-
dations in the maintenance schedule.
If you are not sure how to add f luid,
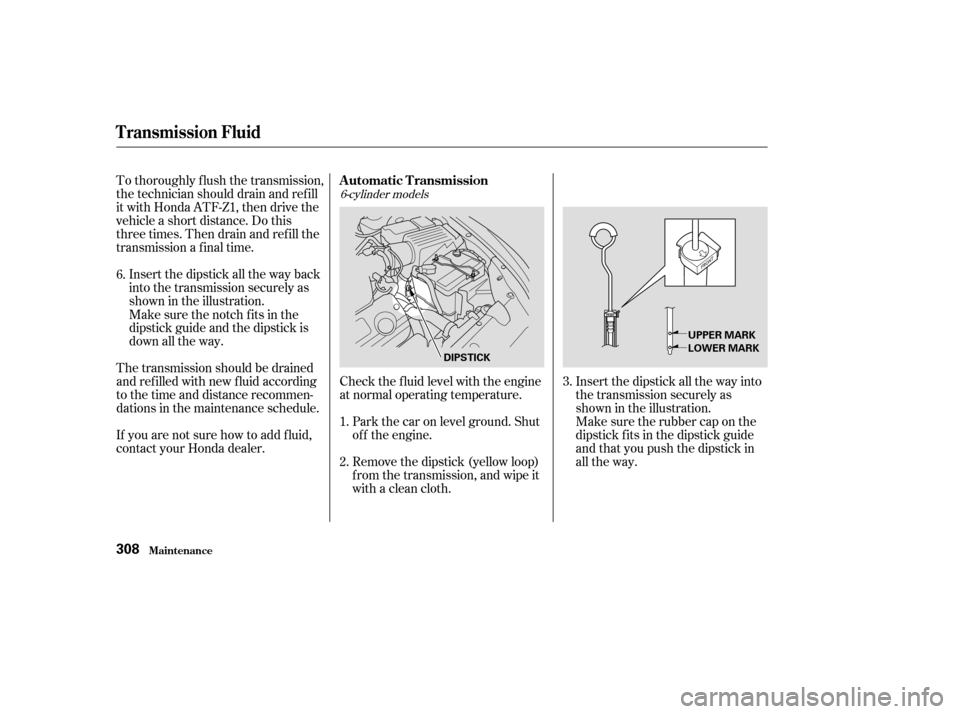
contact your Honda dealer. Check the f luid level with the engine
at normal operating temperature.
Park the car on level ground. Shut
of f the engine.
Remove the dipstick (yellow loop)
f rom the transmission, and wipe it
with a clean cloth. Insert the dipstick all the way into
the transmission securely as
shown in the illustration.
Make sure the notch fits in the
dipstick guide and the dipstick is
down all the way.
Make sure the rubber cap on the
dipstick fits in the dipstick guide
and that you push the dipstick in
all the way.
1.
2.
6.
3.
6-cylinder models
Automatic Transmission
T ransmission Fluid
Maint enance308
DIPSTICKUPPER MARK
LOWER MARK
Page 312 of 429

To thoroughly f lush the transmission,
the technician should drain and ref ill
it with Honda ATF-Z1, then drive the
vehicle a short distance. Do this
three times. Then drain and ref ill the
transmission a f inal time.Insert the dipstick all the way back
into the transmission securely as
shown in the illustration.
Make sure the rubber cap f its in
the dipstick guide and the dipstick
is down all the way.
The transmission should be drained
and ref illed with new f luid according
to the time and distance recommen-
dations in the maintenance schedule.
If you are not sure how to add f luid,
contact your Honda dealer.
Remove the dipstick and check
the f luid level. It should be
between the upper and lower
marks.
If the level is below the lower
mark, remove the f ill plug and add
f luid to bring it to the upper mark.
Pour the f luid slowly and caref ully
so you do not spill. Clean up any
spills immediately. Spilled f luid
could damage components in the
engine compartment.
Always use Honda ATF-Z1
(Automatic Transmission Fluid). If
it is not available, you may use a
DEXRON
III automatic
transmission f luid as a temporary
replacement. However, continued
use can affect shift quality. Have
the transmission f lushed and
ref illed with Honda ATF-Z1 as
soon as it is convenient.
5.
6.
4.
T ransmission Fluid
Maint enance309
Page 399 of 429

�µ�µ�Î
�Î
�Î
�Î
T echnical Inf ormation
Specif ications (4-cylinder Models)
396
Dimensions
Weights
Air Conditioning Capacities
187.6 in (4,766 mm)
71.3 in (1,810 mm)
55.7 in (1,415 mm)
105.1 in (2,670 mm)
61.1 in (1,553 mm)
61.2 in (1,554 mm)
1.88 US gal (7.1
)
1.90 US gal (7.2)
1.37 US gal (5.2
)
1.40 US gal (5.3)
5.6 US qt (5.3
)
HFC-134a (R-134a)
17.6 19.4 oz (500 550 g) 4.4 US qt (4.2
)
4.2 US qt (4.0
)
ND-OIL8 2.0 US qt (1.9
)
2.2 US qt (2.1)
3.0 US qt (2.8)
6.9 US qt (6.5)
2.6 US qt (2.5
)
Including the coolant in the reserve tank and that remaining in the
engine.
Reserve tank capacity:
0.16 US gal (0.6
)
Excluding the oil remaining in the engine. 4.8 US qt (4.5
)
Length
Width
Height
Wheelbase
Track
Gross vehicle weight rating
Refrigerant type
Charge quantity
Lubricant type
See the certification label attached
to the driver’s doorjamb. Fuel tank
Engine
coolant
Engine oil
Manual trans-
mission fluid
Automatic
transmission
fluid
Windshield
washer
reservoir17.09 US gal (64.7
)
Front
Rear Approx.
1:
2: Change
Manual
Automatic
Total Manual
Automatic
Change Including
filter
Without
filter
Total
Change
Total
Change
Total
U.S. Cars
Canada Cars1
2
Page 401 of 429

�µ�µ�Î
�Î
�Î
�Î
T echnical Inf ormation
Specif ications (6-cylinder Models)
398
Dimensions
Weights
Air Conditioning Capacities
Length
Width
Height
Wheelbase
Track
Gross vehicle weight rating
Refrigerant type
Charge quantity
Lubricant type See the certification label attached
to the driver’s doorjamb. Fuel tank
Engine
coolant
Engine oil
Manual
transmission
fluid
Automatic
transmission
fluid
Windshield
washer
reservoir
Including the coolant in the reserve tank and that remaining in the
engine.
Reserve tank capacity:
Excluding the oil remaining in the engine.
61.1 in (1,553 mm)
61.2 in (1,554 mm)
17.6 19.4 oz (500 550 g) HFC-134a (R-134a)
ND-OIL8
2.6 US qt (2.5
)
4.8 US qt (4.5)
7.6 US qt (7.2
)
3.1 US qt (2.9)
5.3 US qt (5.0
)
4.2 US qt (4.0
)
4.5 US qt (4.3
)
0.16 US gal (0.6
) 1.77 US gal (6.7
)
2.22 US gal (8.4
)
105.1 in (2,670 mm)
1.74 US gal (6.6
)
187.6 in (4,766 mm)
71.3 in (1,810 mm)
55.7 in (1,415 mm)
2.17 US gal (8.2
)
2.3 US qt (2.2
)
2.6 US qt (2.5)
17.09 US gal (64.7
)
Front
Rear Approx.
1:
2: Change
Manual
Automatic
Total Manual
Automatic
Change Including
filter
Without
filter
Total
Change
Total
Change
Total
U.S. Cars
Canada Cars1
2