Page 296 of 429
6-cylinder Models
Fluid Locations
Maint enance293
ENGINE OIL FILL CAPRADIATOR CAP
ENGINE OIL DIPSTICK
(Orange loop)
WASHER FLUID
(Blue cap)
POWER STEERING
FLUID (Red cap) BRAKE FLUID
(Gray cap)
AUTOMATIC
TRANSMISSION
FLUID DIPSTICK
(Yellow loop)
ENGINE
COOLANT
RESERVOIR CLUTCH FLUID
(Gray cap)
(6-speed Manual
Transmission only)
Page 308 of 429

The cooling system capacity is:Start the engine and let it run for
about 30 seconds. Then turn of f
the engine.
Fill the radiator with coolant up to
the base of the f iller neck.
Fill the reserve tank to the MAX
mark. Install the reserve tank cap.
Install the radiator cap, and
tighten it to the first stop.
Start the engine and let it run until
the radiator cooling f an comes on
at least twice. Then stop the
engine.
Remove the radiator cap. Pour
coolant into the radiator up to the
base of the f iller neck and into the
reserve tank up to the MAX mark. Start the engine and hold it at
1,500 rpm until the cooling f an
comes on. Turn of f the engine.
Check the coolant level in the
radiator and add coolant if needed.
Install the radiator cap, and
tighten it fully.
If necessary, f ill the reserve tank
to the MAX mark. Install the
reserve tank cap.
16.
17.
18.
15. 14. 13.
12. 10.
11.
With automatic transmission:
With 5-speed manual transmission:
With 6-speed manual transmission:With automatic transmission:
Cooling Syst em
Maint enance
4-cylinder models
6-cylinder models
305
1.37 US gal (5.2)
1.40 US gal (5.3
)
1.77 US gal (6.7
)
1.74 US gal (6.6
)
Page 310 of 429

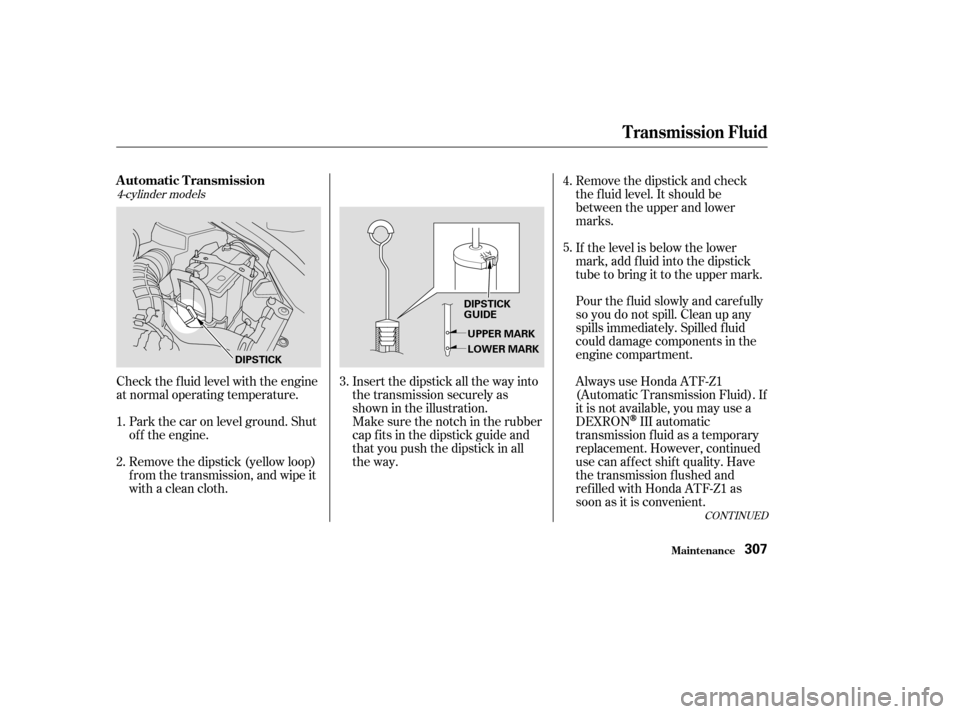
Remove the dipstick (yellow loop)
f rom the transmission, and wipe it
with a clean cloth.
Check the f luid level with the engine
at normal operating temperature.
Insert the dipstick all the way into
the transmission securely as
shown in the illustration.
Park the car on level ground. Shut
of f the engine. Make sure the notch in the rubber
cap f its in the dipstick guide and
that you push the dipstick in all
the way.Remove the dipstick and check
the f luid level. It should be
between the upper and lower
marks.
If the level is below the lower
mark, add f luid into the dipstick
tube to bring it to the upper mark.
Pour the f luid slowly and caref ully
so you do not spill. Clean up any
spills immediately. Spilled f luid
could damage components in the
engine compartment.
Always use Honda ATF-Z1
(Automatic Transmission Fluid). If
it is not available, you may use a
DEXRON
III automatic
transmission f luid as a temporary
replacement. However, continued
use can affect shift quality. Have
the transmission f lushed and
ref illed with Honda ATF-Z1 as
soon as it is convenient.
1.
2. 3.5. 4.
4-cylinder models
CONT INUED
Automatic Transmission
T ransmission Fluid
Maint enance307
DIPSTICK
UPPER MARK
LOWER MARK
DIPSTICK
GUIDE
Page 311 of 429

To thoroughly f lush the transmission,
the technician should drain and ref ill
it with Honda ATF-Z1, then drive the
vehicle a short distance. Do this
three times. Then drain and ref ill the
transmission a f inal time.Insert the dipstick all the way back
into the transmission securely as
shown in the illustration.
The transmission should be drained
and ref illed with new f luid according
to the time and distance recommen-
dations in the maintenance schedule.
If you are not sure how to add f luid,
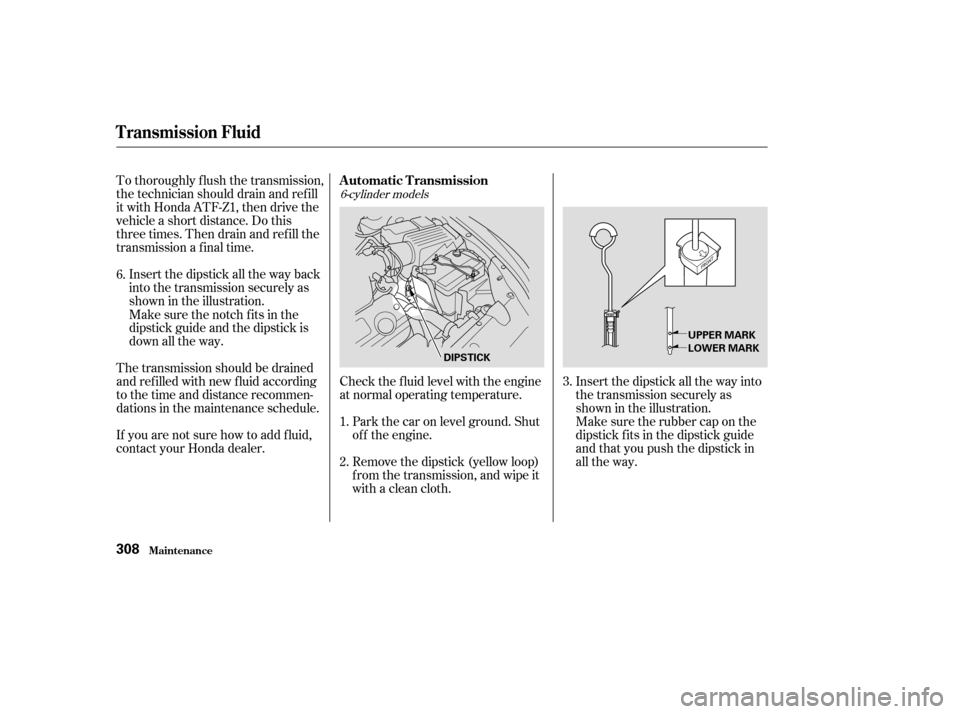
contact your Honda dealer. Check the f luid level with the engine
at normal operating temperature.
Park the car on level ground. Shut
of f the engine.
Remove the dipstick (yellow loop)
f rom the transmission, and wipe it
with a clean cloth. Insert the dipstick all the way into
the transmission securely as
shown in the illustration.
Make sure the notch fits in the
dipstick guide and the dipstick is
down all the way.
Make sure the rubber cap on the
dipstick fits in the dipstick guide
and that you push the dipstick in
all the way.
1.
2.
6.
3.
6-cylinder models
Automatic Transmission
T ransmission Fluid
Maint enance308
DIPSTICKUPPER MARK
LOWER MARK
Page 312 of 429

To thoroughly f lush the transmission,
the technician should drain and ref ill
it with Honda ATF-Z1, then drive the
vehicle a short distance. Do this
three times. Then drain and ref ill the
transmission a f inal time.Insert the dipstick all the way back
into the transmission securely as
shown in the illustration.
Make sure the rubber cap f its in
the dipstick guide and the dipstick
is down all the way.
The transmission should be drained
and ref illed with new f luid according
to the time and distance recommen-
dations in the maintenance schedule.
If you are not sure how to add f luid,
contact your Honda dealer.
Remove the dipstick and check
the f luid level. It should be
between the upper and lower
marks.
If the level is below the lower
mark, remove the f ill plug and add
f luid to bring it to the upper mark.
Pour the f luid slowly and caref ully
so you do not spill. Clean up any
spills immediately. Spilled f luid
could damage components in the
engine compartment.
Always use Honda ATF-Z1
(Automatic Transmission Fluid). If
it is not available, you may use a
DEXRON
III automatic
transmission f luid as a temporary
replacement. However, continued
use can affect shift quality. Have
the transmission f lushed and
ref illed with Honda ATF-Z1 as
soon as it is convenient.
5.
6.
4.
T ransmission Fluid
Maint enance309
Page 342 of 429

If you ever hear the chains
contacting the body or chassis, stop
and investigate. If the chains have
loosened, retighten them. Make sure
they do not contact the brake lines
or suspension.
Removethechainsassoonasyou
begin driving on cleared roads.
Link-type: SCC Quick Grip QG1134
Cable-types: SCC Radial Chain
CH2311T or SCC SC Cable SC1030
The chains listed here are available
at many auto supply stores. For a
complete list of stores, visit the SCC
website at www.scc-chain.com.
When installing chains, f ollow the
manuf acturer’s instructions, and
mount them as tightly as you can.
Drive slowly with chains installed.
Thesechainsaretheonlyonesthat
have been approved by Honda f or
use on your car. Since Honda cannot
test all chains, you must be
personally responsible f or proper
selection, installation, and use of
snow chains. Cable-types: SCC Radial Chain
CH2311T or SCC SC Cable SC1030
CH2412TLX EX, LX-V6 and EX-V6 with automatictransmission
EX-V6 with manual transmission
Tires
Maint enance339
Using the wrong chains, or not
properly installing chains, can
damage the brake lines and
cause a crash in which you can
be seriously injured or killed.
Follow all instructions in this
owner’s manual regarding the
selection and use of tire chains.
Page 357 of 429

Block the rear wheels.
Fill the f uel tank.
Wash and dry the exterior
completely.
Cleantheinterior.Makesurethe
carpeting, floor mats, etc. are
completely dry.
If you need to park your car f or an
extended period (more than one
month), there are several things you
should do to prepare it f or storage.
Proper preparation helps prevent
deterioration and makes it easier to
get your car back on the road. If
possible, store your car indoors.
If the car is to be stored for a
longer period, it should be
supported on jackstands so the
tires are of f the ground.
Leave one window open slightly (if
the car is being stored indoors).
Disconnect the battery.
Support the f ront wiper blade
arms with a f olded towel or rag so
they do not touch the windshield.Coverthecarwitha‘‘breathable’’
cover, one made f rom a porous
material such as cotton.
Nonporous materials, such as
plastic sheeting, trap moisture,
which can damage the paint.
If possible, run the engine f or a
while periodically (pref erably once
amonth).
To minimize sticking, apply a
silicone spray lubricant to all door
and trunk seals. Also, apply a car
body wax to the painted surf aces
that mate with the door and trunk
seals.
Change the engine oil and f ilter
(see page ).
If you store your car f or 12 months
or longer, have your Honda dealer
perf orm the inspections called f or in
the 24 months maintenance schedule
(Normal Conditions) as soon as you
take it out of storage (see page ).
The replacements called f or in the
maintenance schedule are not
needed unless the car has actually
reached that time or mileage.
Leave the parking brake off. Put
the transmission in Reverse
(manual) or Park (automatic). 296
274
Maint enance
St oring Your Car
354
Page 368 of 429

If you have a f lat tire while driving,
stop in a saf e place to change it.
Stopping in traf f ic or on the shoulder
of a busy road is dangerous. Drive
slowly along the shoulder until you
gettoanexitoranareatostopthat
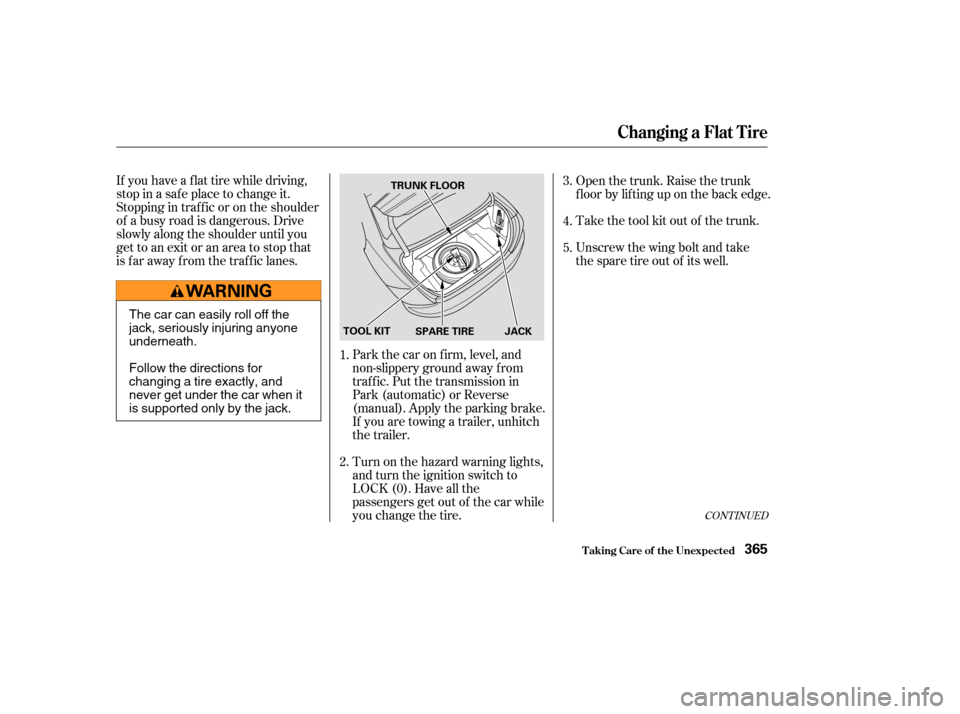
is far away from the traffic lanes.Open the trunk. Raise the trunk
f loor by lif ting up on the back edge.
Take the tool kit out of the trunk.
Unscrew the wing bolt and take
the spare tire out of its well.
If you are towing a trailer, unhitch
the trailer. Park the car on f irm, level, and
non-slippery ground away f rom
traffic. Put the transmission in
Park (automatic) or Reverse
(manual). Apply the parking brake.
Turn on the hazard warning lights,
and turn the ignition switch to
LOCK (0). Have all the
passengers get out of the car while
you change the tire. 5.
4.
3.
2. 1.
CONT INUED
Changing a Flat T ire
T aking Care of t he Unexpect ed365
TRUNK FLOOR
SPARE TIRE JACK
TOOL KIT
The car can easily roll off the
jack, seriously injuring anyone
underneath.
Follow the directions for
changing a tire exactly, and
never get under the car when it
is supported only by the jack.